Table of Contents
Advertisement
Quick Links
Viper Pro
q u i c k s t a r t
g u i d e
Thank you f or pur chas i ng t he Vi per Pr o s ys t em .
Bef or e us i ng t hi s equi pm ent , pl eas e r ead t hi s gui de
car ef ul l y t o enj oy opt i m um per f or m ance and l onger
s er vi ce l i f e.
RDM Removal 34
To prepare and build a part, see Quick System Overview on page 11.
The Viper Pro system runs on 200-240 VAC / 50-60Hz, single phase power 30A for the single
resin delivery module and 50A for the dual and extra large resin delivery module.
i
See "Facility Requirements Guide: Viper Pro SLA System" for complete Viper Pro system electrical,
mechanical, environmental, and network requirements.
Docum ent 23XXX- M XX- 00
3D Sys t em s , t he 3D Sys t em s l ogo, and Vi per Pr o ar e r egi s t er ed t r adem ar ks of 3D Sys t em s ,I nc.
Revi s i on 1X DRAFT
Copyr i ght © 2005 by 3D Syst em s Cor por at i on. Al l r i ght s r eser ved.
Ot her t r adem ar ks ar e t he pr oper t y of t hei r r es pect i ve ow ner s .
™
Lasers 51
Safety 54
Maintenance 60
Glossary 62
Decem ber 2005
Advertisement
Table of Contents

Subscribe to Our Youtube Channel
Related Manuals for 3D Systems Viper Pro SLA iPro 8000


Summary of Contents for 3D Systems Viper Pro SLA iPro 8000
-
Page 1: Table Of Contents
Viper Pro ™ q u i c k s t a r t g u i d e Thank you f or pur chas i ng t he Vi per Pr o s ys t em . Bef or e us i ng t hi s equi pm ent , pl eas e r ead t hi s gui de car ef ul l y t o enj oy opt i m um per f or m ance and l onger s er vi ce l i f e. - Page 2 q u i c k s t a r t g u i d e Customer Support 78 Legal Notices 79...
-
Page 3: What's Inside
q u i c k s t a r t g u i d e w h a t ’ s i n s i d e ? What’s Inside? This Viper Pro Quick Start Guide includes the following topics: New Features This section describes the new features in the Viper Pro, such as the RDM, Intelligent Resin Container, Recoater, and Scanning System;... - Page 4 q u i c k s t a r t g u i d e w h a t ’ s i n s i d e ? RDM Installation and Removal This section describes how to install and remove the Resin Delivery Module (RDM). It also provides blade removal and off-line temperature information.
- Page 5 To verify that your facility was properly prepared for the Viper Pro, see Facility Requirements Guide: Viper Pro SLA System. Your 3D Systems Viper Pro accessory kit includes both guides. They are also available in the /Docs folder on your Viper Pro software CD-ROM.
- Page 6 q u i c k s t a r t g u i d e w h a t ’ s i n s i d e ? Customer Support Have you read everything and you still can’t figure it out? Give us a call! This section tells you how.
-
Page 7: New Features
q u i c k s t a r t g u i d e n e w f e a t u r e s New Features The Viper Pro has the following features that are improvements over SLA models: Resin Delivery Module Single Resin Delivery Module The Viper Pro is capable of building with only one resin delivery module while the second... - Page 8 q u i c k s t a r t g u i d e n e w f e a t u r e s Intelligent Resin Container Each container holds an electronic storage device that has information about the resin that is in the bottle.
-
Page 9: Hazard Messages
q u i c k s t a r t g u i d e h a z a r d m e s s a g e s Hazard Messages You will find four types of safety hazard message in this Viper Pro Quick Start Guide: Also see the Safety section for descriptions of safety labels on your Viper Pro. -
Page 10: Other Useful Documents
q u i c k s t a r t g u i d e Other Useful Documents Other Useful Documents The following documents will help your Viper Pro system to achieve its maximum proficiency. You can find them in the \Documentation folder of your Viper Pro Software CD. Viper Pro Client Online Help Run the Viper Pro software, then select Help >... -
Page 11: Quick System Overview
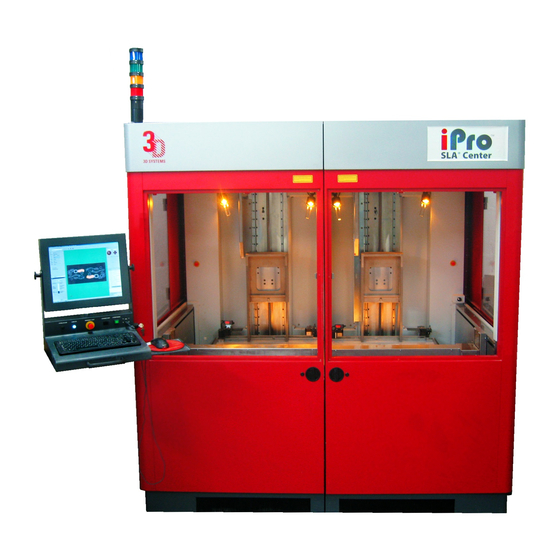
q u i c k s t a r t g u i d e q u i c k s y s t e m o v e r v i e w Quick System Overview picture with callouts here? - Page 12 q u i c k s t a r t g u i d e q u i c k s y s t e m o v e r v i e w...
- Page 13 q u i c k s t a r t g u i d e q u i c k s y s t e m o v e r v i e w...
- Page 14 q u i c k s t a r t g u i d e q u i c k s y s t e m o v e r v i e w...
-
Page 15: Operator Interface
q u i c k s t a r t g u i d e o p e r a t o r i n t e r f a c e Operator Interface The operator interface has a 17-inch high-resolution flat panel display with USB port for the keyboard. -
Page 16: Rdm Installation And Removal
q u i c k s t a r t g u i d e r d m i n s t a l l a t i o n a n d r e m o v a l RDM Installation and Removal Installation Before installing the Resin Delivery Module (RDM), make sure that the power is turned off. - Page 17 q u i c k s t a r t g u i d e r d m i n s t a l l a t i o n a n d r e m o v a l Figure 1.
- Page 18 q u i c k s t a r t g u i d e r d m i n s t a l l a t i o n a n d r e m o v a l Figure 2.
- Page 19 q u i c k s t a r t g u i d e r d m i n s t a l l a t i o n a n d r e m o v a l Figure 4.
- Page 20 q u i c k s t a r t g u i d e r d m i n s t a l l a t i o n a n d r e m o v a l Blade Removal and Installation Off-line Temperature Resin Handling...
- Page 21 q u i c k s t a r t g u i d e r d m i n s t a l l a t i o n a n d r e m o v a l In handling the RDM, please note that no resin that has been exposed to the RDM can be re- introduced into the new resin supply container.
- Page 22 q u i c k s t a r t g u i d e r d m i n s t a l l a t i o n a n d r e m o v a l Stand-by Mode In this mode, the RDM is offline and operates independently from the Viper Pro machine, permitting offline resin and module temperature stabilization when it is connected with line power...
- Page 23 q u i c k s t a r t g u i d e r d m i n s t a l l a t i o n a n d r e m o v a l Empty Resin Container Removal When the resin container is empty and needs additional resin, perform the following procedure.
- Page 24 q u i c k s t a r t g u i d e r d m i n s t a l l a t i o n a n d r e m o v a l Release Lever Figure 5.
- Page 25 q u i c k s t a r t g u i d e r d m i n s t a l l a t i o n a n d r e m o v a l Figure 6.
- Page 26 q u i c k s t a r t g u i d e r d m i n s t a l l a t i o n a n d r e m o v a l 1 Open the front machine door that corresponds to the resin’s build zone until the vent hold, on the topmost end of the bottle, is visible.
- Page 27 q u i c k s t a r t g u i d e r d m i n s t a l l a t i o n a n d r e m o v a l Figure 7.
- Page 28 q u i c k s t a r t g u i d e r d m i n s t a l l a t i o n a n d r e m o v a l Resin Containers Figure 8.
- Page 29 q u i c k s t a r t g u i d e r d m i n s t a l l a t i o n a n d r e m o v a l 2 Release the inner door latch and open the container holder door.
- Page 30 q u i c k s t a r t g u i d e r d m i n s t a l l a t i o n a n d r e m o v a l Figure 9.
- Page 31 q u i c k s t a r t g u i d e r d m i n s t a l l a t i o n a n d r e m o v a l Partially Full Containers Before starting this procedure, make sure that the container slot is empty.
- Page 32 q u i c k s t a r t g u i d e r d m i n s t a l l a t i o n a n d r e m o v a l Resin Leveling and Refill System The Viper Pro contains a resin-leveling system that monitors the resin level within the RDM.
- Page 33 q u i c k s t a r t g u i d e r d m i n s t a l l a t i o n a n d r e m o v a l While wearing protective clothing, disposable nitrile gloves, and goggles, follow these steps: 1 Open the right or left Process Chamber door for the Viper Pro to access the RDM.
-
Page 34: Rdm Removal
q u i c k s t a r t g u i d e r d m r e m o v a l RDM Removal The RDM is made of stainless stell and has casters for moving and maneuvering it while installing or removing it from the frame. - Page 35 q u i c k s t a r t g u i d e r d m r e m o v a l RDM Temperature (possible software explanation to be added) Figure 10. RDM Temperature To set the RDM temperature, contact a qualified 3D Field Service Technician.
- Page 36 q u i c k s t a r t g u i d e r d m r e m o v a l Moving The Recoater and Elevator to Start Positions Figure 11. Manual Move Operations Screen Platform Installation (possible software included in this stage)— picture included? The RDM must be in the machine before this process starts.
- Page 37 q u i c k s t a r t g u i d e r d m r e m o v a l 2 Sit the platform on two L-shaped guides in the rear of the RDM. 3 Push the platform against the front platform guides. 4 The notches in the platform need to engage into the front platform guides 5 Go to the Control Panel, select a part, and start a build.
- Page 38 q u i c k s t a r t g u i d e r d m r e m o v a l Recoating to the Park Position Allowing the Elevator to Unload Ending the Build Blade Installation Do we need pictures? See pp.
- Page 39 Two belts drive the Zephyr recoating system. A vacuum system attaches to the recoater blade to maintain the level of resin within the blade. 3D Systems Customer Support Engineers will adjust the blade for proper part building during installation and setup of the Viper Pro.
-
Page 40: Software Overview
q u i c k s t a r t g u i d e s o f t w a r e o v e r v i e w Software Overview Main Page Figure 12. Main Screen of the 3DPrint Software... - Page 41 q u i c k s t a r t g u i d e s o f t w a r e o v e r v i e w Build Open (Is this the same as loading a part?) To load a part, follow these steps: Open a BFF file.
- Page 42 q u i c k s t a r t g u i d e s o f t w a r e o v e r v i e w Figure 14. Machine Scale Settings Put appropriate ED and DP.
- Page 43 q u i c k s t a r t g u i d e s o f t w a r e o v e r v i e w Figure 15. Machine Options Setting Select options.
- Page 44 q u i c k s t a r t g u i d e s o f t w a r e o v e r v i e w Figure 16. Machine Build Offsets Setting How to get these in? Hmmmm. PLAY STOP PAUSE...
- Page 45 q u i c k s t a r t g u i d e s o f t w a r e o v e r v i e w Build Start Figure 18. The Screen That Allows You to Start a Build Build Complete Figure 19.
-
Page 46: Gel And Debris Filtering
q u i c k s t a r t g u i d e g e l a n d d e b r i s f i l t e r i n g Gel and Debris Filtering Resin life is adversely affected by partially-polymerized material in the RDM, both in debris, such as broken supports and crash remains, and in gel. - Page 47 q u i c k s t a r t g u i d e g e l a n d d e b r i s f i l t e r i n g Debris Filtering Debris is removed periodically, as a maintenance-like action. At least once per month, a debris removal tray should be used.
-
Page 48: Recoater Module
q u i c k s t a r t g u i d e r e c o a t e r m o d u l e Recoater Module The recoating system consists of the platform and platform supports, recoater blade, and elevator. The Buildstation Control Software operates the recoating system as needed to build on the SLA system. -
Page 49: Image Projection Module
The IPM must be aligned before installing it onto the Viper Pro. Geometric Calibration on the Plane For geometric calibration on the plane, please contact a 3D Systems Field Service Engineer. Laser Power Calibration Laser power calibration requires a 3D Systems Field Service Engineer. - Page 50 q u i c k s t a r t g u i d e i m a g e p r o j e c t i o n m o d u l e Beam Rest Position The beam hits a piece of plastic and glows.
-
Page 51: Lasers
q u i c k s t a r t g u i d e l a s e r s Lasers Optical Input The IPM has one laser beam source or laser head. The input beam corresponds to the output of a typical diode pumped, Nd/YVO 4 laser that has been frequency tripled to a wavelength of 355nm. - Page 52 q u i c k s t a r t g u i d e l a s e r s Laser position accuracy on the image plane is ± 25ìm average error over each image plane. The laser position resolution on each image plane is 10ìm or greater. The scanners generate a beam speed on each image plane ranging from 0 mm/sec up to 5000 mm/sec, while positioning the beam at ±25 ìm accuracy.
- Page 53 The Viper Pro system uses a self-contained, or closed, coolant delivery system that mechanically interfaces to the laser head heat sources. All liquid lines use dry-dry quick-disconnect couplings. A 3D Systems Customer Support Engineer should perform any other servicing of the chiller or heat exchanger.
-
Page 54: Safety
q u i c k s t a r t g u i d e s a f e t y Safety General Always follow the safety procedures. Do not, in any way, risk injury by working dangerously. Safety is a part of work, and not an obstacle to it. Laser Safety The Viper Pro is a Class I Laser Device by the Center for Devices and Radiological Health (CDRH). - Page 55 q u i c k s t a r t g u i d e s a f e t y Caution! This method of power shut-off is not recommended and should only be used in an emergency. To restart the system after an emergency shut-off: •...
- Page 56 q u i c k s t a r t g u i d e s a f e t y Safety Interlock Switches Safety interlock switches protect the user from possible UV laser radiation exposure when certain doors or panels are opened. Figures 26, 27, 28, and 29 show these switches. Chemical Safety Warnings Irritant Hazard Always wear chemical-resistant gloves, goggles, and protective clothing when...
- Page 57 Consult the manufacturer’s Material Safety Data Sheet (MSDS) for information on specific resins. For further information on this and related topics, consult the 3D Systems' Resin Handling and Safety Guide. Resin Storage Resin should be stored in opaque, non-reactive containers, according to the guidelines given in the MSDS included with the resin.
- Page 58 q u i c k s t a r t g u i d e s a f e t y Resin Spill Containment Your company has the responsibility to define what constitutes a major spill. Personnel who are involved in cleaning up major spills of resin should wear NIOSH/ MSHA approved respirators designed for use with organic chemical vapors.
- Page 59 q u i c k s t a r t g u i d e s a f e t y Skin Contact Wear 100% nitrile gloves and lab coats to avoid skin contact. Should resin come in contact with skin, wash thoroughly with soap and cold water and immediately remove contaminated clothing and shoes.
-
Page 60: Maintenance
(xx: Add caution graphic) Caution: Do not remove any outer panels when cleaning the Viper Pro. Panels must only be removed by a qualified 3D Systems Customer Support Representative. Cleaning Viper Pro Surfaces Clean Viper Pro outer surfaces as needed following these guidelines: Remove dust from the outer surfaces of the Viper Pro by wiping with a clean, dry, lint-free cloth. - Page 61 Scheduling Preventive Maintenance Your Viper Pro must have preventive maintenance (PM) performed by a qualified 3D Systems Customer Support Representative. Contact 3D Systems after either one year of build time, or after xxxx ?? Any other scheduled maintenance stuff?
-
Page 62: Glossary
q u i c k s t a r t g u i d e g l o s s a r y Glossary Acousto-Optic Modulator (AOM) An electronic device which diffracts laser light to interrupt the laser beam as an on/off switch. Beam profile A pattern of circles or numbers representing the spatial distribution of laser beam power. - Page 63 q u i c k s t a r t g u i d e g l o s s a r y Build file(s) The data file(s) produced by the 3D Lightyear File Preparation Software and used by the controller to build parts.
- Page 64 q u i c k s t a r t g u i d e g l o s s a r y Computer Aided Engineering. The process of solving engineering problems by interaction with a computer. Computer Aided Design is a subset of CAE. Computer Aided Manufacturing.
- Page 65 q u i c k s t a r t g u i d e g l o s s a r y Controller See Control computer. Cure The process of turning liquid resin into a solid by exposure to UV light. Cure depth The thickness or depth of a line of cured resin.
- Page 66 q u i c k s t a r t g u i d e g l o s s a r y Dynamic mirrors Motor driven scanning mirrors with encoder feedback that direct the laser beam to any point on the surface of the resin.
- Page 67 q u i c k s t a r t g u i d e g l o s s a r y Hatch spacing A parameter that specifies the perpendicular distance between adjacent hatch vectors. Laser Light Amplification by Stimulated Emission of Radiation. The device that generates the light energy required to polymerize photocurable resin.
- Page 68 q u i c k s t a r t g u i d e g l o s s a r y Monomer A low molecular weight chemical species, which is a building block of polymers. MSDS Material Safety Data Sheet. Federal government mandated information about the chemical makeup of any chemical substance, such as resin.
- Page 69 q u i c k s t a r t g u i d e g l o s s a r y Platform locators Pins that secure and position the edges of the platform. Platform supports L-shaped brackets that support the platform and attach it to the elevator. Polymer A material built up from a series of smaller units (monomers).
- Page 70 q u i c k s t a r t g u i d e g l o s s a r y Process module The largest of the two modules which make up the Viper Pro. The SLA 5000 and SLA 7000 systems are made up of just one module which combines all functions.
- Page 71 q u i c k s t a r t g u i d e g l o s s a r y Resin Delivery Module The metal container inside the process chamber in the SLA system that holds the resin in which the object is formed. Safety shutter A mechanical device that blocks the laser beam when an interlock switch is activated or when closed via the computer user interface.
- Page 72 q u i c k s t a r t g u i d e g l o s s a r y Slice resolution A slice parameter that specifies the number of slice units assigned to each CAD unit of measure. SmartSweep recoating process A feature used to reduce the build times by sweeping only over that portion of the vat where a part is being built instead of sweeping the full area of the resin delivery module.
- Page 73 q u i c k s t a r t g u i d e g l o s s a r y Tessellate To represent CAD surfaces in polygonal format. Trapped Volume During building, a volume of resin within the part that cannot flow out to the surrounding liquid. Triangle normal A line perpendicular to a triangle starting at its center and pointing away from the mass of the part.
- Page 74 q u i c k s t a r t g u i d e g l o s s a r y Zephyr Recoating System A recoater blade system that uses an internal vacuum cavity to deposit resin on the part, improving trapped volume sweeping.
-
Page 75: Troubleshooting
q u i c k s t a r t g u i d e t r o u b l e s h o o t i n g Troubleshooting Power Outages If you are present when a power outage occurs, or if you discover that the main power is off, complete the following steps: 1 Switch the power OFF at the Viper Pro’s electronic cabinet so that it does not automatically start when the power is restored, preventing damage from power flickers and surges. - Page 76 q u i c k s t a r t g u i d e t r o u b l e s h o o t i n g Table 1: Message Errors MESSAGE CAUSE ACTION MATERIAL Resin Not Detected! If the material container is installed, this material ERROR! cannot be added into the RDM through the RDM’s...
- Page 77 q u i c k s t a r t g u i d e t r o u b l e s h o o t i n g Table 1: Message Errors MESSAGE CAUSE ACTION EXPIRED Container Material The material in this container has passed its MATERIAL Past Expiration Date!
- Page 78 q u i c k s t a r t g u i d e c u s t o m e r s u p p o r t Customer Support If you receive an unrecoverable error message, or if you need to contact us for another problem, you may contact our Customer Support Hotline.
- Page 79 (the “Licensed User”) does not have the right to copy, reproduce, or translate this document in any way or to any media without the prior written consent of 3D Systems, Inc. No copies of the document may be sold or given to any person or other entity.
- Page 80 q u i c k s t a r t g u i d e build zone build, start Dual Resin Delivery Module Extra Large Resin Delivery Module Features keyboard mode, stand-by overflow compartment overflow storage resin level control...
- Page 81 q u i c k s t a r t g u i d e resin surface debris resin, changing Single Resin Delivery Module Zephyr recoater blade...
Need help?
Do you have a question about the Viper Pro SLA iPro 8000 and is the answer not in the manual?
Questions and answers