Table of Contents

Related Manuals for Thermo Scientific MaxQ SHKE416HP


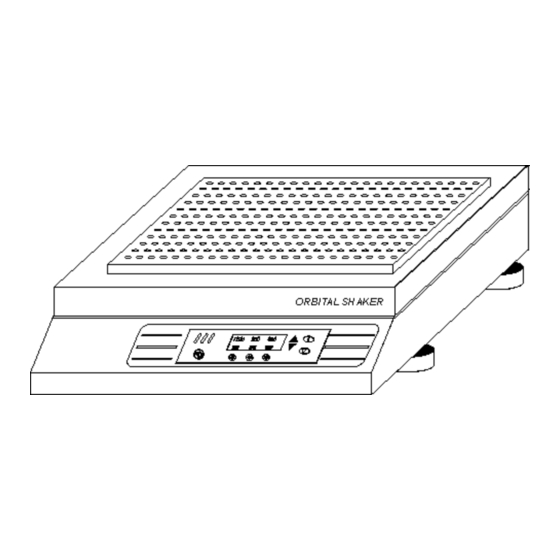
Summary of Contents for Thermo Scientific MaxQ SHKE416HP
- Page 1 MaxQ High Performance Orbital Shakers* Models SHKE416HP and SHKE430HP Operating and Maintenance Manual 7010416 Rev. 0 _________________________________________________________________________________ Part of Thermo Fisher Scientific...
- Page 2 Warning Use the MaxQ High Performance Orbital Shakers to process non-flammable materials only. Caution Grounding circuit continuity is vital for the safe operation of this shaker. Never operate the unit with the grounding conductor disconnected. MANUAL NUMBER 7010416 8/29/11 Release 6 ECR/ECN DATE DESCRIPTION Thermo Scientific Orbital Shakers...
- Page 3 Thermo Fisher Scientific makes no representations or warranties with respect to this manual. In no event shall Thermo be held liable for any damages, direct or incidental, arising out of or related to the use of this manual. ©2011 Thermo Fisher Scientific. All rights reserved. Orbital Shakers Thermo Scientific...
- Page 4 European Country, and this product should be disposed of or recycled through them. Further information on Thermo’s compliance with this directive, the recyclers in your country and information on Thermo Scientific products will be available at www.thermofisher.com. Always use the proper protective equipment (clothing, gloves, goggles, etc.) 4 Always dissipate extreme cold or heat and wear protective clothing.
- Page 5 We can also provide you with a quotation on our Extended Warranty for your Thermo Scientific products. Whatever Thermo Scientific products you need or use, we will be happy to discuss your applications. If you are experiencing technical problems, working together, we will help you locate the problem and, chances are, correct it yourself...over the telephone without a service...
-
Page 6: Table Of Contents
Preventive Maintenance ........2-16 Thermo Scientific... - Page 7 Declaration of Conformity ........9-1 Section 9 Orbital Shakers Thermo Scientific...
-
Page 8: Installation And Start-Up
The Orbital Shaker is secured to its shipping pallet with two brackets, one on each side of the frame. Remove these brackets when the unit is Shipping Brackets unpacked by unhooking them from the shaker frame. Figure 1-2. Pallet Shipping Bracket Thermo Scientific Orbital Shakers... -
Page 9: Location
Bracket operated. Using a 7/16” and 9/16” hex wrench, remove the three 1/4” and the single 3/8” screws. Retain this hardware for future shipping. Orbital Shakers Thermo Scientific... -
Page 10: Installing The Platform
Refer to Figure 1-4. Caution Do not attempt to use a Phillips head screwdriver. Figure 1-4. T-Handle Wrench and Hex Socket Head Screw Figure 1-5. Platform Mounting Holes and Alignment Pin Thermo Scientific Orbital Shakers... - Page 11 7. Tighten all screws using the T-handle wrench. Caution Use only the hex socket flat screws to fasten the platform, and only the T-handle wrench to tighten the screws. Torque these screws to 10 ft/lbs. Orbital Shakers Thermo Scientific...
-
Page 12: Electrical Requirements
Clips end of each spring into the holes on the top of the clip leg as shown in Figures 1-8 and 1-9. Figure 1-8. 250/300ml flask w/ cushion pad Figure 1-9. One screw flask clip assy Thermo Scientific Orbital Shakers... -
Page 13: Installing The Flask Clips
Note that 1, 2, 2.8, 4, 5, and 6 liter flask clips use five screws. The 250/300 flask clip has an adhesive-backed flask cushion pad which is installed on the flat base of the clip body. A hole is provided in the pad for the mounting screw. Refer to Figure 1-8. Orbital Shakers Thermo Scientific... - Page 14 238024 2 w/10 tubes 238025 2 w/12 tubes 238026 2.8l 2 w/10 tubes Table 1-3. SHKE430HP Universal Platform Quantity Flask Size 25ml 50ml 125ml 250/300ml 500ml 2.8l * Microplates can be stacked for greater capacity Microplates* Thermo Scientific Orbital Shakers...
-
Page 15: Installing The Test Tubes Holders
..Locking Pin to swing/tilt test tube rack 15°, 30°, 45° Figure 1-11. Test Tube Rack w/ swing/tilt mechanism Figure 1-12. Test Tube Rack Holder w/ rack removed and bed rotated 90° Orbital Shakers Thermo Scientific... -
Page 16: Rs-232 Interface Connector
Stop bits ........1 Parity ....... . .none Thermo Scientific Orbital Shakers... - Page 17 60 minute interval transmissions if they had been inhibited by a “DC3” (XOFF). DC3 (19, 13 Hexadecimal) Receiving a “DC3” (XOFF) from the remote inhibits the shaker from sending serial data indefinitely until a “DC1” (XON) is received. * Factory-installed temperature monitor, Part No. 194044 1-10 Orbital Shakers Thermo Scientific...
-
Page 18: Connecting The Remote Alarm
(Stock No. 190392) or equivalent may be used to convert the remote alarm output to a screw terminal connection. Refer to Figures 1-14 and 1-15. Figure 1-14. Outputs Figure 1-15. Pin Contacts Thermo Scientific Orbital Shakers 1-11... - Page 19 Section 1 Installation and Start-Up Connecting the Remote Alarm (cont.) Figure 1-16. Remote Alarm Connector on Rear Panel Figure 1-17. Temperature Probe Connector 1-12 Orbital Shakers Thermo Scientific...
-
Page 20: Operation
A temperature probe is immersed in the medium and plugged into a connector on the back panel of the shaker. The probe may also be used to monitor ambient temperatures. Figure 1-16 shows the location of the Temperature Probe Connector. Thermo Scientific Orbital Shakers... -
Page 21: Control Panel Operation
However, the three flashing indicators continue to flash until the alarm condition is corrected. The audible warning will sound again in about fifteen minutes if the condition continues. The alarm features are discussed in detail in the configuration section of this manual. Orbital Shakers Thermo Scientific... -
Page 22: Quick Start-Up
To get the most from the shaker’s microprocessor-based technology, the Models 416/430 can be easily programmed to meet the most demanding laboratory requirements. The following sections outline the procedures for changing the settings and for programming the shaker control system. Thermo Scientific Orbital Shakers... -
Page 23: Change Shaker Speed & Time Settings
3. Press the Speed button again to return to the Operating Screen. Changing Time The MaxQ SHKE416HP and SHKE430HP manage operating time in two ways: Hold - When Time is set to Hold, the value shown in the Actual portion of the display represents total operating time and may be reset at the operator’s convenience. -
Page 24: Changing From Hold To Countdown
(250 RPM) and the countdown is underway. If not interrupted, the shaker will stop in 5 hours, 35 minutes, and the Cycle Complete alarm will sound. Refer to this alarm on the following page. Thermo Scientific Orbital Shakers... -
Page 25: Shaker Alarms
Cycle Complete alerts the operator that the end of the countdown running time has been reached. The Cycle Complete message shown will be displayed and the shaker will stop. Pressing the Silence button clears the message from the display screen. Orbital Shakers Thermo Scientific... -
Page 26: Power Failure
Silence button, but will ring back in about 30 minutes. The screen message and warning lights, however, will continue until the fault is corrected. Then, the alarm message is cleared by cycling power to the unit OFF, then ON. Thermo Scientific Orbital Shakers... -
Page 27: Platform Stalled
Turning Audible To access the system Configuration menu, press the down arrow, the up arrow and the Silence button in that sequence.This screen will appear on Alarm Off and On the display. Orbital Shakers Thermo Scientific... - Page 28 Press the up or down arrow to turn the audible alarm function on or off. Pressing any of the three buttons (Time Speed or Temp) will return the display to the previous screen. Not pressing anything for about fifteen seconds returns the display to the Operating Screen. Thermo Scientific Orbital Shakers...
-
Page 29: Calibrating The Shaker Speed
When finished, press the Speed button to save the setting. The display will return to the Calibrate - RPM Temp screen. Or, if nothing is pressed for about fifteen seconds, the display will revert to the Operating Screen and the setting will be automatically saved to memory. 2-10 Orbital Shakers Thermo Scientific... -
Page 30: Calibrating Optional Temperature Probe
Drive Belt Integrity ....Check Belt Platform Movement Status ..Platform Stalled Motor Fuse Integrity ....Check Fuse Thermo Scientific Orbital Shakers 2-11... -
Page 31: Cycle Complete
Toggle the Power Failure alarm with either the up (ON) arrow or the down (OFF) arrow. Pressing the Next (temperature) button advances the display to the next alarm, saving the Power Failure setting to memory. 2-12 Orbital Shakers Thermo Scientific... -
Page 32: Rpm Tracking
Actual for more Setpoints RunHrs Rmte Pressing RunHrs shows the total accumulated run hours as displayed in the illustration below. In about fifteen seconds, the display will return to the Operating Screen. Thermo Scientific Orbital Shakers 2-13... -
Page 33: Software Version
Press the Time button beneath SwVers and the screen at right will appear, showing the software version in the control system memory. To return to the previous screen, press the Time button. To return to the Operating Screen, wait about fifteen seconds. 2-14 Orbital Shakers Thermo Scientific... - Page 34 Thermo Scientific Orbital Shakers 2-15...
- Page 35 2-16 Orbital Shakers Thermo Scientific...
- Page 36 Thermo Scientific Orbital Shakers 2-17...
-
Page 38: Maintenance
Replace the platform following the procedures in Section 1. Caution If the spill has entered the shaker cabinet through the operating mechanism opening beneath the platform, follow the “Major Spill Cleaning Procedure” in Section 4 of this manual. Thermo Scientific Orbital Shakers... -
Page 40: Service
Motor V-belt has broken or is slipping Audible is Disabled! Continuous operator notification that audible alarm has been disabled Platform Stalled Free movement of the platform has been obstructed Check Fuse Primary drive motor fuse has blown Thermo Scientific Orbital Shakers... -
Page 41: General Fault Conditions
The drive motor pivots around this screw. Loosening all three screws allows internal springs to apply proper tension to the v-belt. 6. Tighten both screws in the slotted holes. Orbital Shakers Thermo Scientific... -
Page 42: Installing A New Drive V-Belt
3. Tighten the two screws in the slotted holes, then tighten the drive motor pivot screw. 4. Replace the bottom cover and return the shaker to service. Thermo Scientific Orbital Shakers... -
Page 43: Spare Fuses
3. Clean the mechanism area with a 70% solution of alcohol. Everything must be cleaned with special attention given to the area around the motor. 4. Allow the unit to air-dry about one hour before reassembling. 5. The shaker is ready to be returned to service. Orbital Shakers Thermo Scientific... -
Page 44: Specifications
RPM ... .Independent platform motion LCD Display Run Time, RPM, Alarm Conditions, and Power Failure indicated by messages Drive Triple-counterbalanced, quiet, belt drive. Accommodates unbalanced platform loads or uneven flask placement Thermo Scientific Orbital Shakers... - Page 45 Net ..... .138 lbs. (62.7 kg) Shipping ....176 lbs. (79.9 kg) Orbital Shakers Thermo Scientific...
- Page 46 1500V for a 230V supply and 1500V for a 120V supply. Pollution Degree describes the amount of conductive pollution present in the operating environment. Pollution degree 2 assumes that normally only non-conductive pollution such as dust occurs with the exception of occasional conductivity caused by condensation. Thermo Scientific Orbital Shakers...
-
Page 48: Parts
360214 Switch, Voltage Select 420064 Transformer, 130VA 420085 Transformer, 25VA 800040 V-Belt, 1/2” x 45” 435051 Screwdriver, Phillips 8-3/4” 443020 Wrench, Hex with T-handle 194046 Spare Part Screw Bag (for platform and clips) 238060 Universal Platform Thermo Scientific Orbital Shakers... - Page 50 Thermo Scientific Orbital Shakers...
- Page 51 Orbital Shakers Thermo Scientific...
- Page 52 Thermo Scientific Orbital Shakers...
- Page 53 Orbital Shakers Thermo Scientific...
- Page 54 Thermo Scientific Orbital Shakers...
- Page 55 Orbital Shakers Thermo Scientific...
- Page 56 Thermo Fisher Scientific 81 Wyman Street P.O. Box 9046 Waltham, Massachusetts 02454-9046 United States www.thermofisher.com...
Need help?
Do you have a question about the MaxQ SHKE416HP and is the answer not in the manual?
Questions and answers