
Related Manuals for Thermo Scientific STP420D


Summary of Contents for Thermo Scientific STP420D
- Page 1 STP420D/STP420ES Thermo Scientific Tissue Processor Instruction manual – English 387791 Issue 1.1 Thermo Fisher Scientific User Guide STP420D/STP420ES Part of Thermo Fisher Scientific...
- Page 2 User Guide STP420D/STP420ES Thermo Fisher Scientific...
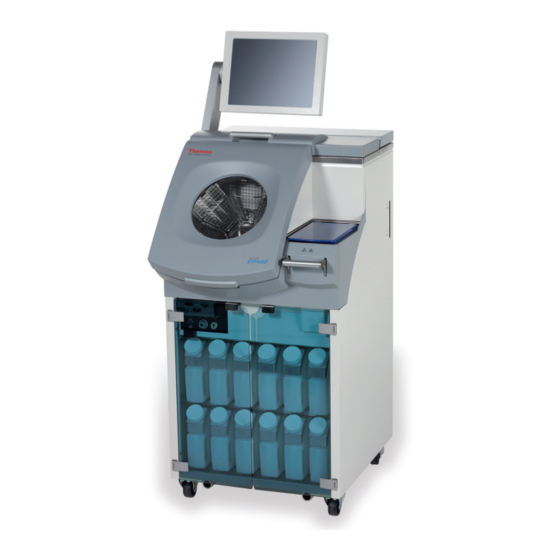
- Page 3 STP420D/STP420ES Thermo Scientific Tissue Processor Instruction manual – English 387791 Issue 1.1 Figure 1. Thermo Scientific Microm STP420ES Tissue Processor. Thermo Fisher Scientific User Guide STP420D/STP420ES...
- Page 4 Germany Tel: +49 6227 836-200 Tel: +1 800 522-7270 Fax: +49 6227 836-111 Fax: +1 269 372-2674 www.thermo.com/pathology www.thermo.com/pathology The STP420 meets the following CE Mark Requirements: In Vitro Diagnostic Directive 98/79/EC. ® 01/12 User Guide STP420D/STP420ES Thermo Fisher Scientific...
- Page 5 The electromagnetic environment must be assessed prior to the operation of the device. This User Guide covers both models of the Thermo Scientific Microm STP420 Tissue Processor: the STP420D produced between 2006 and 2009, and the STP420ES produced from February 2010 onward.
- Page 6 This User Guide will be supplied with each instrument. You can order further copies at the nearest Thermo Scientific sales office by giving the serial number of the instrument, the number of the User Guide and the date of issue.
- Page 7 1 year. Parts which prove to be defective during the warranty period will be repaired or replaced free of charge by Thermo Scientific. No other warranty is expressed or implied. Unauthorized modification or repair by third party persons will void the warranty.
- Page 8 Take suitable precautions. ot surfaCe Some of the instrument’s surfaces become hot during use. They are marked with this warning symbol. Touching these surfaces might cause burns. User Guide STP420D/STP420ES Thermo Fisher Scientific...
- Page 9 User Guide. You must observe the following precautions while operating the instrument. Failure to comply with these precautions violates safety standards and the intended use of the instrument. Thermo Scientific is not liable for misuse of the instrument and failure to comply with basic safety requirements. Note!
- Page 10 Xylene substitutes (such as Toluol or others) might lead to paraffin blockages and must not be used. Any damage caused by using any cleaning reagent other than Xylene is excluded from warranty, and any repair and/or service call will be charged. User Guide STP420D/STP420ES Thermo Fisher Scientific...
- Page 11 • Th e User Guide tells you to ‘select’ buttons. ‘Selecting’ a screen button is the same as clicking it with the mouse, or touching it with your fi nger or stylus. Thermo Fisher Scientifi c User Guide STP420D/STP420ES...
- Page 12 This chapter gives you advice about cleaning and maintaining the instrument. Chapter 6 transportation and Final Shutdown This chapter tells you how to ship the instrument safely, and how to dispose of it correctly when it is no longer required. User Guide STP420D/STP420ES Thermo Fisher Scientific...
-
Page 13: Table Of Contents
2-5-2 Setting local time and date 2-5-3 Adjusting the audible volume 2-5-4 Selecting the pressure units 2-5-5 Selecting the temperature units 2-5-6 Editing processing parameters 2-5-7 Editing reagent groups 2-5-8 Remote alarm 2-5-9 Changing the password Thermo Fisher Scientific User Guide STP420D/STP420ES... - Page 14 4-4 Rotation Error 4-5 Power Failures 4-6 Opening Chambers During Power Failures 4-6-1 Emergency ventilating the biopsy chamber 4-6-2 Emergency ventilating the rotary chamber 4-7 Checking for Bottle Leaks Automatically 4-8 Export o log files User Guide STP420D/STP420ES Thermo Fisher Scientific...
- Page 15 User and Supervisor Permissions Users Supervisors appendix C Factory Default Settings appendix D Approved Reagents appendix E Technical Data appendix F Preferred Protocols and Best Practices Protocols Tissue Grossing and Fixation Wrapping Cassettes index Thermo Fisher Scientific User Guide STP420D/STP420ES...
-
Page 16: Introduction
Processing is governed by protocols and reagent programs which you create and edit. Figure 2a. General layout of the instrument. [1] Touch screen [2] Paraffin reservoir [3] Rotary chamber [4] Biopsy chamber [5] Reagent Managment Panel [6] Reagent stations User Guide STP420D/STP420ES Thermo Fisher Scientific... - Page 17 [4] Interfaces (type II) [5] Serial number plate [6] Main switch interfaces The STP420 has a console interface, which is located either on the left side of the device [4] or on the left side of the monitor [1]. Thermo Fisher Scientific User Guide STP420D/STP420ES...
-
Page 18: Main Features
USB to a remote printer. • A delayed protocol facility for weekend or overnight runs (referred to as ‘protocol’ throughout the manual). User Guide STP420D/STP420ES Thermo Fisher Scientific... - Page 19 • Protection features and sophisticated software controls to guarantee that, in the event of a power failure or other problems during the infiltration process, specimens remain undamaged and the infiltration can be completed successfully. Thermo Fisher Scientific User Guide STP420D/STP420ES...
-
Page 20: Interfaces
If the USB data stick provided does not work initially, shut down the STP420 (Section 3-1-2 Turning the instrument off), plug the USB into the USB port and turn the device on. • 3.5-inch floppy disk drive: For storing protocols on a 3.5-inch (1.44 Mbyte) disk User Guide STP420D/STP420ES Thermo Fisher Scientific... - Page 21 Interfaces Figure 3b. Interfaces, type I, on the left side of the monitor. [1] 4 USB-Ports – for connecting the keyboard or mouse for maintenance purposes or for operating the device. In addition, the connectors can be used to transfer logs on a USB memory stick. [2] LAN – to establish a connection to the laptop of a customer service representative. [3] COM1 – for remote diagnostics and remote access to each function. [4] VGA – for connecting an additional monitor. Thermo Fisher Scientific User Guide STP420D/STP420ES...
-
Page 22: Operation Overview
Exhaust fumes and particles which are environmentally harmful are confined in the instrument through a wash bottle and an active charcoal filter ventilation system. User Guide STP420D/STP420ES Thermo Fisher Scientific... -
Page 23: Touch Screen Monitor
‘Standby screen’: Figure 4. Stand-by screen after tuning-on the instrument. On the right, at the top of the screen, is the Status window. For details of the Status window, see Section 1-5-3 Status window. Thermo Fisher Scientific User Guide STP420D/STP420ES... - Page 24 As processing continues, different command buttons (see Section 1-5-1 Buttons) appear at the bottom of the screen, for example: Start Edit Copy Delete Import Help Figure 6. Example for different buttons taking the place of the general message line during processing. User Guide STP420D/STP420ES Thermo Fisher Scientific...
-
Page 25: Buttons
(that is, ‘technician’ users, see Section 1-6 User Profiles) can carry out testing or make adjustments. Drain Use this to empty reagent bottles automatically. Drain Edit Use this button to see and, if necessary, change Edit protocol steps. Thermo Fisher Scientific User Guide STP420D/STP420ES... - Page 26 Open a chamber to reload specimens and Open continue a protocol. Process Use this button to access process parameters Process you want to change. Quick start This button enables you to create or change Quick start ‘quick start’ buttons. User Guide STP420D/STP420ES Thermo Fisher Scientific...
- Page 27 The instrument must be in “User” or “supervisor” mode. The biopsy and rotation chambers are independantly selectable; with the command applying to all protocols in the respective chamber. Thermo Fisher Scientific User Guide STP420D/STP420ES...
-
Page 28: Using The Touch Screen
Enter. Note! Invalid entries: Entries that fall outside the valid limits are shown in red and cannot be confirmed by pressing Enter. In this case, use the < key to delete digits. User Guide STP420D/STP420ES Thermo Fisher Scientific... - Page 29 Password security: For security, as you type the password in, the input field displays asterisks (*) rather than your typed characters. Note! Upper case: Press Shift for upper case letters. Upper case remains active until you press Shift again. Thermo Fisher Scientific User Guide STP420D/STP420ES...
-
Page 30: Status Window
If a protocol is canceled or terminated, a red “STOP” signal will appear STOP on the icon. If a chamber is opened during a run (for example, to reload specimens), the appropriate icon is replaced with a ‘hand’ icon. User Guide STP420D/STP420ES Thermo Fisher Scientific... -
Page 31: User Profiles
You can check all hardware functions • You can alter the instrument parameters eChniCan CCess Operate at ‘technician’ level with great care. Inappropriate operations at this level might cause malfunctions and damage to the instrument. Thermo Fisher Scientific User Guide STP420D/STP420ES... -
Page 32: Paraffin Containers
First, drain the paraffin from the tank to avoid dirt getting into the filter system. eatinG lements Do not operate the instrument if any of the paraffin container heating elements have been removed. User Guide STP420D/STP420ES Thermo Fisher Scientific... -
Page 33: Filter System
Note: idle time can be adjusted in order to avoid vapors escaping from the chamber on opening. The idle time value will determine how long fresh air is pumped into the chamber after cleaning and before the lid is released for opening. See sections 3-7-3 Thermo Fisher Scientific User Guide STP420D/STP420ES... - Page 34 Wash bottle: After five program runs, or once a week (see Section 3-3 Filter System Maintenance) • Active charcoal filter: After approximately six months (see Section 3-3) • Reagent filter: twice a week (see Section 5-3 Rotary and Biopsy Chamber Cleaning Cylce) User Guide STP420D/STP420ES Thermo Fisher Scientific...
-
Page 35: Reagents And Reagent Lists
• Storing reagents: Store reagents in an external, suitable room, according to your laboratory’s regulations. hemiCals Always use reagents only in accordance with the manufacturer’s safety data sheets (MSDS). Thermo Fisher Scientific User Guide STP420D/STP420ES... -
Page 36: Protocols
For details about executing predefined protocols, see Section 3-5 Starting a Protocol. For details of the types of protocol steps available, and how to create a protocol, see Section 3-7 Editing and Creating Protocols. User Guide STP420D/STP420ES Thermo Fisher Scientific... -
Page 37: Setting Up The Stp420
5. Set the various processing options, such as language, date and time, user level, and so on (see Section 2-5 Setting the Processing Options). 6. Create an initial reagent list (see Section 2-6 Adjusting Reagents and Reagent Lists). Thermo Fisher Scientific User Guide STP420D/STP420ES... -
Page 38: Unpacking The Stp420
(check the ‘tip indicator’) as soon as the equipment is delivered. If there is any visible damage, do not open the packaging. Contact the delivery carrier immediately to report any damage. Also contact Thermo Scientific or your local dealer as soon as possible. -
Page 39: Selecting A Site For The Stp420
<20 dB (A) Monitoring of air flow on site if desired Flow resistance of about 2 to 5 Pa/me depending about 2 to 5 Pa/m depending on the on the quality hose quality hose Thermo Fisher Scientific User Guide STP420D/STP420ES... - Page 40 • There must be a suitable power source for optimal operation. Emergency power is also recommended. Note! The equipment has a 1.5m/60-inch power cord, with a three-wire ground plug. User Guide STP420D/STP420ES Thermo Fisher Scientific...
-
Page 41: Transporting The Stp420 To Its Site
If necessary, use more than one person to make sure the instrument does not tilt to the right or left. You can move the instrument: • On rollers • Using the transport handles • Using lifting equipment These are described in the following three sections. Thermo Fisher Scientific User Guide STP420D/STP420ES... -
Page 42: Moving The Stp420 Using Rollers
Never move the device by holding the locking lever of the biopsy chamber or the handle on the rotating chamber lid. Otherwise, the locking mechanism may be damaged. Figure 10. Moving the equipment over an even floor. User Guide STP420D/STP420ES Thermo Fisher Scientific... -
Page 43: Carrying The Stp420 Using The Transport Handles
Ensure that the clip connectors lock correctly in place. 3. Lift and carry the instrument using the upper and lower transport handles. Figure 12. Position of the clip connectors. [1] Clip connector Thermo Fisher Scientific User Guide STP420D/STP420ES... -
Page 44: Moving The Stp420 Using Lifting Equipment
Unpacking using lifting equipment Instructions found on the shipping container. arryinG usinG liftinG equipment If necessary, use more than one person to make sure the instrument does not tilt to the right or left. User Guide STP420D/STP420ES Thermo Fisher Scientific... -
Page 45: Preparing The Stp420 And Turning It On
Only then, is the device fully booted and ready for operation. urninG the equipment off Never turn the instrument off without following the instructions in Section 3-1 Turning the Instrument On and Off. Thermo Fisher Scientific User Guide STP420D/STP420ES... -
Page 46: Filling The Reagent Bottles Manually
Automatic filling: Once the STP420 is turned on, you can fill the reagent bottles automatically (see Section 3-6-3 Automatically replacing reagents). Note! Reagents are held in bottles with quick-connect terminals to prevent any spillage. User Guide STP420D/STP420ES Thermo Fisher Scientific... -
Page 47: Filling The Paraffin Containers
If the temperature of a paraffin stove drops more than 4° when paraffin is being refilled, the corresponding temperature of the oven must be increased by 5° for the next 2 hours in order to accelerate the melting. Thermo Fisher Scientific User Guide STP420D/STP420ES... -
Page 48: Filling The Wash Bottle
1. Open the rear cover above the wash bottle: Figure 15. Step 1 for filling the wash bottle. [1] Rear cover [2] Screw cap 2. Remove the screw cap from the wash bottle and insert the funnel provided into the opening. User Guide STP420D/STP420ES Thermo Fisher Scientific... - Page 49 OK. Note! You can reset the counter only when you have a “Supervisor” access. 4. Replace the screw cap on the wash bottle and close the rear cover. 5. Next, go to Section 2-5 Setting the Processing Options. Thermo Fisher Scientific User Guide STP420D/STP420ES...
-
Page 50: Setting The Processing Options
Set the pressure units (see Section 2-5-4 Selecting the pressure units) • Set the temperature units (see Section 2-5-5 Selecting the temperature units) • Access the cleaning cycles (see Section 5-1 Rotary and Biopsy Chamber Cleaning Cycle) User Guide STP420D/STP420ES Thermo Fisher Scientific... -
Page 51: Selecting The Language
1. On the Process settings screen, select Language, to display the Standby screen. and date 2. Select Adjust time, on the left of the screen. The Time screen appears. Note! Adjusting the time: You can only adjust the time if you have ‘supervisor’ access. Thermo Fisher Scientific User Guide STP420D/STP420ES... -
Page 52: Adjusting The Audible Volume
2. Select Pressure in psi or Pressure in bar, as appropriate. The button legend indicates the system in use. 2-5-5 Selecting the You can choose between Celsius and Fahrenheit. temperature units 1. On the Process settings screen, select Language, to display the Standby screen. User Guide STP420D/STP420ES Thermo Fisher Scientific... -
Page 53: Editing Processing Parameters
Enter a value no greater than 70°C using the keyboard. c. Follow the same procedure to change the Regeneration time and Drain time. 3. Under ‘Speed of rotation chamber’, press the rotation speed you want. Thermo Fisher Scientific User Guide STP420D/STP420ES... -
Page 54: Editing Reagent Groups
(option II). Others will not work. 2-5-7 Editing reagent Note! Editing reagent groups: You can only edit reagent groups if you have groups ‘supervisor’ access. Figure 20. “Supervisor“ screen for editing reagent groups. User Guide STP420D/STP420ES Thermo Fisher Scientific... - Page 55 Press it to turn the signal off, and press it again to toggle between on and off. The instrument is preset with the signal on. Note! The default name alcohol cleaner and Xylene cleaner can not be changed. Changing them could cause a malfunction. Thermo Fisher Scientific User Guide STP420D/STP420ES...
-
Page 56: Remote Alarm
Repeat the new password and confirm by pressing Enter again. Note! You must be logged in as supervisor to change the password. Note! There is no way to reset the password to the factory setting. Therefore, remember the new administrator password. User Guide STP420D/STP420ES Thermo Fisher Scientific... -
Page 57: Adjusting Reagents And Reagent Lists
You can only edit a list if you have ‘supervisor’ access. 3. Touch the reagent you want to edit. Note! Editing reagents: You cannot edit a reagent that is assigned to a reagent bottle. Thermo Fisher Scientific User Guide STP420D/STP420ES... - Page 58 Cassettes, Cycles, Days until change: Use these to define the shelf life of the reagent. When one of these limits is reached, you must replace the reagent. Note! The shelf-life values of purification reagents may be changed only by service technicians. User Guide STP420D/STP420ES Thermo Fisher Scientific...
-
Page 59: Creating A New Reagent
Even when using compatible reagents, the device might not issue a warning message if the tissue samples are damaged. Therefore, when defining the protocols always use General Procedure Guidelines for tissue processing and tissue-specific reagent compatibility. Thermo Fisher Scientific User Guide STP420D/STP420ES... -
Page 60: Deleting A Reagent
2. Select Export in the lower part of the screen. The list is stored on the floppy disk or USB data stick under the filename ‘Reagenzien.csv’. Note! The option to save to disk is not available for devices with monitor interface. User Guide STP420D/STP420ES Thermo Fisher Scientific... -
Page 61: Routine Operations
“[559.472008] SysRq: Emergency Remount R / O” 3. Wait until you see this message, then press the red switch on the left side of the device.. Note! Shutting down: Press the toggle switch only when the messages above have appeared. Thermo Fisher Scientific User Guide STP420D/STP420ES... -
Page 62: Filling And Emptying The Paraffin Containers
2. Tighten the connection rail by pulling the tension rod down and out completely (see Fig. 23, B). Figure 23. Access the paraffin containers. 3. Open the protective cover (see Fig. 24, A). 4. Place a container beneath the drain rail. User Guide STP420D/STP420ES Thermo Fisher Scientific... - Page 63 Let the paraffin drip for a short time so there is no paraffin left in the drain. Figure 25. Close the paraffin tab. 8. Push the rail back into the device. 9. Close the protective cover. Thermo Fisher Scientific User Guide STP420D/STP420ES...
-
Page 64: Filter System Maintenance
(see Figure 26 B) 5. Attach the other end of the drain hose to the H O connection. Press it firmly until it locks (see Fig. 26, B): Figure 26. Empty the wash bottle. User Guide STP420D/STP420ES Thermo Fisher Scientific... - Page 65 The connection automatically closes. 8. Dispose of the used filter water according to your laboratory’s regulations. 9. Refill the wash bottle with distilled water (see Section 2-4-4 Filling the wash bottle) Thermo Fisher Scientific User Guide STP420D/STP420ES...
-
Page 66: Replacing The Active Charcoal Filter Cartridge
1. Open the cover behind the paraffin containers, with an upward movement. 2. Firmly pull up the filter cartridge: Figure 27. Pulling out the filter cartridge. 3. Insert a new filter cartridge, making sure it locks correctly into place. User Guide STP420D/STP420ES Thermo Fisher Scientific... -
Page 67: Assigning Reagents And Paraffins To Stations
1. Select Reagents on the Standby screen. The Reagent management screen appears: Figure 28. The Reagent management screen. 2. Select the reagent station you want on the touch screen to activate it. The station selected is marked with a frame, for example: Thermo Fisher Scientific User Guide STP420D/STP420ES... - Page 68 “Manual” button will assign it as an empty bottle, pressing “Delete” will confirm this reassignment. Only then is the “reagent” key available. Pressing the “Manual” button again will once more mark the selected reagent station as full. User Guide STP420D/STP420ES Thermo Fisher Scientific...
-
Page 69: Accessing Paraffin Station Functions
You can change the regeneration limits for the paraffin (see Section 3-9 Paraffin Regeneration Program). • Deleting the expiry counter: Select Clear counter to reset the expiry counter for the selected container, for example, after refilling the container with fresh paraffin. Thermo Fisher Scientific User Guide STP420D/STP420ES... -
Page 70: Starting A Protocol
Note! Unavailable reagents: If a protocol uses predefined reagents which are not available in the instrument, the screen displays an error code and the protocol is cancelled. User Guide STP420D/STP420ES Thermo Fisher Scientific... - Page 71 Open the chamber during pumping: If you press Open, while a reagent is pumped, the pumping process will be completed first. 6. When the predefined time has elapsed and the last protocol step has completed, the specimens remain in the last reagent. Thermo Fisher Scientific User Guide STP420D/STP420ES...
- Page 72 To prevent misuse of the device, the touch screen is locked. and will show the “Locked” icon (see Section 1-6 User Profiles) in the Status window (see Section 1-5-3 Status window): Figure 32. Display of the “Locked“ icon. [1] Locked User Guide STP420D/STP420ES Thermo Fisher Scientific...
-
Page 73: Adding More Specimens While A Protocol Is Running
After you have pressed Continue, a start-up procedure runs for a short time. you can not finish the protocol during that. Note! If the protocol does not continue after 2 minutes, a message appears on the screen and an alarm will sound. Thermo Fisher Scientific User Guide STP420D/STP420ES... -
Page 74: Cleaning Baskets And Replacing Reagents
4. The text box shows the estimated finish time. Press Yes to confirm. Note! After 50 cycles of quick-cleaning you must perform an extended cleaning cycle (“standard cleaning”). A reminder will appear on the screen. User Guide STP420D/STP420ES Thermo Fisher Scientific... -
Page 75: Manually Replacing Reagents
If you intend operating with one chamber only, you need only fill the bottles to the lower mark. sinG tWo ChamBers If you intend operating with two chambers simultaneously, you must fill the bottles to the upper mark. Thermo Fisher Scientific User Guide STP420D/STP420ES... -
Page 76: Automatically Replacing Reagents
2. Attach the drain hose to the gray connector socket marked ‘Ext Tank’ on the front of the equipment: Figure 35. Outlet for draining the paraffin tank. User Guide STP420D/STP420ES Thermo Fisher Scientific... - Page 77 If the chamber lid is not locked properly: a. A warning message appears. Select OK to confirm this. b. Select OK again to confirm the drain error message. c. Restart from step 5 above. Thermo Fisher Scientific User Guide STP420D/STP420ES...
- Page 78 Switch off the acoustic warning signal. Note! If there is not enough reagent in the external tank for the automatic filling, the operation is aborted and the reagent is pumped back into the external tank. User Guide STP420D/STP420ES Thermo Fisher Scientific...
- Page 79 The chamber is filled with the cleaning alcohol, rinsed, and then the second Reagent stored. If more reagents are to be filled, including the cleaning alcohol from an external tank, first change the cleaning alcohol. Thermo Fisher Scientific User Guide STP420D/STP420ES...
-
Page 80: Editing And Creating Protocols
OK to save the change. Pressing OK will save the log, or enter additional values. • Duration or Temperature: Select values from the predefined ranges using the virtual keyboard, touch OK to save the change. Pressing OK will save the log, or enter additional values. User Guide STP420D/STP420ES Thermo Fisher Scientific... - Page 81 Select the number of the step you want to delete. b. Touch Delete on the right side of the screen. A message box appears. c. Select Yes to delete the step, or No to return to the Edit screen. Thermo Fisher Scientific User Guide STP420D/STP420ES...
- Page 82 Note! Protocol changes: Changes made to a running protocol are not stored permanently. They are only valid for the current protocol run. opyinG a protoCol If you have copied a protocol, rename it. User Guide STP420D/STP420ES Thermo Fisher Scientific...
-
Page 83: Protocol Steps And Options
Note! Changing colors: See Section 2-5-7 Editing reagent groups, to find out how to change the reagent colors. Thermo Fisher Scientific User Guide STP420D/STP420ES... -
Page 84: Creating A New Protocol
6. Touch the time box that appears, and select the desired end time from the virtual keyboard. 7. On the screen, touch the white box under ‘reagent’, select the desired reagent from the list that appears, then select OK: User Guide STP420D/STP420ES Thermo Fisher Scientific... - Page 85 10. Select the white box under ‘p/v’, select pressure, vacuum, both or neither from the list, then select OK. ressure Values The actual pressure values used are defined as system parameters and, for safety reasons, cannot be changed by routine users. Thermo Fisher Scientific User Guide STP420D/STP420ES...
- Page 86 Alkohol 80% Alkohol 96% Alkohol abs.1 Alkohol abs.2 Alkohol abs.3 Insert Step Xylol 1 Down Delete 1344 Program doesn`t contain a wait step Cancel Start here Export Print Figure 39. Confirming a protocol setup. User Guide STP420D/STP420ES Thermo Fisher Scientific...
- Page 87 The device can not detect whether the defined protocol is suitable for the selected samples. You must therefore always consult the General Procedures for Tissue processing and check the compatibility of the individual samples with the reagents. Thermo Fisher Scientific User Guide STP420D/STP420ES...
-
Page 88: Exporting And Importing Protocols
Microsoft Excel © © Exporting a protocol enables you to change the file name on the floppy disk or data stick, for archiving, without losing the protocol name in the system. User Guide STP420D/STP420ES Thermo Fisher Scientific... -
Page 89: Importing A Protocol
5. Select Yes to overwrite the new, empty protocol. 6. Select the protocol from the list and select Open. Note! Invalid file: If the file you want to import is corrupt, importing is cancelled automatically. Thermo Fisher Scientific User Guide STP420D/STP420ES... -
Page 90: Paraffin Regeneration Program
See Section 3-6-1 Running a cleaning cycle. Note! You must also run a cleaning cycle after each protocol run that includes paraffin steps, to remove the paraffin waste from the rotary and biopsy chambers. User Guide STP420D/STP420ES Thermo Fisher Scientific... -
Page 91: Creating And Changing Quick Start Buttons
3. To create a new button, touch a vacant line in the list. A selection list appears. 4. Press Edit. A selection list appears. Thermo Fisher Scientific User Guide STP420D/STP420ES... - Page 92 6. Touch the field to the right of ‘Text’ in the middle of the screen, and enter a program description, of not more than 10 characters. Confirm with Enter. 7. Select OK. The quick start button is created and becomes available on the Standby screen. User Guide STP420D/STP420ES Thermo Fisher Scientific...
-
Page 93: Troubleshooting And Errors
You must make sure you resolve all error messages before you start a program. rror remoVal If you have any doubts about the resolution of any error messages, contact your technical support provider. Thermo Fisher Scientific User Guide STP420D/STP420ES... -
Page 94: Fill Or Drain Problems
6. Touch OK to acknowledge the prompt. A dialog box with a command prompt: “Please insert the Xylolreinger bottle in position X and put the bottle from the position X into a vacant position.” 7. Follow the instructions on the screen and then click OK. User Guide STP420D/STP420ES Thermo Fisher Scientific... - Page 95 When performing the cleaning of must a station 17 External Tank, the external tank must be used instead of the Xylene cleaning bottle. In this case the external tank must hold at least 6 liters of Xylene. Thermo Fisher Scientific User Guide STP420D/STP420ES...
-
Page 96: Leak Tight Error
2. Check the lids of all the reagent stations and make sure they are properly closed. 3. Check that all reagent stations are engaged correctly in their respective positions. 4. Check the water level in the wash bottle. User Guide STP420D/STP420ES Thermo Fisher Scientific... -
Page 97: Rotation Error
Yes to open the chamber, fix the problem and press Continue. If you cannot see the cause of the blockage press No to stop the current protocol. In such a case, please contact Customer Service. Thermo Fisher Scientific User Guide STP420D/STP420ES... -
Page 98: Power Failures
It may happen that the paraffin present in the chamber is emptied in the last paraffin tank at the end of the protocol even though the tank is already full. User Guide STP420D/STP420ES Thermo Fisher Scientific... -
Page 99: Opening Chambers During Power Failures
Figure 42. Placing the heaxgon key for ventilating the biopsy chamber. 2. Keep the key pressed for approximately 10 seconds, until the ventilation sound is no longer audible. 3. If the vent is no longer audible, the biopsy chamber is opened. Thermo Fisher Scientific User Guide STP420D/STP420ES... -
Page 100: Emergency Ventilating The Rotary Chamber
2. Keep the key pressed for approximately 10 seconds, until the ventilation sound is no longer audible. 3. Insert the hexagonal key into the hole below the lid of the rotary chamber, from the left side: User Guide STP420D/STP420ES Thermo Fisher Scientific... - Page 101 Turn the key to the left until you can open the lid. Note! Turn the key counter-clockwise only.: Try to open the chamber after each rotation of the key. hen the liD opens Do not continue turning the key when the lid has unlocked. Thermo Fisher Scientific User Guide STP420D/STP420ES...
-
Page 102: Checking For Bottle Leaks Automatically
“X over-/under-pressure error“, “X A pressure change of 10 mbar was not reached in 15 sec.“ The system has encountered an error that can be resolved only by a technician. Contact Customer Service at ThermoFisher without delay. User Guide STP420D/STP420ES Thermo Fisher Scientific... -
Page 103: Export O Log Files
“Export” button to appear. 8. Now you can remove the USB stick and plug it into your PC to send the data via email Note! You can export the log files only if no protocol is running. Thermo Fisher Scientific User Guide STP420D/STP420ES... -
Page 104: Cleaning And Maintenance
You can defer change by selecting the “Remind Later” button. The prompt will appear again before the next protocol is started and can be deferred or acknowledged with “OK”. Note! You can reset the counter only when you have “Supervisor” access. User Guide STP420D/STP420ES Thermo Fisher Scientific... -
Page 105: Rotary And Biopsy Chamber Cleaning Cycle
Reducing these values might cause paraffin blockages. Any damage caused by reducing these predefined values is excluded from warranty, and any resulting repair and/or service call will be charged. Thermo Fisher Scientific User Guide STP420D/STP420ES... -
Page 106: Cleaning The Surfaces Of The Instrument
Cleaning the wax drain rail: Use gauze to wipe residual paraffin from the wax drain rail, while the paraffin and rail are still warm. Remove any paraffin solidified on the rail the next time you use the wax drain rail. User Guide STP420D/STP420ES Thermo Fisher Scientific... -
Page 107: Routine Maintenance
Repair work must only be carried out by an authorized service technician. Parts must only be checked or replaced by Thermo Fisher Scientific or its authorized representatives. Thermo Fisher Scientific User Guide STP420D/STP420ES... -
Page 108: Transportation And Final Shutdown
Section 2-1 Unpacking the STP420 • Section 2-2 Selecting a Site for the STP420 • Section 2-3 Transporting the STP420 to Its Site 2. Remove all tissue cassettes. 3. Carry out a cleaning cycle with empty baskets. User Guide STP420D/STP420ES Thermo Fisher Scientific... - Page 109 Note! Original packaging: If the original packaging is no longer available, contact your local Thermo Fisher Scientific representative. eturninG the instrument If you return the unit, make sure it is clean and safe. Thermo Fisher Scientific User Guide STP420D/STP420ES...
-
Page 110: Final Shutdown
Recycling your instrument helps support the sustainable recycling of material resources. isposal You must not dispose of this instrument with other commercial waste. User Guide STP420D/STP420ES Thermo Fisher Scientific... -
Page 111: Appendix
The STP420 is delivered with the following standard equipment. Check all delivered parts against the delivery note and your order. If any parts are missing, please contact your local Thermo Scientific sales office immediately. Use the catalogue numbers listed below to reorder standard equipment. -
Page 112: Appendix B User And Supervisor Permissions
• Access to the log files of error lists • Export log files and send troubleshooting e-mail to the Thermo Fisher Scientific Service • Change password for supervisor User Guide STP420D/STP420ES Thermo Fisher Scientific... -
Page 113: Supervisors
Assign defined reagents to specific stations • General settings: • Access logfiles and data loggers for troubleshooting • Export logfiles and data loggers for Service experts analysis • Receive advice and service help from Service experts Thermo Fisher Scientific User Guide STP420D/STP420ES... -
Page 114: Appendix C Factory Default Settings
– n aution o reset Think very carefully before you edit these values and settings. It is not possible to reset them to the factory defaults automatically. User Guide STP420D/STP420ES Thermo Fisher Scientific... -
Page 115: Appendix D Approved Reagents
Clear-Rite3 Fast Flex Xylene (solution 3) Fast Flex Xylene substitute (solution 3) Clear Xylene Ethanol Thermo Scientific reagent alcohol Thermo Scientific Xylene substitute Note! Use the “Standard Cleaning” function for cleaning the chambers when Xylol substitutes (see Chapters 5-3) nlisteD eaGents Reagents which are not listed here can cause damage to the instrument. -
Page 116: Appendix E Technical Data
Main circuit for heating P24.1 16 A 16 A Pump P1 P24.3 Valve and lock for lid – supply P24.2 6.3 A Controller P24.8 P24.5 6.3 A Turning valve V1 Turning valve V2 P24.6 6.3 A User Guide STP420D/STP420ES Thermo Fisher Scientific... - Page 117 848mm / 33.39in Level paraffin containers 1079mm / 42.48in Overall height, including monitor 1503mm / 59.17in Weight, empty 190kg Weight, with operating media 250kg Note! Temperatures: All temperatures assume an ambient room temperature of +20°C. Thermo Fisher Scientific User Guide STP420D/STP420ES...
-
Page 118: Appendix F Preferred Protocols And Best Practices
Total time including time to fill 11:32 and empty (hr:min) Biopsy Formalin Alc 80% Alc 95% Alc 100% Alc 100% Xylene Xylene Paraffin Paraffin Paraffin Total time including time to fill 04:16 and empty (hr:min) User Guide STP420D/STP420ES Thermo Fisher Scientific... - Page 119 Alcohol cleaner reagent time (Minutes) Cleaning cycle “Standard Cleaning” (both chambers) Xylene cleaner Xylene cleaner Xylene cleaner Alcohol cleaner Cleaning cycle “Cleaning reagent reagent time (Minutes) station” (station cleaning, both chambers) Xylene cleaner Alcohol cleaner Thermo Fisher Scientific User Guide STP420D/STP420ES...
-
Page 120: Tissue Grossing And Fixation
F-4 Cassettes The following cassettes are recommended: • TurboflowII, with attached cover: Catalogue number 170000 • Cassette IV, TissueLok, standard cassette: Catalogue number 35837 • Biopsy cassettes: Catalogue number 35838 • Histoscreen: Catalogue number 35840 User Guide STP420D/STP420ES Thermo Fisher Scientific... -
Page 121: Index
25, 50, 74, 78, 90, 105, 119 liquids 105, 110 reagent 10, 58, 105, 119 station 18, 35, 94 command buttons 24, 70, 83 conventions drain hose 64, 65, 76 rail 62, 106 time 53, 71, 81, 86, 90 Thermo Fisher Scientific User Guide STP420D/STP420ES... - Page 122 18, 29, 55 numeric language level sensors 97, 104 maintenance 6, 9, 34, 64, 95, 104 message error 12, 22, 77, 78, 87 maintenance progress status MSDS numeric keypad User Guide STP420D/STP420ES Thermo Fisher Scientific...
- Page 123 58, 59, 71 groups 51, 54, 58 replacing 74, 76 stations 18, 35, 67 unavailable reagent filter 33, 104, 111 rotary chamber 18, 36, 69, 77, 90 rotation chamber 27, 53, 74, 76, 94, 97, 104 Thermo Fisher Scientific User Guide STP420D/STP420ES...
- Page 124 11, 18, 23, 28 transportation transport handles 41, 43 USB data stick 20, 54, 60, 88 user access 66, 90 level using two chambers 32, 46, 75 ventilation 10, 22, 99, 100 User Guide STP420D/STP420ES Thermo Fisher Scientific...
- Page 125 70, 81, 86 wash bottle 18, 22, 45, 48, 64 waste disposal 11, 110 water level 48, 64, 96, 102 Thermo Fisher Scientific User Guide STP420D/STP420ES...
- Page 126 Pathology Otto-Hahn-Strasse 1A 69190 Walldorf GERMANY +49 6227 836-200 4481 Campus Drive Kalamazoo, MI 49008 +1 800 522-7270 www.thermofisher.com User Guide STP420D/STP420ES Thermo Fisher Scientific...
Need help?
Do you have a question about the STP420D and is the answer not in the manual?
Questions and answers