
Related Manuals for Thermo Scientific SHKE6000 (4359)


Summary of Contents for Thermo Scientific SHKE6000 (4359)
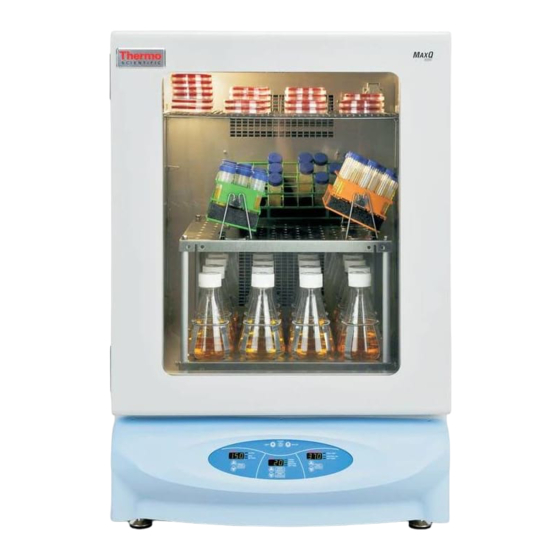
- Page 1 MaxQ 6000 Stackable Incubated and Refrigerated Shakers Operating Manual and Parts List LT2120X1 (7004352) Rev. 11 Visit us online to register your warranty www.thermoscientific.com/labwarranty...
- Page 2 New fuses, connector power entry and fuse drawer for UL (pgs 8-2, 9-1 & 9-2 list) ccs 29034 9/10/12 Added note to hyperterminal information on pg 5-5 28449 3/26/12 Clarified defrost cycle time on pg 5-7 Thermo Scientific MaxQ 6000 Shaker...
- Page 3 Thermo Fisher Scientific makes no representations or warranties with respect to this manual. In no event shall Thermo be held liable for any damages, direct or incidental, arising out of or related to the use of this manual. ©2010 Thermo Fisher Scientific. All rights reserved. MaxQ 6000 Shaker Thermo Scientific...
- Page 4 European Country, and this product should be disposed of or recycled through them. Further information on Thermo’s compliance with this directive, the recyclers in your country and information on Thermo Scientific products will be available at www.thermoscientific.com. Always use the proper protective equipment (clothing, gloves, goggles, etc.) Always dissipate extreme cold or heat and wear protective clothing.
- Page 5 We can also provide you with a quotation on our Extended Warranty for your Thermo Scientific products. Whatever Thermo Scientific products you need or use, we will be happy to discuss your applications. If you are experiencing technical problems, working together, we will help you locate the problem and, chances are, correct it yourself...over the telephone without a service...
-
Page 6: Table Of Contents
Model Alteration ........5-9 Thermo Scientific... - Page 7 Replacement Parts ......... . . 9-1 MaxQ 6000 Shaker Thermo Scientific...
-
Page 8: Safety Information
Safety Information Section 1 Your Thermo Scientific MaxQ 6000 Shaker has been designed with function, reliability, and safety in mind. It is the user’s responsibility to install it in conformance with local electrical codes. For safe operation, pay attention to Notes, Cautions, and Warnings throughout the manual. -
Page 9: Section 1 Safety Information
9. Perform regular maintenance service as specified in this manual and keep unit in good repair. Do not operate with known defects. 10. Do not use the shaker to mix flammable materials or where the transfer of mechanical energy to glass could cause glass breakage. MaxQ 6000 Shaker Thermo Scientific... -
Page 10: Specifications
Orbit Diameter ... . . 0.75 inches (1.9 cm) Shipping Weight SHKE6000-7 and SHKE6000-8CE: ..430 lbs. (195 kg) SHKE6000 and SHKE6000-1CE: ..330 lbs. (150 kg) Thermo Scientific MaxQ 6000 Shaker... -
Page 11: Section 2 Specifications
If a leak in the sealed system is detected, the operator shall repair without undue delay. The following model is designed for use with the following amounts of flu- orinated greenhouse gases: Model Refrigerant Amount (kg) SHKE6000-8CE R-134a 0.326 1430 MaxQ 6000 Shaker Thermo Scientific... - Page 12 1) Not intended for use in Class I or II applications as defined in 21 CFR 2) Not intended for mixtures of flammable materials Declaration of Conformity Copies of the Declaration of Conformity are available upon request. Thermo Scientific MaxQ 6000 Shaker...
-
Page 13: Features
Shaking action is halted while door is open. • User settable over-temperature control monitors the chamber temperature and unit’s temperature deviation if main control fails. • 6 permanently lubricated ball bearings. • UL, cUL and CE certification. Thermo Scientific MaxQ 6000 Shaker... -
Page 14: Control Panel Features
9. Up Arrow Key: Increases shaking time 10. Down Arrow Key: Decreases shaking time 11. Time(r) Display: 3 digit LED indicates time remaining or continual time 12. Set time: Illuminates when time is being set MaxQ 6000 Shaker Thermo Scientific... - Page 15 23. Temp ON/OFF Switch: Turns heat on and off 24. High-Limit Light: Indicates high-limit control has been activated 25. Control ON Light: Indicates heaters are energized 26. Set temp Light: Indicates temperature can be set Thermo Scientific MaxQ 6000 Shaker...
-
Page 16: Unpacking And Installation
The following items are included in the shipment: Inspection Tag- 528-028-00 Mounting Plate Mat- 790-316-11 Thumbscrew Knob (4) - 562-184-10 Shelves (2) - 319565 Shelf Clips (4) - 315642 Cord Male Connector If any items are missing, contact Technical Services. Thermo Scientific MaxQ 6000 Shaker... -
Page 17: Location
3. Position one of the thumbscrews provided through each of the 4- platform mounting holes and tighten securely. Caution Do not operate shaker with an unbalanced load. Platforms should be loaded for optimum stability and operation. Do not lift shaker by the platform. MaxQ 6000 Shaker Thermo Scientific... -
Page 18: Test Tube Rack Installation
There Installation are four feet on each unwire test tube rack clamp that need to be secured to the platform. 2. Secure the rack to the platform with mounting screws provided. Thermo Scientific MaxQ 6000 Shaker... -
Page 19: Operation
Note Speed can be changed without pressing the START/STOP key. Simply press the appropriate up or down arrow until desired rpm is reached. There will be an audible beep before the display lights. Thermo Scientific MaxQ 6000 Shaker... -
Page 20: Over-Temperature Protection (Otp)
Note When adjusting OTP, E06 appears on Temp Display when you have exceeded the 5°C window. If the E06 mode continues for more than 5 seconds without adjusting OTP, the setpoint will need to be reset to original settings. MaxQ 6000 Shaker Thermo Scientific... -
Page 21: Temperature Calibration
7. Using the TEMP UP and TEMP DOWN keys, adjust the temperature display to match the recorded independent sensor reading. 8. Press the POWER key. This completes temperature calibration. Thermo Scientific MaxQ 6000 Shaker... -
Page 22: Setting Timer For Timed Shaking
TIMER and MINUTES or HOURS lights will illuminate and timer will count down from time selected. An audible alarm will sound at the end of the timing cycle and platform rotation will cease. MaxQ 6000 Shaker Thermo Scientific... -
Page 23: Rs232 Communication Configuration
Stop bits: ......1 Flow control ..... . . None After verifying the above settings, click “OK.” Thermo Scientific MaxQ 6000 Shaker... -
Page 24: Setting Low Level Controls
6. When desired temperature is achieved, load the shaker. Warning Do not operate the unit if any of the temperature controls become inoperative. A hazardous condition will develop which can result in injury or death and property damage. MaxQ 6000 Shaker Thermo Scientific... -
Page 25: Defrost Cycle Alteration
4. Press the POWER key. This will enable or disable defrost based on the previous selection. If ‘OFF’ was selected, defrost will be disabled and the operation is complete. If ‘ On’ was selected, continue to set the other defrost parameters. Thermo Scientific MaxQ 6000 Shaker... -
Page 26: Interior 1 Amp Chamber Outlet
MaxQ 6000 units come in two varieties (exclusive of voltage): incubated and refrigerated. As incubated units do not have cooling, it is necessary to configure the unit to avoid defrost cycles from triggering. The default model state is refrigerated. MaxQ 6000 Shaker Thermo Scientific... -
Page 27: Model Alteration
4. Press the POWER key. This logs the model type to memory and initializes the unit. Note It is not necessary to change models unless the firmware has been updated or if model selection is accidentally changed in the menu. Thermo Scientific MaxQ 6000 Shaker... -
Page 28: Maintenance
Note The shaking mechanism is equipped with sealed ball bearings which do not require further lubrication or adjustment. Note Make no attempt to service or repair a Thermo Scientific product under warranty before consulting your Thermo Scientific dealer. After the warranty period, such consultation is still advised, especially when the repair may be technically sophisticated or difficult. -
Page 29: Cleaning Condenser Filter / Coil
Remove the bearing pan by loosening 4 thumbscrews in the platform center. Remove the sheet metal panel (9 screws) under the platform to expose the belt and interior parts. Inspect the drive belt for wear. Order a replacement if necessary. MaxQ 6000 Shaker Thermo Scientific... -
Page 30: Troubleshooting
Allow unit to complete defrost mode. This may “dEF” flashing on the temperature display. normal operation for refrigerated units. take up to five minutes. Chamber receptacle will not work. Check GFI located on right side of unit. Push “RESET” button. Thermo Scientific MaxQ 6000 Shaker... -
Page 31: Heating Error Codes
Check connections on PC1415X3 AC board not properly connected. AC board. Failure in cooling control circuit on AC Replace PC1415X3 AC board. board. Check the rubber door gasket. Door not sealed properly. Make sure that door seals. MaxQ 6000 Shaker Thermo Scientific... -
Page 32: General Error Codes
Corrupt Data Flash Invalid Data Flash Services or see Notes Memory Checksum on E21 below. Replace or Reprogram Continuous Beep, No Corrupt Program Flash Invalid Program Flash PC1415X1 control Display. Memory Checksum board. Call Technical Services. Thermo Scientific MaxQ 6000 Shaker... -
Page 33: Notes
Note that it may be necessary to recalibrate the unit and/or re-enter custom settings as the unit has been reset to factory default. • The unit can now be started normally using the POWER key. MaxQ 6000 Shaker Thermo Scientific... - Page 34 Thermo Scientific MaxQ 6000 Shaker...
- Page 35 MaxQ 6000 Shaker Thermo Scientific...
-
Page 36: Wiring Diagram
CC1415X2 CC1415X2 CC1415X2 Shaker Mechanism 019-445-00 019-445-00 019-445-00 019-445-00 Switch, Door 440-080-00 440-080-00 440-080-00 440-080-00 Temperature Sensor TC1415X1 TC1415X1 TC1415X1 TC1415X1 Transformer TN1415X1 TN1415X1 Thermostat, Low Limit 920-098-01 920-098-01 Wiring Diagram LT2120X2 LT2120X2 LT2120X2 LT2120X2 Thermo Scientific MaxQ 6000 Shaker... -
Page 37: Section 9 Replacement Parts
All parts listed herein may be ordered from the Thermo Scientific dealer from whom this unit was purchased, or can be obtained promptly from the factory. When service or replacement parts are needed, check first with your dealer. - Page 38 Section 10 Warranty Information Thermo Scientific MaxQ 6000 Shaker 10-1...
- Page 39 Section 10 Warranty Information 10-2 MaxQ 6000 Shaker Thermo Scientific...
- Page 40 thermoscientific.com © 2014 Thermo Fisher Scientific Inc. All rights reserved. All trademarks are the property of Thermo Fisher Scientific and its subsidiaries. Specifications, terms and pricing are subject to change. Not all products are available in all countries. Please consult your local sales representative for details.
Need help?
Do you have a question about the SHKE6000 (4359) and is the answer not in the manual?
Questions and answers