
Subscribe to Our Youtube Channel
Related Manuals for Thermo Scientific MaxQ Mini 4450 series


Summary of Contents for Thermo Scientific MaxQ Mini 4450 series
- Page 1 MaxQ Mini 4450 Shaker Model SHKA4450 and SHKE4450 Operating Manual and Parts List 057-810-00 (7004324) Rev. 14 Visit us online to register your warranty www.thermoscientific.com/labwarranty...
- Page 2 Added care and cleaning of the acrylic lid to Section 7 30954 4/10/14 Updated Setting Timer for Continuous Shaking Step 3 - pg 5-8 30837/OS-738 2/27/14 Removed obsolete Model 4326 29034 9/10/12 Updated hyper terminal info on pg 5-9 Thermo Scientific MaxQ Mini 4450...
- Page 3 Thermo Fisher Scientific makes no representations or warranties with respect to this manual. In no event shall Thermo be held liable for any damages, direct or incidental, arising out of or related to the use of this manual. ©2010 Thermo Fisher Scientific. All rights reserved. MaxQ Mini 4450 Thermo Scientific...
- Page 4 Always use the proper protective equipment (clothing, gloves, goggles, etc.) Always dissipate extreme cold or heat and wear protective clothing. Always follow good hygiene practices. Each individual is responsible for his or her own safety. Thermo Scientific MaxQ Mini 4450...
- Page 5 We can also provide you with a quotation on our Extended Warranty for your Thermo Scientific products. Whatever Thermo Scientific products you need or use, we will be happy to discuss your applications. If you are experiencing technical problems, working together, we will help you locate the problem and, chances are, correct it yourself...over the telephone without a service...
-
Page 6: Table Of Contents
Turning Shaker On ........5-4 Thermo Scientific... - Page 7 Ordering Procedures ........8-3 MaxQ Mini 4450 Thermo Scientific...
-
Page 8: Safety Information
Safety Information Section 1 Your Thermo Scientific MaxQ Mini 4450 Shakers have been designed with function, reliability, and safety in mind. It is your responsibility to install it in conformance with local electrical codes. For safe operation, pay attention to the cautions and warnings throughout the manual. -
Page 9: Product Profile
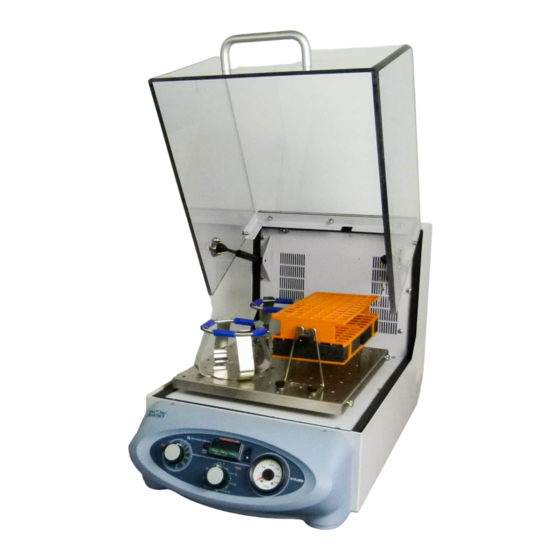
Product Profile Section 2 The Thermo Scientific MaxQ Mini 4450 bench top, incubated shakers are available in either analog or digital control configurations: • Analog shakers: SHKA4450, SHKA4450CC, SHKA44500-1CE and SHKA4450CC-1CE: control temperature by a Proportional/ Integral/ Derivative microprocessor-based controller. Solid-state control maintains time and speed and is adjustable with rotary dials. -
Page 10: Analog Control Panel Features
5. Heat Switch: Activates heater, turns heat on and off. 6. Speed Tachometer: Analog display of platform rotation speed (RPM). Figure 2-1. Analog Control Panel 15-18 23-24 21 22 19-20 10 11-12 Figure 2-2. Digital Control Panel MaxQ Mini 4450 Thermo Scientific... -
Page 11: Digital Control Panel Features
23. HEAT ON Light: Indicates heaters are energized 24. SET TEMP Light: Indicates temperature can be set 25. TEMPERATURE Display: 3-digit LED indicates chamber temperature 26. HIGH LIMIT Light: Indicates hi-limit control has been activated. Thermo Scientific MaxQ Mini 4450... -
Page 12: General Specifications
Mutable Alarms None None 1 hour without deactivating 1 hour without deactivating the actual alarm condition by the actual alarm condition by depressing any key. depressing any key. Thermo Scientific MaxQ Mini 4450... -
Page 13: Section 3 General Specifications
Orbital shakers are designed to provide increased aeration in a stable temperature environment. Unintended Use 1) Not intended for use in Class I or II applications as defined in 21 CFR 2) Not intended for mixtures of flammable materials MaxQ Mini 4450 Thermo Scientific... -
Page 14: Environmental Operating Conditions
*Interface cables not to exceed 9.8' (3 m) in length. **Refer to IEC 664-1 Caution Operation of a shaker in a CO2 enriched atmosphere is not recommended. The formation of carbonic acid could cause electrical failures. Declaration of Conformity available on request. Thermo Scientific MaxQ Mini 4450... -
Page 15: Unpacking And Installation
• Place shaker near an electrical outlet that matches the unit's nameplate requirements. • Allow approximately 2" (5 cm) of clearance around the unit for free air convection, accessory attachments and user convenience. Thermo Scientific MaxQ Mini 4450... -
Page 16: Platform Installation
3. Positions one of the thumbscrews provided through each of the 4- platform mounting holes and tighten securely. Caution Do not operate shaker with an unbalanced load. Platforms should be loaded for optimum stability. Do not lift shaker by the platform. MaxQ Mini 4450 Thermo Scientific... -
Page 17: Test Tube Rack Installation
Installation mounting holes on the platform. There are two cutouts on each side of the rack. 2. Secure the rack to the platform with mounting screws provided with the rack. Thermo Scientific MaxQ Mini 4450... -
Page 18: Operation
1. From the 12 o’clock off position, rotate timer knob counterclockwise to the ON position to initiate continuous operation. 2. For timed operation, rotate timer knob clockwise from 1 minute to 60 minutes. The markings on the side of the dial are in 5-minute increments. Thermo Scientific MaxQ Mini 4450... -
Page 19: Temperature Calibration
4. Press and hold the “star” (*) key and using the up or down arrow key, adjust the set point to the desired temperature. 5. Allow the unit to run for at least 30 minutes. MaxQ Mini 4450 Thermo Scientific... - Page 20 10. Allow the unit to run for at least an additional 60 minutes. 11. Re-check the thermometer reading. The controller display and the thermometer should agree to within ±0.5°C. If not, repeat Steps 7, 8 and 9. Thermo Scientific MaxQ Mini 4450...
-
Page 21: Turning Shaker On
2. POWER switch a second time (0) to turn OFF shaker. Note There will be a 3 second delay from the time power is turned on to the time the shaker is activated - control panel will illuminate when shaker power is activated. MaxQ Mini 4450 Thermo Scientific... -
Page 22: Calibrating Shaking Speed
6. Use the up or down arrow keys to set the shaker speed to match the tachometer’s readout. 7. Press STOP key to enter the new speed value. 8. Press START key to exit the calibration mode. Thermo Scientific MaxQ Mini 4450... -
Page 23: Setting High-Limit Control
7. When desired temperature is achieved, load the shaker. Warning Do not operate the unit if any of the temperature controls become inoperative. A hazardous condition will develop which can result in injury or death and property damage. MaxQ Mini 4450 Thermo Scientific... -
Page 24: Temperature Calibration
10. Press HEAT ON button twice to complete the return to normal operating mode. Note It is important to press the Heat Off button to exit the calibration mode. Thermo Scientific MaxQ Mini 4450... -
Page 25: Setting Timer For Continuous Timing
3. Press START to begin timed shaking. TIME display should show 000. Timer will begin to count up and will display accumulated time in display window. Display will flash when 999 minutes or 999 hours is achieved. MaxQ Mini 4450 Thermo Scientific... -
Page 26: Rs232 Communication Configuration
• Stop bits: 1 • Flow control: None After verifying the above settings, click "OK." 6. In the main dialog box click on "File" \ "Save." 7. Exit the program by clicking on "File" \ "Exit" \ "Yes". Thermo Scientific MaxQ Mini 4450... -
Page 27: Using The Optional Cooling Coil
15°C less than the desired chamber temperature. The coolant flow and temperature must be constant. 3. Allow the chamber temperature to stabilize at the setpoint. 4. Readjust the safety thermostat. 5. Lift the cover and load platform. Close lid. 5-10 MaxQ Mini 4450 Thermo Scientific... -
Page 28: Troubleshooting
Replace if worn, broken or Check drive belt. slipped off pulley. Analog: check for power to Replace if defective. speed control. Digital: make sure “HEAT ON” Shaker won’t heat Push “HEAT ON” button. lamp is lit. Thermo Scientific MaxQ Mini 4450... -
Page 29: Over Temperature Protection
4. Once the thermostat is reset, reinstall the rear panel, plug the power cord back into the outlet and verify the unit is heating again. 5. If the shaker still fails to heat, contact Technical Services for further assistance. MaxQ Mini 4450 Thermo Scientific... -
Page 30: Maintenance
C screws. Caution All screws must first be slightly tightened to seat the plate properly. 4. Repeat the screw-tightening procedure at 50-100 RPM until all 9 screws are securely tightened. Thermo Scientific MaxQ Mini 4450... -
Page 31: Platform Maintenance
Inspect the drive belt for wear. Order a replacement if necessary. Caution Make no attempt to service or repair a Thermo Scientific product under warranty before consulting your Thermo Scientific dealer. After the warranty period, such consultation is still advised, especially when repair may be technically sophisticated or difficult. - Page 32 Then wipe with a damp cloth to help eliminate electrostatic charges that can attract dust particles. Use of proper cleaning agents: When selecting a cleaning or decontamination agent, use the following table as a guideline. Thermo Scientific MaxQ Mini 4450...
- Page 33 Sulfuric Acid (30%) Ethylene Glycol Sulfuric Acid (Conc.) Gasoline Toluene Glycerine Transformer Oil Heptane Trichloroethylene Hexane Turpentine Hydrochloric Acid Water Hydrofluoric Acid (25%) Xylene R = Resistant LR = Limited Resistance N = Not Resistant MaxQ Mini 4450 Thermo Scientific...
-
Page 34: Replacement Parts
Pan, Holder-Platform 019-671-08 PCB, Display-Time, Speed 019-533-09 PCB, Micro-Programmed 019-534-00 PCB, Power/Motor Drive 228-612-00 PCB, Tach 460-315-00 Power Supply 150-287-00 Pulley, Drive 150-297-00 Pulley, Driver 470-357-00 Ribbon Cable 019-445-00 Shaker Mechanism Assy 400-233-00 Solid State Relay Thermo Scientific MaxQ Mini 4450... -
Page 35: Ordering Procedures
All parts listed herein may be ordered from the Thermo Scientific dealer from whom you purchased this unit or can be obtained promptly from the factory. - Page 36 Section 9 Warranty Information Thermo Scientific MaxQ Mini 4450...
- Page 37 Section 9 Warranty Information MaxQ Mini 4450 Thermo Scientific...
- Page 38 Section 9 Warranty Information Thermo Scientific MaxQ Mini 4450...
- Page 39 Section 9 Warranty Information MaxQ Mini 4450 Thermo Scientific...
- Page 40 thermoscientific.com © 2014 Thermo Fisher Scientific Inc. All rights reserved. All trademarks are the property of Thermo Fisher Scientific and its subsidiaries. Specifications, terms and pricing are subject to change. Not all products are available in all countries. Please consult your local sales representative for details.
Need help?
Do you have a question about the MaxQ Mini 4450 series and is the answer not in the manual?
Questions and answers