
Subscribe to Our Youtube Channel
Related Manuals for Thermo Scientific MaxQ 7000


Summary of Contents for Thermo Scientific MaxQ 7000
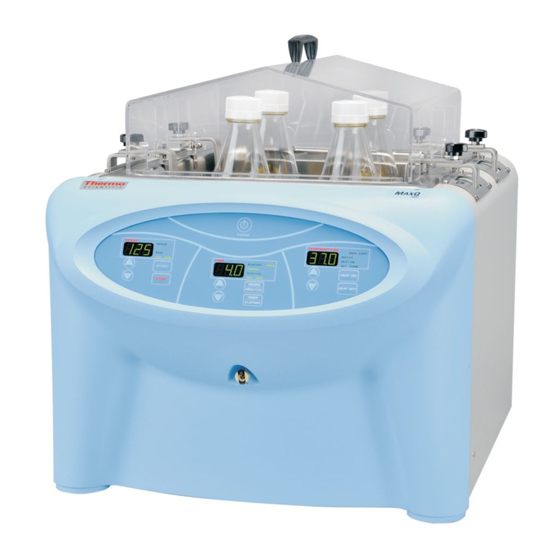
- Page 1 MaxQ 7000 Benchtop Water Bath Shakers Operating Manual and Parts List 057-286-00 (7004301) Rev. 7 Visit us online to register your warranty www.thermoscientific.com/labwarranty...
- Page 2 Updated Setting TImer for Continuous Shaking Step 3 - pg 5-8 30461 10/21/13 Corrected suspension arms part number in Replacement Parts section 29034 9/10/12 Updated Hyperterminal information 27615 7/22/11 Revised warranty 27135 3/16/11 Added warranty pages 4/20/10 Transfer to Marietta (was 057-286-00 5/15/09) ECR/ECN DATE DESCRIPTION Thermo Scientific MaxQ 7000...
- Page 3 Thermo Fisher Scientific makes no representations or warranties with respect to this manual. In no event shall Thermo be held liable for any damages, direct or incidental, arising out of or related to the use of this manual. ©2003 Thermo Fisher Scientific. All rights reserved. MaxQ 7000 Thermo Scientific...
- Page 4 This product is required to comply with the European Union’s Waste Electrical & Electronic Equipment (WEEE) Directive 2002/96/EC. It is marked with the WEEE symbol. Thermo Scientific has contracted with one or more recycling/disposal companies in each EU Member State European Country, and this product should be disposed of or recycled through them.
- Page 5 We can also provide you with a quotation on our Extended Warranty for your Thermo Scientific products. Whatever Thermo Scientific products you need or use, we will be happy to discuss your applications. If you are experiencing technical problems, working together, we will help you locate the problem and, chances are, correct it yourself...over the telephone without a service...
-
Page 6: Table Of Contents
Setting Timer for Timed Shaking ......5-8 RS-232 Communication Configuration .....5-9 Thermo Scientific MaxQ 7000... - Page 7 Ordering Procedures ........8-2 MaxQ 7000...
-
Page 8: Safety Information
Safety Information Section 1 Your Thermo Scientific MaxQ 7000 Shaker has been designed with function, reliability, and safety in mind. It is your responsibility to install it in conformance with local electrical codes. For safe operation, pay attention to Notes, Cautions, and Warnings throughout the manual. - Page 9 9. Perform regular maintenance service as specified in this manual and keep unit in good repair. Do not operate with known defects. 10. Do not use the shaker to mix flammable materials or where the transfer of mechanical energy to glass could cause glass breakage. MaxQ 7000 Thermo Scientific...
-
Page 10: Specifications
Orbital shakers are designed to provide increased aeration in a stable temperature environment. Unintended Use 1) Not intended for use in Class I or II applications as defined in 21 CFR 2) Not intended for mixtures of flammable materials Thermo Scientific MaxQ 7000... - Page 11 °C and time with a com- in °C and time with a com- puter. puter. 10 mv/°C output monitors 10 mv/°C output monitors Recorder Output * None None temperature with external temperature with external chart recorder. chart recorder. MaxQ 7000 Thermo Scientific...
- Page 12 The speed display will flash “bAL” on speed panel flash “bAL” on speed panel LED. LED. Optional Platform Dimensions - in. (cm) Catalog Number L x W 30105 Universal 13” x 11” (33 x 27.9 cm) Thermo Scientific MaxQ 7000...
- Page 13 Section 2 Specifications The Thermo Scientific MaxQ 7000 series of bench top, water bath shakers are available in either analog or digital control configurations: • SHKA7000, SHKA7000-1CE: control temperature by a Proportional/Integral/Derivative (PID) microprocessor-based controller. Solid-state control maintains time and speed and is adjustable with rotary dials.
- Page 14 Product Usage Indoor use only **Refer to IEC 664-1 Caution Operation of the shaker in a CO2 enriched atmosphere is not recommended. The formation of carbonic acid could cause electrical failures. Declaration of Conformity available on request Thermo Scientific MaxQ 7000...
-
Page 15: Analog Units Control Panel Features
4. Speed Control: Sets platform rotation speed. 5. Power Switch: Turns power on and off to shaker. 6. Speed Tachometer: Analog display of platform rotation speed. 7. Time(r): Allows user to choose either continuous or timed operation. Figure 3-1. Analog Control Panel Thermo Scientific MaxQ 7000... -
Page 16: Digital Control Panel Features
13. Set time: Illuminates when time is being set 14. Timer/Elapsed: Allows the user to choose elapsed time operation, elapsed, or timed operation, timer. 15. Hours/Minutes Switch: Allows user to choose timing operation in either hours or minutes MaxQ 7000 Thermo Scientific... - Page 17 23. Water Light: Indicates water level in tank is below recommended operating level 24. Heat on Light: Indicates heaters are energized 25. Set temp Light: Indicates temperature can be set 26. Heat on Switch: Turns on heat 27. Heat off Switch: Turns off heat Thermo Scientific MaxQ 7000...
-
Page 18: Location
Place shaker near an electrical outlet that matches the unit nameplate requirements. Allow approximately 2” (5 cm) of clearance around the unit for free air convection, accessory attachments and user convenience. Thermo Scientific MaxQ 7000... -
Page 19: Platform Installation
Caution Do not operate shaker with an unbalanced load. Platforms should be loaded for optimum stability and operation. Do not lift shaker by the platform. MaxQ 7000 Thermo Scientific... - Page 20 Similarly, high purity (deionized) water that does not fall within a resistivity range of 50K to 1M ohm will void the manufacturer’s warranty. If you should have any questions, please contact Technical Services. Thermo Scientific MaxQ 7000...
-
Page 21: Optional Cooling Coil Installation
6. Re-install suspension arms and platform. Note Shipped cooling coils is compressed to 3-4” across. Coil needs to be expanded to 6” for installation. This does not affect coil performance as copper coil is annealed for flexibility. MaxQ 7000 Thermo Scientific... -
Page 22: Test Tube Rack Installation
Caution It is recommended that the shaking action be started at a low speed in order to check that all vessels are secure and that no spilling of contents will occur. Thermo Scientific MaxQ 7000... -
Page 23: Operation
2. For timed operation, rotate timer knob clockwise from 1 minute to 60 minutes. The markings on the side of the dial are in 5-minute increments. Note Shaker will not operate if the timer is in the Off position. Thermo Scientific MaxQ 7000... -
Page 24: Temp Controller/ Setting Temperature
Press and hold the “star” (*) key and use either the up or down arrow key to adjust the set point to the desired temperature. Release the “star” (*) key. b. Allow sufficient time for chamber temperature to stabilize. MaxQ 7000 Thermo Scientific... -
Page 25: Temperature Calibration
±0.5°C. If not repeat steps 5, 6, and 7 above. Table 5-1. Determining Zero Value Thermometer 60°C Controller Reading = 65°C Subtract -5°C Enter Zero value of -5°C Thermometer 70°C Controller Reading = 65°C Subtract +5°C Enter Zero value of +5°C Thermo Scientific MaxQ 7000... -
Page 26: Turning Shaker On
Note There will be a 3 second delay from the time power is turned on to the time the shaker is activated. Control panel will illuminate when shaker power is activated. There will be an audible beep before the display lights MaxQ 7000 Thermo Scientific... -
Page 27: Calibrating Shaking Speed
6. Use the up or down arrow keys to set the shaker speed to match the tachometer’s readout. 7. Press STOP key to enter the new speed value. 8. Press START key to exit Calibration mode. Thermo Scientific MaxQ 7000... -
Page 28: Setting High-Limit Control
7. When desired temperature is achieved, load the shaker. Warning Do not operate shaker if any of the temperature controls become inoperative. A hazardous condition will develop which can result in injury or death and property damage. MaxQ 7000 Thermo Scientific... -
Page 29: Temperature Calibration
Note It is important to press HEAT OFF button to exit Calibration mode. 10. Press HEAT ON button twice to complete return to normal operating mode. Thermo Scientific MaxQ 7000... -
Page 30: Rs232 Interface Port
Figure 5-3. RS232 Interface Microsoft Windows 98 or newer operating system. Note RS232 Interface Port is for output only. Interface cables must not exceed 9.8’ (3m) in length. MaxQ 7000 Thermo Scientific... -
Page 31: Rs-232 Communication Configuration
10. Turn shaker off and connect computer (COM 1) to shaker (COM PORT) with DB-9 serial printer cable. 11. Start HyperTerminal by clicking on “Max Q Shaker.” 12. Power up shaker. Shaker will screen print speed, time and temperature at one-minute intervals. Thermo Scientific MaxQ 7000... -
Page 32: Troubleshooting
Replace if worn, broken or slipped Check drive belt. off pulley. Analog: check for power to speed control. Replace if defective. Shaker won’t heat Digital: make sure “HEAT ON” lamp is lit. Push “HEAT ON” button. Thermo Scientific MaxQ 7000... -
Page 33: Maintenance
Maintenance Section 7 Note Make no attempt to service or repair a Thermo Scientific product under warranty before consulting your Thermo Scientific dealer. After the warranty period, such consultation is still advised, especially when the repair may be technically sophisticated or difficult. - Page 34 Note The drain is located on the front of the cabinet and is opened when the ½” (0.64 cm) adapter fitting is inserted. Quick-connect Quick-connect reset button Adapter fitting side view Adapter fitting front view Flexible tubing Figure 7-1. Drain Fitting Assembly MaxQ 7000 Thermo Scientific...
-
Page 35: Secondary Overtemp Thermostat
6. If the shaker still fails to heat, contact Technical Services for further assistance. Over Temperature Thermostat Located Underneath REAR PANEL VIEW Insulation Retainer Shaker Mounting Plate Figure 7-2. Locations on back Thermo Scientific MaxQ 7000... -
Page 36: Care And Cleaning Of Stainless Steel
Chemicals that should be limited to a 3 hour maximum exposure time to stainless steel are: Aluminum chloride E.D.T.A. Potassium permanganate Barium chloride Ferrous chloride Potassium thiocyanate Calcium chloride Lysol Sodium hypochlorite Chlorinated Lime Mercury salts Stannous chloride Citric acid (boiling) Phenol Tartaric acid Dakin’s solution MaxQ 7000 Thermo Scientific... -
Page 37: Cleaning Methods
Oxalic acid 2% to 5% in warm water. Swab solution on surface allowing it to remain until rust is loosened. Immediately follow with a distilled water rinse. This method should ONLY be used if SEVERE rust and scale stains are present. Thermo Scientific MaxQ 7000... -
Page 38: Refilling The Tank
Caution Using chlorinated tap water or additives that contain chlorine will void the manufacturer’s warranty. Similarly, high purity (deionized) water that does not fall within a resistivity range of 50K to 1M ohm will void the manufacturer’s warranty. Contact Technical Services with any questions. MaxQ 7000 Thermo Scientific... -
Page 39: Replacement Parts
RTD Temperature Sensor 410-632-00 SHKA7000, SHKA7000-1CE Round Switch 440-396-00 SHKA7000, SHKA7000-1CE Mini Rocker Switch 440-397-00 SHKA7000, SHKE7000 Line Cord 470-262-00 SHKA7000-1CE, SHKE7000-1CE Line Cord 470-305-00 SHKA7000-1CE, SHKE7000-1CE Line Cord, UK CRX108 SHKA7000-1CE, SHKE7000-1CE Line Cord, China CRX115 Thermo Scientific MaxQ 7000... -
Page 40: Ordering Procedures
All parts listed herein may be ordered from the Thermo Scientific dealer from whom you purchased this unit, or can be obtained promptly from the factory. - Page 41 Thermo Scientific MaxQ 7000...
- Page 42 Section 9 Warranty Information MaxQ 7000 Thermo Scientific...
- Page 43 Section 9 Warranty Information Thermo Scientific MaxQ 7000...
- Page 44 Section 9 Warranty Information MaxQ 7000 Thermo Scientific...
- Page 45 thermoscientific.com © 2014 Thermo Fisher Scientific Inc. All rights reserved. All trademarks are the property of Thermo Fisher Scientific and its subsidiaries. Specifications, terms and pricing are subject to change. Not all products are available in all countries. Please consult your local sales representative for details.
Need help?
Do you have a question about the MaxQ 7000 and is the answer not in the manual?
Questions and answers