Advertisement
UNPACKING YOUR UNIT
PLEASE READ THE INSTRUCTION CAREFULLY BEFORE OPERATING THE UNIT
When you unpack your new clock radio, make sure that you have removed all the accessories and information papers:
- Main unit
- AUX line-in cable
- User manual
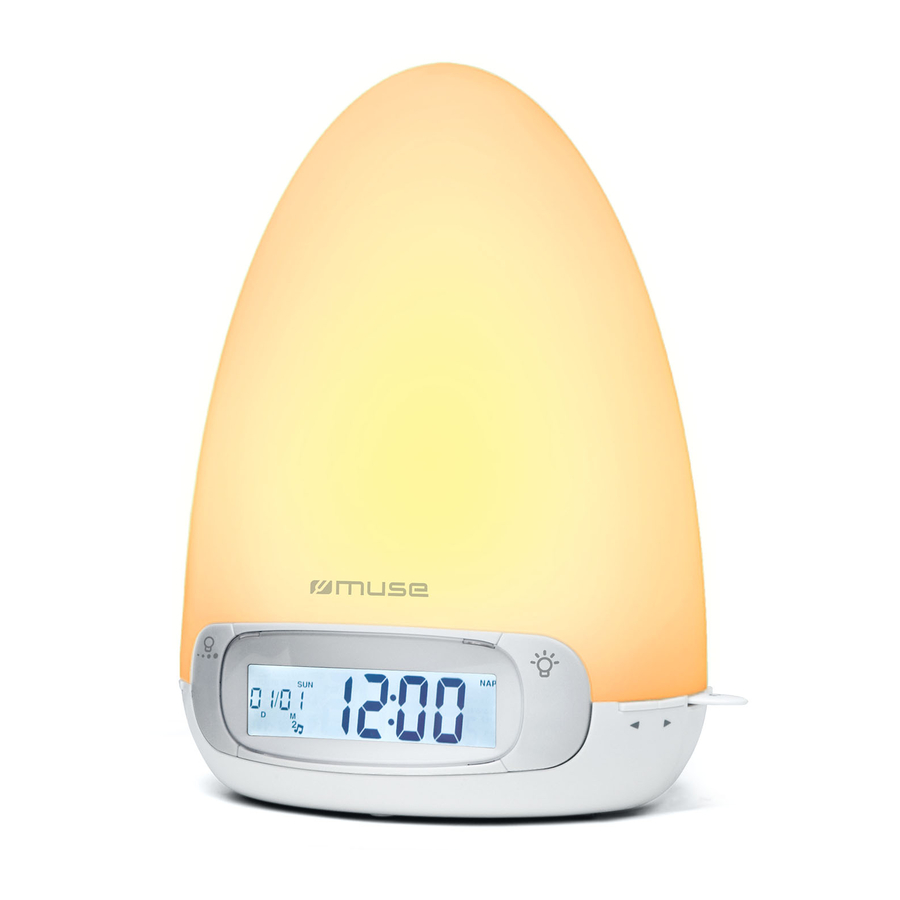
LOCATION OF CONTROLS
Front view

![]() : Brightness control of main light; Pause or start the cycle of the ambience color light
: Brightness control of main light; Pause or start the cycle of the ambience color light![]() : Main light on; Color light on; light off
: Main light on; Color light on; light off![]() : Display dimmer; alarm snooze; setting confirmation.
: Display dimmer; alarm snooze; setting confirmation.- Light diffuser
- LCD display
 : Brightness control of main light; Pause or start the cycle of the ambience color light
 : Main light on; Color light on; light off
 : Display dimmer; alarm snooze; setting confirmation.
Left view

![]() : Setting mode switch (time, alarm1, alarm2, lock)
: Setting mode switch (time, alarm1, alarm2, lock)-
![]() : Volume adjustment knob
: Volume adjustment knob - NAP button
- SLEEP button
![]() button: Alarm 2 setting
button: Alarm 2 setting![]() button: Alarm1 setting
button: Alarm1 setting- ON/OFF button (turn on/off the radio or natural sounds)
 : Setting mode switch (time, alarm1, alarm2, lock)
 button: Alarm 2 setting
 button: Alarm1 setting
- FM antenna wire
Right view

![]() : Display dimmer; alarm snooze; setting confirmation.
: Display dimmer; alarm snooze; setting confirmation.
![]() : Backward button
: Backward button![]() : Forward button
: Forward button- FM/MW/
![]() : Radio band and natural sounds switch
: Radio band and natural sounds switch - TUNING knob
- AUX: Auxiliary input jack
 : Backward button
 : Forward button
- AC power cord
Bottom view

- Speaker
- Battery compartment
POWER SUPPLY
AC power: 230 V ~ 50 Hz (CE standard)
Insert the AC power cord (20) into a convenient standard AC wall outlet.
 NOTE:
NOTE:
In a concern of saving energy, when playback has reached to the end or listening volume is set at a very low level and no control is operated on the device for a period of 15 minutes, the unit will automatically switch to Standby mode.
DC power: 3V (2 batteries UM4/AAA/R03 type, not provided) for clock and alarm time backup.
Batteries of alkaline type are recommended. For optimum performance, batteries should be replaced every 6 months.
Open the lid of the battery compartment (19) and insert two (type UM4/AAA/ R03) batteries (not supplied), with the + and - marks correctly aligned, then close the lid.
SYSTEM BACK-UP: Ensures that the unit will continue to operate as normal after an AC power disruption (in order to preserve the battery life, the display will not light up). All clock settings will be kept in the memory, however, the clock time may require adjustment for exact accuracy.
If no battery is installed, the display (5) will blink 0:00 to indicate that you have to reset the time and alarm.
* Please refer the operation to section "TIME SETTING".
Notes on batteries:
- Do not mix different types of batteries or old batteries with new ones.
- Never recharge, apply heat to them or take the batteries apart.
- In order to avoid leakage, always remove the batteries when unit will not be used for a long period of time.
- Battery shall not be exposed to excessive heat such as sunshine, fire or the like.
LCD DISPLAY

Setting the brightness of the display
When the alarm is not triggered, and the setting switch is at ![]() position, press
position, press  button (3) repeatedly to adjust the brightness (high, medium or low level) of the display.
TIME SETTING
- Slide the setting mode switch (6) to
![]() (time) position, the HOUR digit will flash on display (5).
(time) position, the HOUR digit will flash on display (5). - Press
![]() /
/![]() (13/14) to adjust the value. The time decrements or increments at a faster rate when you press and hold the buttons. Press
(13/14) to adjust the value. The time decrements or increments at a faster rate when you press and hold the buttons. Press![]() button (3) to confirm your setting.
button (3) to confirm your setting. - Repeat step 2 to complete the setting of minute-date-month-year-12/24hour mode.
Press![]() button and your set time will show on display.
button and your set time will show on display. - After finish the setting, slide the setting mode switch (6) to
![]() (lock) position.
(lock) position.
 /
/ (13/14) to adjust the value. The time decrements or increments at a faster rate when you press and hold the buttons. Press
 NOTE: When the switch is NOT at ![]() position, some of the function keys are disabled.
position, some of the function keys are disabled.
LIGHTING
- Your clock radio is equipped with a saving energy LED (Light Emitting Diode) main light and multicolor ambience light.
Main light
- Press
![]() button (2) once to turn on the main light. The current level of brightness will show on display for 5 seconds.
button (2) once to turn on the main light. The current level of brightness will show on display for 5 seconds. - Press
![]() button (1) repeatedly to adjust the level of brightness (from 01 to 20).
button (1) repeatedly to adjust the level of brightness (from 01 to 20).
 button (2) once to turn on the main light. The current level of brightness will show on display for 5 seconds.
 button (1) repeatedly to adjust the level of brightness (from 01 to 20).
Color light
- Press
![]() button (2) twice to turn on the color light, then it will start to cycle different colors.
button (2) twice to turn on the color light, then it will start to cycle different colors. - Press
![]() button (1) to stop at current color, press this button again to resume the cycle.
button (1) to stop at current color, press this button again to resume the cycle. - Press
![]() button (2) thrice to turn off the light.
button (2) thrice to turn off the light.
AUDIO
Press ON/OFF button (12) to switch on/off the audio function (radio, natural sounds or auxiliary input.)
Radio
- Slide the sound switch (15) to FM or MW position to select the band.
- Select a radio station with tuning knob (16).
- Adjust the volume (7) to the desired level.
- For better reception, in FM mode, extend the antenna (21); in MW mode, rotate the unit.
Natural sounds
- Turn on unit (12) and slide the sound switch (15) to
![]() position.
position. - Press
![]() or
or ![]() (13/14) to select a different kind of natural sound. There are 4 options available. "S1"..."S4" will show on display
(13/14) to select a different kind of natural sound. There are 4 options available. "S1"..."S4" will show on display - Adjust the volume (7) to the desired level.
Auxiliary device
- Connect your auxiliary source (e.g. mp3 player) to the AUX input jack (17).
- Turn on the unit (12) and turn on your auxiliary source. Adjust the volume bythe knob (7) to the desired level.
- To stop listening to the auxiliary source, disconnect your auxiliary source fromthe AUX input jack (17).
SETTING THE ALARM AND WAKE-UP MODE
This unit allows two wake times and to set the main light to turn on automatically and progressively a certain time before the alarm triggers.
- To set the alarm time
- Slide the setting mode switch (6) to
![]() (alarm1) or
(alarm1) or ![]() (alarm2) position, "AL 1" or "AL 2" will appear on display and the HOUR digit will flash.
(alarm2) position, "AL 1" or "AL 2" will appear on display and the HOUR digit will flash.
Press![]() /
/ ![]() (13/14) to adjust the value. The time decrements or increments at a faster rate when you press and hold the buttons.
(13/14) to adjust the value. The time decrements or increments at a faster rate when you press and hold the buttons. - Press
![]() button (3) and the MINUTE digit will flash, press
button (3) and the MINUTE digit will flash, press ![]() /
/ ![]() (13/14) to adjust.
(13/14) to adjust.
- Slide the setting mode switch (6) to
- To set the progressive light
(with setting mode switch (6) on![]() or
or ![]() position)
position) - Press
![]() button (1) repeatedly to adjust the progressive light activated duration (OFF-05-10-15-20-OFF) before alarm triggers. "
button (1) repeatedly to adjust the progressive light activated duration (OFF-05-10-15-20-OFF) before alarm triggers. " ![]() " is displayed (5).
" is displayed (5).
![warning]() NOTE: When set to "OFF", the main light will remain switched off at wake-up, "
NOTE: When set to "OFF", the main light will remain switched off at wake-up, " ![]() " is not displayed.
" is not displayed.
- Press
- When alarm time and progressive light settings are completed, slide the setting mode switch (6) to
![]() (lock) position.
(lock) position. - To select the alarm source (buzzer or radio/natural sound)
- Press
![]() or
or ![]() button (11 or 10).
button (11 or 10).
1st press:"![]() "/"
"/" ![]() " (wake up by buzzer)
" (wake up by buzzer)
2nd press: "![]() "/"
"/"![]() " (wake up by radio/natural sound)
" (wake up by radio/natural sound)
3rd press: alarm off
![warning]() NOTE: Waking up by FM/MW radio or natural sound depends on position (FM-MW-
NOTE: Waking up by FM/MW radio or natural sound depends on position (FM-MW- ![]() ) of the sound mode switch.
) of the sound mode switch.
- Press
- To check the alarm settings
- Press and hold
![]() or
or ![]() button (11 or 10) for 3 seconds. Time, alarm source and progressive light status are displayed for the corresponding alarm. Release this button to go back to clock display.
button (11 or 10) for 3 seconds. Time, alarm source and progressive light status are displayed for the corresponding alarm. Release this button to go back to clock display.
- Press and hold
 (alarm1) or
  /
/  (13/14) to adjust the value. The time decrements or increments at a faster rate when you press and hold the buttons.
 button (1) repeatedly to adjust the progressive light activated duration (OFF-05-10-15-20-OFF) before alarm triggers. "
  " is displayed (5).
 ) of the sound mode switch.
STOPPING THE ALARM
The alarm is programmed to run for 59 minutes.
Once the alarm 1 or alarm 2 is activated, corresponding alarm indicator " ![]() "/ "
"/ "  " or "
![]() "/ "
"/ " " will flash on display, the main light will turn on automatically if progressive light is set for the alarm. Stopping the alarm will turn off the progressive light.
-
![]() (3): Press to stop the alarm temporarily, the alarm will trigger again 9 minutes later. "
(3): Press to stop the alarm temporarily, the alarm will trigger again 9 minutes later. " ![]() "/ "
"/ " ![]() " or "
" or "![]() "/ "
"/ "![]() " and "SNOOZE" flash on display (5).
" and "SNOOZE" flash on display (5).
"![]() " remains displayed if progressive light has been set.
" remains displayed if progressive light has been set. - ON/OFF (12): Press to stop the alarm and it will sound again 24 hours later. "
![]() "/ "
"/ " ![]() " or "
" or "![]() "/ "
"/ "![]() " remains displayed. "
" remains displayed. " ![]() " remains displayed if progressive light has been set.
" remains displayed if progressive light has been set. - Press
![]() or
or ![]() (11 or 10) repeatedly until the alarm indicator "
(11 or 10) repeatedly until the alarm indicator " ![]() "/ "
"/ " ![]() " or "
" or "![]() "/ "
"/ "![]() " goes off. The alarm is turned off permanently,
" goes off. The alarm is turned off permanently,
 " remains displayed if progressive light has been set.
NAP FUNCTION
This function wakes you up after a short period of time. Only buzzer sound is available for NAP alarm.
- Press and release the NAP (8) button. The "NAP" icon and the current nap time flashes on display (5). During this period, adjust nap time by pressing
![]() or
or ![]() (13/14).
(13/14).
![warning]() NOTE: The nap range is up to 2 hours. (The default time is 10 minutes)
NOTE: The nap range is up to 2 hours. (The default time is 10 minutes) - If no button is pressed after 5 seconds, it will return to clock display with "NAP" icon.
- When the Nap alarm is triggered, press NAP (8) to stop, "NAP" icon will disappear.
- To check the remaining time before the NAP alarm is triggered, press NAP button (8), ON/OFF (12), or
![]() button (3).
button (3). - To cancel NAP function before NAP alarm is triggered, press NAP button (12), adjust nap time to "00" by pressing
![]() or
or ![]() (13/14), it will return to clock display after 5 seconds, "NAP" icon disappears.
(13/14), it will return to clock display after 5 seconds, "NAP" icon disappears.
SLEEP FUNCTION
In sleep mode, the audio will turn off automatically after a specified time.
If the main light is on, it will turn off gradually 5 minutes before the SLEEP activates.
- To set the sleep time, press SLEEP button (9), the radio or natural sound will turn on automatically, then press this button repeatedly to adjust the value (120, 110, 100...0).
- If no button is pressed after 5 seconds, it will return to clock display with"SLEEP" icon.
- The radio or natural sound will turn off when the preset time elapses. The"SLEEP" icon will disappear.
- To check the remaining time before automatic turning off, pressSLEEP button (9)
- To turn off the radio/natural sound before the SLEEP activates, press ON/OFF button (12), or press SLEEP button (9) repeatedly until value is adjusted to "00". It will return to normal display after 5 seconds, the sleep function will be cancelled and "SLEEP" icon will not be displayed.
MORE INFORMATION

RISK OF ELECTRIC SHOCK
DO NOT OPEN
 ATTENTION: To reduce the risk of electric shock, do not remove the cover. There are no user serviceable parts inside the unit. Refer all servicing to qualified personnel.
The lightening flash with arrowhead symbol within the triangle is a warning sign alerting the user of "dangerous voltage" inside the unit.
The exclamation point within the triangle is a warning sign alerting the user of important instructions accompanying the product.

To reduce the risk of fire or electric shock, do not expose this appliance to rain or moisture.

For indoor use only
Class 1 LED product.

- Do not throw batteries in fire!
- Do not place the product in closed bookcases or racks without proper ventilation.
- If the external flexible cable or cord of this luminaire is damaged, it shall be exclusively replaced by the manufacturer or his service agent or a similar qualified person in order to avoid a hazard.
- Attention should be drawn to the environmental aspects of battery disposal.
- The marking information is located at the bottom of apparatus.
- Ensure a minimum distance of 5cm around the apparatus for sufficient ventilation.
- Ensure that the ventilation is not impeded by covering the ventilation openings with items, such as newspapers, table-clothes, curtains, etc.
- Do not place naked flame sources, such as lighted candles on the apparatus.
- Use the apparatus only in moderate climates.
- Do not be exposed to dripping or splashing. And that no object filled with liquids, such as vases, shall be placed on the apparatus.
- Do not use your set immediately after transport from a cold place to a warm place, there may be condensation problems.
- Make sure that you keep your set away from water and high temperatures.
- Clean the player with a soft cloth, or damp chamois leather. Never use solvent.
- To be completely disconnected the power input, the mains plug of the apparatus shall be disconnected from the mains completely.
- The mains plug should not be obstructed or should be easily accessed during intended use.
- Where the mains plug is used as the disconnect device, the disconnect device shall remain readily operable.
- Under the influence of electrical fast transient or/and electrostatic phenomenon, the product may malfunction and require user to power reset.

If at any time in the future you should need to dispose of this product please note that Waste electrical products should not be disposed of with household waste. Please recycle where facilities exist. Check with your Local Authority or retailer for recycling advice.(Waste Electrical and Electronic Equipment Directive)
NEW ONE S.A.S
10 Rue de la Mission, 25480 Ecole Valentin, France


Documents / ResourcesDownload manual
Here you can download full pdf version of manual, it may contain additional safety instructions, warranty information, FCC rules, etc.
Advertisement


Need help?
Do you have a question about the ML-30 CR and is the answer not in the manual?
Questions and answers