Table of Contents
Advertisement
Quick Links
Advertisement
Table of Contents

Related Manuals for Newland NLS-HR20-BT


Summary of Contents for Newland NLS-HR20-BT
- Page 1 NLS-HR20-BT Barcode Scanner User Guide...
- Page 2 The products depicted in this manual may include software copyrighted by Fujian Newland Auto-ID Tech. Co., Ltd or third party. The user, corporation or individual, shall not duplicate, in whole or in part, distribute, modify, decompile, disassemble, decode, reverse engineer, rent, transfer or sublicense such software without prior written consent from the copyright holders.
- Page 3 CE Statem Hereby, Fujia n Newland Au uto-ID Tech Co o., Ltd. declar res that the rad dio equipment t type [designa ation of type o of radio of...
-
Page 4: Table Of Contents
Table of Contents Preface ........................................1 Introduction ....................................1 Chapter Description ..................................1 Explanation of Icons ..................................2 Chapter 1 Getting Started ..................................3 Introduction ....................................3 HR20-BT ..................................... 4 Chapter 2 Easyset ....................................5 ... - Page 5 Reread Timeout ..................................23 Image Decoding Timeout ................................24 Scanning Preference ................................25 Surround GS1 Application Identifiers (AI’s) with Parentheses ....................26 Sensitivity ....................................27 Trigger Commands ................................... 28 Modify Start Scanning Command ............................28 ...
- Page 6 Convert Case ..................................54 Emulate Numeric Keypad ..............................55 Fast Mode ..................................58 Polling Rate ..................................59 USB CDC ....................................61 HID POS (POS HID Barcode Scanner) ............................. 62 Introduction ..................................62 Access the Scanner with Your Program ..........................
- Page 7 Code 128 ....................................79 Restore Factory Defaults ..............................79 Enable/Disable Code 128 ..............................79 Set Length Range for Code 128 ............................80 EAN-8 ....................................... 81 Restore Factory Defaults ..............................81 Enable/Disable EAN-8 ............................... 81 ...
- Page 8 2-Digit Add-On Code ................................99 5-Digit Add-On Code ................................ 100 Add-On Code Required ..............................101 Transmit Preamble Character ............................101 Coupon ....................................102 UPC-A/EAN-13 with Extended Coupon Code ........................102 Coupon GS1 Databar Output ............................103 ...
- Page 9 Codabar ....................................123 Restore Factory Defaults ..............................123 Enable/Disable Codabar ..............................123 Set Length Range for Codabar ............................124 Check Character Verification ............................125 Start/Stop Character ................................ 126 Code 93 ....................................127 Restore Factory Defaults ..............................
- Page 10 ISSN......................................143 Restore Factory Defaults ..............................143 Enable/Disable ISSN ............................... 143 Industrial 25 .................................... 144 Restore Factory Defaults ..............................144 Enable/Disable Industrial 25 ............................144 Set Length Range for Industrial 25 ..........................145 ...
- Page 11 PDF417 ECI Output ................................. 164 Micro PDF417 ..................................165 Restore Factory Defaults ..............................165 Enable/Disable Micro PDF417 ............................165 Set Length Range for Micro PDF417 ..........................166 QR Code ....................................167 Restore Factory Defaults ..............................167 ...
- Page 12 Chapter 7 Data Formatter ................................... 185 Introduction ..................................... 185 Add a Data Format .................................. 185 Programming with Barcodes ............................185 Programming with Serial Commands ..........................188 Enable/Disable Data Formatter ............................... 189 Non-Match Error Beep ................................190 ...
- Page 13 Terminating Character Suffix ..............................224 Enable/Disable Terminating CharacterSuffix ........................224 Set Terminating Character Suffix ............................. 224 Appendix ......................................226 Digit Barcodes ..................................226 Save/Cancel Barcodes................................229 Factory Defaults Table ................................230 AIM ID Table ................................... 238 ...
-
Page 14: Preface
Preface Introduction This manual provides detailed instructions for setting up and using the NLS-HR20-BTwireless barcode scanner (hereinafter referred to as “the HR20-BT” or “the scanner”). Chapter Description Chapter 1AboutNLS-HR20-BT : Gives a general description of HR20-BTscanner. Chapter2EasySet : Introduces a useful tool you can use to set up HR20 canner and develop newapplications. -
Page 15: Explanation Of Icons
Explanation of Icons This icon indicates something relevant to this manual. This icon indicates this information requires extra attention from the reader. This icon indicates handy tips that can help you use or configure the scanner with ease. This icon indicates practical examples that can help you to acquaint yourself with operations. -
Page 16: Chapter 1Getting Started
Introduction HR20-BT scanner reads a 1D or 2D barcode by capturing its image. Adopting the advancedtechnology independently developed by Newland Auto-ID Techand2d image embedding application barcodeengine, it begins a new era of 2d image embedding application barcodeengine. Newland2d decode IC combines advanced UIMG and IC designation and manufacturing technology, simplifying the difficulties of designation of 2d decode products, establishing remarks of high quality, high reliability and low consumption products. -
Page 17: Hr20-Bt
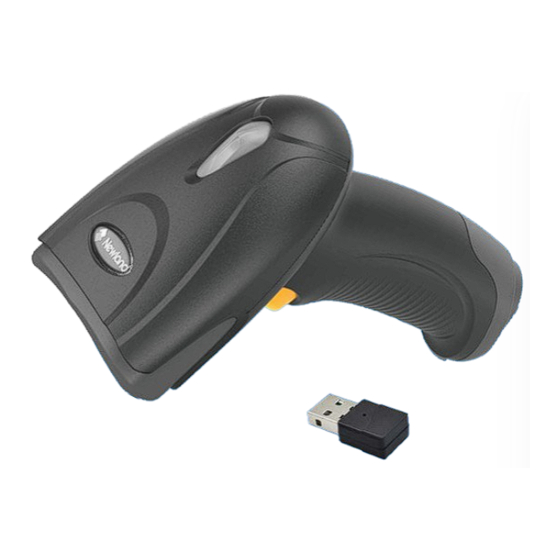
HR20-BT Good Read L LED: Red LED flas shes slowly - L Low battery ale ert. Red LED on - - Scanner is c charging. RedLEDoffan nd greenLEDo on-Fullcharged Blue LED flas shes slowly - P Paired but no connection es s tablished. Blue LED on - Connection established. -
Page 18: Chapter 2 Easyset
2 2 Easys EasySet supports Win ndows operat ting systems. EasySet, dev veloped by Fu ujian Newland d Auto-ID Te ech Co., Ltd., is a configura ation tool for N Newland’s 1D/2 2D handheld barcode scan ner, fixed mou... -
Page 19: Chapter 3 System Setting
Users can design an application program to send those command strings to the scanners to perform device configuration. EasySet Programming Besides the two methods mentioned above, you can conveniently perform scanner configuration through EasySet too. EasySet is a Windows-based configuration tool particularly designed for Newland products, enabling users to gain access todecodeddataandcapturedimagesandtoconfigurescanners.Formoreinformationaboutthistool,refertothe EasySet... -
Page 20: Programming Barcode/ Programming Command/Function
Enter Setup Programming Barcode/ Programming Command/Function The figure above is an example that shows you the programming barcode and command for the Enter Setup function: 1. The No Case Conversionbarcode. 2. The No Case Conversioncommand. 3. The description offeature/option. 4. ** indicates factory defaultsetting... -
Page 21: Use Of Programming Command
Enter Setup Use of Programming Command Besides the barcode programming method, the scanner can also be configured by serial commands (HEX) sent from the host device. All commands must be entered in uppercase letters. Use of Programming Barcodes Scanning the Enter Setup barcode can enable the scanner to enter the setup mode. Then you can scan a number of programming barcodes to configure your scanner. -
Page 22: Illumination
Enter Setup Illumination ** On Always lighting Aiming ** On Always lighting ** Exit Setup... -
Page 23: Good Read Led
Enter Setup Good Read LED The green LED can be programmed to be On or Off to indicate good read. ** On ** Exit Setup... -
Page 24: Good Read Led Duration
Enter Setup Good Read LED Duration This parameter sets the amount of time that the Good Read LED to remain on following a good read. It is programmable in 1ms increments from 1ms to 2,000ms. ** Short (20ms) Medium (120ms) Long (220ms) Prolonged (320ms) Custom (1 - 2,000ms) - Page 25 Enter Setup 100ms 200ms 300ms 400ms 500ms 600ms 700ms 800ms ** Exit Setup...
- Page 26 Enter Setup 900ms 1000ms 1100ms 1200ms 1300ms 1400ms 1500ms 1600ms ** Exit Setup...
-
Page 27: Power On Beep
Enter Setup Power On Beep The scanner can be programmed to beep when it is powered on. Scan the Off barcode if you do not want a power on beep. ** On Good Read Beep Scanning the Off barcode can turn off the beep that indicates successful decode; scanning the Onbarcode can turn it back ** On ** Exit Setup... -
Page 28: Good Read Beep Duration
Enter Setup Good Read Beep Duration This parameter sets the length of the beep the scanner emits on a good read. It is programmable in 1ms increments from 20ms to 300ms. Short (40ms) ** Medium (80ms) Long (120ms) Custom (20 – 300ms) Set the Good Read Beep duration to 200ms: 1. -
Page 29: Good Read Beep Frequency
Enter Setup Good Read Beep Frequency This parameter is programmable in 1Hz increments from 20Hz to20,000Hz Extra Low (800Hz) Low(1600Hz) ** Medium (2730Hz) High(4200Hz) Custom (20 - 20,000Hz) Set the Good Read Beep frequency to 2,000Hz: 1. Scan the Enter Setupbarcode. 2. -
Page 30: Good Read Beep Volume
Enter Setup Good Read Beep Volume This parameter is programmable in 1 increments from 1 to20 ** Loud Medium Custom(1-20) ** Exit Setup... -
Page 31: Vibration
Enter Setup Vibration Good Read Vibration ** Off Good Read Vibration Duration This parameter is programmable in 1ms increments from 100ms to2000ms Vibration Duration ** Exit Setup... -
Page 32: Scan Mode
Enter Setup Scan Mode Level Mode: A trigger pull activates a decode session. The decode session continues until a barcode is decoded or you release thetrigger. Trigger Mode: A trigger pull activates a decode session. The decode session continues until a barcode is decoded, eitheryou release thetrigger or decodesession timeout. - Page 33 Enter Setup ContinuousMode PulseMode BatchMode ** Exit Setup...
-
Page 34: Decode Session Timeout
Enter Setup Decode Session Timeout This parameter sets the maximum time decode session continues during a scan attempt. It is programmable in 1ms increments from 1ms to 3,600,000ms. When it is set to 0, the timeout is infinite. The default setting is 3,000ms. Decode Session Timeout Set the decode session timeout to 1,500ms: 1. -
Page 35: Image Stabilization Timeout (Sense Mode)
Enter Setup Image Stabilization Timeout (Sense Mode) This parameter defines the amount of time the scanner will spend adapting to ambient environment after it decodes a barcode and “looks” for another. It is programmable in 1ms increments from 0ms to 3,000ms. The default setting is 100ms. Image Stabilization Timeout Set the image stabilization timeout to 800ms: 1. -
Page 36: Reread Timeout
Enter Setup Reread Timeout RereadTimeoutcanavoidundesiredrereadingofsamebarcodeinagivenperiodoftime.Thisfeatureisonlyapplicableto the Sense and Continuousmodes. Enable Reread Timeout: Do not allow the scanner to reread same barcode before the reread timeout expires. Disable Reread Timeout: Allow the scanner to reread same barcode. Enable Reread Timeout Disable Reread Timeout The following parameter sets the timeout between decodes for same barcode. -
Page 37: Image Decoding Timeout
Enter Setup You may wish to restar rt the reread t timeout when the scanner e encounters the e same barcod de that was d ecoded in the e last scan ses ssion before th he reread time eout expires. To enable thi s feature, sca an the Reread... -
Page 38: Scanning Preference
Enter Setup Scanning Preference Normal Mode: Select this mode when reading barcodes on paper. Screen Mode: Select this mode when reading barcodes on the screen. BarcodePayMode:Select this mode when reading the payment barcode. ** NormalMode ScreenMode BarcodePayMode ** Exit Setup... -
Page 39: Surround Gs1 Application Identifiers (Ai's) With Parentheses
Enter Setup Surround GS1 App plication Id dentifiers ( (AI’s) with h Parenthe eses WhenSur rroundGS1AI I’swithParent thesesisselec cted,eachappli cationidentifie er(AI)contained dinscannedda atawillbe enclo osed in parenth heses in the o outputmessage ** Do Not S Surround GS S1 AI’s withPa arentheses Surround G S1 AI’s with... -
Page 40: Sensitivity
Enter Setup Sensitivity Sensitivity specifies the degree of acuteness of the scanner’s response to changes in images captured. The higher the sensitivity,thelowerrequirementinimagechangetotriggerthescanner.Youcanselectanappropriatedegreeofsensitivity that fits the application environment. The feature is only applicable to the Sensemode. It is programmable from1 to 20.The default setting is Medium (5). -
Page 41: Trigger Commands
Enter Setup Trigger Commands When Enable Trigger Commands is selected, you can activate and deactivate the scanner in the Level mode with serial trigger commands. Sending the Start Scanning command (default: <SOH> T <EOT>, user-programmable) to the scanner in the Level mode activates a decode session. The decode session continues until a barcode is decoded or the decode session timeout or the scanner receives the Stop Scanning command (default: <SOH>... -
Page 42: Modify Stop Scanning Command
Enter Setup Modify Stop Scanning Command The Stop Scanning Command canstimulate the trigger unreleased and consist of 1-10 characters (HEX values from 0x01 to 0xFF). In this command, the character “?” (HEX: 0x3F) cannot be the first character. The default Stop Scanning command is <SOH>... -
Page 43: Read Barcode After Power On
Enter Setup Read Barc code after r Power O Disable: The scanner can not decod de barcodes a after power on . The illumina tion and aimin ng are off. You u can send Re Barcode Command to the scanner to o activate it. -
Page 44: Decode Area
Enter Setup Decode Area WholeAreaDecoding:Thescannerattemptstodecodebarcode(s)withinitsfieldofview,fromthecentertotheperiphery, transmits the barcode that has been firstdecoded. Specific Area Decoding: The scanner attempts to read barcode(s) within a specified decoding area and transmits the barcode that has been first decoded. This option allows the scanner to narrow its field of view to make sure it reads only those barcodes intended by the user. - Page 45 Enter Setup Program the scanner to o only read Barc code 1 in the figure above e by setting th he decoding area to 10% top, 4 45% bottom, 1 15% left and 3 30% right: Scan the e Enter Setup p barcode.
-
Page 46: Image Flipping
Enter Setup Image Flipping ** Do NotFlip Flip Horizontally FlipVertically Flip Horizontally & Vertically Example of imagenotflipped Example of image flippedhorizontally Example of imageflippedvertically Example of image flipped horizontally &vertically ** Exit Setup... -
Page 47: Bad Read Message
Enter Setup Bad Read Message Scan the appropriate barcode below to select whether or not to send a bad read message (user-programmable) when a good read does not occur before trigger release, or the decode session timeout expires, or the scanner receives the Stop Scanning command (For more information, see the “Serial Trigger Command”... -
Page 48: Default Settings
Enter Setup Default Settings Factory Defaults Scanning the following barcode can restore the scanner to the factory defaults. You may need to reset all parameters to the factory defaults when: The scanner is not properly configured so that it fails to decodebarcodes. You forget previous configuration and want to avoid itsimpact. -
Page 49: Query Product Information
Enter Setup Query Product Information After scanning the barcode below, the product information (including product name, firmware version, decoder version, hardware version, product serial number, OEM serial number, manufacturing dateand data formatter version) will be sent to the host device. Query Product Information Query Product Name Query Product Name... -
Page 50: Query Decoder Version
Enter Setup Query Decoder Version Query Decoder Version Query Hardware Version Query Hardware Version Query Product Serial Number Query Product Serial Number ** Exit Setup... -
Page 51: Query Oem Serial Number
Enter Setup Query OEM Serial Number Query OEM Serial Number Query Manufacturing Date Query Manufacturing Date Query Data Formatter Version Query Data Formatter Version ** Exit Setup... -
Page 52: Chapter4Usbinterface
Chapter4USBInterface Introduction There are four options for USB connection: USB HID Keyboard: The scanner’s transmission is simulated as USB keyboard input with no need for command configuration or a driver. Barcode data could be entered by the virtual keyboard directly and it is also convenient for the host device to receivedata. -
Page 53: Usb Hid Keyboard
Enter Setup USB HID Keyboard When the scanner is connected to the USB port on a host device, you can enable the USB HID Keyboard feature by scanning the barcode below. Then scanner’s transmission will be simulated as USB keyboard input. The Host receives keystrokes onthe virtual keyboard. -
Page 54: Usb Country Keyboard Types
Enter Setup USB Country Keyboard Types Keyboard layouts vary from country to country. The default setting is U.S. keyboard. ** U.S. (English) Belgium Brazil Canada (French) Czechoslovakia Denmark Finland (Swedish) ** Exit Setup... - Page 55 Enter Setup France Germany/ Australia Greece Hungary Israel (Hebrew) Italy Latin America/ South America Netherlands (Dutch) ** Exit Setup...
- Page 56 Enter Setup Norway Poland Portugal Romania Russia Slovakia Spain Sweden ** Exit Setup...
- Page 57 Enter Setup Switzerland (German) Turkey_F Turkey_Q Japan ** Exit Setup...
-
Page 58: Beep On Unknown Character
Enter Setup Beep on Unknown Character Due to the differences in keyboard layouts, some characters contained in barcode data may be unavailable on the selected keyboard. As a result, the scanner fails to transmit the unknown characters. Scan the appropriate barcode below to enable or disable the emission of beep when an unknown character is detected. ** Do Not Beep on Unknown Character Beep on Unknown Character Supposing French keyboard (Country Code: 7) is selected and barcode data ”AÐF”... -
Page 59: Emulate Alt+Keypad
ter Setup Emulate e ALT+Key ypad When Em mulate ALT+K Keypad is turn ned on, any ch haracter is sen nt via the num meric keypad a and overlook U USB country keyboard d type.This mo ode need to se et Code Page Option and U Unicode Outp... - Page 60 Enter Setup Code Page Code pages define the mapping of character codes to characters. If the data received does not display with the proper characters,itmaybebecausethebarcodebeingscannedwascreatedusingacodepagethatisdifferentfromtheonethe host program is expecting. If this is the case, select the code page with which the barcodes were created by scanning the appropriate barcode below.
- Page 61 Enter Setup Code Page 1256 (Arabic) Code Page 1257 (Baltic) Code Page 1258 (Vietnamese) Code Page 936 (Simplified Chinese, GB2312,GBK) Code Page 874(Thai) ** Exit Setup...
- Page 62 Enter Setup Unicode Encoding Different host program may use different character encodings for handling incoming barcode data. For instance, Microsoft Office Word uses Unicode encoding and therefore you should turn Unicode Encoding on, whereas Microsoft Office Excel or Notepad uses Code Page encoding and therefore you should turn Unicode Encoding off. This feature is only effective when Emulate ALT+Keypad is turned on.
-
Page 63: Function Key Mapping
Enter Setup Function Key Mapping When Ctrl+ASCII Mode is selected, function characters (0x00 - 0x1F) are sent as ASCII sequences. The default setting is Off. ** Disable Ctrl+ASCII Mode Alt+Keypad Mode IfCtrl+ASCIIModeisselectedandotherparametersofUSBHIDKeyboardadoptfactorydefaults,barcode data “A<HT>(i.e. Horizontal Tab)F” (0x41/0x09/0x46) is sent asbelow: “A”... -
Page 64: Ascii Function Key Mapping Table
Enter Setup ASCII Function Key Mapping Table ASCII Function ASCII Value (HEX) Function Key Mapping Disabled Ctrl+ASCII Null Ctrl+@ Keypad Enter Ctrl+A Caps Lock Ctrl+B Ctrl+C Null Ctrl+D CTRL Ctrl+E Null Ctrl+F Enter Ctrl+G Left Arrow Ctrl+H Horizontal Tab Ctrl+I Down Arrow Ctrl+J Vertical Tab... -
Page 65: Ascii Function Key Mapping Table (Continued)
Enter Setup ASCII Function Key Mapping Table (Continued) The last five characters (0x1B~0x1F) in the table above apply to US keyboard layout only. The following chart provides the equivalents of these five characters for other countries. Country Ctrl+ASCII United States Ctrl+[ Ctrl+\ Ctrl+]... -
Page 66: Inter-Keystroke Delay
Enter Setup Inter-Keystroke Delay This parameter specifies the delay between emulated keystrokes.Scanning below barcodes to delay longer when the host device needs slower data transmission. The default setting is No Delay. ** No Delay Long Delay (40ms) Short Delay (20ms) Caps Lock The Caps Lock ON option can invert upper and lower case characters contained in barcode data. -
Page 67: Convert Case
Enter Setup Convert Case Scan the appropriate barcode below to convert all barcode data to your desired case. ** No Case Conversion Convert All to Upper Case Convert All to Lower Case When the Convert All to Lower Case feature is enabled, barcode data “AbC” is transmitted as “abc”. If Emulate ALT+Keypad ON is selected, Convert All to Lower Case and Convert All to Upper Case do not function. -
Page 68: Emulate Numeric Keypad
Enter Setup Emulate Numeric Keypad Do Not Emulate Numeric Keypad 1: Sending a number (0-9) is emulated as keystroke(s) on main keyboard. Emulate Numeric Keypad 1: Sending a number (0-9) is emulated as keystroke(s) on numeric keypad. The state of Num Lock on the simulated numeric keypad is determined by its equivalent on the host device. - Page 69 Enter Setup ** Do Not Emulate Numeric Keypad 2 Emulate Numeric Keypad 2 Emulate ALT+Keypad ON prevails over Emulate NumericKeypad. Supposing the Emulate Numeric Keypad 1 and Emulate Numeric Keypad 2 features are enabled: if Num Lock on the host device is ON, “A4.5” is transmitted as“A4.5”; if Num Lock on the host device is OFF, “A4.5”...
- Page 70 Enter Setup Character”+”,”-“,”*”,”/”Adopt Numeric Keypad ** Exit Setup...
-
Page 71: Fast Mode
Enter Setup Fast Mode When Fast Mode On is selected, the scanner sends characters to the host faster. If the host drops characters, turn the Fast Mode off or change the polling rate to a bigger value. ** Fast Mode Off Fast Mode On ** Exit Setup... -
Page 72: Polling Rate
Enter Setup Polling Rate This parameter specifies the polling rate for a USB keyboard. The smaller value rate is, the faster characters transmission from scanner to the host.If the host drops characters, change the polling rate to a bigger value. **4ms ** Exit Setup... - Page 73 Enter Setup 10ms ** Exit Setup...
-
Page 74: Usb Cdc
Enter Setup USB CDC IfyourscannerisconnectedtotheUSBportonahostdevice,theUSBCDCfeatureallowsthehostdevicetoreceive data in the way as a serial port does. A driver is needed when using this feature. You may download it from our website at www.newlandaidc.com. USB CDC ** Exit Setup... -
Page 75: Hid Pos (Pos Hid Barcode Scanner)
Enter Setup HID POS (POS HID Barcode Scanner) Introduction The HID-POS interface is recommended for new application programs. It can send up to 56 characters in a single USB report and appears more efficient than keyboard emulation. Features: HID based, no custom driverrequired. More efficient in communication than keyboard emulation interface. -
Page 76: Acquire Scanned Data
Barcode Length 2-57 Decoded Data (1-56) 58-61 Reserved Newland Symbology Identifier or N/C: 0x00 Decoded data continued Send Command to the Scanner This output report is used to send commands to the scanner. All programming commands can be used. Byte... -
Page 77: Ibm Surepos (Tabletop)
Enter Setup IBM SurePOS (Tabletop) IBM SurePOS (Tabletop) IBM SurePOS (Handheld) IBM SurePOS (Handheld) VID/PID USBusesVID(VendorID)andPID(ProductID)toidentifyandlocateadevice.TheVIDisassignedbyUSBImplementers Forum.Newland’svendorIDis1EAB(Hex).ArangeofPIDsareusedforeachNewlandproductfamily.EveryPIDcontains base number and interface type (keyboard, COM port,etc.). Product Interface PID (Hex) PID (Dec) USB HID Keyboard 1D03 7427 USB CDC 1D06 7430... -
Page 78: Chapter5Wirelesscommunication
Chapter5WirelessCommunication Operating Modes The scanner provides the following three operating modes. Scanning the Enter Setup Barcode to change the operating mode. The default setting is 2.4G Mode: Bluetooth HID Mode allows your scanner to communicate with a remote host using Bluetooth. You must first pair your scanner to the host before these two Bluetooth devices can communicate with each other. -
Page 79: Batch Mode
Enter Setup Batch Mode Batch Mode Options Off: The scanner attempts to transmit every barcode you scan. When you are out of service range, the scanned data will be lost. Automatic Batch Mode: When in service range, the scanner attempts to transmit every barcode you scan. When out of range, the scanner stores the scanned data in the flash memory. -
Page 80: Prevent Same Barcode Storage
Enter Setup Prevent Same Barcode Storage This feature is available only when scanning barcodes in the Automatic or Manual Batch mode. On: The scanner discards the data and generates an error beep when encountering a barcode that has existed in the flash memory. -
Page 81: Batch Mode Transmit Delay
Batch M Mode Trans smit Delay Sometim es when multi iple barcodes stored in the f flash memory are sent to th he host, the tra ansmission of those barcode es is too fast fo or the applicat tion to process s. -
Page 82: End Of Transmission Message For Batch Mode
Ente er Setup End of Transmissi ion Messag ge for Batch h Mode You may y scan the app propriate barc code below to o select wheth her or not to s send an end of transmissio on message ( (user- programm mable) to not... -
Page 83: Transmit Stored Data
Enter Setup Transmit Stored Data You may scan the barcode below to send the stored data in the flash memory to the host. This feature is only available to the Manual Batch mode. Transmit Stored Data Auto Clear Stored Data after Transmission You may scan the appropriate barcode below to choose whether to clear or keep the stored data in the flash memory after transmission. -
Page 84: Clear Pairing Info On Scanner
Enter Setup Clear Pairing Info on Scanner Clear Pairing Info on Scanner Tips: Clear Pairing Info on Scanneris not available in 2.4G Mode ** Exit Setup... -
Page 85: Auto Power-Off Timeout
Enter Setup Auto Power-Off Timeout Auto Power-off Timeout specifies the amount of time it takes before the scanner automatically powers off from inactivity. ** 5 Minutes 10 Minutes 20 Mintues 30 Mintues 60 Minutes Disable Auto Power-off ** Exit Setup... -
Page 86: Set Scanner Name
Enter Setup Set Scanner Name You may scan the below barcode to set the name of your scanner. The maximum length is 5 characters (HEX values from 0x20 to 0x7E). The default scanner name is “00000”. Scanner Name If setting the scanner name as “0AB00”: Scan the Enter Setup barcode Scan the Scanner Name barcode Scan the numeric barcode “3”“0”“4”“1”“4”“2”from the “Digit Barcodes”... -
Page 87: Time Stamp
Enter Setup Time Stamp You can select whether or not to send date & time before each scanned data by scanning the appropriate barcode below. ** Do Not Send Time Stamp Send Time Stamp ** Exit Setup... -
Page 88: Set Time Stamp Format
Set Time Stamp Format ** Format 1: (YYYY/MM/DD, HH: MM: SS) Format 2: (DD/MM/YYYY/, HH: MM: SS) (example: 2018/01/23, 10:30:20)(example: 23/01/2018, 10:30:20) Format 3: (MM/DD/YYYY,HH:MM:SS) (example: 01/23/2018, 10:30:20) -
Page 89: Chapter6Symbologies
Enter Setup Chapter6Symbologies Introduction Everysymbology(barcodetype)hasitsownuniqueattributes.Thischapterprovidesprogrammingbarcodesforconfiguring scanner so that it can identify various symbologies. It is recommended to disable those that are rarely used to increase the efficiency of thescanner. Global Settings Enable/Disable All Symbologies If the Disable All Symbologies feature is enabled, the scanner will not be able to read any non-programming barcodes except the programming barcodes. -
Page 90: Enable/Disable 2D Symbologies
Enter Setup Enable/Disable 2D Symbologies Enable 2D Symbologies Disable 2D Symbologies ** Exit Setup... -
Page 91: 1D Twin Code
Enter Setup 1D Twin Code 1D twin code is two 1D barcodes of a symbology or of different symbologies paralleled vertically. Both barcodes must have similar specifications and be placed closely together. There are 3 options for reading 1D twincode: Single 1D Code Only: Read either 1Dcode. -
Page 92: Code 128
Enter Setup Code 128 Restore Factory Defaults Restore the Factory Defaults of Code 128 Enable/Disable Code 128 Enable Code 128 Disable Code 128 If the scanner fails to identify Code 128 barcodes, you may first try this solution by scanning the Enter Setup barcode and then Enable Code 128 barcode. -
Page 93: Set Length Range For Code 128
Enter Setup Set Length Range for Code 128 The scanner can be configured to only decode Code 128 barcodes with lengths that fall between (inclusive) the minimum and maximum lengths. To accomplish it, you need to set the minimum and maximum lengths. Set the Minimum Length (Default: 1) Set the Maximum Length (Default: 48) If minimum length is set to be greater than maximum length, the scanner only decodes Code 128... -
Page 94: Restore Factory Defaults
Enter Setup EAN-8 Restore Factory Defaults Restore the Factory Defaults of EAN-8 Enable/Disable EAN-8 ** Enable EAN-8 Disable EAN-8 If the scanner fails to identify EAN-8 barcodes, you may first try this solution by scanning the Enter Setup barcode and then Enable EAN-8 barcode. Transmit Check Character EAN-8 is 8 digits in length with the last one as its check character used to verify the integrity of the data. -
Page 95: 2-Digit Add-On Code
Enter Setup 2-Digit Add-On Code An EAN-8 barcode can be augmented with a two-digit add-on code to form a new one. In the example below, the part surrounded by blue dotted line is an EAN-8 barcode while the part circled by red dotted line is a two-digit add-on code. ** Disable 2-Digit Add-On Code Enable 2-Digit Add-On Code Disable2-DigitAdd-OnCode:ThescannerdecodesEAN-8andignorestheadd-oncodewhenpresented... -
Page 96: 5-Digit Add-On Code
Enter Setup 5-Digit Add-On Code An EAN-8 barcode can be augmented with a five-digit add-on code to form a new one. In the example below, the part surrounded by blue dotted line is an EAN-8 barcode while the part circled by red dotted line is a five-digit add-on code. ** Disable 5-Digit Add-On Code Enable 5-Digit Add-On Code Disable5-DigitAdd-OnCode:ThescannerdecodesEAN-8andignorestheadd-oncodewhenpresented... -
Page 97: Add-On Code Required
Enter Setup Add-On Code Required When EAN-8 Add-On Code Required is selected, the scanner will only read EAN-8 barcodes that contain add-on codes. EAN-8 Add-On Code NotRequired EAN-8 Add-On CodeRequired Convert EAN-8 to EAN-13 ConvertEAN-8toEAN-13:ConvertEAN-8decodeddatatoEAN-13formatbeforetransmission.Afterconversion,thedata follows EAN-13 format and is affected by EAN-13 programming selections (e.g., CheckCharacter). Do Not Convert EAN-8 to EAN-13: EAN-8 decoded data is transmitted as EAN-8 data, without conversion. -
Page 98: Restore Factory Defaults
Enter Setup EAN-13 Restore Factory Defaults Restore the Factory Defaults of EAN-13 Enable/DisableEAN-13 ** EnableEAN-13 Disable EAN-13 If the scanner fails to identify EAN-13 barcodes, you may first try this solution by scanning the Enter Setup barcode and then Enable EAN-13 barcode. ** Exit Setup... -
Page 99: Transmit Check Character
Enter Setup Transmit Check Character ** Transmit EAN-13 Check Character Do Not Transmit EAN-13 Check Character 2-Digit Add-On Code An EAN-13 barcode can be augmented with a two-digit add-on code to form a new one. In the example below, the part surrounded by blue dotted line is an EAN-13 barcode while the part circled by red dotted line is a two-digit add-on code. -
Page 100: 5-Digit Add-On Code
Enter Setup 5-Digit Add-On Code An EAN-13 barcode can be augmented with a five-digit add-on code to form a new one. In the example below, the part surrounded by blue dotted line is an EAN-13 barcode while the part circled by red dotted line is a five-digit add-on code. ** Disable 5-Digit Add-On Code Enable 5-Digit Add-On Code Disable 5-Digit Add-On Code: The scanner decodes EAN-13 and ignores the add-on code when... -
Page 101: Ean-13 Beginning With 290 Add-On Code Required
Enter Setup EAN-13 Beginning with 290 Add-On Code Required This setting programs the scanner to require an add-on code (2-digit or 5-digit) on EAN-13 barcodes that begin with “290”. The following settings can be programmed: RequireAdd-OnCode:AllEAN-13barcodesthatbeginwith“290”musthavea2-digitor5-digitadd-oncode.TheEAN-13 barcodewiththeadd-oncodeisthentransmitted.Iftherequiredadd-oncodeisnotfound,theEAN-13barcodeisdiscarded. Do Not Require Add-On Code: If you have selected Require Add-On Code, and you want to disable this feature, scan DoNotRequireAdd-OnCode.EAN-13barcodesarehandled,dependingonyourselectionforthe“Add-OnCodeRequired”... -
Page 102: Ean-13 Beginning With 414/419 Add-On Code Required
Enter Setup EAN-13 Beginning with 414/419 Add-On Code Required This setting programs the scanner to require an add-on code (2-digit or 5-digit) on EAN-13 barcodes that begin with a “414” or “419”. The following settings can be programmed: Require Add-On Code: All EAN-13 barcodes that begin with a “414” or “419” must have a 2-digit or 5-digit add-on code. TheEAN-13barcodewiththeadd-oncodeisthentransmitted.Iftherequiredadd-oncodeisnotfound,theEAN-13barcode discarded. -
Page 103: Ean-13 Beginning With 434/439 Add-On Code Required
Enter Setup EAN-13 Beginning with 434/439 Add-On Code Required This setting programs the scanner to require an add-on code (2-digit or 5-digit) on EAN-13 barcodes that begin with a “434” or “439”. The following settings can be programmed: Require Add-On Code: All EAN-13 barcodes that begin with a “434” or “439” must have a 2-digit or 5-digit add-on code. TheEAN-13barcodewiththeadd-oncodeisthentransmitted.Iftherequiredadd-oncodeisnotfound,theEAN-13barcode discarded. -
Page 104: Ean-13 Beginning With 977 Add-On Code Required
Enter Setup EAN-13 Beginning with 977 Add-On Code Required This setting programs the scanner to require an add-on code (2-digit or 5-digit) on EAN-13 barcodes that begin with “977”. The following settings can be programmed: RequireAdd-OnCode:AllEAN-13barcodesthatbeginwith“977”musthavea2-digitor5-digitadd-oncode.TheEAN-13 barcodewiththeadd-oncodeisthentransmitted.Iftherequiredadd-oncodeisnotfound,theEAN-13barcodeisdiscarded. Do Not Require Add-On Code: If you have selected Require Add-On Code, and you want to disable this feature, scan DoNotRequireAdd-OnCode.EAN-13barcodesarehandled,dependingonyourselectionforthe“Add-OnCodeRequired”... -
Page 105: Ean-13 Beginning With 979 Add-On Code Required
Enter Setup EAN-13 Beginning with 979 Add-On Code Required This setting programs the scanner to require an add-on code (2-digit or 5-digit) on EAN-13 barcodes that begin with “979”. The following settings can be programmed: RequireAdd-OnCode:AllEAN-13barcodesthatbeginwith“979”musthavea2-digitor5-digitadd-oncode.TheEAN-13 barcodewiththeadd-oncodeisthentransmitted.Iftherequiredadd-oncodeisnotfound,theEAN-13barcodeisdiscarded. Do Not Require Add-On Code: If you have selected Require Add-On Code, and you want to disable this feature, scan DoNotRequireAdd-OnCode.EAN-13barcodesarehandled,dependingonyourselectionforthe“Add-OnCodeRequired”... -
Page 106: Upc-E
Enter Setup UPC-E Restore Factory Defaults Restore the Factory Defaults of UPC-E Enable/Disable UPC-E ** Enable UPC-E Disable UPC-E ** Enable UPC-E0 Disable UPC-E0 **Enable UPC-E1 Disable UPC-E1 If the scanner fails to identify UPC-E/UPC-E0/UPC-E1 barcodes, you may first try this solution by scanning the Enter Setup barcode and then Enable UPC-E/UPC-E0/UPC-E1 barcode. -
Page 107: Transmit Check Character
Enter Setup Transmit Check Character UPC-E is 8 digits in length with the last one as its check character used to verify the integrity of the data. ** Transmit UPC-E Check Character Do Not Transmit UPC-E Check Character 2-Digit Add-On Code A UPC-E barcode can be augmented with a two-digit add-on code to form a new one. -
Page 108: 5-Digit Add-On Code
Enter Setup 5-Digit Add-On Code A UPC-E barcode can be augmented with a five-digit add-on code to form a new one. In the example below, the part surrounded by blue dotted line is a UPC-E barcode while the part circled by red dotted line is a five-digit add-on code. ** Disable 5-Digit Add-On Code Enable 5-Digit Add-On Code Disable 5-Digit Add-On Code: The scanner decodes UPC-E and ignores the add-on code when... -
Page 109: Add-On Code Required
Enter Setup Add-On Code Required When UPC-E Add-On Code Required is selected, the scanner will only read UPC-E barcodes that contain add-on codes. UPC-E Add-On CodeNot Required UPC-E Add-On Code Required Transmit Preamble Character Preamble characters (Country Code and System Character) can be transmitted as part of a UPC-E barcode. Select one of the following options for transmitting UPC-E preamble to the host device: transmit system character only, transmit system character and country code (“0”... -
Page 110: Convert Upc-E To Upc-A
Enter Setup Convert UPC-E to UPC-A Convert UPC-E to UPC-A: Convert UPC-E (zero suppressed) decoded data to UPC-A format before transmission. After conversion, the data follows UPC-A format and is affected by UPC-A programming selections (e.g., Preamble, Check Character). Do Not Convert UPC-E to UPC-A: UPC-E decoded data is transmitted as UPC-E data, without conversion. ** Do Not Convert UPC-E to UPC-A Convert UPC-E to UPC-A ** Exit Setup... -
Page 111: Upc-A
Enter Setup UPC-A Restore Factory Defaults Restore the Factory Defaults of UPC-A Enable/Disable UPC-A Enable UPC-A Disable UPC-A If the scanner fails to identify UPC-A barcodes, you may first try this solution by scanning the Enter Setup barcode and then Enable UPC-A barcode. Transmit Check Character UPC-A is 13 digits in length with the last one as its check character used to verify the integrity of the data. - Page 112 Enter Setup 2-Digit Add-On Code A UPC-A barcode can be augmented with a two-digit add-on code to form a new one. In the example below, the part surrounded by blue dotted line is a UPC-A barcode while the part circled by red dotted line is a two-digit add-on code. ** Disable 2-Digit Add-On Code Enable 2-Digit Add-On Code Disable 2-Digit Add-On Code: The scanner decodes UPC-A and ignores the add-on code when...
- Page 113 Enter Setup 5-Digit Add-On Code A UPC-A barcode can be augmented with a five-digit add-on code to form a new one. In the example below, the part surrounded by blue dotted line is a UPC-A barcode while the part circled by red dotted line is a five-digit add-on code. ** Disable 5-Digit Add-On Code Enable 5-Digit Add-On Code Disable 5-Digit Add-On Code: The scanner decodes UPC-A and ignores the add-on code when...
- Page 114 Enter Setup Add-On CodeRequired When UPC-A Add-On Code Required is selected, the scanner will only read UPC-A barcodes that contain add-on codes. UPC-A Add-On Code Not Required UPC-A Add-On Code Required Transmit Preamble Character Preamble characters (Country Code and System Character) can be transmitted as part of a UPC-A barcode. Select one of the following options for transmitting UPC-A preamble to the host device: transmit system character only, transmit system character and country code (“0”...
- Page 115 Enter Setup Coupon UPC-A/EAN-13 with Extended Coupon Code The following three types of coupon code + extended coupon code are supported: UPC-A (starting with “5”) +GS1-128 UPC-A (starting with “5”) + GS1Databar EAN-13 (starting with “99”) +GS1-128 Use the appropriate barcode below to enable or disable UPC-A/EAN-13 with Extended Coupon Code. When left on the default setting (Off), the scanner treats Coupon Codes and Extended Coupon Codes as single bar codes.
- Page 116 Enter Setup Coupon GS1 Databar Output If you scan coupons that have both UPC and GS1 Databar codes, you may wish to scan and output only the data from the GS1 Databar code. Scan the GS1 Output On barcode below to scan and output only the GS1 Databar code data. When GS1 Output Off is selected, coupons that have both UPC and GS1 Databar codes are transmitted depending on your selection for the “UPC-A/EAN-13 with Extended Coupon Code”...
- Page 117 Enter Setup Interleaved 2 of 5 Restore Factory Defaults Restore the Factory Defaults of Interleaved 2 of 5 Enable/Disable Interleaved 2 of 5 ** Enable Interleaved 2 of 5 Disable Interleaved 2 of 5 If the scanner fails to identify Interleaved 2 of 5 barcodes, you may first try this solution by scanning the Enter Setup barcode and then Enable Interleaved 2 of 5 barcode.
- Page 118 Enter Setup Set Length Range for Interleaved 2 of 5 The scanner can be configured to only decode Interleaved 2 of 5 barcodes with lengths that fall between (inclusive) the minimum and maximum lengths. To accomplish it, you need to set the minimum and maximum lengths. Set the Minimum Length (Default: 6) Set the Maximum Length (Default: 80) If minimum length is set to be greater than maximum length, the scanner only decodes Interleaved 2 of 5...
- Page 119 Enter Setup Check Character Verification A check character is optional for Interleaved 2 of 5 and can be added as the last character. It is a calculated value used to verify the integrity of the data. Disable: The scanner transmits Interleaved 2 of 5 barcodes as is. DoNotTransmitCheckCharacterAfterVerification:Thescannercheckstheintegrityofall Interleaved2of5barcodes to verify that the data complies with the check character algorithm.
- Page 120 Enter Setup Febraban Disable/Enable Febraban **Disable Febraban Enable Febraban, Do Not Expand Enable Febraban, Expand Transmit Delay per Character Transmit Delay per Character applies to both Expanded and Unexpanded Febraban. This feature is available only when USB HID Keyboard is enabled. ** Disable Transmit Delay per Character Enable Transmit Delay per Character ** Exit Setup...
- Page 121 Enter Setup You may select an appropriate delay value from the options below as per your actual needs. 10ms 15ms 20ms 25ms 30ms 35ms ** Exit Setup...
- Page 122 Enter Setup 40ms 45ms 50ms 55ms 60ms 65ms ** 70ms 75ms ** Exit Setup...
- Page 123 Enter Setup Transmit Delay per 12 Characters Transmit Delay per 12 Characters applies to Expanded Febraban only. This feature is available only when USB HID Keyboard is enabled. ** Disable Transmit Delay per 12 Characters Enable Transmit Delay per 12 Characters You may select an appropriate delay value from the options below as per your actual needs.
- Page 124 Enter Setup ** 500ms 600ms 700ms 800ms 900ms ** Exit Setup...
- Page 125 Enter Setup ITF-14 ITF-14 is a special kind of Interleaved 2 of 5 with a length of 14 characters and the last character as the check character. ITF-14 priority principle: Forthe Interleaved 2 of 5 barcodes with a length of 14 characters and the last character as the check character, the ITF-14 configurations shall take precedence over the Interleaved 2 of 5 settings.
- Page 126 Enter Setup ITF-6 ITF-6 is a special kind of Interleaved 2 of 5 with a length of 6 characters and the last character as the check character. ITF-6 priority principle: For the Interleaved 2 of 5 barcodes with a length of 6 characters and the last character as the check character, the ITF-6 configurations shall take precedence over the Interleaved 2 of 5 settings.
- Page 127 Enter Setup Matrix 2 of 5 Restore Factory Defaults Restore the Factory Defaults of Matrix 2 of 5 Enable/Disable Matrix 2 of 5 **Enable Matrix 2 of 5 Disable Matrix 2 of 5 If the scanner fails to identify Matrix 2 of 5 barcodes, you may first try this solution by scanning the Enter Setup barcode and then Enable Matrix 2 of 5 barcode.
- Page 128 Enter Setup Set Length Range for Matrix 2 of 5 ThescannercanbeconfiguredtoonlydecodeMatrix2of5barcodeswithlengthsthatfallbetween(inclusive)theminimum and maximum lengths. To accomplish it, you need to set the minimum and maximumlengths. Set the Minimum Length (Default: 4) Set the Maximum Length (Default: 80) If minimum length is set to be greater than maximum length, the scanner only decodes Matrix 2 of 5 barcodeswitheithertheminimumormaximumlength.Ifminimumlengthissameasmaximumlength,only Matrix 2 of 5 barcodes with that length are to bedecoded.
- Page 129 Enter Setup Check Character Verification AcheckcharacterisoptionalforMatrix2 of5andcanbeaddedasthelastcharacter.Itisacalculatedvalueusedtoverify the integrity of the data. Disable: The scanner transmitsMatrix 2 of 5 barcodes as is. Do Not Transmit Check Character After Verification: The scanner checks the integrity of all Matrix 2 of 5 barcodes to verifythatthedatacomplieswiththecheckcharacteralgorithm.Barcodespassingthecheckwillbetransmittedexceptthe last digit, whereas those failing it will not betransmitted.
- Page 130 Enter Setup Code 39 Restore Factory Defaults Restore the Factory Defaults of Code 39 Enable/Disable Code39 ** Enable Code39 Disable Code 39 If the scanner fails to identify Code 39 barcodes, you may first try this solution by scanning the Enter Setup barcode and then Enable Code 39 barcode.
- Page 131 Enter Setup Set Length Range for Code 39 The scanner can be configured to only decode Code 39 barcodes with lengths that fall between (inclusive) the minimum and maximum lengths. To accomplish it, you need to set the minimum and maximum lengths. Set the Minimum Length (Default: 1) Set the Maximum Length (Default: 48) Ifminimumlengthissettobegreaterthanmaximumlength,thescanneronlydecodesCode39barcodes...
- Page 132 Enter Setup Check Character Verification Acheckcharacteris optionalforCode39andcanbeaddedasthelastcharacter.Itisacalculatedvalueusedtoverifythe integrity of thedata. Disable: The scanner transmitsCode 39 barcodes as is. Do Not Transmit Check Character After Verification: The scanner checks the integrity of all Code 39 barcodes to verify that the data complies with the check character algorithm. Barcodes passing the check will be transmitted except the last digit, whereas those failing it will not be transmitted.
- Page 133 Enter Setup Transmit Start/Stop Character Code 39 uses an asterisk (*) for both the start and the stop characters. You can choose whether or not to transmit the start/stop characters by scanning the appropriate barcode below. ** Do Not Transmit Start/Stop Character Transmit Start/Stop Character Enable/Disable Code 39 Full ASCII The scanner can be configured to identify all ASCII characters by scanning the appropriate barcode below.
- Page 134 Enter Setup Enable/Disable Code 32 (Italian Pharma Code) Code32isavariantofCode39usedbytheItalianpharmaceuticalindustry.Scantheappropriatebarcodebelowtoenable ordisableCode32.Code39mustbeenabledandCode39checkcharacterverificationmustbedisabledforthisparameter tofunction. ** Disable Code 32 Enable Code 32 Code 32 Prefix Scan the appropriate barcode below to enable or disable adding the prefix character “A” to all Code 32 barcodes. Code 32 must be enabled for this parameter to function.
- Page 135 Enter Setup Transmit Code 32 Start/Stop Character Code 32 must be enabled for this parameter to function. ** Do Not Transmit Code 32 Start/Stop Character Transmit Code 32 Start/Stop Character Transmit Code 32 Check Character Code 32 must be enabled for this parameter to function. ** Do Not Transmit Code 32 Check Character Transmit Code 32 Check Character ** Exit Setup...
- Page 136 Enter Setup Codabar Restore Factory Defaults Restore the Factory Defaults of Codabar Enable/Disable Codabar ** Enable Codabar Disable Codabar If the scanner fails to identify Codabar barcodes, you may first try this solution by scanning the Enter Setup barcode and then Enable Codabar barcode. ** Exit Setup...
- Page 137 Enter Setup Set Length Range for Codabar The scanner can be configured to only decode Codabar barcodes with lengths that fall between (inclusive) the minimum and maximum lengths. To accomplish it, you need to set the minimum and maximum lengths. Set the Minimum Length (Default: 2) Set the Maximum Length (Default: 60) Ifminimumlengthissettobegreaterthanmaximumlength,thescanneronlydecodesCodabarbarcodes...
- Page 138 Enter Setup Check Character Verification AcheckcharacterisoptionalforCodabarandcanbeaddedasthelastcharacter.Itisacalculatedvalueusedtoverifythe integrity of thedata. Disable: The scanner transmits Codabar barcodes as is. Do Not Transmit Check Character After Verification: The scanner checks the integrity of all Codabar barcodes to verify that the data complies with the check character algorithm. Barcodes passing the check will be transmitted except the last digit, whereas those failing it will not be transmitted.
- Page 139 Enter Setup Start/Stop Character You can set the start/stop characters and choose whether or not to transmit the start/stop characters by scanning the appropriate barcode below. ** Do Not Transmit Start/Stop Character Transmit Start/Stop Character ** ABCD/ABCD as the Start/Stop Character ABCD/TN*E as the Start/Stop Character abcd/abcd as the Start/Stop Character abcd/tn*e as the Start/Stop Character...
- Page 140 Enter Setup Code 93 Restore Factory Defaults Restore the Factory Defaults of Code 93 Enable/Disable Code 93 Enable Code 93 **Disable Code 93 If the scanner fails to identify Code 93 barcodes, you may first try this solution by scanning the Enter Setup barcode and then Enable Code 93 barcode.
- Page 141 Enter Setup Set Length Range for Code 93 The scanner can be configured to only decode Code 93 barcodes with lengths that fall between (inclusive) the minimum and maximum lengths. To accomplish it, you need to set the minimum and maximum lengths. Set the Minimum Length (Default: 1) Set the Maximum Length (Default: 48) Ifminimumlengthissettobegreaterthanmaximumlength,thescanneronlydecodesCode93barcodes...
- Page 142 Enter Setup Check Character Verification Check characters are optional for Code 93 and can be added as the last two characters, which are calculated values used to verify the integrity of the data. Disable: The scanner transmits Code 93 barcodes as is. Do Not Transmit Check Character After Verification: The scanner checks the integrity of all Code 93 barcodes to verify that the data complies with the check character algorithm.
- Page 143 Enter Setup China Post 25 Restore Factory Defaults Restore the Factory Defaults of China Post 25 Enable/Disable China Post 25 Enable China Post 25 ** Disable China Post 25 If the scanner fails to identify China Post 25 barcodes, you may first try this solution by scanning the Enter Setup barcode and then Enable China Post 25 barcode.
- Page 144 Enter Setup Set Length Range for China Post 25 The scanner can be configured to only decode China Post 25 barcodes with lengths that fall between (inclusive) the minimum and maximum lengths. To accomplish it, you need to set the minimum and maximum lengths. Set the Minimum Length (Default: 1) Set the Maximum Length (Default: 48) If minimum length is set to be greater than maximum length, the scanner only decodes China Post 25...
- Page 145 Enter Setup Check Character Verification AcheckcharacterisoptionalforChinaPost25andcanbeaddedasthelastcharacter.Itisacalculatedvalueusedtoverify the integrity of thedata. Disable: The scanner transmits China Post 25 barcodes as is. Do Not Transmit Check Character After Verification: The scanner checks the integrity of all China Post 25 barcodes to verifythatthedatacomplieswiththecheckcharacteralgorithm.Barcodespassingthecheckwillbetransmittedexceptthe last digit, whereas those failing it will not betransmitted.
- Page 146 Enter Setup GS1-128 (UCC/EAN-128) Restore Factory Defaults Restore the Factory Defaults of GS1-128 Enable/Disable GS1-128 ** Enable GS1-128 Disable GS1-128 If the scanner fails to identify GS1-128 barcodes, you may first try this solution by scanning the EnterSetup barcode and then Enable GS1-128 barcode. ** Exit Setup...
- Page 147 Enter Setup Set Length Range for GS1-128 The scanner can be configured to only decode GS1-128 barcodes with lengths that fall between (inclusive) the minimum and maximum lengths. To accomplish it, you need to set the minimum and maximum lengths. Set the Minimum Length (Default: 1) Set the Maximum Length (Default: 48) Ifminimumlengthissettobegreaterthanmaximumlength,thescanneronlydecodesGS1-128barcodes...
- Page 148 Enter Setup GS1 Databar (RSS) Restore Factory Defaults Restore the Factory Defaults of GS1 Databar Enable/Disable GS1 Databar ** Enable GS1 Databar Disable GS1 Databar If the scanner fails to identify GS1 Databar barcodes, you may first try this solution by scanning the Enter Setup barcode and then Enable GS1 Databar barcode.
- Page 149 Enter Setup GS1 Composite (EAN·UCC Composite) Restore Factory Defaults Restore the Factory Defaults of GS1 Composite Enable/Disable GS1 Composite Enable GS1 Composite ** Disable GS1 Composite If the scanner fails to identify GS1 Composite barcodes, you may first try this solution by scanning the Enter Setup barcode and then Enable GS1 Composite barcode.
- Page 150 Enter Setup Code 11 Restore Factory Defaults Restore the Factory Defaults of Code 11 Enable/Disable Code 11 Enable Code 11 ** Disable Code 11 If the scanner fails to identify Code 11 barcodes, you may first try this solution by scanning the Enter Setup barcode and then Enable Code 11 barcode.
- Page 151 Enter Setup Set Length Range for Code 11 The scanner can be configured to only decode Code 11 barcodes with lengths that fall between (inclusive) the minimum and maximum lengths. To accomplish it, you need to set the minimum and maximum lengths. Set the Minimum Length (Default: 4) Set the Maximum Length (Default: 48) Ifminimumlengthissettobegreaterthanmaximumlength,thescanneronlydecodesCode11barcodes...
- Page 152 Enter Setup Check Character Verification Check characters are optional for Code 11 and can be added as the last one or two characters, which are calculated values used to verify the integrity of the data. If the Disable option is enabled, the scanner transmits Code 11 barcodes as is. Disable ** One Check Character, MOD11 Two Check Characters, MOD11/MOD11...
- Page 153 Enter Setup Transmit Check Character Do Not Transmit Code 11 Check Character **Transmit Code 11 Check Character If you select a check character algorithm and the Do Not Transmit Check Character option, Code 11 barcodes with a length that is less than the configured minimum length after having the check character(s) excluded will not be decoded.
- Page 154 Enter Setup ISBN Restore Factory Defaults Restore the Factory Defaults of ISBN Enable/Disable ISBN Enable ISBN **Disable ISBN If the scanner fails to identify ISBN barcodes, you may first try this solution by scanning the Enter Setup barcode and then Enable ISBN barcode. ** Exit Setup...
- Page 155 Enter Setup Set ISBN Format **ISBN-10 ISBN-13 ** Exit Setup...
- Page 156 Enter Setup ISSN Restore Factory Defaults Restore the Factory Defaults of ISSN Enable/Disable ISSN Enable ISSN ** Disable ISSN If the scanner fails to identify ISSN barcodes, you may first try this solution by scanning the Enter Setup barcode and then Enable ISSN barcode. ** Exit Setup...
- Page 157 Enter Setup Industrial 25 Restore Factory Defaults Restore the Factory Defaults of Industrial 25 Enable/Disable Industrial 25 Enable Industrial 25 ** Disable Industrial 25 If the scanner fails to identify Industrial 25 barcodes, you may first try this solution by scanning the Enter Setup barcode and then Enable Industrial 25 barcode.
- Page 158 Enter Setup Set Length Range for Industrial 25 ThescannercanbeconfiguredtoonlydecodeIndustrial25barcodeswithlengthsthatfallbetween(inclusive)theminimum and maximum lengths. To accomplish it, you need to set the minimum and maximumlengths. Set the Minimum Length (Default: 6) Set the Maximum Length (Default: 48) If minimum length is set to be greater than maximum length, the scanner only decodes Industrial 25 barcodeswitheithertheminimumormaximumlength.Ifminimumlengthissameasmaximumlength,only Industrial 25 barcodes with that length are to bedecoded.
- Page 159 Enter Setup Check Character Verification AcheckcharacterisoptionalforIndustrial25andcanbeaddedasthelast character.Itisacalculatedvalueusedtoverify the integrity of the data. Disable: The scanner transmits Industrial 25 barcodes as is. Do Not Transmit Check Character After Verification: The scanner checks the integrity of all Industrial 25 barcodes to verifythatthedatacomplieswiththecheckcharacteralgorithm.Barcodespassingthecheckwillbetransmittedexceptthe last digit, whereas those failing it will not betransmitted.
- Page 160 Enter Setup Standard 25 Restore Factory Defaults Restore the Factory Defaults of Standard 25 Enable/Disable Standard 25 Enable Standard 25 **Disable Standard 25 If the scanner fails to identify Standard 25 barcodes, you may first try this solution by scanning the Enter Setup barcode and then Enable Standard 25 barcode.
- Page 161 Enter Setup Set Length Range for Standard 25 ThescannercanbeconfiguredtoonlydecodeStandard25barcodeswithlengthsthatfallbetween(inclusive)theminimum and maximum lengths. To accomplish it, you need to set the minimum and maximumlengths. Set the Minimum Length (Default: 6) Set the Maximum Length (Default: 48) If minimum length is set to be greater than maximum length, the scanner only decodes Standard 25 barcodeswitheithertheminimumormaximumlength.Ifminimumlengthissameasmaximumlength,only Standard 25 barcodes with that length are to bedecoded.
- Page 162 Enter Setup Check Character Verification AcheckcharacterisoptionalforStandard25andcanbeaddedasthelast character.Itisacalculatedvalueusedtoverify the integrity of the data. Disable: The scanner transmits Standard 25 barcodes as is. Do Not Transmit Check Character After Verification: The scanner checks the integrity of all Standard 25 barcodes to verifythatthedatacomplieswiththecheckcharacteralgorithm.Barcodespassingthecheckwillbetransmittedexceptthe last digit, whereas those failing it will not betransmitted.
- Page 163 Enter Setup Plessey Restore Factory Defaults Restore the Factory Defaults of Plessey Enable/Disable Plessey Enable Plessey **Disable Plessey If the scanner fails to identify Plessey barcodes, you may first try this solution by scanning the Enter Setup barcode and then Enable Plessey barcode. ** Exit Setup...
- Page 164 Enter Setup Set Length Range for Plessey ThescannercanbeconfiguredtoonlydecodePlesseybarcodeswithlengthsthatfallbetween(inclusive)theminimumand maximum lengths. To accomplish it, you need to set the minimum and maximumlengths. Set the Minimum Length (Default: 4) Set the Maximum Length (Default: 48) If minimum length is set to be greater than maximum length, the scanner only decodes Plessey barcodes witheithertheminimumormaximumlength.Ifminimumlengthissameasmaximumlength,onlyPlessey barcodes with that length are to bedecoded.
- Page 165 Enter Setup Check Character Verification Check characters are optional for Plessey and can be added as the last two characters, which are calculated values used to verify the integrity of the data. Disable: The scanner transmits Plessey barcodes as is. Do Not Transmit Check Character After Verification: The scanner checks the integrity of all Plessey barcodes to verify that the data complies with the check character algorithm.
- Page 166 Enter Setup MSI-Plessey Restore Factory Defaults Restore the Factory Defaults of MSI-Plessey Enable/Disable MSI-Plessey Enable MSI-Plessey **Disable MSI-Plessey If the scanner fails to identify MSI-Plessey barcodes, you may first try this solution by scanning the Enter Setup barcode and then Enable MSI-Plessey barcode. ** Exit Setup...
- Page 167 Enter Setup Set Length Range for MSI-Plessey ThescannercanbeconfiguredtoonlydecodeMSI-Plesseybarcodeswithlengthsthatfallbetween(inclusive)theminimum and maximum lengths. To accomplish it, you need to set the minimum and maximumlengths. Set the Minimum Length (Default: 4) Set the Maximum Length (Default: 48) If minimum length is set to be greater than maximum length, the scanner only decodes MSI-Plessey barcodeswitheithertheminimumormaximumlength.Ifminimumlengthissameasmaximumlength,only MSI- Plessey barcodes with that length are to bedecoded.
- Page 168 Enter Setup Check Character Verification Check characters are optional for MSI-Plessey and can be added as the last one or two characters, which are calculated values used to verify the integrity of the data. If the Disable option is enabled, the scanner transmits MSI-Plessey barcodes as is. Disable ** One Check Character, MOD10 Two Check Characters, MOD10/MOD10...
- Page 169 Enter Setup Transmit Check Character Transmit MSI-Plessey Check Character Do Not Transmit MSI-Plessey Check Character IfyouselectacheckcharacteralgorithmandtheDoNotTransmitCheckCharacteroption,MSI-Plessey barcodeswithalengththatislessthantheconfiguredminimumlengthafterhavingthecheckcharacter(s) excluded will not be decoded. (For example, when the One Check Character, MOD10 and Do Not TransmitCheckCharacteroptionsareenabledandtheminimumlengthissetto4,MSI-Plesseybarcodes with a total length of 4 characters including the check character cannot beread.) ** Exit Setup...
- Page 170 Enter Setup AIM 128 Restore Factory Defaults Restore the Factory Defaults of AIM 128 Enable/Disable AIM 128 Enable AIM 128 **Disable AIM 128 If the scanner fails to identify AIM 128 barcodes, you may first try this solution by scanning the Enter Setup barcode and then Enable AIM 128 barcode.
- Page 171 Enter Setup Set Length Range for AIM 128 The scanner can be configured to only decode AIM 128 barcodes with lengths that fall between (inclusive) the minimum and maximum lengths. To accomplish it, you need to set the minimum and maximum lengths. Set the Minimum Length (Default: 1) Set the Maximum Length (Default: 48) If minimum length is set to be greater than maximum length, the scanner only decodes AIM 128 barcodes...
- Page 172 Enter Setup ISBT 128 Restore Factory Defaults Restore the Factory Defaults of ISBT 128 Enable/Disable ISBT 128 Enable ISBT 128 ** Disable ISBT 128 If the scanner fails to identify ISBT 128 barcodes, you may first try this solution by scanning the Enter Setup barcode and then Enable ISBT 128 barcode.
- Page 173 Enter Setup PDF417 Restore Factory Defaults Restore the Factory Defaults of PDF417 Enable/DisablePDF417 ** EnablePDF417 Disable PDF417 If the scanner fails to identify PDF417 barcodes, you may first try this solution by scanning the Enter Setup barcode and then Enable PDF417 barcode. ** Exit Setup...
- Page 174 Enter Setup Set Length Range for PDF417 The scanner can be configured to only decode PDF417 barcodes with lengths that fall between (inclusive) the minimum and maximum lengths. To accomplish it, you need to set the minimum and maximum lengths. Set the Minimum Length (Default: 1) Set the Maximum Length (Default: 2710) Minimum length is not allowed to be greater than maximum length.
- Page 175 Enter Setup PDF417 Twin Code PDF417 twin code is 2 PDF417 barcodes paralleled vertically or horizontally. They must both be either regular or inverse barcodes. They must have similar specifications and be placed closely together. There are 3 options for reading PDF417 twin codes: ...
- Page 176 Enter Setup PDF417 Inverse Regular barcode: Dark bars on a bright background. Inverse barcode: Bright bars on a dark background. ** Decode Regular PDF417 Barcodes Only Decode Inverse PDF417 Barcodes Only Decode Both Character Encoding ** Default Character Encoding UTF-8 ** Exit Setup...
- Page 177 Enter Setup PDF417 ECI Output Disable PDF417 ECI Output **Enable PDF417 ECI Output ** Exit Setup...
- Page 178 nter Setup Micro PDF F417 Restore e Factory D Defaults estore the Fa actory Defaul ts of Micro P PDF417 Enable/ /Disable Mi cro PDF417 Enable Micro PDF417 ** Dis sable Micro P PDF417 If the e scanner fails s to identify Mi icro PDF417 b barcodes, you may first try t...
- Page 179 ter Setup Set Len ngth Range for Micro P PDF417 The scan nner can be co onfigured to on nly decode Mi cro PDF417 b barcodes with lengths that fa all between (in nclusive) the minimum m and maximum m lengths. To accomplish it t, you need to set the minim...
- Page 180 Enter Setup QR Code Restore Factory Defaults Restore the Factory Defaults of QR Code Enable/Disable QR Code ** Enable QR Code Disable QR Code If the scanner fails to identify QR Code barcodes, you may first try this solution by scanning the Enter Setup barcode and then Enable QR Code barcode.
- Page 181 Enter Setup Set Length Range for QR Code The scanner can be configured to only decode QR Code barcodes with lengths that fall between (inclusive) the minimum and maximum lengths. To accomplish it, you need to set the minimum and maximum lengths. Set the Minimum Length (Default: 1) Set the Maximum Length (Default: 7089) Minimum length is not allowed to be greater than maximum length.
- Page 182 Enter Setup QR Twin Code QR twin code is 2 QR barcodes paralleled vertically or horizontally. They must both be either regular or inverse barcodes. They must have similar specifications and be placed closely together. There are 3 options for reading QR twin codes: Single QR Only: Read either QR code.
- Page 183 Enter Setup QR Inverse Regular barcode: Dark bars on a bright background. Inverse barcode: Bright bars on a dark background. ** Decode Regular QR Barcodes Only Decode Inverse QR Barcodes Only Decode Both Character Encoding ** Default Character Encoding UTF-8 ** Exit Setup...
- Page 184 Enter Setup QR ECI Output Disable QR ECI Output **Enable QR ECI Output ** Exit Setup...
- Page 185 ter Setup Micro QR Code Restore e Factory D Defaults Restore the Factory Defa aults of Micro o QR Enable/ /Disable Mi cro QR ** Enable Mic cro QR Disable Micro If the e scanner fails s to identify Mi icro QR barco odes, you may y first try this s...
- Page 186 nter Setup Set Len ngth Range for Micro Q The scan nner can be co onfigured to on nly decode Mi cro QR barco des with lengt ths that fall be etween (inclus ive) the minim and maxi imum lengths. .
- Page 187 Enter Setup Aztec Restore Factory Defaults Restore the Factory Defaults of Aztec Code Enable/Disable Aztec Code Enable Aztec Code ** Disable Aztec Code If the scanner fails to identify Aztec Code barcodes, you may first try this solution by scanning the Enter Setup barcode and then Enable Aztec Code barcode.
- Page 188 Enter Setup Set Length Range for Aztec Code The scanner can be configured to only decode Aztec barcodes with lengths that fall between (inclusive) the minimum and maximum lengths. To accomplish it, you need to set the minimum and maximum lengths. Set the Minimum Length (Default: 1) Set the Maximum Length (Default: 3832) Minimumlengthisnotallowedtobegreaterthanmaximumlength.IfyouonlywanttoreadAztecbarcodes with a...
- Page 189 Enter Setup Read Multi-barcodes on an Image There are three options: Mode 1: Read one barcode only. Mode 2: Read fixed number of barcodes only. Mode 3: Composite Reading. Read fixed number of barcodes first. If unsuccessful, read one barcode only. ** Mode 1 Mode 2 Mode 3...
- Page 190 Enter Setup Set the Number of Barcodes ** 1 ** Exit Setup...
- Page 191 Enter Setup Character Encoding ** Default Character Encoding UTF-8 Aztec ECI Output Disable Aztec ECI Output Enable Aztec ECI Output ** Exit Setup...
- Page 192 Enter Setup Data Matrix Restore Factory Defaults Restore the Factory Defaults of Data Matrix Enable/Disable Data Matrix ** Enable Data Matrix Disable Data Matrix If the scanner fails to identify Data Matrix barcodes, you may first try this solution by scanning the Enter Setup barcode and then Enable Data Matrix barcode.
- Page 193 Enter Setup Set Length Range for Data Matrix The scanner can be configured to only decode Data Matrix barcodes with lengths that fall between (inclusive) the minimum and maximum lengths. To accomplish it, you need to set the minimum and maximum lengths. Set the Minimum Length (Default: 1) Set the Maximum Length (Default: 3116) Minimum length is not allowed to be greater than maximum length.
- Page 194 Enter Setup Data Matrix Twin Code Data Matrix twin code is 2 Data Matrix barcodes paralleled vertically or horizontally. They must both be either regular or inverse barcodes. They must have similar specifications and be placed closely together. There are 3 options for reading Data Matrix twin codes: Single Data Matrix Only: Read either Data Matrix code.
- Page 195 Enter Setup Rectangular Barcode Data Matrix has two formats: Square barcodes having the same amount of modules in length and width: 10*10, 12*12..144*144. Rectangular barcodes having different amounts of models in length and width: 6*16, 6*14...14*22. ** Enable Rectangular Barcode Disable Rectangular Barcode Data Matrix Inverse Regular barcode: Dark bars on a bright background.
- Page 196 Enter Setup Character Encoding ** Default Character Encoding UTF-8 Data Matrix ECI Output Disable Data Matrix ECI Output Enable Data Matrix ECI Output ** Exit Setup...
- Page 197 ter Setup Passport Restore e Factory D Defaults estore the Fa actory Default ts of Passpor rt OCR Enable/ /Disable Pa assport OCR Enable Passp port OCR ** Dis sable Passpor rt OCR If the e scanner fails s to identify Pa assport OCR b barcodes, you u may first try t...
- Page 198 Enter Setup Chapter 7 Data Formatter Introduction You may use the Data Formatter to modify the scanner’s output. For example, you can use the Data Formatter to insert charactersatcertainpointsinbarcodedataortosuppress/replace/sendcertaincharactersinbarcodedataasitisscanned. Normally, when you scan a barcode, it gets outputted automatically; however, when you create a format, you must use a “send”command(seethe“SendCommands”sectioninthischapter)withintheformatprogrammingtooutputdata.Multiple data formats can be programmed into the scanner.
- Page 199 Enter Setup Step 2: Scan the Add Data Format barcode. Add Data Format Add Data Format Step 3: Select a label (Format_0 or Format_1 or Format_2 or Format_3). Scan a numeric barcode 0 or 1 or 2 or 3 to label this data format Format_0 or Format_1 or Format_2 or Format_3. Step 4: Select formatter command type.
- Page 200 Ente er Setup Program maFormat_0da ataformatusing gformattercom mmandtype6,C Code128contai ining10charac ctersapplicable e, send all characte ers followed by y“A”. 1. Scan t the EnterSetu upbarcode 2. Scan t the Add Data Formatbarcod 3. Scan t the0 barcode 4. Scan t the6 barcode 5.
- Page 201 Enter Setup Programming with Serial Commands A data format can also be created by serial commands (HEX) sent from the host device. All commands must be entered in uppercase letters. The syntax consists of the following elements: Prefix: “~<SOH>0000” (HEX: 7E 01 30 30 30 30), 6 characters. Storagetype:“...
- Page 202 Enter Setup Enable/Disable Data Formatter When Data Formatter is disabled, the barcode data is outputted to the host as read, including prefixes and suffixes. ** Disable Data Formatter You may wish to require the data to conform to a data format you have created. The following settings can be applied to your data format: Enable Data Formatter, Required, Keep Prefix/Suffix: Scanned data that meets your data format requirements is modified accordingly and gets outputted along with prefixes and suffixes (if prefix and suffix are enabled).
- Page 203 Enter Setup Enable Data Formatter, Required, Keep Prefix/Suffix Enable Data Formatter, Required, Drop Prefix/Suffix Enable Data Formatter, Not Required, KeepPrefix/Suffix Enable Data Formatter, Not Required, Drop Prefix/Suffix Non-Match Error Beep If Non-Match Error Beep is turned ON, the scanner generates an error beep when a barcode is encountered that does not match your required data format.
- Page 204 Enter Setup Data Format Selection After enabling the Data Formatter, you can select a data format you want to use by scanning the appropriate barcode below. The default setting is Format_0. ** Format_0 Format_1 Format_2 Format_3 ** Exit Setup...
- Page 205 Enter Setup Change Data Format for a Single Scan You can switch between data formats for a single scan. The next barcode is scanned using the data format selected here, then reverts to the format you have selected above. For example, you may have set your scanner to use the data format you saved as Format_3. You can switch to Format_1 for a single trigger pull by scanning the Single Scan –...
- Page 206 Enter Setup Clear Data Format There are two methods to remove data format created from your scanner: Delete one data format: Scan the Clear One barcode, a numeric barcode (0-3) and the Save barcode. For example, to delete Format_2, you should scan the Clear One barcode, the 2 barcode and the Save barcode Delete all data formats: Scan the Clear All barcode.
- Page 207 Enter Setup Formatter Command Type 6 WhenworkingwiththeDataFormatter,avirtualcursorismovedalongyourinputdatastring.Thefollowingcommandsare used both move this cursor to different positions, and to select, replace, and insert data into the final output. For the hex value of ASCII characters involved in the commands, refer to the “ASCII Table” inAppendix. Send Commands F1 Send all characters Syntax=F1xx (xx: The insert character’s hex value)
- Page 208 Enter Setup F3 Send all characters up to a particular character Syntax=F3ssxx (ss: The particular character’s hex value; xx: The insert character’s hex value) Includeintheoutputmessageallcharactersfromtheinputmessage,startingwiththecharacteratthecurrentcursorposition continuing to, but not including, the particular character “ss,” followed by character “xx.” The cursor is moved forward to the “ss”character.
- Page 209 Enter Setup Command string: B900024142 B9 is the “Send all characters up to a particular string”command 0002 is the length of the particular string (2 characters) 41 is the hex value for a “A” (character in the string) 42 is the hex value for a “B” (character in the string) The data is output as: 1234567890 E9 Send all but the last characters Syntax=E9nn (nn: The numeric value (00-99) for the number of characters that will not be sent at the end of the message)
- Page 210 Enter Setup E9 and F4 Example: Send all but the last characters, followed by 2 tabs Send all characters except for the last 9 from the barcode above, followed by 2 tabs. Command string: E908F40902 E9 is the “Send all but the last characters” command 08 is the number of characters at the end to ignore F4 is the “Insert a character multiple times”...
- Page 211 Enter Setup B3 and B4 Example: Insert the symbology name and length Send the symbology name and length before the barcode data from the barcode above. Break up these insertions with spaces. End with a carriage return. Command string:B3F42001B4F42001F10D B3 is the “Insert symbology name”command F4 is the “Insert a character multiple times”...
- Page 212 Enter Setup F5 Example: Move the cursor forward and send the data Move the cursor forward 3 characters, then send the rest of the barcode data from the barcode above. End with a carriage return. Command string: F503F10D F5 is the “Move the cursor forward a number of characters” command 03 is the number of characters to move the cursor F1 is the “Send all characters”...
- Page 213 Enter Setup Search Commands F8 Search forward for a character Syntax=F8xx (xx: The search character’s hex value) Search the input message forward for “xx” character from the current cursor position, leaving the cursor pointing to the “xx” character. F8 Example: Send barcode data that starts after a particular character Search for the letter “D”...
- Page 214 Enter Setup B0 Search forward for a string Syntax=B0nnnnS (nnnn: The string length (up to 9999); S: The ASCII hex value of each character in the string) Search forward for “S” string from the current cursor position, leaving cursor pointing to “S” string. For example, B0000454657374 will search forward for the first occurrence of the 4-character string “Test.”...
- Page 215 Enter Setup E6 Search forward for a non-matchingcharacter Syntax=E6xx (xx: The search character’s hexvalue) Searchtheinputmessageforwardforthefirstnon-“xx”characterfromthecurrentcursorposition,leavingthecursorpointing to the non-“xx”character. E6 Example: Remove zeros at the beginning of barcode data Thisexampleshowsabarcodethathasbeenzerofilled.Youmaywanttoignorethezerosandsendallthedatathatfollows. E6searchesforwardforthefirstcharacterthatisnotzero,thensendsallthedataafter,followedbyacarriagereturn.Using barcodeabove: Command string: E630F10D E6 is the “Search forward for a non-matching character” command 30 is the hex value for 0 F1 is the “Send all characters”...
- Page 216 Ente er Setup Compa arison Co mmand B2 string g is compare d with B@ Sn (nnnn : the aracter string , , SS1- SSn : Syntax= B2nnnnSS1S e length of cha the hex value e of character string) The com parison starts s from the righ ht side of the...
- Page 217 ter Setup The data is output as 0 0000123abc<C CR> ED Chec ck if the chara acter to the ri ight of the cu ursor is non-n numeric This com mmand takes n no parameters s. If the right s side of the curs sor is a numb er, the curren...
- Page 218 Enter Setup the characters to be suppressed) Suppress all occurrences of up to 15 different characters, starting at the current cursor position, as the cursor is advanced by other commands. FB Example: Remove spaces and other characters in barcode data This example shows a barcode that has spaces, “_”...
- Page 219 Enter Setup E4 Example: Replace zeros with CRs in barcode data If the barcode has characters that the host application does not want included, you can use the E4 command to replace thosecharacterswithsomethingelse.Inthisexample,youwillreplacethezerosinthebarcodeabovewithcarriagereturns. Command string: E402300DF10D E4 is the “Replace characters” command 02 isthetotalcountofcharacterstobereplaced,plusthereplacementcharacters(0isreplacedbyCR,sototalcharacters=2) 30 is the hex value for0 0D is the hex value for a CR (the character that will replace the 0)
- Page 220 Enter Setup BA Replace a string multiple times Syntax=BAnnNN nn: The count of replacements to be made, if nn=00 or nn>=the number of occurrences of a string to be replaced, then replace all occurrences of that string. : The length of the string to be replaced, NN >0.
- Page 221 Enter Setup 32 is the hex value for 2 (character in the string to be replaced) 33 is the hex value for 3 (character in the string to be replaced) 03 is the length of XYZ 58595A is the hex value for XYZ F1 is the “Send all characters”command 00 is the hex value for a NUL The data is output as: 1XYZ4AbcXYZR0123U...
- Page 222 Enter Setup B5 Insert key strokes Syntax=B5nnssxx (nn: The number of keys pressed (without key modifiers); ss: the key modifier from the table below; xx: the key number from the “Unicode Key Maps” in Appendix.) Insertakeystrokeorcombinationofkeystrokes.Keystrokesaredependentonyourkeyboard(seethe“UnicodeKeyMaps” in Appendix). This command can only be used with USB HIDKeyboard. Key Modifiers No Key Modifier Shift Left...
- Page 223 Enter Setup Chapter 8 Prefix & Suffix Introduction A1Dbarcodecouldcontaindigits,letters,symbols,etc.A2Dbarcodecouldcontainmoredata,suchasChinesecharacters other multi-byte characters. However, in real applications, they do not and should not have all information we need, such as barcode type, data acquisition time and delimiter, in order to keep the barcodes short andflexible. Preffixandsuffixarehowtofulfilltheneedsmentionedabove.Theycanbeadded,removedandmodifiedwhiletheoriginal barcode data remains intact.
- Page 224 Enter Setup Global Settings Enable/Disable All Prefixes/Suffixes Disable All Prefixes/Suffixes: Transmit barcode data with no prefix/suffix. EnableAllPrefixes/Suffixes:AllowtoappendCodeIDprefix,AIMIDprefix,customprefix/suffixandterminatingcharacter to the barcode data before thetransmission. ** Disable All Prefixes/Suffixes Enable All Prefixes/Suffixes Prefix Sequence ** Code ID+ Custom +AIM ID Custom + Code ID + AIM ID ** Exit Setup...
- Page 225 Enter Setup Custom Prefix Enable/Disable Custom Prefix If custom prefix is enabled, you are allowed to append to the data a user-defined prefix that cannot exceed 10 characters. For example, if the custom prefix is “AB” and the barcode data is “123”, the Host will receive “AB123”. ** Disable Custom Prefix Enable Custom Prefix Set Custom Prefix...
- Page 226 Enter Setup AIM ID Prefix AIM (Automatic Identification Manufacturers) ID defines symbology identifier (For the details, see the “AIM ID Table” section in Appendix). If AIM ID prefix is enabled, the scanner will add the symbology identifier before the scanned data after decoding.
- Page 227 Enter Setup Code ID Prefix CodeIDcanalsobeusedtoidentifybarcodetype.UnlikeAIMID,CodeIDisuserprogrammable.CodeIDcanonlyconsist of one or two Englishletters. ** Disable Code ID Prefix Enable Code ID Prefix Restore All Default Code IDs For the information of default Code IDs, see the “Code ID Table” section in Appendix. Restore All Default Code IDs Modify Code ID See the examples below to learn how to modify a Code ID and restore the default Code IDs of all symbologies.
- Page 228 Enter Setup Modify PDF417 Code ID to be “p” (HEX: 0x70): Scan the Enter Setup barcode. Scan the Modify PDF417 Code IDbarcode. Scan the numeric barcodes “7” and “0” from the “Digit Barcodes” section inAppendix. Scan the Save barcode from the “Save/Cancel Barcodes” section inAppendix. Scan the Exit Setup barcode.
- Page 229 Enter Setup Modify 1D symbologies Modify Code 128 Code ID Modify GS1-128 Code ID Modify EAN-8 CodeID Modify EAN-13 Code ID Modify UPC-E CodeID Modify UPC-A Code ID Modify Interleaved 2 of 5 Code ID ** Exit Setup...
- Page 230 Enter Setup Modify ITF-14 Code ID ModifyITF-6 Code ID ModifyMatrix 2 of 5Code ID ModifyCode 39 ModifyCodabarCode ID ModifyCode 93Code ID ModifyChina Post 25Code ID ModifyAIM 128Code ID ** Exit Setup...
- Page 231 Enter Setup ModifyISBT 128Code ID ModifyISSNCode ID ModifyISBN Code ID ModifyIndustrial 25 Code ID ModifyStandard 25 Code ID ModifyPlessey Code ID ModifyCode 11Code ID ModifyMSI PlessyCode ID ** Exit Setup...
- Page 232 Enter Setup ModifyGS1 Composite Code ID ModifyGS1 Databar (RSS)Code ID ** Exit Setup...
- Page 233 Enter Setup Modify 2D symbologies: Modify Aztec Code ID Modify QR Code ID Modify PDF417 Code ID Modify Data Matrix Code ID ** Exit Setup...
- Page 234 Enter Setup Custom Suffix Enable/Disable Custom Suffix If custom suffix is enabled, you are allowed to append to the data a user-defined suffix that cannot exceed 10 characters. For example, if the custom suffix is “AB” and the barcode data is “123”, the Host will receive “123AB”. ** Disable Custom Suffix Enable Custom Suffix Set Custom Suffix...
- Page 235 Enter Setup Data Packing Introduction Datapackingisdesignedforaspecificgroupofuserswhowanttohavethedatapackedbeforetransmission.Datapacking influences data format, so it is advised to disable this feature when it is notrequired. Data Packing Options Disable Data Packing: Transmit decoded data in raw format (unpacketed). Enable Data Packing, Format 1: Transmit decoded data with the packet format 1 defined below. Packet format 1: [STX + ATTR + LEN] + [AL_TYPE + DATA] + [LRC] STX: 0x02 ATTR: 0x00...
- Page 236 Enter Setup ** Disable Data Packing Enable Data Packing, Format 1 Enable Data Packing, Format 2 ** Exit Setup...
- Page 237 Enter Setup Terminating Character Suffix Enable/Disable Terminating CharacterSuffix Aterminatingcharactersuchascarriagereturn(CR)orcarriagereturn/linefeedpair(CRLF)canonlybeusedtomarkthe end of data, which means nothing can be added afterit. **Disable Terminating Character Suffix Enable Terminating Character Suffix Set Terminating Character Suffix To set a terminating character suffix, scan the Set Terminating Character Suffix barcode then the numeric barcodes corresponding to the hexadecimal value of a desired terminating character then the Save barcode.
- Page 238 Enter Setup Set the terminating character suffix to 0x0A: Scan the Enter Setup barcode. Scan the Set Terminating Character Suffixbarcode. Scan the numeric barcodes “0” and “A” from the “Digit Barcodes” section inAppendix. Scan the Save barcode from the “Save/Cancel Barcodes” section inAppendix. Scan the Enable Terminating Character Suffix barcode.
- Page 239 Appendix Enter Setup Digit Barcodes...
- Page 242 Save/Cancel Barcodes Afterreadingnumericbarcode(s),youneedtoscantheSavebarcodetosavethedata.Ifyouscanthewrongdigit(s),you can either scan the Cancel barcode and then start the configuration all over again, or scan the Delete the Last Digit barcode and then the correct digit, or scan the Delete All Digits barcode and then the digits youwant. For instance, after reading the Maximum Length barcode and numeric barcodes “1”, “2”...
- Page 243 Factory Defaults Table Parameter Factory Default Remark System Settings Barcode Programming Disabled (Exit Setup) Programming Barcode Data Do not transmit Illumination Aiming Good Read LED Good Read LED Duration Short (20ms) Power On Beep Good Read Beep Good Read Beep Duration Medium (80ms) Good Read Beep Frequency Medium (2730Hz)
- Page 244 USB Interface USB Country Keyboard US keyboard USB HID Keyboard Beep on Unknown Character USB HID Keyboard Emulate ALT+Keypad USB HID Keyboard Code Page Code Page 1252 (West European Latin) USB HID Keyboard Unicode Encoding USB HID Keyboard Emulate Keypad with Leading Zero USB HID Keyboard Function Key Mapping Disable...
- Page 245 Check Character Transmit 2-Digit Add-On Code Disabled 5-Digit Add-On Code Disabled Add-On Code Required Not Required Convert EAN-8 to EAN-13 Disabled EAN-13 EAN-13 Enabled Check Character Transmit 2-Digit Add-On Code Disabled 5-Digit Add-On Code Disabled EAN-13 Beginning with 290 Add-On Code Do Not Require Add-On Code Required EAN-13 Beginning with 378/379 Add-On...
- Page 246 Check Character Transmit 2-Digit Add-On Code Disabled 5-Digit Add-On Code Disabled Add-On Code Required Not Required Transmit Preamble Character System Character Coupon UPC-A/EAN-13 with Extended Coupon Code Coupon GS1 DataBar Output Interleaved 2 of 5 Interleaved 2 of 5 Enabled Maximum Length Minimum Length Check Character Verification...
- Page 247 Code 32 Prefix Disabled Code 32 Start/Stop Character Do not transmit Code 32 Check Character Do not transmit Codabar Codabar Enabled Maximum Length Minimum Length Check Character Verification Disabled Do not transmit Start/Stop Character All capital ABCD/ABCD Code 93 Code 93 Disabled Maximum Length Minimum Length...
- Page 248 Check Character Transmit ISBN ISBN Enabled Set ISBN Format ISBN-10 ISSN ISSN Disabled Industrial 25 Industrial 25 Enabled Maximum Length Minimum Length No less than 4 Check Character Verification Disabled Standard 25 Standard 25 Disabled Maximum Length Minimum Length No less than 4 Check Character Verification Do Not Transmit Check Character After Verification Plessey...
- Page 249 Maximum Length 2710 Minimum Length PDF417 Twin Code Single PDF417 Only PDF417 Inverse Decode Regular PDF417 Barcodes Only Character Encoding Default Character Encoding PDF417 ECI Output Enabled Micro PDF417 Micro PDF417 Enabled Maximum Length Minimum Length QR Code QR Code Enabled Maximum Length 7089...
- Page 250 Character Encoding Default Character Encoding Data Matrix ECI Output Enabled Passport OCR Passport OCR Disable Data Formatter Data Formatter Disabled Data Format Selection Format_0 Non-Match Error Beep Multiple Data Format Setting Disabled Prefix & Suffix All Prefixes/Suffixes Disabled Prefix Sequence Code ID+ Custom +AIM ID Custom Prefix Disabled...
- Page 251 AIM ID Table Symbology AIM ID Possible AIM ID Modifiers (m) Code128 GS1-128 (UCC/EAN-128) EAN-8 EAN-8 with Addon EAN-13 EAN-13 with Addon UPC-E UPC-E with Addon UPC-A UPC-A with Addon Interleaved 2 of 5, Febraban 0, 1, 3 ITF-14 1, 3 ITF-6 1, 3 Matrix 2 of 5...
- Page 252 Micro PDF 417 QR Code Micro QR Code Aztec 0-9, A-C Data Matrix Passport OCR Note:“m”representstheAIMmodifiercharacter.RefertoISO/IEC15424:2008Informationtechnology–Automaticidentification anddatacapturetechniques –DataCarrierIdentifiers (includingSymbologyIdentifiers)forAIMmodifiercharacterdetails.
- Page 253 Code ID Table Symbology Code ID Code128 GS1-128 (UCC/EAN-128) EAN-8 EAN-13 UPC-E UPC-A Interleaved 2 of 5 ITF-14 ITF-6 Matrix 2 of 5 Code 39 Codabar Code 93 China Post 25 AIM 128 ISBT 128 ISSN ISBN Industrial 25 Standard 25 Plessey Code 11 MSI Plessey...
- Page 254 Symbology ID Number Symbology ID Number Code 128 GS1-128 (UCC/EAN-128) EAN-8 EAN-13 UPC-E UPC-A Interleaved 2 of 5 ITF-14 ITF-6 Matrix 2 of 5 Code 39 Codabar Code 93 AIM 128 China Post 25 ISBT 128 ISSN ISBN Industrial25 Standard25 Plessey Code11 MSI-Plessey...
- Page 255 ASCII Table Char (Null char.) (Start of Header) (Start of Text) (End of Text) (End of Transmission) (Enquiry) (Acknowledgment) (Bell) (Backspace) (Horizontal Tab) (Line Feed) (Vertical Tab) (Form Feed) (Carriage Return) (Shift Out) (Shift In) (Data Link Escape) (XON) (Device Control 1) (Device Control 2) (XOFF) (Device Control 3) (Device Control 4)
- Page 256 Char (Request to Send) (Unit Separator) (Space) (Exclamation Mark) " (DoubleQuote) (Number Sign) (DollarSign) (Percent) & (Ampersand) (Single Quote) (Left/ Opening Parenthesis) (Right/ Closing Parenthesis) (Asterisk) (Plus) (Comma) (Minus/Dash) (Dot) (ForwardSlash) (Colon) (Semi-colon) < (Less Than) (Equal Sign)
- Page 257 Char > (GreaterThan) (QuestionMark) (ATSymbol) (Left/ OpeningBracket) (Back Slash) (Right/ ClosingBracket)
- Page 258 Char (Caret/Circumflex) (Underscore) (GraveAccent) (Left/ OpeningBrace) (VerticalBar) (Right/ Closing Brace) (Tilde) (Delete)
- Page 259 Unicode K K ey Maps 104 Key y U.S. Style Keyboard 105 Key European St tyle Keyboard d...
- Page 260 A Auto-ID T Tech Co. ., Ltd. (H eadquar rter) d: Newland Sc cience & Tech hnology Park N No.1 Rujiang W West Rd., Ma awei district Fu uzhou, Fujian China l: +86 (0) 591 8397 9500 x: +86 (0)591...
Need help?
Do you have a question about the NLS-HR20-BT and is the answer not in the manual?
Questions and answers