Newland NLS-HR200 Quick Start Manual
Hand-held 2d barcode scanner
Hide thumbs
Also See for NLS-HR200:
- User manual (157 pages) ,
- User manual (168 pages) ,
- User manual (118 pages)
Table of Contents
Advertisement
Quick Links
Advertisement
Table of Contents

Related Manuals for Newland NLS-HR200


Summary of Contents for Newland NLS-HR200
- Page 1 NLS-HR200 Hand-held 2D Barcode Scanner 手持式二维码扫描器 Quick Start 快速使用指南 V2.0.0...
- Page 2 Revisions/版本信息 Version/版本 Description/更新描述 Date/日期 Initial release,only 6 pages . V1.0 20090708 最初版本,仅6页。 Support as from HR200 firmware V 3.06.007 and higher. V 2.0.0 20100315 支持V 3.06.007 和更高的固件版本。...
-
Page 3: Table Of Contents
Content 目录 Getting to Start 开始使用 Unpacking.......... E-01 打开包装 ........... C-01 Main Unit........... E-01 主机 ........... C-01 Accessories ........E-01 配件 ........... C-01 Outline and Function ......E-03 产品外观 ........... C-03 Specification ........E-04 性能参数 ........... C-04 Distance of Field........ E-05 识读景深... -
Page 4: Getting To Start
请更换节标题 Getting to Start Unpacking Unpack and check the main unit and accessories.In case there is any problem, please contact with your dealer. Main Unit » HR200 Accessories » PS/2 Cable E-01... - Page 5 Getting to Start Accessories » USB Cable » RS232 Cable + Power Adapter » Stand E-02...
-
Page 6: Outline And Function
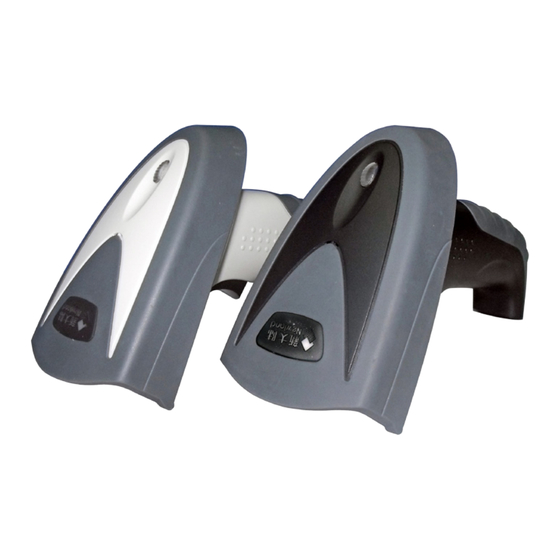
Getting to Start Outline and Function Beeper Power Indicator Scan Windows Tag(S/N,Cetifications,etc) Trigger Cable Slot E-03... -
Page 7: Specification
Getting to Start Specification Performance Image Sensor CMOS Resoluing 752 * 480 Interface RS232 / HID-KBW / UDP / USB COM Port Emulation / HID-POS PDF417, QR Code(Model 1/2), DataMatrix (ECC200, ECC000, 050, 080,100,140), Aztec, Maxicode, etc. Symbologies Code128, EAN-13, EAN-8, Code39, UPC-A, UPC-E, Codabar, China post 25,Interleaved 2 of 5, ISBN, Code 93, GS1 Databar, Code 11,etc Precision... -
Page 8: Distance Of Field
Getting to Start Distance of Field 36° 63mm Code 39 (5 mil) 120mm 25mm Code 39 (10 mil) 210mm 57mm PDF417 (5 mil) 115mm 37mm PDF417 (10 mil) 215mm 35mm QR Code (10 mil) 145mm 25mm QR Code (15 mil) 210mm 35mm Data Matrix (10 mil) -
Page 9: Connect Hr200 To The Host
Getting to Start Connect HR200 to the Host Connecting with PS/2 Cable 1、 Insert PS/2 cable (RJ 45 male DIN) into HR200 cable slot; 2、 Insert PS/2 cable (PS/2 male DIN) into Host PS/2 female slot; 3、 If necessary, connect PS/2 cable and the power adapter;... -
Page 10: Removal Of Communication Cable
Getting to Start Removal of Communication Cable A Pin that fit the HR200 “dismount hole” is needed. A paper clip could be ideal. Stretch one end of the paper clip to fit the “Dismount Hole”. Follow the steps: 1、 For RS232 and PS/2 connections, unplug the power adaptor. 2、... -
Page 11: On, Off, Idle, Restart
Getting to Start ON, OFF, IDLE, RESTART Power On Connect HR200 and Host. One click the "Trigger". HR200 powers on and in "Idle" (ready to use) state (factory default). Power Off There are 4 ways to "Power OFF": » Remove Cable Off HR200; »... -
Page 12: Reading
请更换节标题 Reading Hand-held Mode 1、 Ensure HR200, cables, and the Host are connected, then turn the unit Power ON 2、 Press & hold Trigger. Illumination LED and Aiming LED cast an Illumination Pattern (red light) and an Aiming Pattern (blue light); 3、... -
Page 13: Hands-Free Mode
Reading Hands-Free Mode Adjust Height 1、 Select reading mode “sensor mode” or “continuous mode” when working in hands- free mode. 2、 Adjust the stand height for the optimum reading stance. E-10... -
Page 14: Programming Code
请更换节标题 Programming Code Code Programming ON Query “Send Product Info”, the engine sends product information to the Host immediately.“Send Sys Info when Power ON”, the engine sends product information through RS232(only) to the Host after Power ON. Code Programming OFF Send Product Info Send Sys Info when Power ON Do not Send Product Info when Power ON... -
Page 15: Factory Default
Programming Code Factory Default Code Programming ON Code Programming OFF Load All Factory Default Part of Factory Default Subject Factory Default RS232 and USB Self-adaption ,The default value is as below: RS232(Baud Rate: 9600bit/s,Parity Check:No Check,Data / Stop HR200R Bit:8 bits/1 bit); USB(HID-KBW) Interface PS/2 and USB Self-adaption ,The default value is as below:... -
Page 16: Reading Mode
Programming Code Reading Mode » Code Programming ON Hand-held Mode: Pull and keep holding the trigger line to read. Complete one reading or release the trigger to terminate reading status. » Auto Mode: The ambient luminance change in front of the engine automatically initiates reading. -
Page 17: Rs232 Programming
Programming Code RS232 Programming Code Programming ON Baud Rate Under RS232 connection, the engine and the Host should set communication baud rate to the same to keep normal communication. Baud rate is the bits transmitted per second (8 bits per bytes). The engine and the Host must communicate at the same baud rate. - Page 18 Programming Code RS232 Programming Code Programming ON Parity Check Code Programming OFF NO Check (Factory Default) Odd Check Even Check Stop Bits 1 Stop Bit (Factory Default) 2 Stop Bits E-15...
- Page 19 Programming Code RS232 Programming Code Programming ON Data Bits Transmitted Code Programming OFF 8 Data Bits (Factory Default) 6 Data Bits 7 Data Bits 5 Data Bits E-16...
-
Page 20: Usb Programming
Programming Code USB Programming Code Programming ON Code Programming OFF Select USB HID-KBW Select USB COM Port Emulation Select USB DataPipe Select USB HID-POS Note: A driver has to be installed before using USB DataPipe and USB COM Port Emulation. E-17... - Page 21 Programming Code USB HID-KBW Programming Code Programming ON Keyboard Coutry The keyboard arrangements and country codes vary in different countries. Refer country codes to the table “USB Country Keyboard Types”. Follow the steps mentioned below to program. 1.“Code Programming ON” Code Programming OFF 2.“Select Country Code”...
-
Page 22: Usb Hid-Kbw Programming
Programming Code USB HID-KBW Programming Code Programming ON Keystroke Delay This parameter sets the delay, in milliseconds, between emulated key- strokes. Scan programming code below to increase the delay when the Host require a slower transmission of data. Code Programming OFF Short Delay(Continuous keystroke)... - Page 23 Programming Code USB HID-KBW Programming Code Programming ON Convert Case The Imager converts all barcode messages to the selected case. Code Programming OFF No Case Conversion (Factory Default) Convert All to Lower Case Convert All to Upper Case E-20...
-
Page 24: Beeper
Programming Code Beeper Code Programming ON Decoding Beep Code Programming OFF Beep ON (Factory Default) Beep OFF Volume Loud (Factory Default) Medium Beep Denotation (Beeper Definitions) Beep Denotation low-higher-higher-higher Power ON completed 1 beep successful reading of an ordinary barcode 2 beeps successful reading of an programming barcode 3 short low-2 high... -
Page 25: Line Feed And Carriage Return
Programming Code Line Feed and Carriage Return Code Programming ON Need to program stop suffix and enable it supports line feed and carriage return. Program Stop Suffix Read “Program Stop Suffix”. Then program stop suffix byte(s) to end Code Programming OFF the suffix, read “Save ”. -
Page 26: Symbols
Programming Code 1D Symbols Code Programming ON All 1D Symbols Code Programming OFF Enable Reading All 1D Disable Reading All 1D Code 128 Disable Code 128 Enable Code 128 (Factory Default) Min Message Length (default: 1) Max Message Length (default: 48) E-23... - Page 27 Programming Code 1D Symbols EAN-8 Code Programming ON Code Programming OFF Enable EAN-8 (Factory Default) Disable EAN-8 EAN-13 Enable EAN-13 (Factory Default) Disable EAN-13 E-24...
- Page 28 Programming Code 1D Symbols UPC-E Code Programming ON Code Programming OFF Enable UPC-E (Factory Default) Disable UPC-E UPC-A Enable UPC-A (Factory Default) Disable UPC-A E-25...
- Page 29 Programming Code 1D Symbols Code Programming ON Interleaved 2 of 5 Code Programming OFF Enable Interleaved 2 of 5 (Factory Default) Disable Interleaved 2 of 5 Min Message Length (default: 4) Max Message Length (default: 80) E-26...
- Page 30 Programming Code 1D Symbols Code Programming ON Code 39 Code Programming OFF Enable Code 39 (Factory Default) Disable Code 39 Min Message Length (default: 1) Max Message Length (default: 48) GS1 Databar Enable GS1 Databar (Factory Default) Disable GS1 Databar E-27...
- Page 31 Programming Code 2D Symbols Code Programming ON All 2D Symbols Code Programming OFF Enable Reading All 2D Disable Reading All 2D PDF417 Enable PDF417 (Factory Default) Disable PDF417 Data Matrix Enable Data Matrix (Factory Default) Disable Data Matrix E-28...
- Page 32 Programming Code 2D Symbols Code Programming ON QR Code Code Programming OFF Enable QR Code (Factory Default) Disable QR Code Aztec Enable Aztec Disable Aztec (Factory Default) Maxicode Enable Maxicode Disable Maxicode (Factory Default) E-29...
-
Page 33: Appendix
请更换节标题 Appendix A. Testing Codes Code 128 UCC/EAN-128 UPC-A UPC-E Interleaved 2 of 5 Code39 QR Code Micro QR PDF417 Aztec DataMatrix E-30... -
Page 34: Digit Code And Save
Appendix B. Digit Code and Save It is must to read save after reading digit code. Save E-31... -
Page 35: Troubleshooting
Appendix C. Troubleshooting Problem Possible Cause Possible Solution With RS232 communication, adapter Insert the adapter not inserted With RS232 communication, Connect communication Scanner does not turn on communication interface port in right way fails. With USB or PS/2 communication, Connect communication communication interface port in right way fails. -
Page 36: 打开包装
请更换节标题 开始使用 打开包装 开启包装,检查主机和配件,如有任何问题,请与您的经销商或直接与我们联 系。 主机 » HR200 配件 » PS/2 数据线 C-01... - Page 37 开始使用 配件 » USB 数据线 » RS232数据线 + 电源适配器 » 支架 C-02...
-
Page 38: 产品外观
开始使用 产品外观 发音孔 电源指示灯 读码指示灯 扫描窗口 产品标牌 扫描按键 数据线拆卸孔 C-03... -
Page 39: 性能参数
开始使用 性能参数 识读参数 CMOS 识读模式 752 * 480 分辨率 RS232 / HID-KBW / UDP / USB COM Port Emulation / HID-POS 接口 PDF417, QR Code(Model 1/2), DataMatrix (ECC200, ECC000, 050, 080,100,140), Aztec, Maxicode等. 识读码制 Code128, EAN-13, EAN-8, Code39, UPC-A, UPC-E, Codabar, China post 25,Interleaved 2 of 5, ISBN, Code 93, GS1 Databar, Code 11等... - Page 40 开始使用 识读景深 36° 63mm Code 39 (5 mil) 120mm 25mm Code 39 (10 mil) 210mm 57mm PDF417 (5 mil) 115mm 37mm PDF417 (10 mil) 215mm 35mm QR Code (10 mil) 145mm 25mm QR Code (15 mil) 210mm 35mm Data Matrix (10 mil) 155mm 30mm Data Matrix (15 mil)
-
Page 41: 如何连接Hr200和信息接收主机
开始使用 如何连接HR200和信息接收主机 用PS/2数据线连接 1、 将 PS/2 数据线的设备接口端(RJ 45 接口) 与 HR200 连接; 2、 将 PS/2 数据线的 PS/2 接口公口端与接收主 机连接; 3、 如有需要,将电源接口插入 PS/2 数据线电源 口,并将电源适配器插入电源插座; 4、 如有需要,请将普通键盘与 PS/2 数据线母 口端相连。 用 USB数据线连接 1、 将USB数据线的设备接口端(RJ 45 接口)与 HR200 相连; 2、 将USB数据线的主机接口端(USB 接口)与 主机相连。... -
Page 42: 如何拆卸通讯线
开始使用 如何拆卸通讯线 首先,请找一个类似回形针的针状物,要求其一端要有足够长度可以捅入HR200的数 据线拆卸孔,然后按如下步骤拆卸: 1、 通过RS232和PS/2方式连接时,先拔下电源。 2、 将此针状物捅入数据线拆卸孔,用力捅下。 3、 同时将数据线小心的向与插入方向相反的方向拉。 4、 将数据线完全从设备中拔出。 5、 将针状物从数据线拆卸孔中取出。 C-07... -
Page 43: 开机、关机、待机和重启
开始使用 开机、关机、待机和重启 开机 用数据线将HR200和数据接收主机正确连接之后,HR200将自动上电并进入待机状 态。 开机之后才可以对HR200的通讯进行设置,可以开始读码,以及进行读码相关的各种 设置。 关机 切断电源关机,根据联线方式不同而不同: » 从HR200拔出数据线; » 如果是RS232连接方式,可以拔出RS232电源线; » 如果是USB连接方式,可以从数据接收主机拔出USB线; » 如果是PS/2连接方式,可以从数据接收主机拔出PS/2线。若有使用电源适配器 供电,也需将其移除。 待机 扫描器不读码时的状态即为待机状态。 在前一次读码完成后到下一次被触发进行读码期间,扫描器会自动进入待机状态。 重启 如果因某些特殊情况导致扫描器无法正常工作,可以通过关机再开机完成重启操作。 C-08... -
Page 44: 手动识读模式
请更换节标题 识读条码 手动识读模式 1、 确保扫描器、数据线、数据接收主机和电源等已正确连接后开机 2、 按住触发键不放,照明灯和对焦灯被激活,出现红色照明区域和蓝色对焦区域: 照明区域是用来照亮条码,让识读头拍到高质量的图片,提高识读成功率;对焦区域是用 来定位拍照,帮助您找到最佳识读距离。 3、 将对焦区域的中心十字大致对准条码中心,对焦区域大致覆盖条码图像的大部 分。移动扫描器调整扫描器与条码之间的距离,对焦区域将随移动而放大或缩小。 4、 听到成功提示音响起,同时红色照明区域和蓝色对焦区域熄灭,则读码成功,扫 描器将解码后的数据传输至主机。 注意: 在识读过程中,对同一批次的条码,您会找到一段距离内读码成功率都很高。此距 离即为最佳识读距离。 C-09... -
Page 45: 自动识读模式
识读条码 自动识读模式 调整支架 1、 扫描器置于支架上读码时无法用手操作触发键,因此识读模式应设为“自动读 码”或“演示连续读码”。 2、 同样,由于无法手动对焦,因此需要在读码前通过调整支架以取得最好的读码距 离。 C-10... -
Page 46: 查询命令
请更换节标题 常用设置码 开启设置码 查询命令 关闭设置码 查询产品信息 开机时不发送产品信息给主机 (出厂默认) 开机时发送产品信息给主机 产品信息内容 名称 描述 Firmware Ver 扫描器固件版本 Build Time 扫描器固件版本建立时间 Device ID 扫描器类型 App Ver 扫描器应用程序版本 uIMG Ver 扫描器uIMG版本 Date 扫描器出厂日期 设备序列号 用户自定义设备序列号 Manufacture ID 扫描器名称 Interface 扫描器使用的接口方式 扫描器当前允许识读的一维条码 扫描器当前允许识读的二维条码 有以下几种识读模式: 1. Manual Scan ,手动读码模式。 Scan Mode 2. -
Page 47: 恢复出厂设置
常用设置码 恢复出厂设置 开启设置码 关闭设置码 设置所有属性恢复出厂默认 部分出厂默认值 项目 默认值 RS232 和 USB 自适应,以下是默认值: RS232(波特率: 9600bit/s,校验:无校验;数据位 / 停止位:8位/1 HR200R 位); USB(HID-KBW) 接口 PS/2 和 USB 自适应 ,以下是默认值: HR200P PS/2(标准键盘口) ,USB(HID-KBW) 声音 开启 识读模式 手动 Code128, EAN-13, EAN-8, Code39, UPC-A, UPC-E, Codabar, China post 25,Interleaved 2 of 5, ISBN, Code 93, GS1 Databar, 默认开启的一维条码... -
Page 48: 识读模式设置
常用设置码 识读模式设置 开启设置码 » 手动读码:按住触发键,启动读码状态;读码完成或松开 触发键后,读码状态结束。 » 自动读码:扫描器感应到识读窗口前端的环境亮度改变后 将自动触发读码,读码完成后停止并处于监测状态等待下一次环 关闭设置码 境亮度的改变,此模式下单击触发键也可以启动读码。 » 演示连续读码:单击触发键启动读码,扫描器在一次读码 完成后会开始下次一读码;直到再次单击触发键,扫描器停止读 码。 手动读码 (出厂默认) 演示连续读码 自动读码 C-13... -
Page 49: Rs232 通讯设置
常用设置码 RS232 通讯设置 开启设置码 波特率设置 波特率是串口数据通讯是每秒传输的位数(8位一个字节),扫 描器和数据接收主机所使用的波特率须保持一致才能保证数据传输 的准确。 扫描器支持以下列出的波特率,单位是 bit/s。 关闭设置码 9600 (出厂默认) 1200 2400 4800 14400 19200 38400 57600 115200 C-14... - Page 50 常用设置码 RS232 通讯设置 开启设置码 校验设置 关闭设置码 无校验 (出厂默认) 奇校验 偶校验 停止位设置 1 位 (出厂默认) 2 位 C-15...
- Page 51 常用设置码 RS232 通讯设置 开启设置码 数据位传输设置 关闭设置码 8 位 (出厂默认) 6 位 7位 5位 C-16...
-
Page 52: Usb 通讯设置
常用设置码 USB 通讯设置 开启设置码 关闭设置码 设置为USB HID-KBW 设置为USB 虚拟串口 设置为USB DataPipe 设置为 HID-POS 说明:USB DataPipe和USB虚拟串口需要驱动,请联系您的经销商或直接从我司网站 (www.nlscan.com)下载 C-17... - Page 53 常用设置码 USB HID-KBW 相关设置 开启设置码 选择国家/语言键盘制式 不同国家语言对应的键盘键位排布,符号等不尽相同。因此,本设 备可以根据需要虚拟成不同国家的键盘制式。选择操作为依次读取 相应设置码,其中本设备所支持的国家/语言对应的键盘制式及其编 关闭设置码 号在下页附表中列出,默认设置为美国制式的键盘: 1、 读“启动设置码” 2、 读“选择国家键盘制式” 3、 读国家/语言编号对应的数据码 (见 附录) 4、 读“保存”码(见 附录) 5、 关闭设置码 选择国家/语言键盘制式 国家/语言代码列表 国家/语言 代码 国家/语言 代码 U.S.(出厂默认) Netherlands(Dutch) Belgium Norway Brazil Poland Canada(French) Portugal Czechoslovakia Romania Denmark Russia Finland(Swedish)
-
Page 54: Usb Hid-Kbw 相关设置
常用设置码 USB HID-KBW 相关设置 开启设置码 按键延迟 扫描器允许设置虚拟键盘连续按键操作时的按键时间间隔,间隔时间 为上一次按键松开到下一次按键按下。 关闭设置码 不延迟 (出厂默认) 长延迟(40ms) 短延迟(20ms) 大写锁定设置 当开启时,设备将像键盘上的Caps Lock开启状态一样转换条码信息中的大小写字符。这 种转换不受键盘的Caps Lock当前状态影响。 关闭 Caps Lock (出厂默认) 开启Caps Lock C-19... - Page 55 常用设置码 USB HID-KBW相关设置 开启设置码 强制转换字母大小写 此项设置允许强制锁定扫描器虚拟键盘字母的大小写状态。 若设置为“全部转换为大写字母”,则无论条码数据中字母是大 关闭设置码 写还是小写,全部转换为大写字母; 若设置为“全部转换为小写字母”,则无论条码数据中字母是大 写还是小写,全部转换为小写字母; 不转换 (出厂默认) 全转换成小写字符 全转换成大写字符 C-20...
-
Page 56: 提示音设置
常用设置码 提示音设置 开启设置码 解码提示音设置 关闭设置码 打开声音 (出厂默认) 关闭声音 解码成功声音音量设置 高 (出厂默认) 低 中 提示音的含义 提示音 含义 4声持续升高 扫描器上电成功 1声“哔” 读码成功 2声“哔” 读设置码成功 3声短促低音2高音 读码失败 1声低沉长音 USB虚拟键盘未知字符提示 C-21... -
Page 57: 回车换行设置
常用设置码 回车换行设置 开启设置码 回车换行的实现需要设置停止符后缀并使能。 设置结束符后缀 首先读取“设置结束符后缀”,然后按顺序读取要设置的后缀字符 关闭设置码 串中每个字节的16进制值,最后读取“保存设置”完成结束符后缀 的设置。对 Windows 操作系统而言,“回车换行”对应的16进制值 是 “0X0D/0X0A”. 设置结束符后缀 结束符后缀设置 禁止添加结束符后缀 (出厂默认) 允许添加结束符后缀 Windows 操作系统下设置回车换行的步骤为 1. 读启动设置码 2. 读“设置结束符后缀”设置码 3. 读以下数据码:“0”“D”“0”“A” 4. 读“保存”设置码 5. 读“允许添加结束符后缀” 6. 读关闭设置码 C-22... -
Page 58: 条码设置
常用设置码 1D 条码设置 开启设置码 开启所有1D条码 关闭设置码 允许识读所有1D条码 禁止识读所有1D条码 Code 128 禁止识读 Code 128 允许识读 Code 128 (出厂默认) 设置最小长度限制(默认值:1 ) 设置最大长度限制(默认值:48) C-23... - Page 59 常用设置码 1D条码设置 EAN-8 开启设置码 关闭设置码 允许识读 EAN-8 (出厂默认) 禁止识读 EAN-8 EAN-13 允许识读 EAN-13 (出厂默认) 禁止识读 EAN-13 C-24...
- Page 60 常用设置码 1D条码设置 UPC-E 开启设置码 关闭设置码 允许识读 UPC-E (出厂默认) 禁止识读 UPC-E UPC-A 允许识读 UPC-A (出厂默认) 禁止识读 UPC-A C-25...
- Page 61 常用设置码 1D条码设置 开启设置码 Interleaved 2 of 5 关闭设置码 允许识读 Interleaved 2 of 5 (出厂默认) 禁止识读 Interleaved 2 of 5 设置最小长度限制(默认值:4 ) 设置最大长度限制(默认值:80) C-26...
- Page 62 常用设置码 1D条码设置 开启设置码 Code 39 关闭设置码 允许识读 Code 39 (出厂默认) 禁止识读 Code 39 设置最小长度限制(默认值:1 ) 设置最大长度限制(默认值:48 ) GS1 Databar 允许识读 GS1 Databar (出厂默认) 禁止识读 GS1 Databar C-27...
-
Page 63: 条码设置
常用设置码 2D 条码设置 开启设置码 开启所有2D 条码 关闭设置码 允许识读所有2D条码 禁止识读所有2D条码 PDF417 允许识读 PDF417 (出厂默认) 禁止识读 PDF417 Data Matrix 允许识读 Data Matrix (出厂默认) 禁止识读 Data Matrix C-28... - Page 64 常用设置码 2D 条码设置 QR Code 开启设置码 关闭设置码 允许识读 QR Code (出厂默认) 禁止识读 QR Code Aztec 允许识读 Aztec 禁止识读 Aztec (出厂默认) Maxicode 允许识读 Maxicode 禁止识读 Maxicode (出厂默认) C-29...
-
Page 65: 测试样码
请更换节标题 附表 A. 测试样码 Code 128 UCC/EAN-128 UPC-A UPC-E Interleaved 2 of 5 Code39 QR Code Micro QR PDF417 Aztec DataMatrix C-30... -
Page 66: 数据码和保存
附表 B. 数据码和保存 读完数据码必须识读保存才会生效。 保存 C-31... -
Page 67: 常见故障及判处方法
附表 C. 常见故障及判处方法 故障 可能原因 排除方法 RS232通讯下没有接上 插入适配器 适配器 RS232通讯下,接口未 无数据返回 重新连接 连好 USB和PS/2通讯下,接 重新连接 口未连好 检查所有连向主机的线是 HR200未向主机发送数据 HR200未正确连至主机 否连接完毕 HR200和主机波特率设 RS232通讯时接收到乱码 将波特率设成相同值 置不相符 该条码未开启 将该条码设为允许识读 HR200不能识读条码 HR200固件不支持该条码 请联系我们 C-32... - Page 68 福建新大陆自动识别技术有限公司 网址:www.nlscan.com 地址:福建省福州市马尾区儒江西路1 号新大陆科技园 邮编:350015 电 话:+86-591-8397-9215 传 真:+86-591-8397-9216 AsiaPac Office Newland Taiwan Co., Ltd. 7F.-6, No.268, Liancheng Rd., Zhonghe City, Taipei County, Taiwan TEL: +886-2-77315388 WEB: www.newland-id.com EMEA office Newland Europe BV Nijverheidsweg 1-d-e 6651 KS Druten, The Netherlands TEL: +31 (0) 487 58 88 99 WEB: www.newland-id.com...
Need help?
Do you have a question about the NLS-HR200 and is the answer not in the manual?
Questions and answers