Table of Contents
Advertisement
Quick Links
Advertisement
Table of Contents

Related Manuals for Nonin 8600V


Summary of Contents for Nonin 8600V
- Page 1 Operator’s Manual Models 8600V & 8600MV Veterinary Pulse Oximeters...
- Page 2 The information in this manual has been carefully checked and is believed to be accurate. In the interest of continued product development, NONIN reserves the right to make changes and improvements to this manual and the products it describes at any time, without notice or obligation.
-
Page 3: Table Of Contents
Table Of Contents Precautions for Use ........................... 1 Unpacking Your Pulse Oximeter ....................... 4 Introduction ............................5 Operating Instructions ........................6 Battery Charging ............................6 Connecting the Cable and Sensors........................ 7 Turning On the Pulse Oximeter........................7 Verifying Operation ............................8 Cleaning the Pulse Oximeter ......................... -
Page 4: Precautions For Use
Use the 8600 Pole Mount System or comparable device to secure monitor in MRI environment. • Do not operate the 8600V in the MRI environment while connected to A/C power. The battery charger contains a large amount of ferrous material. Remove the 8600V from the MRI environment to recharge the battery. - Page 5 • Cardiogreen and other intravascular dyes, depending on concentration, may affect the accuracy of the SpO measurement. • The NONIN Model 8600V pulse oximeter is calibrated to determine the percentage of arterial oxygen saturation of functional hemoglobin measured at the fingertip of an adult human. Significant levels of dysfunctional hemoglobins such as carboxyhemoglobin or methemoglobin may affect the accuracy of the measurement.
- Page 6 Manufacturer’s Declaration Refer to the following table for specific information regarding this device’s compliance to IEC Standard 60601-1-2. Table 1: Electromagnetic Emissions Emissions Test Compliance Electromagnetic Environment— Guidance This device is intended for use in the electromagnetic environment specified below. The customer and/or user of this device should ensure that it is used in such an environment.
-
Page 7: Unpacking Your Pulse Oximeter
Unpacking Your Pulse Oximeter Contact the carrier immediately if the shipping carton for the 8600V is damaged. Carefully unpack the pulse oximeter and its accessories, and confirm that the items listed below are packed with the 8600V Pulse Oximeter. The 8600V/8600MV shipment includes the following: •... -
Page 8: Introduction
The 8600V is a small, lightweight, and portable pulse oximeter with audible and visual alarms for monitoring animal status. The 8600V may be connected to A/C power or run from its internal battery. It typically operates for 30 hours on a fully charged battery. The 8600V requires no routine calibration or maintenance. -
Page 9: Operating Instructions
The battery pack in the 8600V will typically power the unit for 30 hours with a full charge without needing to be charged. -
Page 10: Connecting The Cable And Sensors
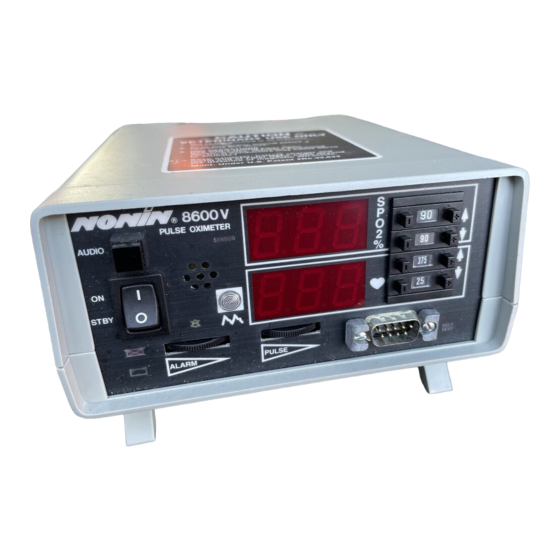
Turning On the Pulse Oximeter Turn on the 8600V by pressing the "" power switch on the front of the pulse oximeter. Refer to Figure I. When the 8600V is powered on, the displays will cycle through the following sequence before displaying valid data values: •... -
Page 11: Verifying Operation
CAUTION! Do not immerse the 8600V in liquid to clean, and do not use caustic or abrasive cleaning agents. The 8600V Pulse Oximeter may be cleaned with a mild detergent and a soft cloth or with an isopropyl alcohol wipe. -
Page 12: Features
Features Controls All functions of the 8600V are controlled by switches found on the front and rear of the unit. Power Switch Pressing the power switch ON ("") causes power to be applied to all internal circuitry. Pressing the power switch to STBY ("Ο") causes power to be removed from the displays and puts the pulse oximeter into a low power standby... - Page 13 Pressing this button has no effect if the audible alarm has been permanently disabled. Calibrate Recorders When using a strip-chart recorder for outputting data, calibration between the recorder and the 8600V may be AUDIO necessary. To do this during normal operation, continuously hold the button more than 5 seconds to activate the recording output calibrate sequence.
- Page 14 AUDIO button and wait for the 8600V to advance to the next parameter as listed in Table II. This process is continued until all parameters are set. The settings can be easily checked, since the first value displayed for each parameter represents the current setting.
- Page 15 SpO display, indicating print setup mode. This option is not available at this time. Release AUDIO button and wait for approximately 3 seconds for the 8600V to automatically advance to the calendar settings. NOTE: There are 16 settings available for future expansion of the printer settings. Setting for the printer for any one of these values will have no effect on the 8600V.
- Page 16 , indicating the setup mode for the day of the month. The day may be set to "01" through "31". When the calendar setting sequence has been completed, the 8600V continues to the clock settings (refer to next section). Display...
- Page 17 • Clock Settings After the calendar settings have been determined in the real-time setup mode, will appear in the SpO display, indicating the hour. The time is set in a 24-hour format. The hour may be set to "00" through "23". After selecting the hour, the display will show , indicating the minutes.
- Page 18 Patient Alarm Limits Set the patient alarm condition switches located on the front of the 8600V to the attending veterinarian’s recommendations. These values may be changed at any time and will take effect immediately. Figure V: Patient Alarm Display Patient Alarm...
- Page 19 Pulse Volume The 8600V may be set such that it will emit a short tone on each pulse detected. Turn the pulse volume control, marked with the symbol, until an audible pulse is heard with each beat. The tone will change pitch as the level changes.
- Page 20 Option Switches Option Switch 1 This switch controls the audible alarm OFF capabilities. down: Audible Alarm Cannot Be Disabled Prevents audible alarm from being permanently disabled by the user Audible Alarm May Be Disabled Allows the audible alarm to be permanently disabled by the user via the alarm volume dial turned to OFF Option Switch 2 This switch controls the rate of averaging of the pulse rate and SpO data.
-
Page 21: Visual Indicators
After 90 seconds of yellow perfusion, the 8600V will go into sensor alarm mode. Green indicates the pulse waveform signal is of good quality and SpO 2 data is accurate. - Page 22 Fully charged batteries will typically power the 8600V for 30 hours. Charging depleted batteries will require 15 hours to fully recharge, but the pulse oximeter may be used if only partially recharged as long as the indicator is not illuminated.
-
Page 23: Audible Indicators
As the SpO level decreases, the pitch of the pulse tone decreases. If the 8600V loses the pulse, the audible pulse tone will beep at a much higher pitch. The audible pulse tone volume may be varied from OFF to 70 db(A). -
Page 24: Communications
The 8600V may communicate in two forms: serial and analog communications. It may be connected to three different devices as given in Table IV. Real-time data may be output to all listed devices from a 8600V or 8600MV, and stored memory data may be output to all listed devices from a 8600MV. - Page 25 Sub-D connector labeled as "RECORDING OUTPUT" on the rear of the 8600V. The information from the 8600V/8600MV in the real-time mode is sent in an ASCII serial format at 9600 baud with 9 data bits, 1 start bit, and 1 stop bit. The data is output at a rate of once per second.
- Page 26 Memory Option (8600MV Only) The memory option is identified by the "M" in the model number (i.e. 8600MV as opposed to the 8600V). The 8600MV Pulse Oximeter can collect and store up to eighteen hours of Patient SpO and pulse rate information. This information may be output via the 15-pin sub-D connector labeled as "RECORDING OUTPUT"...
-
Page 27: Specifications
Specifications 1. Oxygen Saturation Range 0 to 100% (SpO 2. Pulse Rate Range 18 to 450 pulses per minute 3. Displays Animal Indicators Perfusion, SpO2 Low, SpO2 High Pulse Fast, Pulse Slow Digital Displays 3-digit 7-segment LEDs Equipment Indicators Sensor, Self Test, Battery Low, Battery Charging, and Audible Alarm Disabled indicators 4. -
Page 28: Service And Support
Failure to release the plastic catches when opening the case will damage the case. The circuit board in the 8600V is a multi-layer board using traces 0.01" wide. Due to the very small trace size, extreme care must be used when replacing components to prevent permanent non-repairable damage to the circuit board. Most components are surface-mounted and require special hot air jet soldering and desoldering equipment. -
Page 29: Warranty
All non-warranty work shall be done according to NONIN standard rates and charges in effect at the time of delivery to NONIN. -
Page 30: Accessories
Small Fiber Optic Sensor-30 feet/9 meters (For MRI use) For more information about NONIN parts and accessories, contact your local distributor. If you do not have your local distributor information, call NONIN at (800) 356-8874 or (763) 553-9968, and ask for your local distributor's... -
Page 31: Troubleshooting Guide
ON are within alarm limits If any of these solutions do not correct the problem with your Model 8600V, please contact NONIN Customer Support at (800) 356-8874 (USA and Canada) or (763) 553-9968.