Table of Contents
Advertisement
Quick Links
Advertisement
Table of Contents

Related Manuals for Nonin Avant 9700


Summary of Contents for Nonin Avant 9700
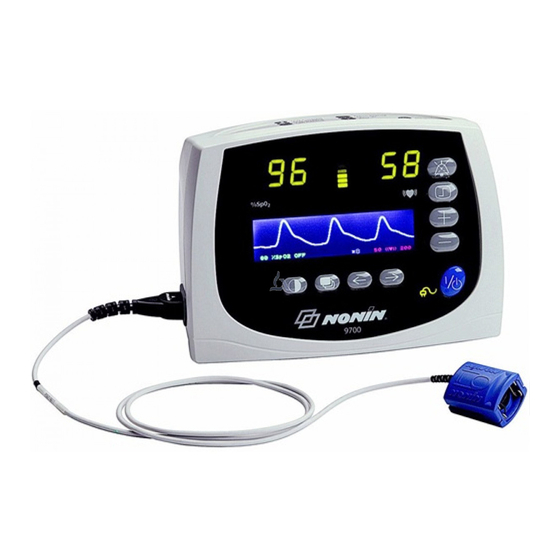
- Page 1 Operator’s Manual vant 9700 ™ Avant 9700 ™ Digital Pulse Oximeter English 0123...
- Page 3 Avant™ 9700 Digital Pulse Oximeter. The information in this manual has been checked carefully and is believed to be accurate. In the interest of continued product development, NONIN reserves the right to make changes and improvements to this manual and the products it describes at any time, without notice or obligation.
-
Page 5: Table Of Contents
Guide to Symbols ............1 Precautions for Use ............2 Using the Avant 9700 ........... 4 Intended Use ..............4 Installing the Batteries ............5 Verifying Avant 9700 Operation ........6 Displays, Indicators, and Controls ........6 Default Settings ..............11 LCD Display Views ............12 User Functions ...............14... -
Page 7: Guide To Symbols
Guide to Symbols Detailed information for functional symbols can be found in “Using the Avant 9700.” Regulatory Symbols Attention: See Instructions for Use or related materials. Type BF Applied Part (Patient isolation from electrical shock). UL Mark for Canada and the United States... -
Page 8: Precautions For Use
Do not use a damaged sensor. Do not use the Avant 9700 in or around water or any other liquid when the AC power adapter is used. As with all medical equipment, carefully route patient cables and connections to reduce the possibility of entanglement or strangulation. - Page 9 If the Avant 9700 fails to respond as described, discontinue use until the situation is corrected by qualified personnel.
-
Page 10: Using The Avant 9700
Using the Avant 9700 Using the Avant 9700 The Avant 9700 features an LCD display through which all parameters and advanced features can be accessed and adjusted. The device’s audible and visual alarms include easily understandable multi-colored LED indicators, alerting users to abnormal conditions. -
Page 11: Installing The Batteries
Installing the Batteries NOTE: Contact NONIN to purchase or replace battery packs. NOTE: Reposition the back cover carefully, and tighten the screws firmly—being careful not to over-tighten. -
Page 12: Verifying Avant 9700 Operation
Avant 9700. Contact your distributor or NONIN Customer Support for assistance. In order to verify that the Avant 9700 is functioning properly, it is important to monitor SpO and pulse rate readings. Use the following procedure to verify that the pulse oximeter sensor is functioning properly. - Page 13 This amber LED indicates a marginal battery charge when blinking. In addition, this LED—when lit solidly—indicates that the battery charge is being displayed. This LED does not indicate that the Avant 9700 is running on battery power. The battery charge indication will not be accurate before...
- Page 14 Patient Security Mode This icon can be toggled between NO (default) and YES to lock and unlock the Avant 9700’s alarms. Selecting YES activates Patient Security mode, locking all alarms to prevent accidental activation or adjustment. The Plus (+) or Minus (-) buttons must be pressed and held for 3 seconds to toggle between NO and YES.
- Page 15 Avant 9700 Front Panel Buttons ON/STANDBY Pressing this button once turns on the Avant 9700. Holding this button for at least 1 second shuts down the 9700. In Patient Security mode, the ON/STANDBY button must be held for five seconds to shut down the 9700.
- Page 16 These buttons adjust the values for many Avant 9700 functions, including time, date, volume, and upper and lower alarm limits. In Plethysmographic Waveform view (when the Avant 9700 is not in any setting mode), the Plus and Minus buttons can be used to adjust the intensity of the LED displays.
-
Page 17: Default Settings
Once set, the adjusted values are used as defaults until the Avant 9700 is turned on with DIP switch 4 in the DOWN position, at which time the device restarts in Factory Default setting. -
Page 18: Lcd Display Views
Using the Avant 9700 LCD Display Views The Avant 9700 features three unique LCD display views: Plethysmographic Waveform view, Trend Waveform view, and Trend Histogram view. Plethysmographic Waveform View Plethysmographic Waveform view is the Avant 9700’s default. Approximately 3.4 seconds of data are displayed on the device’s LCD screen. Upon reaching the right edge of the LCD screen, new data overwrites old data starting at the left edge of the screen. - Page 19 In Trend Waveform view, the desired record can be selected by positioning the cursor and pressing the LCD Screens button. One of three pre-defined SpO pulse rate ranges selected during setup can be displayed. Those ranges are as follows: %SpO Mode Heart Rate 1 (default)
-
Page 20: User Functions
Using the Avant 9700 User Functions Avant 9700 operating functions can be broken into Basic and Advanced groups. Basic Functions The Avant 9700 has several basic functions, which are easy to use and generally involve only a single button. Function Button... - Page 21 Function Button Instruction Adjust the LCD Hold the Display Contrast button contrast. until the desired contrast is dis- played. Change the LCD Press the LCD Screens button to display screen. toggle through Plethysmographic Waveform view, Trend Waveform view, and Trend Histogram view. Adjust the With the unit in Plethysmographic display intensity...
-
Page 22: Advanced Functions
Function Button Instruction Recall Press and hold the Settings button Previous User- while turning on the Avant 9700. Defined Settings NOTE: Previous user-defined settings can also be recalled within the Parameter Adjustment menu, which is accessed by pressing the Settings button. -
Page 23: Avant 9700 Dip Switches
(See “Installing the Batteries” for instructions on removing the back cover). The UP position is toward the top of the unit, and the DOWN position is toward the bottom of the unit. The factory setting for all Avant 9700 DIP switches is the DOWN position. -
Page 24: Nurse Call Feature
Using the Avant 9700 Nurse Call Feature The Avant 9700 features a Nurse Call circuit that can be connected to hospital nurse call systems, allowing alarm conditions to be recognized at a central monitoring location and on the Avant 9700. -
Page 25: Care And Maintenance
Clean the Avant 9700 with a soft cloth dampened with isopropyl alcohol. Do not pour or spray any liquids onto the Avant 9700, and do not allow any liquid to enter any openings in the device. Allow the unit to dry thoroughly before using it. -
Page 26: Alarms And Limits
Alarms and Limits Alarms and Limits This chapter describes alarms and limits for the Avant 9700 Digital Pulse Oximeter. High Priority Alarms High priority alarms are those that require immediate attention to the patient. They include SpO pulse rate, and low perfusion alarms. On the Avant 9700, high priority alarms are indicated with rapidly blinking red LED displays when alarm limits are met or exceeded. -
Page 27: Alarm Summary
Avant 9700 will signal a high priority alarm, indicated by red numeric LEDs that flash in sync with the Main Alarm LED. -
Page 28: Setting And Changing Volume And Alarm Limits
DIP switch 1 must be placed in the UP position. This allows the alarm volume to be set to zero. The Alarm Silence LED will remain illuminated when the alarm volume is set to less than 45 dB. Refer to “Avant 9700 DIP Switches” for more information. -
Page 29: Recalling Previous Settings
The Avant 9700 allows users to select Unlatched or Latched alarms. DIP switch 3, located at the bottom of the Avant 9700 behind the back cover, is used to toggle between Latched Alarms and Unlatched Alarms modes. Unlatched mode (DIP switch 3 in the DOWN position) is the default. -
Page 30: Patient Security Mode
If the error persists, disconnect all power (AC and battery), and then reconnect the power and turn the unit back on. If the error still persists, note the error code and contact your distributor or NONIN Customer Support at (800) 356-8874 (USA and Canada) or +1 (763) 553-9968. -
Page 31: Communication
If you wish to create your own software, contact NONIN for the data format. The memory in the Avant 9700 functions much like an “endless loop” tape. When the memory fills up, the unit begins overwriting the oldest data with the new data. -
Page 32: Playing Back Memory Data
The Avant 9700 has a Memory Playback feature, allowing stored data to be output through the RS232 serial connection. With the unit off, connect the RS-232 connector port of the Avant 9700 to the back of your computer using a null modem cable. -
Page 33: Patient Data Outputs
The Avant 9700 provides real-time data output capability via the RS232 connector port. A null modem cable may be used to connect the Avant 9700 to the receiving computer. The information from the Avant 9700 is sent in an ASCII serial format at 9600 baud with 8 data bits, 1 start bit, and 2 stop bits. -
Page 34: Specifications
S p e c i f i c a t i o n s Specifications OXIMETER Oxygen Saturation Range 0% to 100% (%SpO Pulse Rate Range 18 to 300 pulses per minute Displays Numeric Displays 3-digit LEDs, Tricolor (red, green, amber) Pulse Strength Tricolor LED segments Bargraph LED... - Page 35 Internal Power Battery 7.2 volt battery pack (6 cells) Operating Life Minimum 8 hours of continuous operation with a fully charged battery pack Storage Life 27 days Recharge 4 hours Dimensions 5.5” H x 7.25” W x 4.5” D approximate Weight 2.4 lbs approximate Memory...
-
Page 36: Parts And Accessories
Parts and Accessories Parts and Accessories Model Number Description AVANTB Battery Pack 9700 Manual Operator’s Manual for the Avant 9700 300PS-UNIV Battery Charger, Universal Desktop with IEC320 Connector 1300PC-XX Power Cord (Contact your distributor or NONIN for options) External Cables UNI-RA-0 7.25”... - Page 37 Avant CC Carrying case for Avant products For more information about NONIN parts and accessories, contact your distributor, or contact NONIN at (800) 356-8874 (USA and Canada) or +1 (763) 553-9968. This information is also available on NONIN’s website: www.nonin.com.
-
Page 38: Service, Support, And Warranty
This warranty excludes cost of delivery to and from NONIN. All repaired units shall be received by the purchaser at NONIN's place of business. NONIN reserves the right to charge a fee for a warranty repair request on any Avant 9700 that is found to be within specifications. -
Page 39: Troubleshooting
The battery pack is Check the battery pack operate on batteries. inserted incorrectly. connection. The battery pack is not Plug in the Avant 9700 charged. AC Adapter to charge the battery pack. The battery pack is Contact your distributor or inoperable. - Page 40 There is excessive Shield the sensor from the pulse quality ambient light. light source. indication. The Avant 9700 is Apply the sensor to a finger applied to a polished or without artificial or polished artificial fingernail. nails. Position the sensor at a different site.
- Page 41 The digit was removed Reinsert the digit and keep the from the sensor. sensor motionless for at least 10 seconds. The Avant 9700 is not Turn the unit off, check all functioning. connections, and retry. Contact your distributor or NONIN Customer Support.
- Page 42 The battery is missing. Contact your distributor or NONIN Customer Support for repair or replacement. If these solutions do not correct the problem, please contact your distributor, or contact NONIN Customer Support at (800) 356-8874 (USA and Canada) or +1 (763) 553-9968.
Need help?
Do you have a question about the Avant 9700 and is the answer not in the manual?
Questions and answers