ETC fos/4 Panel User Manual
Hide thumbs
Also See for fos/4 Panel:
- User manual (32 pages) ,
- Quick manual (9 pages) ,
- Installation manual (3 pages)

Related Manuals for ETC fos/4 Panel


Summary of Contents for ETC fos/4 Panel
- Page 1 Panel User Manual Version 1.2.0 Part Number: 7471M1200-1.2.0 Rev: A Released: 2022-09...
- Page 2 To view a list of ETC trademarks and patents, go to etcconnect.com/ip. All other trademarks, both marked and not marked, are the property of their respective owners. ETC intends this document, whether printed or electronic, to be provided in its entirety.
-
Page 3: Table Of Contents
Table of Contents Introduction Help from ETC Technical Services Safety Overview Fixture User Interface Display What's Controlling the Fixture? Set Up and Focus the Fixture Mount the Fixture Add Accessories Connect Power and Data Focus the Fixture Use Fixture in DMX Mode Set DMX Address... - Page 4 View Battery Level Export Fixture Data for Troubleshooting Restore Default Settings Update Firmware Backup and Restore the Fixture Configuration Clean the Diffusion Specifications and Reference Environment Dimensions and Weight Electrical RDM Parameters Fixture Compliance Licensed Software fos/4 Panel User Manual...
-
Page 5: Introduction
Introduction The fos/4Panel provides an incredibly bright, top quality, highly tunable light. The Panel is available in three sizes, and each size is available in two array types: • Lustr X8: The next generation of the Lustr color system incorporates deep red into the already amazing x7 mix to create an even more rich, vibrant X8 color palette. -
Page 6: Help From Etc Technical Services
Help from ETC Technical Services If you are having difficulties and your problem is not addressed by this document, try the ETC support website at support.etcconnect.com or the main ETC website at etcconnect.com. If none of these resources are sufficient, contact ETC Technical Services directly at one of the offices identified below. -
Page 7: Safety
WARNING: RISK OF ELECTRIC SHOCK! The light source in this luminaire is not user-replaceable, and must be replaced only by a qualified technician. Contact ETC Customer Support for assistance. AVERTISSEMENT : RISQUE DE DÉCHARGE ÉLÉCTRIQUE! La source lumineuse de ce projecteur n'est pas remplaçable par l'utilisateur et ne doit être remplacée seulement par un technicien qualifié. - Page 8 Ce produit ne doit pas être jeté avec les déchets waste but must be sent to separate collection facilities ménagers mais doit être déposé dans une collecte de for recovery and recycling. déchets électroniques ou dans un point de collecte. fos/4 Panel User Manual...
-
Page 9: Overview
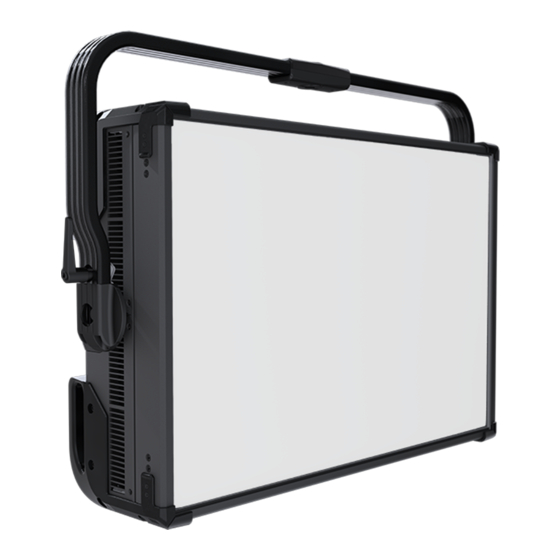
Overview Fixture Large Medium (PL24 or PD24) (PL16 or PD16) Small (PL8 or PD8) Accessory holder: Insert accessories into the two available slots from either side of the holder, and then lock the holder. See Add Accessories on page 9 Handles: For medium (PL16 or PD16) and large (PL24 or PD24) fixtures, carry the fixture by the pairs of handles on the back of the fixture, and attach safety cables to handles when mounting the fixture. -
Page 10: User Interface
USB port: Use for updating firmware, saving and loading fixture configuration settings, or saving error logs via a flash drive. See Troubleshooting and Maintenance on page 27 Lock UI lock: Set this switch to lock the UI. This prevents inadvertent changes to the UI. See the Display on page 26 fos/4 Panel User Manual... -
Page 11: Display
(for example, "Config Received" or "DMX Control Resumed") or important warnings in red (for example, "LED High Temp" or "Array Failure"). What's Controlling the Fixture? The fos/4 Panel follows two rules Sample Event What's Controlling the Fixture? to determine what is controlling... -
Page 12: Set Up And Focus The Fixture
(PL16 or PD16) and large (PL24 or PD24) fixtures. Small (PL8 or PD8) Attach safety cables to the connection points Medium (PL16 or PD16) and Large (PL24 or PD24) Attach safety cables to either pair of handles using looped attachments (see inset) fos/4 Panel User Manual... -
Page 13: Add Accessories
Add Accessories You can use up to two standard accessories (one diffusion and one additional accessory, such as a barn door) in the accessory holder. 1. Unlock the accessory holder on either side by pressing and sliding both accessory holder locks (A), and then rotating the accessory holder door (B). -
Page 14: Focus The Fixture
Focus the Fixture 1. Apply power to the fixture, and wait until the fixture has booted up (the ETC splash screen displays during boot up). 2. Press any encoder to "wake" the display. 3. What screen is currently displayed? • DMX: Press any encoder to leave the view-only screen, and then press the Intensity encoder to turn on the LED array. -
Page 15: Use Fixture In Dmx Mode
Use Fixture in DMX Mode After you connect power and data to the fixture and provide DMX, press the Function button ( ), use the Intensity encoder to navigate to DMX Mode, and then press the Intensity encoder to select it. In the DMX screen, you can set the DMX address, DMX mode, and DMX loss behavior. -
Page 16: Set Dmx Address
DMX values that set these parameters. DMX Control Channels: Effects on page 15 † See for the DMX values that set these parameters. ‡ See DMX Control Channels: Effect Styles on page 16 for the DMX values that set this parameter. fos/4 Panel User Manual... - Page 17 DMX Cell Modes You can control the left and right sides of the fixture separately in one of three available cell modes. Direct Cell Direct Cell Expanded Cell Studio Cell (Daylight HDR) (Lustr X8) RDM ID „ 9 DMX Channel ‚ Cell 1 Intensity Cell 1 Intensity...
- Page 18 Neutral 1–127 Linear between +10 and 0 Tint shifts toward green (+10) as the DMX value decreases to 1. Neutral 129–255 Linear between 0 and -10 Tint shifts toward magenta (-10) as the DMX value increases to 255. fos/4 Panel User Manual...
- Page 19 Parameter DMX Value Description Comments 0–49 Brightest Calculation uses a combination of LEDs to produce the Tuning brightest version of the selected chromaticity. (Color calculation 50–99 Spectral Calculation uses a combination of LEDs to produce the method) (backward-compatible*) best spectral match of the selected chromaticity. The Spectral option results in higher color rendering, but lower intensity levels.
- Page 20 Brownout 20–255 Reserved This range is reserved for future development, but currently outputs the Brownout style. Fireworks 0–9 Rainbow 10–19 Custom 20–255 Reserved This range is reserved for future development, but currently outputs the Custom style. fos/4 Panel User Manual...
- Page 21 Parameter DMX Value Description Comments Flicker 0–9 Basic Fire 10–19 Glowing 20–29 Warm 30–39 High Temp 40–49 Unnatural 50–59 Custom 60–69 Basic Fire L/R These styles use Cell mode (two sides of the fixture controlled separately). 70–79 Glowing L/R 80–89 Warm L/R 90–99 High Temp L/R...
-
Page 22: Set Dmx Loss Behavior
• HLL: Hold last look until you make local changes. This is the default setting. • Preset 12: Two-second fade from last look to Preset 12. fos/4 Panel User Manual... -
Page 23: Use Fixture In Stand-Alone Mode
Press the Intensity encoder to toggle between the current intensity and 0%. If the fixture is connected to other fos/4 Panel fixtures that are in the same stand-alone mode, the connected fixtures will play the same preset or effect. -
Page 24: Studio Mode
The display shows a three-second countdown before re-recording the preset. Note: The CCT, Tint, and Tune values match the values that are available when the DMX mode is set to Studio. See DMX Control Channels on page 14. fos/4 Panel User Manual... -
Page 25: Color Mode
Color Mode 1. Press the Function button ( ), use the Intensity encoder to navigate to Color Mode, and then press the Intensity encoder to select it. Turn to adjust intensity, or press to toggle between current intensity and 0. Color Color I: 97%... -
Page 26: Gel Mode
0. Press the Intensity encoder again to toggle back to the previous intensity value. • Save the color to a gel preset: Press and hold an encoder to save the current gel to that encoder. The display shows a three-second countdown before re-recording the gel preset. fos/4 Panel User Manual... -
Page 27: Effects Mode
Effects Mode 1. Press the Function button ( ), use the Intensity encoder to navigate to Effects Mode, and then press the Intensity encoder to select it. Turn an encoder to modify the value in the matching field. Effects Settings Max Int 100% Max Int... -
Page 28: Preset Mode
• Push the preset to connected fixtures: Press the Menu button ( ), and then use the Intensity encoder to navigate through the menu: Local Settings > Push Presets. When the screen prompts you to confirm, press the green encoder (for the OK icon ) to continue. fos/4 Panel User Manual... -
Page 29: Use Wireless Control
Use Wireless Control Set Up Multiverse Wireless Communication ® You can use a City Theatrical Multiverse transmitting device to wirelessly configure and control the fixture. For information on using Multiverse products, see the documentation provided with the products. Note: For additional guidance and troubleshooting resources when setting up your wireless system, download the Multiverse Wireless Setup Information Guide at etcconnect.com. -
Page 30: Control And Customize The Display
• Auto: Display inverts as the fixture moves. • Normal: Display matches the orientation of the fixture labeling. • Invert: Display is inverted in relation to the orientation of the fixture labeling. Encoders Set the brightness of the four encoders from 10–100%. fos/4 Panel User Manual... -
Page 31: Troubleshooting And Maintenance
Troubleshooting and Maintenance Troubleshooting Checklist If you cannot find the resources that you need in this document, contact ETC Technical Services (see Help from ETC Technical Services on page 2 What I'm Seeing What Might Be Wrong What To Try Color on the fixture does not •... -
Page 32: Adjust The Pulse Width Modulation (Pwm)
• Press the blue encoder to select all emitter colors, or turn the encoder to select an individual emitter color. (De = Deep red, Re = Red, etc.) • Press the green encoder to toggle between off and full (FL) for the selected emitters, or turn the encoder to set a specific level (0%–100%). -
Page 33: View Diagnostic Data
View Diagnostic Data As part of troubleshooting any issues with a fixture, ETC Technical Services may ask that you view diagnostic data on the fixture. 1. Press the Menu button ( ), turn the Intensity encoder to navigate to Diagnostics, and then press the Intensity encoder to select it. -
Page 34: Export Fixture Data For Troubleshooting
Export Fixture Data for Troubleshooting As part of troubleshooting any issues with a fixture, ETC Technical Services may ask that you export fixture data to a USB drive and then send the data for further analysis. -
Page 35: Restore Default Settings
Copying the files to the fixture: A progress meter displays as the files are copied to the fixture. b. Verifying the files: The ETC logo displays on the top half of the screen as the fixture verifies the files. You can safely remove the USB drive at this time. -
Page 36: Backup And Restore The Fixture Configuration
Note: For diffusion accessories, verify that the rough side of the diffusion faces the LEDs and that you can read the label on the diffusion from the front of the fixture. fos/4 Panel User Manual... -
Page 37: Specifications And Reference
For current and complete compliance and specifications, see the fos/4 Panel datasheet at etcconnect.com. Environment The fos/4 Panel operates in ambient temperatures of 0°C–40°C (32°F–104°F) and is rated IP20 (for use in dry locations only). Fixture temperature information: • Maximum recommended ambient operating temperature: Ta=40°C (104°F) •... -
Page 38: Electrical
Parameter Fixture Value Description Manufacturer ID 0x6574 Electronic Theatre Controls Model ID fos4PL8 0x0400 ETC fos/4 Small Panel Lustr fos4PD8 0x0401 ETC fos/4 Small Panel Daylight fos4PL16 0x0410 ETC fos/4 Medium Panel Lustr fos4PD16 0x0411 ETC fos/4 Medium Panel Daylight... -
Page 39: Fixture Compliance
Fixture Compliance For current and complete compliance and specifications, see the fos/4 Panel datasheet at etcconnect.com. FCC Compliance fos/4 Panel (For any FCC matters): Electronic Theatre Controls, Inc. 3031 Pleasant View Road Middleton, WI 53562 +1 (608) 831-4116 etcconnect.com This device complies with Part 15 of the FCC Rules. Operation is subject to the following two conditions: (1) this device may not cause harmful interference, and (2) this device must accept... -
Page 40: Licensed Software
• ETSI EN 300 328 v2.1.1 (2016) • ETSI EN 301 489 v2.1.1 (2017) • ETSI EN 301 489-18 v3.1.1 (2016) Licensed Software This product uses licensed software provided by third parties. Please visit etcconnect.com/licenses for licensing information. fos/4 Panel User Manual... - Page 41 Specifications and Reference...
- Page 42 Panel User Manual...
- Page 43 Specifications and Reference...
- Page 44 | Support support.etcconnect.com | Contact etcconnect.com/contactETC © 2022 Electronic Theatre Controls, Inc. | Trademark and patent info: etcconnect.com/ip Product information and specifications subject to change. ETC intends this document to be provided in its entirety. 7471M1200-1.2.0 Rev A Released 2022-09...
Need help?
Do you have a question about the fos/4 Panel and is the answer not in the manual?
Questions and answers