Table of Contents
Advertisement
Quick Links
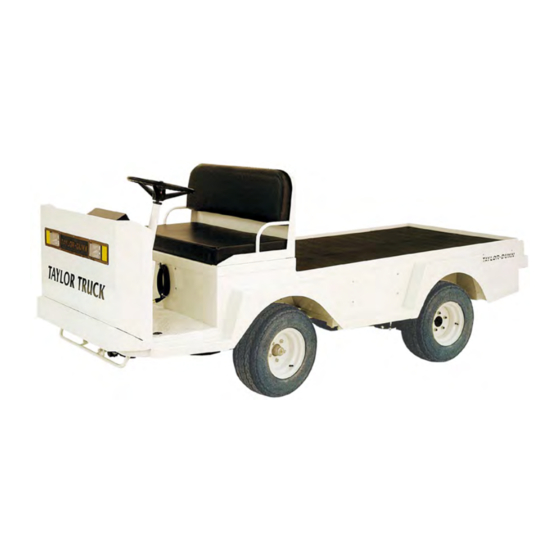
Model: ET-3000
Model: T-48
Models Inlcuded:
B0-T48-48AC (T-48, 48 volt system)
B0-T48-72AC (T-48, 72 volt system)
T h e B e s t W a y
ET-030-48AC (ET-3000)
T o G o
A b o u t Y o u r
B u s i n e s s
Equipped with AC Motor Speed Control
MANUAL MB-T48-02
Operation, Troubleshooting and
Replacement Parts Manual
Serial Number Starting: 172581
Revision: E 10/22/2013
Ending Serial Number: See Introduction Chapter
Advertisement
Chapters
Table of Contents

Subscribe to Our Youtube Channel
Related Manuals for Taylor-Dunn ET-3000


Summary of Contents for Taylor-Dunn ET-3000
- Page 1 Model: ET-3000 Model: T-48 Models Inlcuded: B0-T48-48AC (T-48, 48 volt system) B0-T48-72AC (T-48, 72 volt system) T h e B e s t W a y ET-030-48AC (ET-3000) T o G o A b o u t Y o u r...
- Page 3 Taylor-Dunn Contact information Service, Parts, Sales: Taylor-Dunn has a network of dealers distributed around the globe to support our vehicles. Information regarding vehicle sales, replacement parts, or service should be obtained through your local dealer. A dealer locator can be found on the Taylor-Dunn website at www.taylor-dunn.com.
- Page 4 Decades of experience are an invaluable asset, and it is an asset we cherish and protect. Our guiding principle is to provide application- specific solutions, which are reliable, efficient, and economical. Our domestic and international network of quality Taylor-Dunn Dealers and Parts & Service Support keeps our customers moving. Tiger Tractor: Tiger manufacturing has become a leading manufacturer of internal combustion industrial tractors and ground support equipment.
- Page 5 Section Index T-48 AC / ET 3000 ® Operator and Service Manual Section Index Introduction Safety Rules and Operating Instructions General Maintenance Front Axle Steering Component Brakes Motor Transmission Suspension Tires and Wheels Battery Wire diagram Motor Controller Chargers Illustrated Parts Appendix This quick reference section index guide will assist you in...
- Page 6 Notes:...
-
Page 7: Table Of Contents
Introduction Table of Contents Introduction About this manual ...........2 Who Should Read This Manual ......3 Responsibilities ..........3 How To Use This Manual ........4 Conventions ............5 How to Identify Your Vehicle ......6 Taking Delivery of Your Vehicle......7... -
Page 8: Introduction
Please continue to read this manual and enjoy this high quality Taylor-Dunn vehicle. ® This manual is to serve as a guide for the service, repair, and operation of Taylor-Dunn vehicles and ® is not intended as a training guide. Taylor-Dunn has made every effort to include as much information ®... -
Page 9: Who Should Read This Manual
Of the Service Personnel... The service personnel are responsible for the service and maintenance of the vehicle. At no time should a service person allow any untrained personnel to service or repair this or any Taylor-Dunn vehicle. ®... -
Page 10: How To Use This Manual
Introduction T-48 AC / ET 3000 HOW TO USE THIS MANUAL This manual is organized into five main sections: Introduction This section describes how to use this service manual and how to identify your vehicle. Safety Rules and Operating Instructions This section outlines the safety and operational issues, location and operation of controls, and the operational checks that are to be performed on this vehicle. -
Page 11: Conventions
Introduction T-48 AC / ET 3000 Conventions Symbols and/or words that are used to define warnings, cautions, instructions, or notes found throughout this manual: A shaded box with the word “Warning” on its left denotes a warning. A warning alerts the reader of a hazard that may result in injury to themselves or others. -
Page 12: How To Identify Your Vehicle
Introduction T-48 AC / ET 3000 HOW TO IDENTIFY YOUR VEHICLE This manual applies to vehicles with the same model and serial numbers listed on the front cover. If the ending serial number is blank, then this manual was for current production vehicles when printed. These vehicles are designed for driving on smooth surfaces in and around facilities such as industrial plants, nurseries, institutions, motels, mobile home parks, and resorts. -
Page 13: Taking Delivery Of Your Vehicle
The report must be made within 24 ® hours of receiving the vehicle and its accessories. The only personnel authorized to repair, modify, or adjust any part of this or any Taylor-Dunn vehicle ® is a factory authorized service technician. - Page 14 Notes:...
- Page 15 Signet Charger Operation, Model HB Series ..16 Signet Charger Operation, Model HBS series ..17 Lestronic II Charger Operation ......17 ® Taylor-Dunn X-Series Charger ........18 Storing and Returning to Service ....20 Storing Your Vehicle ..........20 Returning to Service ..........20 Periodic Maintenance Checklist.....21 Daily Visual inspection:..........22...
-
Page 16: Standard Specifications
Battery Voltage to 12 volt DC-DC converter Frame Dimensions T-48 318 L x 127 W x 119 H cm (125 L x 50 W x 47 H Inches) ET-3000 Not available at time or printing Deck dimensions T-48 104.75 W x 191 L cm (41.25 W x 75.25 L Inches) ET-3000 125 W x 200 L cm (49.25 W x 78.75 L inches) -
Page 17: Safety Rules And Guidelines
Safety Rules and Operating Instructions T-48 AC / ET 3000 SAFETY RULES AND GUIDELINES It is the responsibility of the owner of this vehicle to assure that the operator understands the various controls and operating characteristics of this vehicle (extracted from the American National Standards Institute Personnel and Burden Carriers ANSI B56.8). -
Page 18: Driver Training Program
Safety Rules and Operating Instructions T-48 AC / ET 3000 DRIVER TRAINING PROGRAM According to ANSI B56.8, the owner of this vehicle shall conduct an Operator Training program for all those who will be operating this vehicle. The training program shall not be condensed for those claiming to have previous vehicle operation experience. -
Page 19: Vehicle Controls
Safety Rules and Operating Instructions T-48 AC / ET 3000 VEHICLE CONTROLS WARNING WARNING This section is one section of a complete service Do not depress the Emergency Disconnect Switch manual. Before starting any procedure, read all while the vehicle is in motion unless the vehicle warnings and instructions that are located in the must be stopped in an emergency. -
Page 20: Dash Starting Serial #180000
Safety Rules and Operating Instructions T-48 AC / ET 3000 Dash Starting Serial #180000 WARNING Do not depress the Emergency Disconnect Switch while the vehicle is in motion unless the vehicle must be stopped in an emergency. Depressing the switch will immediately apply the park brake, stopping the vehicle. -
Page 21: Combination Dash Display
Safety Rules and Operating Instructions T-48 AC / ET 3000 Combination Dash Display Battery Status Indicator-bar graph There are five LED’s at the bottom of the gauge. Each LED represents an approximate state of charge as listed below: #5 green: Indicates 84% to 100% charge remaining. #4 green: Indicates 68%-84% charge remaining. - Page 22 Safety Rules and Operating Instructions T-48 AC / ET 3000 Accelerator Pedal The accelerator pedal is located to the right of the brake pedal. It controls the speed of the vehicle and operates similar to the accelerator pedal in an automobile.
- Page 23 Safety Rules and Operating Instructions T-48 AC / ET 3000 Park Brake, Automatic WARNING Refer to Towing This Vehicle for information on The automatic park brake should be disabled temporarily disabling the automatic park brake. for servicing or towing procedures only. Do not Vehicles manufactured up to 4/1/2007: operate the vehicle while the automatic park brake is disabled.
-
Page 24: Vehicle Operational Guidelines
Safety Rules and Operating Instructions T-48 AC / ET 3000 VEHICLE OPERATIONAL GUIDELINES WARNING This section is one section of a complete service manual. Before starting any procedure, read all warnings and instructions that are located in the Service Guidelines chapter. Safety Guidelines Starting: •... -
Page 25: Loading And Unloading
Safety Rules and Operating Instructions T-48 AC / ET 3000 Loading and Unloading Towing • Do not carry more than the maximum number This vehicle is equipped with a standard automatic of passengers allowed for this vehicle. electric parking brake. The brake is automatically applied when the vehicle is stopped. -
Page 26: Adjustable Controller Parameters
Safety Rules and Operating Instructions T-48 AC / ET 3000 Adjustable Controller Parameters 48-volt equipped with 18:1 drive ratio WARNING Acceleration Parameters (normal mode) Improper programming may cause unexpected Function Value Unit Description operation of the vehicle and/or damage the Time to accelerate to ~15% of FwdAS LS full speed... - Page 27 Safety Rules and Operating Instructions T-48 AC / ET 3000 72-volt equipped with 18:1 drive ratio 48-volt equipped with 24:1 drive ratio Acceleration Parameters (normal mode) Acceleration Parameters (normal mode) Function Value Unit Description Function Value Unit Description S Time to accelerate to ~15% of full Time to accelerate to ~15% of full FwdAS LS FwdAS LS...
- Page 28 Safety Rules and Operating Instructions T-48 AC / ET 3000 48-volt equipped with 30:1 drive ratio 72-volt equipped with 24:1 drive ratio Acceleration Parameters (normal mode) Acceleration Parameters (normal mode) Function Value Unit Description Function Value Unit Description Time to accelerate to ~15% of full S Time to accelerate to ~15% of full FwdAS LS FwdAS LS...
- Page 29 Safety Rules and Operating Instructions T-48 AC / ET 3000 72-volt equipped with 30:1 drive ratio Acceleration Parameters (normal mode) Function Value Unit Description Time to accelerate to ~15% of full FwdAS LS speed FwdAc HS Time to accelerate to full speed Time to accelerate to from FwdAC LS RevAc LS to full...
-
Page 30: Charging Your Vehicle
Safety Rules and Operating Instructions T-48 AC / ET 3000 CHARGING YOUR VEHICLE CAUTION WARNING This section is one section of a complete service The key switch must be in the “OFF” position manual. Before starting any procedure, read all when charging the batteries. -
Page 31: Signet Charger Operation, Model Hbs Series
Safety Rules and Operating Instructions T-48 AC / ET 3000 Signet Charger Operation, Model HBS series The Signet HBS series chargers are fully automatic. The charger will turn itself ON when the AC power ® cord is connected to the AC power source and turn itself OFF when the batteries are fully charged. Once the charge cycle is complete, the charger will continue to monitor the batteries. -
Page 32: Taylor-Dunn X-Series Charger
Safety Rules and Operating Instructions T-48 AC / ET 3000 Taylor-Dunn X-Series Charger CAUTION This charger is rated for 115 VAC or 230 VAC operation (nominal). Confirm the charger installed is correct for the AC voltage power source before connecting the charger. - Page 33 Safety Rules and Operating Instructions T-48 AC / ET 3000 Charging with the X-Series Charger WARNING Note: Opportunity charging is not recommended. F o r m a x i m u m b a t t e r y l i f e , i t i s This charger requires a standard household 15 Amp recommended that the batteries be electrical circuit.
-
Page 34: Storing And Returning To Service
Safety Rules and Operating Instructions T-48 AC / ET 3000 To obtain the maximum battery life: Charge the batteries only after they reach a normal discharge as indicated on the Battery Status Indicator (BSI). Failure to follow this guideline could result in the batteries entering an overcharge state, which will reduce the life of the batteries. -
Page 35: Periodic Maintenance Checklist
Safety Rules and Operating Instructions T-48 AC / ET 3000 PERIODIC MAINTENANCE CHECKLIST Taylor-Dunn Preventative Maintenance Schedule for GT Drive with AC Motor Date: ________________________ Model #: ________________ Hour Meter: _______________ Inspected By: ________________________ Serial #: ________________ Serviced By: ________________________... -
Page 36: Daily Visual Inspection
Safety Rules and Operating Instructions T-48 AC / ET 3000 Daily Visual inspection: Tire condition and pressure. External frame damage (body). Operation of all lights and warning alarms and/or horns. Smooth and proper operation of all controls such as but not limited to: •... - Page 37 General Maintenance TABLE OF CONTENTS General Maintenance Maintenance Guidelines .........2 Troubleshooting Guide ........3 Lubrication Chart ..........4...
- Page 38 • Inspect and maintain battery limit switches, protective devices, electrical conductors, and connections in conformance with Taylor-Dunn’s recommended procedures. ® • Keep the vehicle in clean condition to minimize fire hazards and facilitate detection of loose or defective parts.
- Page 39 General Maintenance T-48 AC / ET 3000 TROUBLESHOOTING GUIDE Symptom Probable Cause Front End Out of Alignment Steering Pulls in One Direction Low Tire Pressure Dry Lube Points in Steering Linkage Hard Steering Damaged King Pin/Ball Joint Low Tire Pressure Worn Ball Joints Excessive Steering Play Mis-Adjusted or Worn Steering Gear...
- Page 40 General Maintenance T-48 AC / ET 3000 LUBRICATION CHART Rear Axle Lubrication Front End Lubrication Refer to service section for lubrication of optional hydraulic dump bed. # Description Locations Lubricant Type 1 Ball Joints General Purpose Grease 2 Pedal Linkages General Purpose Grease 3 Front Wheel Bearings High Temperature Wheel Bearing Grease...
- Page 41 Front Axle Service TABLE OF CONTENTS Front Axle Service Inspect the Front Wheel Bearings and King Pin ..........2 Adjust Front Wheel Bearings ......3 Front Axle Removal and Installation .....4 Removal ..............4 Installation ...............5 Front Axle Disassembly ........6 Replace Front Wheel Bearings.......7 Replace the King Pins and Bushings ....9 Replace the Steering Knuckle ......11...
-
Page 42: Inspect The Front Wheel Bearings And King Pin
Front Axle T-48 AC / ET 3000 INSPECT THE FRONT WHEEL BEARINGS AND KING PIN 1. Make sure the key-switch is in the “OFF” position, then remove the key. 2. Place the forward-reverse switch in the center “OFF” position. 3. If equipped with a hand operated park brake, set the brake. 4. -
Page 43: Adjust Front Wheel Bearings
Front Axle T-48 AC / ET 3000 ADJUST FRONT WHEEL BEARINGS 1. Make sure the key-switch is in the “OFF” position, then remove the key. 2. Place the forward-reverse switch in the center “OFF” position. 3. If equipped with a hand operated park brake, set the brake. 4. -
Page 44: Front Axle Removal And Installation
Front Axle T-48 AC / ET 3000 FRONT AXLE REMOVAL AND INSTALLATION Removal 1. Make sure the key-switch is in the “OFF” position, then remove the key. 2. Place the forward-reverse switch in the center “OFF” position. 3. If equipped with a hand operated park brake, set the brake. 4. -
Page 45: Installation
Front Axle T-48 AC / ET 3000 Installation 1. Make sure the key-switch is in the “OFF” position, then remove the key. 2. Place the forward-reverse switch in the center “OFF” position. 3. If equipped with a hand operated park brake, set the brake. 4. -
Page 46: Front Axle Disassembly
Front Axle T-48 AC / ET 3000 FRONT AXLE DISASSEMBLY Disassembling and reassembling involves removing and replacing the left and right steering knuckles and king pin bushings. Refer to the following sections for information regarding these procedures: Replace the Steering Knuckle Replace the King Pins and Bushings Note: The front axle does not have to be removed unless the axle Front Axle Removal and... -
Page 47: Replace Front Wheel Bearings
Front Axle T-48 AC / ET 3000 REPLACE FRONT WHEEL BEARINGS 1. Make sure the key-switch is in the “OFF” position, then remove the key. 2. Place the forward-reverse switch in the center “OFF” position. 3. If equipped with a hand operated park brake, set the brake. 4. - Page 48 Front Axle T-48 AC / ET 3000 13. Install the hub dust cap. 14. Reinstall the brake body and the tire/wheel assembly. Brakes Note: Refer to the section for information regarding the installation of the brake body. 15. Lower the vehicle. 16.
-
Page 49: Replace The King Pins And Bushings
Front Axle T-48 AC / ET 3000 REPLACE THE KING PINS AND BUSHINGS There are different types of king pin bushings depending on the configuration of your vehicle. • Bronze bushings in the axle beam. • Bronze bushings in the steering knuckle. •... - Page 50 Front Axle T-48 AC / ET 3000 Note: It is not necessary to remove the tie rod or drag link for this procedure. 8. Press the king pin bushings out from the axle, steering knuckle or suspension arm. 9. Press new bushings into the axle, steering knuckle or suspension arm. Ream or broach bronze bushings to 1.25”...
-
Page 51: Replace The Steering Knuckle
Front Axle T-48 AC / ET 3000 REPLACE THE STEERING KNUCKLE 1. Make sure the ON-OFF switch is in the “OFF” position, then remove the key. 2. Place the forward-reverse switch in the center “OFF” position. 3. If equipped with a hand operated park brake, set the brake. 4. - Page 52 Front Axle T-48 AC / ET 3000 12. Thoroughly clean and/or replace all bearings, nuts, washers, and bushings. Note: Both the left and right side bushings and thrust bearings should be replaced as a set. 13. Assemble in reverse order. 14.
- Page 53 Steering TABLE OF CONTENTS Steering Front End Alignment ........2 Inspect Ball Joints ...........6 Inspect Rod Ends ..........7 Adjust the Steering Gear ........8 Replace the Steering Shaft ......10 Replace the Steering Wheel ......12 Replace the Steering Gear ......13 Replace the Ball Joints, Tie Rods, and Drag Link .............14 Replacing the Drag Link ..........16 Replacing the Tie Rod ..........17...
-
Page 54: Front End Alignment
Steering T-48 AC / ET 3000 FRONT END ALIGNMENT This section will refer to two different types of ball joints. One type is has a grease fitting and a tapered shaft where it is fitted to the steering arm or pitman arm. The second type cannot be greased and has a straight shaft. - Page 55 Steering T-48 AC / ET 3000 10. At this point both the steering wheel and the front wheels should be tied up and held in position. If one or the other is not tied up then you must start from the beginning. Do not drive the vehicle while the steering wheel or front wheels are tied in position.
- Page 56 Steering T-48 AC / ET 3000 Front wheel alignment Note: It is recommended to center the steering before aligning the front Center the Steering wheels. Refer to the section for information. 1. Make sure the key-switch is in the “OFF” position, then remove the key.
- Page 57 Steering T-48 AC / ET 3000 11. Measure the distance between the lines at the front of the tires. 12. Measure the distance between the lines at the rear of the tires. 13. Adjust the tie rod so that the distance at the front and rear of the tires is the same.
-
Page 58: Inspect Ball Joints
Steering T-48 AC / ET 3000 INSPECT BALL JOINTS Note: A set of ball joints and/or rod ends will wear at the same rate. If a ball joint and or rod end is worn out, then all should be replaced as a set. -
Page 59: Inspect Rod Ends
Steering T-48 AC / ET 3000 INSPECT ROD ENDS Note: A set of ball joints and/or rod ends will wear at the same rate. If a ball joint and or rod end is worn out, then all should be replaced as a set. -
Page 60: Adjust The Steering Gear
Steering T-48 AC / ET 3000 ADJUST THE STEERING GEAR Note: In some vehicle configurations it may be necessary to remove the Replace the steering gear to perform this procedure. Refer to Steering Gear for information regarding removing the steering gear. 1. Make sure the key-switch is in the “OFF” position, then remove the key. - Page 61 Steering T-48 AC / ET 3000 13. While rotating the input shaft back and forth through its centered position, adjust the gear lash adjusting screw so that there is a slight drag as the steering gear is rotated through its centered position.
-
Page 62: Replace The Steering Shaft
Steering T-48 AC / ET 3000 REPLACE THE STEERING SHAFT 1. Make sure the key-switch is in the “OFF” position, then remove the key. 2. Place the forward-reverse switch in the center “OFF” position. 3. If equipped with a hand operated park brake, set the brake. 4. - Page 63 Steering T-48 AC / ET 3000 11. Remove the steering shaft from the vehicle. 12. Lightly grease the input shaft splines, steering wheel splines and the upper steering shaft bushing. 13. Install the steering shaft in reverse order using a new pinch bolt.
-
Page 64: Replace The Steering Wheel
Steering T-48 AC / ET 3000 REPLACE THE STEERING WHEEL 1. Make sure the key-switch is in the “OFF” position, then remove the key. 2. Place the forward-reverse switch in the center “OFF” position. 3. If equipped with a hand operated park brake, set the brake. 4. -
Page 65: Replace The Steering Gear
Steering T-48 AC / ET 3000 REPLACE THE STEERING GEAR 1. Make sure the key-switch is in the “OFF” position, then remove the key. 2. Place the forward-reverse switch in the center “OFF” position. 3. If equipped with a hand operated park brake, set the brake. 4. -
Page 66: Replace The Ball Joints, Tie Rods, And Drag Link
Steering T-48 AC / ET 3000 REPLACE THE BALL JOINTS, TIE RODS, AND DRAG LINK This section will refer to two different types of ball joints. One type is has a grease fitting and a tapered shaft where it is installed on the steering arm or pitman arm. - Page 67 Steering T-48 AC / ET 3000 10. Install the new rod end into the steering sleeve. Screw it into the sleeve the same number of turns counted in the previous step. Do not tighten the rod end clamp or jam nut at this time. 11.
-
Page 68: Replacing The Drag Link
Steering T-48 AC / ET 3000 12. Install the ball joint into the steering arm. Tighten the ball joint nut to 40-45 ft-lbs. and install a new cotter pin. 13. Realign the front wheels. Steering Note: Refer to the section for information regarding realignment of the front wheels. -
Page 69: Replacing The Tie Rod
Steering T-48 AC / ET 3000 11. Lower the vehicle. 12. Reconnect the main positive and negative cables at the batteries. 13. Remove the blocks from behind the wheels. 14. Release the park brake and test drive the vehicle. Replacing the Tie Rod The Tie Rod is the linkage that connects the two steering knuckles together. -
Page 70: Center The Steering Gear
Steering T-48 AC / ET 3000 CENTER THE STEERING GEAR 1. Remove the pitman arm. 2. Rotate the input shaft clockwise until it stops. 3. While counting the rotations, rotate the input shaft counter clockwise until it stops. 4. Rotate the input shaft clockwise 1/2 the rotations counted in the previous step. 5. -
Page 71: Repair The Steering Gear
Steering T-48 AC / ET 3000 REPAIR THE STEERING GEAR Disassembly Note: The steering gear must be removed from the vehicle for this procedure. Refer to Replace the Steering Gear section for information regarding removing the steering gear. Note: The steering gear is packed with grease. Only perform maintenance on the steering gear in an area that will contain any grease that may spill out of the steering gear when it is disassembled. - Page 72 Steering T-48 AC / ET 3000 4. Remove the worm shaft and ball nut assembly from the bottom of the housing. 5. Remove the worm shaft seal. 6. Remove the pitman shaft seal. 7. Remove the upper worm bearing and bearing cup from the housing.
- Page 73 Steering T-48 AC / ET 3000 9. Place the upper worm bearing on the worm shaft and install the worm shaft/ball nut assembly into the housing being careful not to damage the worm shaft seal. 10. Install the assembled worm bearing adjuster into the housing and tighten just enough to remove all play in the worm shaft.
-
Page 74: Exploded View Of Steering Gear
Steering T-48 AC / ET 3000 Exploded View of Steering Gear HARDWARE TORQUE If hardware is not listed here, refer to standard torque values in the appendix. Description Foot Pounds Ball Joint 40-45 Rod End Nut 20-25 Ball Joint Clamps 28-32 Pinch Bolt 24-26... - Page 75 Brakes TABLE OF CONTENTS Brakes Inspect the Service Brake .......2 Disc Brake Pads ............2 Disc Brake Rotor .............3 Inspect the Automatic Parking Brake ....4 Adjust the Automatic Parking brake ....4 Adjust the Service Brakes ......4 Check Master Cylinder Fluid ......5 Bleed the Brake System........6 Flush the Brake System ........8 Replace Front Disc Brake Pads .....9...
-
Page 76: Inspect The Service Brake
Brakes T-48 AC / ET 3000 INSPECT THE SERVICE BRAKE Disc Brake Pads Current Taylor-Dunn brakes are asbestos free. However, there is the ® possibility that the original brakes were replaced with aftermarket parts containing asbestos. Since this possibility exists, all brake parts should be handled as if they contain asbestos. -
Page 77: Disc Brake Rotor
Brakes T-48 AC / ET 3000 Disc Brake Rotor Current Taylor-Dunn brakes are asbestos free. However, there is the ® possibility that the original brakes were replaced with aftermarket parts containing asbestos. Since this possibility exists, all brake parts should be handled as if they contain asbestos. Refer to Appendix C for recommended handling precautions. -
Page 78: Inspect The Automatic Parking Brake
Brakes T-48 AC / ET 3000 INSPECT THE AUTOMATIC PARKING BRAKE The parking brake is located inside of the motor and is electromagnetically operated. To inspect operation of the parking brake, disconnect the harness to the parking brake and push the vehicle to confirm that the brake is applied. -
Page 79: Check Master Cylinder Fluid
Brakes T-48 AC / ET 3000 CHECK MASTER CYLINDER FLUID Do not ingest brake fluid or allow contact with skin or eyes. Always wear protective clothing and a face shield when working with or around brake fluid. SKIN CONTACT Flush area immediately with water for several minutes. If a rash or skin irritation develops, get medical attention immediately. -
Page 80: Bleed The Brake System
Brakes T-48 AC / ET 3000 BLEED THE BRAKE SYSTEM Do not ingest brake fluid or allow contact with skin or eyes. Always wear protective clothing and a face shield when working with or around brake fluid. SKIN CONTACT Flush area immediately with water for several minutes. If a rash or skin irritation develops, get medical attention immediately. - Page 81 Brakes T-48 AC / ET 3000 • Only use DOT 3 brake fluid from a new sealed container. • DOT 3 brake fluid is corrosive and will damage paint finishes. • Dispose of brake fluid in accordance with local state and federal regulations.
-
Page 82: Flush The Brake System
Brakes T-48 AC / ET 3000 FLUSH THE BRAKE SYSTEM 1. Make sure the key-switch is in the “OFF” position, then remove the key. 2. Place the forward-reverse switch in the center “OFF” position. 3. If equipped with a hand operated park brake, set the brake. 4. -
Page 83: Replace Front Disc Brake Pads
REPLACE FRONT DISC BRAKE PADS Note: It is recommended that both the left and right brake pads be replaced as a set. Current Taylor-Dunn brakes are asbestos free. However, there is the ® possibility that the original brakes were replaced with aftermarket parts containing asbestos. - Page 84 Brakes T-48 AC / ET 3000 10. Remove the brake body bolts (10) and discard the lock nuts (1) and brake pads (8). 11. Remove the spacer bushings (6) from the mounting bracket (5) and discard the bushings. 12. Inspect the brake rotor. See section for information regarding Inspect the Service Brakes inspecting the brake rotor.
-
Page 85: Replace Rear Brake Pads
Brakes T-48 AC / ET 3000 REPLACE REAR BRAKE PADS Hydraulic Disc Current Taylor-Dunn brakes are asbestos free. However, there is the ® possibility that the original brakes were replaced with aftermarket parts containing asbestos. Since this possibility exists, all brake parts should be handled as if they contain asbestos. - Page 86 Brakes T-48 AC / ET 3000 9. Remove the tire/wheel assembly. Tires and Wheels Note: Refer to section for information on removing the tire and wheel assembly. 10. Release the park brake (wheel brake only). 11. Remove the brake body bolts and discard the lock nuts and brake pads. 12.
-
Page 87: Replace The Wheel Cylinder
Brakes T-48 AC / ET 3000 REPLACE THE WHEEL CYLINDER Disc Brake Body Assembly (front or rear) Current Taylor-Dunn brakes are asbestos free. However, there is the ® possibility that the original brakes were replaced with aftermarket parts containing asbestos. Since this possibility exists, all brake parts should be handled as if they contain asbestos. - Page 88 Brakes T-48 AC / ET 3000 8. Remove the tire/wheel assembly. Refer to section for information on removing Tires and Wheels the tire and wheel assembly. 9. Thoroughly clean the area around the brake body. 10. Remove the brake body bolts and discard the lock nuts.
-
Page 89: Replace The Master Cylinder
Brakes T-48 AC / ET 3000 REPLACE THE MASTER CYLINDER Do not ingest brake fluid or allow contact with skin or eyes. Always wear protective clothing and a face shield when working with or around brake fluid. SKIN CONTACT Flush area immediately with water for several minutes. If a rash or skin irritation develops, get medical attention immediately. -
Page 90: Repair The Master Cylinder
Brakes T-48 AC / ET 3000 17. Remove the blocks from behind the wheels. 18. Release the park brake and test drive the vehicle. • Only use DOT 3 brake fluid from a new sealed container. • DOT 3 brake fluid is corrosive and will damage paint finishes. - Page 91 Motor TABLE OF CONTENTS Motor Motor Identification ........2 Inspection ..........2 Thermal Sensor ............2 Motor Brake ..........3 Bearing and Sensor ............ 4 Disassemble ..........4 Reassemble ..............5 Motor Connector ........5 Motor Service Limits and Specifications ..6 Hardware Torque ........
-
Page 92: Motor Identification
Motor T-48 AC / ET 3000 Phase Windings MOTOR IDENTIFICATION Shown below is a typical motor specification decal that is applied to the motor. 1. Make sure the start switch is in the “OFF” position, then remove the key. The specification number on this illustration is for reference only. -
Page 93: Motor Brake
Motor T-48 AC / ET 3000 MOTOR BRAKE Disconnect the motor brake pigtail from the vehicle harness and check the coil resistance. • The brake coil resistance should be within 10% of specification. Remove the rear motor cover and the rubber band sealing gasket from around the brake. -
Page 94: Bearing And Sensor
Motor T-48 AC / ET 3000 Bearing and Sensor DISASSEMBLE Note: The bearing in Motor spec DLGF112150-4 Note: If the motor does not have the fan or brake, skip consists of a combination bearing and armature to step #9. rotation sensor. 1. -
Page 95: Reassemble
Motor T-48 AC / ET 3000 Reassemble MOTOR CONNECTOR 1. Insert the armature/housing assembly into the field housing` while carefully pulling the field cable Spec 191624805 and 806 assemblies through the opening. 2. Install the sensor bearing and thermal sensor grommets into their respective slots on the end housing and bolt the end housing to the field housing. -
Page 96: Motor Service Limits And Specifications
Motor T-48 AC / ET 3000 MOTOR SERVICE LIMITS AND HARDWARE TORQUE If hardware is not listed here, refer to standard torque SPECIFICATIONS values in the appendix. Description Foot Pounds Newton Meters Phase Winding resistance: Terminal Studs 7.14 0.3 Ohms, all phases (nominal) Thermal sensor resistance: 581 Ohms @ 20 degrees C Brake Coil Resistance:... - Page 97 Transmission TABLE OF CONTENTS Transmission Check Oil Level ..........2 Change Oil ............3 Motor Removal and Installation .....4 Rear Hub or Rotor ...........5 Removing and Installing the Rear Axles (Disc Brakes) ..........6 Transmission Assembly .........8 Remove and Install ..........8 Disassembly and Reassembly of the Primary Reduction Gear Case ........9 Disassembling the 3rd Member .....12 Assembling the 3rd Member ......15...
-
Page 98: Check Oil Level
Transmission T-48 AC / ET 3000 CHECK OIL LEVEL The oil flows freely between the main gear case (3rd member) and the primary reduction gear case. It is only necessary to check the oil level of the 3rd member. Park the vehicle on a level surface. 1. -
Page 99: Change Oil
Transmission T-48 AC / ET 3000 CHANGE OIL 1. Make sure the key-switch is in the “OFF” position, then remove the key. 2. Place the forward-reverse switch in the center “OFF” position. 3. If equipped with a hand operated park brake, set the brake. 4. -
Page 100: Motor Removal And Installation
Transmission T-48 AC / ET 3000 MOTOR REMOVAL AND INSTALLATION Note: Some applications will require removing the drive assembly from the Removing and Installing vehicle to remove the motor. Refer to the Drive Assembly for information on removing the drive assembly. -
Page 101: Rear Hub Or Rotor
Transmission T-48 AC / ET 3000 REAR HUB OR ROTOR Note: The torque specification for the axle hub bolt is listed in the Hardware Torque Table at the end of this section. An impact wrench will be required to remove the bolt. Note: The axle hub bolt has a special thread locking compound applied to the threads. -
Page 102: Removing And Installing The Rear Axles (Disc Brakes)
Transmission T-48 AC / ET 3000 REMOVING AND INSTALLING THE REAR AXLES (DISC BRAKES) The oil level in the housing is above the bottom of the axle flange. To minimize oil spills, raise the side of the vehicle high enough so that the oil level is below the bottom of the axle flange. - Page 103 Transmission T-48 AC / ET 3000 11. Remove the axle retaining plate and brake body assembly as one unit. 12. Secure the brake body assembly, do not let it hang by the brake hose. 13. Pull the axle out of the housing. 14.
-
Page 104: Transmission Assembly
Transmission T-48 AC / ET 3000 TRANSMISSION ASSEMBLY Remove and Install 1. Make sure the key-switch is in the “OFF” position, then remove the key. 2. Place the forward-reverse switch in the center “OFF” position. 3. If equipped with a hand operated park brake, set the brake. 4. -
Page 105: Disassembly And Reassembly Of The Primary Reduction Gear Case
Transmission T-48 AC / ET 3000 DISASSEMBLY AND REASSEMBLY OF THE PRIMARY REDUCTION GEAR CASE 1. Make sure the key-switch is in the “OFF” position, then remove the key. 2. Place the forward-reverse switch in the center “OFF” position. 3. If equipped with a hand operated park brake, set the brake. 4. - Page 106 Transmission T-48 AC / ET 3000 12. Remove the circlip from the idler gear. 13. Remove the input shaft/bearing assembly and idler gear/ bearing assembly from the gear case cover at the same time. 14. Remove the pinion nut from the output gear and remove the output gear from the pinion shaft.
- Page 107 Transmission T-48 AC / ET 3000 Lubricate all parts with gear oil before installation. Failure to pre-lube the parts may result in premature failure. 19. Assemble the gear case in reverse order. Note: Torque the drain plug to the specified amount listed in the Hardware Torque Table at the end of this section. Note: Torque the gear case to 3rd member retaining bolts to the specified amount listed in the Hardware Torque Table at the end of this section.
-
Page 108: Disassembling The 3Rd Member
Transmission T-48 AC / ET 3000 DISASSEMBLING THE 3RD MEMBER 1. Make sure the key-switch is in the “OFF” position, then remove the key. 2. Place the forward-reverse switch in the center “OFF” position. 3. If equipped with a hand operated park brake, set the brake. 4. - Page 109 Transmission T-48 AC / ET 3000 13. Remove the carrier bearing adjusting nut roll pin and adjusting nut from the side plate. 14. Turn the side plate over and remove the carrier bearing race from the side plate. 15. Remove the differential assembly from the 3rd member housing.
- Page 110 Transmission T-48 AC / ET 3000 17. Remove the carrier bearing race from the 3rd member housing. 18. Remove the front bearing from the input shaft. Note: The input shaft may have to be driven out to perform this procedure. 19.
-
Page 111: Assembling The 3Rd Member
Transmission T-48 AC / ET 3000 ASSEMBLING THE 3RD MEMBER 1. Temporarily install the pinion gear (hand tighten only). 2. Install the carrier bearing race ring nuts into the housing and cover. Cover Housing 3. Install the carrier bearing races into the housing and cover. - Page 112 Transmission T-48 AC / ET 3000 10. Mark the position of each carrier bearing ring nut in relation to the drive housing and cover and then remove the differential assembly, do not allow the ring nuts to rotate. 11. Install the pinion gear. Re-shim if required. If the ring and pinion gears or bearings are replaced then the pinion gear must be re- shimmed.
- Page 113 Transmission T-48 AC / ET 3000 17. Install the locking roll pins into the housing and cover to lock the ring nuts in place. 18. Remove the pinion gear holding tool. 19. Install the primary reduction gear case, axles and housings, motor, and install the complete drive onto the vehicle.
-
Page 114: Pinion Bearing Preload
Transmission T-48 AC / ET 3000 Pinion Bearing Preload Note: The pinion gear depth must be set before the preload. Refer to Setting the Pinion Gear Depth 1. Install the pinion gear, spacer, and shims into the housing. 2. Install the outer pinion bearing. 3. -
Page 115: Pinion Gear Shimming Instructions
Transmission T-48 AC / ET 3000 PINION GEAR SHIMMING INSTRUCTIONS Note: This procedure is required only when replacing the front or rear pinion bearings and races or the ring and pinion gears. Note: To perform this procedure, all parts must be clean and the bearings lightly lubricated. -
Page 116: Hardware Torque
Transmission T-48 AC / ET 3000 Note: Values shown are for reference only HARDWARE TORQUE If hardware is not listed here, refer to standard torque values in the appendix. Description Foot Pounds Newton Meters Pinion nut 154-169 209-229 Drain plug 21-25 28.4-33 Gear case to 3rd member... - Page 117 Suspension TABLE OF CONTENTS Suspension Replace the Rear Springs .......2 Replace the Front Springs ......3 Replace the Spring Bushings ......4 Replace the Shocks.........6 Hardware Torque ..........6...
-
Page 118: Replace The Rear Springs
Suspension T-48 AC / ET 3000 REPLACE THE REAR SPRINGS If a spring has failed or is fatigued, then it is recommended that both rear springs are replaced as a set. Hint: In most vehicles it will be easier if the springs are replaced one at a time. -
Page 119: Replace The Front Springs
Suspension T-48 AC / ET 3000 REPLACE THE FRONT SPRINGS If a spring has failed or is fatigued, then it is recommended that both front springs are replaced as a set. Hint: In most vehicles it will be easier if the springs are replaced one at a time. -
Page 120: Replace The Spring Bushings
Suspension T-48 AC / ET 3000 REPLACE THE SPRING BUSHINGS It is recommended that all front spring bushings are replaced as a set. Your vehicle will be equipped with one of two types of spring bushings, internal and external (see illustration to the right): •... - Page 121 Suspension T-48 AC / ET 3000 10. Install the new bushings in reverse order. Hint: Apply a light coating of grease to the bushing before pressing into the spring eye. 11. Install the spring onto the vehicle. Replace the Front Springs Note: Refer to section for information regarding installing the front springs.
-
Page 122: Replace The Shocks
Suspension T-48 AC / ET 3000 REPLACE THE SHOCKS It is recommended to replace all shocks as a set. Note: On some vehicles it may be required to remove the front wheel to gain access to the shock mounting bolts. Refer to Tires and Wheels section for information regarding removing the front wheels. - Page 123 Tires and Wheels TABLE OF CONTENTS Tires and Wheels Tire Inflation .............2 Tire Inspection ..........2 Replace the Tire/Wheel ........3 Repair the Tire (pneumatic) ......4 Replace the Tire (pneumatic) ......5...
-
Page 124: Tire Inflation
Tires and Wheels T-48 AC / ET 3000 TIRE INFLATION 1. Make sure the key-switch is in the “OFF” position, then remove the key. 2. Place the forward-reverse switch in the center “OFF” position. 3. Set the park brake. 4. Place blocks under the front wheels to prevent vehicle movement. 5. -
Page 125: Replace The Tire/Wheel
Tires and Wheels T-48 AC / ET 3000 8. Inspect for uneven tire wear on the front tires. Uneven tire wear could be a result of an improperly inflated tire or a misaligned or damaged front end. Note: Refer to Tire Inflation section or Steering Component Service section for information on proper tire inflation or front end wheel alignment. -
Page 126: Repair The Tire (Pneumatic)
Tires and Wheels T-48 AC / ET 3000 Pattern for tightening the wheel nuts Re-torque all wheel nuts to their final value after 1-week (20-hours) of operation. Failure to re-torque the wheel nuts may result in the wheel coming off of the vehicle causing severe bodily injury and/or property damage. -
Page 127: Replace The Tire (Pneumatic)
Tires and Wheels T-48 AC / ET 3000 REPLACE THE TIRE (PNEUMATIC) Note: To replace the tire, the tire/wheel assembly must be removed Replace the Tire/Wheel from the vehicle. Refer to section for information on removing the tire/wheel assembly. Explosion Hazard. Fully deflate the tire before attempting to remove the tire from the wheel. - Page 128 Notes:...
- Page 129 Battery TABLE OF CONTENTS Battery Cleaning ..........2 Testing ..........3 Watering ..........4 Charging ..........5 Storing ..........5 Storage ..............5 Returning to Service ........... 5 Remove/install ........6 Industrial Battery or Lift Out Battery Pack ..6 Roll Out Battery Box (ROBB) with battery Dolly 7 Individual Batteries ..........
-
Page 130: Cleaning
Battery T-48 AC / ET 3000 CLEANING • Explosive mixtures of Hydrogen gas are 1. Make sure the start switch is in the “OFF” present within battery cells at all times. Do position, then remove the key. not work with or charge battery in an area where open flames (including gas furnace 2. -
Page 131: Testing
Battery T-48 AC / ET 3000 TESTING • Explosive mixtures of Hydrogen gas are DO NOT attempt the test the specific gravity of present within battery cells at all times. Do a sealed battery. Removing the caps of a sealed not work with or charge battery in an area battery will damage the battery resulting in where open flames (including gas furnace... -
Page 132: Watering
Battery T-48 AC / ET 3000 WATERING • Do not overfill the batteries. Over filling the Explosive mixtures of Hydrogen gas are present within battery cells at all times. Do batteries may cause the batteries to boil over not work with or charge battery in an area and result in severe bodily injury or property damage. -
Page 133: Charging
Battery T-48 AC / ET 3000 CHARGING STORING Refer to the Operator Section for charging information. Storage Thoroughly clean the battery and battery compartment. Refer to in this section for information Cleaning • regarding cleaning the battery. Explosive mixtures of Hydrogen gas are present within battery cells at all times. -
Page 134: Remove/Install
Battery T-48 AC / ET 3000 REMOVE/INSTALL • Explosive mixtures of Hydrogen gas are present within battery cells at all times. Do not work with or charge battery in an area where open flames (including gas furnace or water heater pilots), sparks, cigarettes, or any other sources of combustion are present. -
Page 135: Roll Out Battery Box (Robb) With Battery Dolly
Battery T-48 AC / ET 3000 Roll Out Battery Box (ROBB) with battery Dolly 5. Untie the ROBB from the dolly and push forward until it starts to enter the vehicle. 1. Make sure the start switch is in the “OFF” 6. - Page 136 Notes Battery T-48 AC / ET 3000 MB-T48-02 Page 8...
- Page 137 Wire Diagrams The vehicle wiring diagram is too large to be legible when printed at this size. A full size diagram (22 x 16) is included on the CD in PDF format. You can access the diagram from a button on the CD menu. The diagram # is SCH-00021 Charger AC Cords: If you are not familiar with standard AC power wiring, then...
- Page 138 Notes...
- Page 139 Motor Controller TABLE OF CONTENTS Motor Controller Remove/Install ..........2 Remove ..............2 Install ...............2 Inspect ..............2 Troubleshooting ..........2 Repair/Programming ........3 Hardware Torque ..........3 This section is one section of a complete service manual. Before starting any procedure, read all warnings and instructions that are located in the Service Guidelines chapter.
- Page 140 The manual part number is M7-001-69 and was provided on the original vehicle CD. A hard copy can be purchased Install from your authorized Taylor-Dunn distributor or can be 1: Thoroughly clean the controller base, mounting downloaded from the Taylor-Dunn web site.
- Page 141 1314 application and cable. Refer to the Tools section for part numbers. If you have a special application that may require modified parameters, contact your local authorized Taylor-Dunn distributor to submit a request to the factory. Note: There may be a fee to created a custom parameter set.
- Page 142 Motor Controller Notes T-48 AC / ET 3000 MB-T48-02 Page 4...
- Page 143 Chargers TABLE OF CONTENTS Chargers Remove/Install ..........2 Troubleshooting ..........2 This section is one section of a complete service manual. Before starting any procedure, read all warnings and instructions that are located in the Service Guidelines chapter.
- Page 144 Service Guidelines chapter. The manual part number is M7-001-69 and was provided on the original vehicle CD. A hard copy can be purchased from your authorized Taylor-Dunn distributor or can be downloaded from the Taylor-Dunn web site. HIGH VOLTAGE. Disconnect the batteries and make sure that the AC power cord has been unplugged before disconnecting any wires or removing the cover of the charger.
- Page 145 Illustrated Parts TABLE OF CONTENTS Illustrated Parts Axles ............2 Batteries .............4 Brake Identification ........6 Brakes (Short Bushing) ......7 Brakes (Long Bushing) .......10 Brake Lines ..........12 Cab Components (ET 3000) ......14 Cab Options ..........16 Cargo Box, Rear ........18 Chargers ............20 Charger Wiring, Portable ......25 Decals ............26 Covers ............27 Door Options ..........28...
-
Page 146: Axles
Illustrated Parts T-48 AC / ET 3000 Axles Front Axle Item No. Part No. Description 15-210-70 Axle Beam, B 2-48, BT 2-48, B 2-54 15-049-15 Complete axle assembly MB-T48-02 Page 2... - Page 147 Illustrated Parts T-48 AC / ET 3000 Inner bearing on optional double bearing axle does not have an oil seal or o-ring. Orientation of bearing should have o-ring groove adjacent to o-ring on outer bearing. Rear Axle Item No. Part No. Description 41-154-15 Axle shaft...
-
Page 148: Batteries
Illustrated Parts T-48 AC / ET 3000 Batteries MB-T48-02 Page 4... - Page 149 Not shown 77-055-15 Battery watering system for Trojan batteries (optional) 77-055-12 Battery watering system for Exide or Taylor-Dunn batteries (optional) 77-055-13 BATTERY FILLING GUN, used with watering systems (optional) 01-534-43 Battery locator (angle in bottom of battery box, 72 v only) Quantities depend on voltage configuration of vehicle.
-
Page 150: Brake Identification
Illustrated Parts T-48 AC / ET 3000 Brake Identification This is an example of a Short bushing Left and right brake assemblies must be the same. Mismatched brake assemblies can cause uneven brake ware, and could result in bodily injury and/or property damage. -
Page 151: Brakes (Short Bushing)
Illustrated Parts T-48 AC / ET 3000 Brakes (Short Bushing) Rear Brakes Item No. Part No. Description 99-588-00 Bleeder valve 99-588-01 Bleeder adaptor 41-348-70 Brake pad 41-351-30 Brake body assembly (includes 3, 4, 5, 8, 9, 10) 32-240-41 Bushing 41-348-57 Spacer 88-067-21 Bolt... - Page 152 Illustrated Parts T-48 AC / ET 3000 Front Brake MB-T48-02 Page 8...
- Page 153 Illustrated Parts T-48 AC / ET 3000 Front Brake Item No. Part No. Description 88-067-29 Bolt, 1/4 X 3-3/4” NC, Hex Head, Gr. 8 41-350-91 Plate, Secondary, Hydraulic Disc 41-348-70 Pad, Disc Brake 41-348-57 Spacer, Disc Brake 32-240-41 Bearing TeflonR Coated 99-588-00 Bleeder screw 99-588-01...
-
Page 154: Brakes (Long Bushing)
Illustrated Parts T-48 AC / ET 3000 Brakes (Long Bushing) Rear Brake Item No. Part No. Description 41-351-35 Brake assembly (Mounting bracket 41-350-35 not included) Brake body 32-208-01 Bushing (included in rebuild kit) 41-348-52 Spacer (included in rebuild kit) 41-350-35 Mounting Bracket ( rear brake only) 41-350-91 Secondary Plate... - Page 155 Illustrated Parts T-48 AC / ET 3000 Front Brakes Item No. Part No. Description 88-067-29 Bolt 88-069-82 41-350-91 Plate, Secondary 41-348-52 Spacer 32-208-01 Bushing (included in rebuild kit) Brake body assembly (no internally serviceable parts) 99-588-01 Bleeder adaptor 99-588-00 Bleeder valve See rebuild kit Brake pad, Inner See rebuild kit...
-
Page 156: Brake Lines
Illustrated Parts T-48 AC / ET 3000 Brake Lines MB-T48-02 Page 12... - Page 157 Illustrated Parts T-48 AC / ET 3000 Brake Lines Item No. Part No. Description 99-648-52 BRAKE LINE, FORMED, FRT, RIGHT 99-648-51 BRAKE LINE, FORMED, FRT, LEFT 99-564-00 UNION T, 3/16 INV FLARE 99-580-10 HOSE,BRK,W/3/8-24M &3/16MTF 99-576-00 Clip 88-527-11 Cotter pin 96-772-00 Clevis pin 88-119-80...
-
Page 158: Cab Components (Et 3000)
Illustrated Parts T-48 AC / ET 3000 Cab Components (ET 3000) 1, 2 Door Latch 5, 6 MB-T48-02 Page 14... - Page 159 Illustrated Parts T-48 AC / ET 3000 Cab Components Item No. Part No. Description 90-854-10 Window, Door, Left, 3 Pieces 90-854-20 Window, Door, Right, 3 Pieces 90-854-01 Latch, Window, Door 91-017-02 Strap, Door, Brackets Included 91-017-31 Handle, Inside, Door, Left 91-017-32 Handle, Inside, Door, Right 72-015-10...
-
Page 160: Cab Options
Illustrated Parts T-48 AC / ET 3000 Cab Options Cab, ET-3000 Fiberglass cab, T-48 Steel Cab, T-48 MB-T48-02 Page 16... - Page 161 Illustrated Parts T-48 AC / ET 3000 Cab (ET 3000) Item No. Part No. Description 91-017-60 Fiberglass cab 90-854-10 Window, Door, Left, 3 Pieces 90-854-20 Window, Door, Right, 3 Pieces 90-854-01 Latch, Window, Door 91-017-02 Strap, Door, Brackets Included 91-017-31 Handle, Inside, Door, Left 91-017-32 Handle, Inside, Door, Right...
-
Page 162: Cargo Box, Rear
Illustrated Parts T-48 AC / ET 3000 Cargo Box, Rear MB-T48-02 Page 18... - Page 163 Illustrated Parts T-48 AC / ET 3000 Rear Cargo Box Item No. Part No. Description 91-333-02 Cargo box (unpainted) 90-471-00 Front deck board 90-472-00 Rear deck board 90-850-10 Front window 98-310-00 Rubber window gasket (by the foot) 90-851-00 Rear window Not shown 94-320-10 Load line decal...
-
Page 164: Chargers
Illustrated Parts T-48 AC / ET 3000 Chargers Lestronic® Charger (Page 1) MB-T48-02 Page 20... - Page 165 Illustrated Parts T-48 AC / ET 3000 MB-T48-02 Page 21...
- Page 166 Illustrated Parts T-48 AC / ET 3000 Lestronic® Charger (Page 2) MB-T48-02 Page 22...
- Page 167 Illustrated Parts T-48 AC / ET 3000 MB-T48-02 Page 23...
- Page 168 Illustrated Parts T-48 AC / ET 3000 Signet® Charger (Page 1) Model HBS series charger shown Chargers for Flooded Batteries PART # DESCRIPTION 79-309-42 48 volt charger assembly (see note) Chargers for GEL Batteries PART # DESCRIPTION 79-309-43 48 volt charger assembly (see note) * - Not available at time of printing Note: There are no user serviceable components inside the charger Note: The charger AC cord is an intergral part of the charger.
-
Page 169: Charger Wiring, Portable
Illustrated Parts T-48 AC / ET 3000 X-Series Charger ** - AC cord has integral NEMA plug. Item No. Part No. Description 79-303-49 Charger Assembly, X-Series, 48 volt 79-831-00 Fuse 79-809-61 Relay board assembly Control board assembly 79-749-14 SCR assembly 79-840-02 Circuit breaker 79-848-01... -
Page 170: Decals
Illustrated Parts T-48 AC / ET 3000 Decals MB-T48-02 Page 26... -
Page 171: Covers
Illustrated Parts T-48 AC / ET 3000 Decals Item No. Part No. Description 94-301-41 Brake fluid 94-384-24 Emergency stop 94-301-42 Arms and legs 94-384-21 Brake warning 94-384-01 Not a motor vehicle 94-384-14 When leaving vehicle warning 94-313-20 Safety warning 94-384-17 Do not wash 94-384-06 Emergency brake bypass switch... -
Page 172: Door Options
Illustrated Parts T-48 AC / ET 3000 Door Options MB-T48-02 Page 28... - Page 173 Illustrated Parts T-48 AC / ET 3000 Cab Doors Naugahyde (Steel Cab) Item No. Part No. Description 90-923-98 Door Frame, Left 90-924-98 Side Curtain, Left 97-315-53 Handle Assembly, Outer 97-315-51 Door Latch 97-315-54 Handle Assembly Inside 97-303-03 Snap Fastener 88-727-06 Rivet, 5/32 X 5/8”...
- Page 174 Illustrated Parts T-48 AC / ET 3000 Cab Doors Naugahyde (Fiberglass Cab, T-48) Item No. Part No. Description 00-248-37 Door Frame, Left 00-248-38 Door Frame, Right 98-451-11 Weather seal tape (by the foot) 90-909-97 Side Curtain, Left 90-909-96 Side Curtain Right 97-315-59 Handle Assembly, Outer 97-315-51...
- Page 175 Illustrated Parts T-48 AC / ET 3000 MB-T48-02 Page 31...
-
Page 176: Electrical, Lighting
Illustrated Parts T-48 AC / ET 3000 Electrical, Lighting Stobe Light T-48 cowl or steel cab ET-3000 T-48 fiberglass cab MB-T48-02 Page 32... - Page 177 Red lens Not shown 72-023-21 Replacement bulb * -There are many special order types of mounting configurations. Contact your Taylor-Dunn distributor with the serial number of the vehcle for more information. Head and Tail Lights Item No. Part No. Description...
-
Page 178: Electrical, Miscellaneous
Illustrated Parts T-48 AC / ET 3000 Electrical, Miscellaneous Motion Alarms Miscellaneous Wire Harness Clamps MB-T48-02 Page 34... - Page 179 Illustrated Parts T-48 AC / ET 3000 Miscellaneous Electrical Item No. Part No. Description 73-005-05 Reverse Warning alarm 96-650-01 Wire Harness Clip, stick on 96-642-00 Wire harness Clip, push mount 62-033-48 Throttle Module, 48-volt system 62-033-47 Throttle module, 72-volt system 71-122-20 Horn Switch 88-065-06...
-
Page 180: Frame Components
Illustrated Parts T-48 AC / ET 3000 Frame Components ET 3000 7,15 12,13 21,22 14,15 23,24, 3, 4 5, 6 MB-T48-02 Page 36... - Page 181 Illustrated Parts T-48 AC / ET 3000 Miscellaneous Frame Components (ET 3000) Item No. Part No. Description 90-854-50 Window, Rear 98-319-00 Molding, Window, Rear 91-017-11 Mirror, Door, Left 91-017-12 Mirror, Door, Right 91-017-33 Handle, Outside, Door, Left 91-017-34 Handle, Outside, Door, Right 72-025-00 Tail and Brake Light (Rubber Seal Included) Aluminum Side panels...
- Page 182 Illustrated Parts T-48 AC / ET 3000 Miscellaneous Frame Components (T-48) Item No. Part No. Description 79-511-00 Charger AC cord holder 79-530-00 Charger AC cord strain relief 79-575-25 Charger cord, Lester charger only 30-807-00 COVER,STEERING GEAR SUPT 01-110-20 Throttle pedal 98-200-00 Rubber brake pedal pad 02-210-25...
-
Page 183: Hitches
Illustrated Parts T-48 AC / ET 3000 Hitches Trailer Hitches Item No. Part No. Description 97-811-00 1-7/8 inch Ball 97-821-00 2-inch Ball 88-140-14 1/2NC x 1-1/2 Hex bolt 88-149-80 1/2NC Hex nut 88-148-62 1/2 Split lock washer MB-T48-02 Page 39... -
Page 184: Instrument Panel
Illustrated Parts T-48 AC / ET 3000 Instrument Panel Instrument Panel (Up To S/N 179999) Item No. Part No. Description 71-102-15 Horn switch 71-039-02 F&R switch 71-039-11 Light switch High / Low speed switch 74-010-20 Gauge, Spy Glass 71-100-00 Auxiliary switches 0, 1, 2 71-120-10 Start switch (standard) - Page 185 Illustrated Parts T-48 AC / ET 3000 Instrument Panel (S/N Starting 180000) Item No. Part No. Description 71-039-11 Light switch 71-039-11 Wiper Switch 0, 1 71-039-11 Strobe switches 0, 1 71-039-02 F&R switch 71-039-11 High / Low speed switch 74-010-20 Gauge, Spy Glass 71-102-15 Horn switch...
- Page 186 Illustrated Parts T-48 AC / ET 3000 Instrument Panel, ET 3000 (Starting 180000) Item No. Part No. Description 71-039-11 Light switch 71-039-11 Accessory (Wiper) 0, 1 74-010-00 Gauge, Smart View 71-039-02 F&R switch 71-039-11 Accessory 0, 1 71-120-10 Start Switch 71-102-15 Horn Switch 71-070-00...
-
Page 187: Mirrors
Illustrated Parts T-48 AC / ET 3000 Mirrors Mirrors Item No. Part No. Description 92-202-21 92-202-23 Bracket 92-202-22 Joint 88-080-14 5/16NC x 1-1/2 Hex bolt 88-088-61 5/16 SAE flat washer 88-089-81 5/16NC Lock nut 88-088-62 5/16 Split lock washer 88-089-80 5/16NC Hex nut 88-080-14 5/16NC x 1-1/2 Hex bolt... -
Page 188: Motor
Illustrated Parts T-48 AC / ET 3000 Motor MB-T48-02 Page 44... - Page 189 Illustrated Parts T-48 AC / ET 3000 70-059-41 Motor Spec # ZFB40SO/4 DF100L-4 Item No. Part No. Description 41-354-05 Brake 70-400-14 Snap ring 70-400-12 Fan Shroud 70-400-11 70-400-15 O-ring 70-400-16 70-400-17 Snap ring 70-400-21 70-400-18 Snap ring 70-400-19 Snap ring 70-400-13 Seal 70-400-09...
-
Page 190: Motor Mount
Illustrated Parts T-48 AC / ET 3000 Motor Mount Apply 94-421-34 grease to inside of motor coupler Motor Mount Item No. Part No. Description See Motor Motor 96-114-12 U-bolt 80-714-05 O-ring 88-068-62 1/4 Split lock washer 89-060-11 6mm x 1.0 x 50 Hex bolt 89-111-27 10mm x 1.5 x 20 Hex bolt 88-128-62... -
Page 191: Seat Cushions And Deck
Illustrated Parts T-48 AC / ET 3000 Seat Cushions and Deck Seats and Deck Item No. Part No. Description 90-140-00 Backrest, standard 90-179-00 Backrest, Steel Cab 90-150-00 Seat Cushion, standard 90-172-00 Seat cushion, steel cab 90-444-00 Deck board, standard 90-466-10 DECKBOARD, 19.500 X 41.000 90-467-10 DECKBOARD, 55-3/4 X 41... -
Page 192: Speed Control Panel
Illustrated Parts T-48 AC / ET 3000 Speed Control Panel Typical, 48 volt shown Resetting the Maintenance Meter Function NOTE: The Maintenance meter function is optional. The controller handset is required to reset the Maintenance meter. Refer to the Appendix for the part number of the handset. - Page 193 Illustrated Parts T-48 AC / ET 3000 Speed Control Panel Item No. Part No. Description 73-005-01 Motion alarm 62-400-40 Motor speed control, 48 volt 62-400-05 Motor speed control, 72 volt 89-080-16 8mm x 1.25 x 16mm Hex bolt 89-060-17 8mm Lock washer 02-425-17 Controller base, 1/4 plate 02-425-18...
-
Page 194: Stake Sides (T-48)
Illustrated Parts T-48 AC / ET 3000 Stake Sides (T-48) Item No. Part No. Description 90-542-01 GATE, END, W/HOOKS 42-3/4 90-542-08 GATE SIDE, LT, TT, W/F G CAB 90-542-09 GATE SIDE, RT, TT, W/F G CAB MB-T48-02 Page 50... -
Page 195: Steering Column
Illustrated Parts T-48 AC / ET 3000 Steering Column Steering Column Item No. Part No. Description 88-199-82 5/8NF Hex nut 19-011-20 Steering wheel 88-081-14 5/16NF x 1-1/2 Hex bolt, grade 8 88-089-84 5/16NF Hex lock nut, grade C 32-248-10 Upper bushing 20-031-65 Steering shaft assembly (incl. -
Page 196: Steering Gear
Illustrated Parts T-48 AC / ET 3000 Steering Gear MB-T48-02 Page 52... - Page 197 Illustrated Parts T-48 AC / ET 3000 Steering Gear 18-308-21 Item No. Part No. Description 18-308-70 Locknut 18-308-71 Adjuster assembly 18-308-72 Worm assembly 18-308-23 Upper worm bearing 18-308-22 Upper worm bearing race 18-308-77 Housing 18-308-78 Seal, pitman shaft 18-308-80 Nut, pitman shaft 18-308-81 Lock washer 18-308-79...
-
Page 198: Steering Knuckle
Illustrated Parts T-48 AC / ET 3000 Steering Knuckle MB-T48-02 Page 54... - Page 199 Illustrated Parts T-48 AC / ET 3000 Steering Knuckle Item No. Part No. Description 88-239-86 3/4-NF Hex Slotted Nut 88-228-60 3/4 Cut Flat Washer 98-603-07 Rubber Bushing 01-220-99 Washer 32-240-44 Bushing 32-240-43 Bushing 80-309-12 Thrust Bearing 45-338-00 Grease Seal 80-017-00 Tapered Bearing 80-103-00 Tapered Bearing Race...
-
Page 200: Steering Linkage
Illustrated Parts T-48 AC / ET 3000 Steering Linkage MB-T48-02 Page 56... - Page 201 Illustrated Parts T-48 AC / ET 3000 Steering Linkage Item No. Part No. Description 18-057-00 Tie rod 86-510-00 Ball joint clamp 86-501-98 Ball joint (left) 86-501-99 Ball joint (right) 88-527-11 1/8 x 1 Cotter pin 18-037-00 Drag link 88-159-85 1/2NF Castle nut 18-104-00 Pitman Arm MB-T48-02...
-
Page 202: Suspension
Illustrated Parts T-48 AC / ET 3000 Suspension Front Suspension Item No. Part No. Description 96-121-00 U-bolt 85-498-00 Leaf spring 32-214-50 Bushing 96-240-00 1/2NC x 4 Hex bolt 88-149-81 1/2NC Lock nut 88-149-81 1/2NC Lock nut 16-872-00 Spring hanger Not shown 86-015-00 Shock MB-T48-02... - Page 203 Illustrated Parts T-48 AC / ET 3000 Rear Suspension Item No. Part No. Description 85-510-17 Leaf spring 16-861-46 Spring mounting plate (left) 16-861-47 Spring mounting plate (right) 96-114-00 U-bolt 88-159-84 1/2NC Nylon lock nut 96-103-00 U-bolt 88-149-81 1/2NC Lock nut 50-460-00 Strap 98-002-00...
-
Page 204: Transmission Differential/Gear Case
Illustrated Parts T-48 AC / ET 3000 Transmission Differential/Gear Case MB-T48-02 Page 60... - Page 205 Illustrated Parts T-48 AC / ET 3000 Transmission Differential/Gear Case Item No. Part No. Description GT-71682 M8 x 60 bolt GT-3287563 Gear case cover GT-71259 Bearing GT-3287513 Input shaft, 30:1 0 or 1 GT-3287523 Input shaft, 24:1 0 or 1 GT-3287533 Input shaft, 18:1 0 or 1...
-
Page 206: Wheels And Tires
Illustrated Parts T-48 AC / ET 3000 Wheels and Tires Item No. Part No. Description Wheels 12-025-00 8 x 10 Wheel Tires 10-264-00 TIRE, 20.5X8X10 LR-E, tubeless 97-236-00 Wheel Nut 13-989-00 Valve stem, tubeless tire only Tire and Wheel Assemblies 13-746-14 TIRE,ASSY, 20.5X8X10,LD RNG E Wire Harnesses... - Page 207 Appendixes TABLE OF CONTENTS Appendixes Appendix A: Special Tools ....2 Appendix A: Special Tools ....3 Appendix B: Suggested Torque Limits for Standard Hardware ......4 Hardware Identification ....... 4 Standard Head Markings ........4 Hex Bolts ............4 Other Bolts ............
-
Page 208: Appendix A: Special Tools
Appendix T-48 AC / ET 3000 APPENDIX A: SPECIAL TOOLS Note: This is a listing of all tools available. Not all tools would be required for all vehicles. Refer to the Maintenance, Repair, and Troubleshooting sections for information on tools required. 75-089-00: Throttle Module Test Harness 62-027-32: Throttle Module Analyzer Used in conjunction with a volt meter to test... - Page 209 Molex # 11-300-06: Pin Removing Tool Removes 0.062 diameter pins from Molex Removes 0.093 diameter pins from Molex rectangular harness connectors. Not rectangular harness connectors. Not available from Taylor-Dunn. Purchase from available from Taylor-Dunn. Purchase from any local electronics distributor. any local electronics distributor. Appendixes...
-
Page 210: Appendix B: Suggested Torque Limits For Standard Hardware
Appendix T-48 AC / ET 3000 APPENDIX B: SUGGESTED TORQUE LIMITS FOR STANDARD HARDWARE HARDWARE IDENTIFICATION Standard Head Markings Note: Torque value used should be for lowest grade of hardware used. If a grade 2 nut is used on a grade 8 bolt, use grade 2 torque value. -
Page 211: Hex Nuts
Nuts with no markings are to be treated as S.A.E. Grade A S.A.E. Grade B S.A.E. Grade C Grade L’9 Other Nuts Other nuts used by Taylor-Dunn should be treated as S.A.E. grade A ® *Not available at time of printing Appendixes... -
Page 212: Generic Torque Values
Appendix T-48 AC / ET 3000 Generic Torque Values All torque values are for clean dry zinc plated threads in noncritical steel assemblies of the same hardess specification. Reduce torque approximately 10-15% for lubricated threads. Refer to the service section assembly procedure for critical torque values. Imperial (inch), Foot Pounds Imperial (inch), Newton Meters Grade, SAE... - Page 213 Appendix T-48 AC / ET 3000 All torque values are for clean dry zinc plated threads in noncritical steel assemblies of the same hardess specification. Reduce torque approximately 10-15% for lubricated threads. Refer to the service section assembly procedure for critical torque values. Metric, Newton Meters Metric, Foot Pounds Grade, N-m...
-
Page 214: Appendix C: Brake Lining Handling Precautions
Appendix T-48 AC / ET 3000 APPENDIX C: BRAKE LINING HANDLING PRECAUTIONS Taylor-Dunn does not currently supply asbestos fiber-brake pads/shoes with any vehicle. However, there is the possibility that the original brake pads/shoes were replaced with aftermarket pads/shoes containing asbestos. Since this possibility does exist, the brake pads/shoes should be handled as if they do contain asbestos. - Page 215 Notes:...
- Page 216 Taylor-Dunn® Mfg. 2114 W. Ball Rd. Anaheim, CA 92804 (800)-688-8680 (714) 956-4040 (FAX) (714) 956-0504 Visit our Website: www.taylor-dunn.com...
Need help?
Do you have a question about the ET-3000 and is the answer not in the manual?
Questions and answers