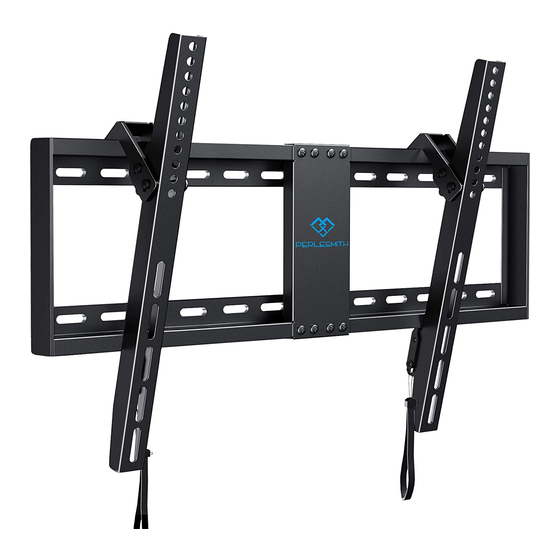
Summary of Contents for Perlesmith PSLTK1
- Page 1 Tilting TV Wall Mount Instruction Manual Model : PSLTK1 For any parts enquiries, please contact AV Supply Group as below: New Zealand: P: 64 9 274 9172 E: info@avsupply.co.nz Australia: P: 61 3 9071 4585 E: info@avsupplygroup.com.au...
-
Page 2: Weight Restrictions
Please carefully read all instructions before attempting installation. If you do not understand the instructions or have any concerns or questions, please contact our customer service at supportus@perlesmith.com. CAUTION: Avoid potential personal injuries and property damage! • Do not use this product for any purpose that is not explicitly specified in this manual. -
Page 3: Supplied Parts And Hardware
Before starting assembly, verify all parts are included and undamaged. Do not use damaged or defective parts. lf you require replacement parts, please contact our customer service at supportus@perlesmith.com. • PLEASE NOTE: Not all hardware included in this package will be used. - Page 4 Washers Spacers [if needed] NOTE: The spacers shown are actual size. M4 / M5 [B1] x 4 M6 / M8 [B2] x 4 [F1] [F2] [F3] L2.5mm L10mm L22mm TV Bolts [Only one size of the bolt fits your TV] NOTE: The bolts shown are actual size.
- Page 5 IMPORTANT: When using the spacers, it is important to note that they can be used in multi-layers (meaning stacked). If you have any difficulty undestand- ing how to install the TV bolts or spacers, please contact customer service at supportus@perlesmith.com.
- Page 6 CAUTION: When attaching the TV brackets [03] and [04] to the back of the TV, ensure the ends with round holes on the TV brackets are pointing to the top of the TV and are equally centered on the back of the TV. PLEASE NOTE: The bolt hole locations on your TV may vary in accordance of the manufacturer's...
- Page 7 Option C (For TV with A “Bump”) C2 / D2 / E2 / E3 B1 / B2 F1 / F2 / F3 Alternate Spacer Setups Option D For cable interference or inset holes, use spacers [06] to create extra space between the TV and TV brackets. F1 / F2 / F3 C2 / D2 / E2 / E3 B1 / B2...
- Page 8 Step 2 Assemble the Wall Plate [01] and [02] 2-1 Loosen 4 preassembled bolts [S1] using Phillips screwdriver and keep for the use in 2-2. 2-2 Secure the right wall plate [01] to the left wall plate [02] by tightening the bolts [S1].
- Page 9 3A-1 Stud Finder (NOT lncluded) (NOT lncluded) Use a stud finder (NOT included) to locate wood studs or use an awl (NOT included) to verify the edges. Mark the edge and center locations. 3A-2 Pencil (NOT lncluded) Position the wall plate [01] and [02] at your desired height and line up the holes with your stud center line.
- Page 10 3A-4 1/2” (13mm) Socket Wrench (NOT lncluded) Install the wall plate [01] and [02] using lag screws [A1]. Tighten the lag screws [A1] only until they are pulled firmly against the wall plate [01] and [02]. Do not over-tighten the lag screws [A1].
- Page 11 3B-2 Drill 4 pilot holes using a 3/8” (10mm) diameter drill bit. Make sure the depth is NOT less than 3” (75mm). NEVER drill into the mortar between the blocks. 3” (75mm) Drill (NOT lncluded) ø3/8” (10mm) 3B-3 Use the hammer to knock anchors [A2] into the wall.
- Page 12 Verify TV Plate Installation by Putting Pressure on TV Step 4 Plate Before attaching the TV to the mount, please try to pull down the TV wall mount with your hands to check whether it is firmly secured. Step 5 Adjust Tilt Angle of TV Slightly loosen 4 preassembled tilt tension bolts [S] in brackets [03] and [04].
- Page 13 Step 6 Secure the TV onto the Wall Plate [01] and [02] 1. Hang the TV with brackets [03] and [04] onto the wall plate [01] and [02]. 2. While pulling and holding both ropes [R] , press the bottom of the TV into the wall plate [01] and [02] until the latches lock the wall plate [01] and [02], then release the ropes [R].
- Page 14 Step 7 Remove the TV 1. Disconnect all cables, pull down and hold both ropes [R] while gently pulling the bottom of the TV away from the wall. CAUTION: Avoid potential personal injury or property damage! To prevent breaking the locking latches, always pull and hold the ropes [R] down while pulling the TV away from the wall.


Need help?
Do you have a question about the PSLTK1 and is the answer not in the manual?
Questions and answers