
Related Manuals for Wilo Control EC-L1 Series


Summary of Contents for Wilo Control EC-L1 Series
- Page 1 Pioneering for You Wilo-Control EC-L en Installation and operating instructions · 2543252 • Ed.04/2022-09 [HW: 1&2 / SW: 2.x]...
- Page 2 Control EC-L https://qr.wilo.com/1401...
-
Page 3: Table Of Contents
Quick access to “Easy Actions”......... 29 Factory settings .............. 30 8 Commissioning ................. 30 Operator responsibilities............ 30 Commissioning in explosive atmospheres ...... 30 Connection of signal transmitters and pumps within po- tentially explosive atmospheres ........ 31 Activating the device ............ 31 Installation and operating instructions • Wilo-Control EC-L • Ed.04/2022-09... -
Page 4: General Information
All rights reserved. Subject to change Wilo shall reserve the right to change the listed data without notice and shall not be liable for technical inaccuracies and/or omissions. The illustrations used may differ from the ori- ginal and are intended as an example representation of the device. -
Page 5: Personnel Qualifications
Electrical work: qualified electrician Person with appropriate technical training, knowledge and ex- perience who can identify and prevent electrical hazards. • Installation/dismantling work: qualified electrician Knowledge regarding tools and fixation material for various structures Installation and operating instructions • Wilo-Control EC-L • Ed.04/2022-09... -
Page 6: Electrical Work
Do not use any aggressive cleaners or scouring agents or fluids. • The product is not watertight. Do not submerse the product in fluids. • Only carry out maintenance tasks mentioned in these installa- tion and operating instructions. Installation and operating instructions • Wilo-Control EC-L • Ed.04/2022-09... -
Page 7: Operator Responsibilities
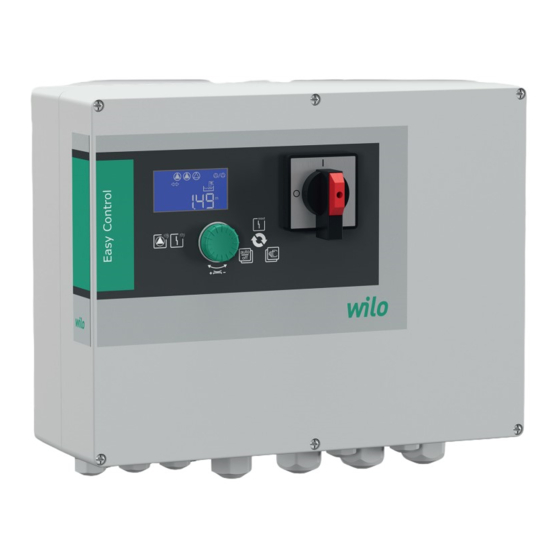
LEDs. Operation and input of operating parameters is carried out using a rotary knob. NOTICE! Control EC-L3 ...: A max. of 2 pumps can be actuated with level measurement using a float switch! Operating modes The switchgear has two different operating modes: Installation and operating instructions • Wilo-Control EC-L • Ed.04/2022-09... -
Page 8: Technical Data
Thermal winding monitor (PTC) − − − (Electrode) leakage detection Other inputs Extern OFF: for remote switch off of all pumps In “fill” operating mode, dry-running protection is realised via this input. Installation and operating instructions • Wilo-Control EC-L • Ed.04/2022-09... -
Page 9: Type Key
The transport company or the manufacturer must be notified of any defects the day the shipment is received, and the damage noted on the freight documentation. Claims cannot be asserted if the notification of defects takes place at a later date. Installation and operating instructions • Wilo-Control EC-L • Ed.04/2022-09... -
Page 10: Transport
Seal unused threaded cable glands. • Ensure that the following ambient conditions are adhered to: – Ambient/operating temperature: -30 … +50 °C – Relative humidity: 40 … 50 % – Max. relative humidity: 90 %, non-condensing Installation and operating instructions • Wilo-Control EC-L • Ed.04/2022-09... - Page 11 Dynamic pressure bell Only “IPS” version! Set the switching point in the menu. • Separate float switch • Separate electrode – Only Control EC-L1 ... and EC-L2 ... – Hardware version 2 or higher Installation and operating instructions • Wilo-Control EC-L • Ed.04/2022-09...
- Page 12 Operating mode “fill”: A forced switch-off of all pumps always takes place in the event of an alarm, irrespective of the selected signal transmitter! The pumps must be activated for the forced switch-on: • Menu 3.01: Pumps are enabled. • Extern OFF: Function is inactive. Installation and operating instructions • Wilo-Control EC-L • Ed.04/2022-09...
-
Page 13: Electrical Connection
• Route connection cable in accordance with the local guidelines. • Do not damage the connection cable during routing or installation. • Earth the switchgear and all electrical consumers. Installation and operating instructions • Wilo-Control EC-L • Ed.04/2022-09... - Page 14 Contactor combinations Output relay Control board Potentiometer for motor current monitoring ModBus RTU: RS485 interface Dynamic pressure bell pressure connection (“IPS” version only) ModBus RTU: Jumper for termination/polarisation Slot 9 V rechargeable battery Installation and operating instructions • Wilo-Control EC-L • Ed.04/2022-09...
- Page 15 400 V at the factory. To use another mains voltage, change the position of the cable jumper before connection. If the wrong mains voltage is set, the switchgear will be destroyed! Installation and operating instructions • Wilo-Control EC-L • Ed.04/2022-09...
- Page 16 The rotating field is routed from the mains connection directly to the pump connection. Check the required rotating field of the pumps to be connected (clockwise or counter-clockwise)! Observe the installation and operating instructions of the pumps. Installation and operating instructions • Wilo-Control EC-L • Ed.04/2022-09...
- Page 17 • Observe the section on explosive atmospheres in the appendix. • Connection must be carried out by a qualified electrician. CAUTION Do not apply external voltage! An external voltage which is applied destroys the component. Installation and operating instructions • Wilo-Control EC-L • Ed.04/2022-09...
- Page 18 • Connection must be carried out by a qualified electrician. CAUTION Do not apply external voltage! An external voltage which is applied destroys the component. The level can be measured via the following signal transmitters: • Level sensor Installation and operating instructions • Wilo-Control EC-L • Ed.04/2022-09...
- Page 19 Risk of explosion if the level monitor is installed in potentially explosive areas! The NW16 level monitor does not have its own explosive protection class. • The NW16 level monitor may only be installed outside potentially ex- plosive atmospheres! Installation and operating instructions • Wilo-Control EC-L • Ed.04/2022-09...
- Page 20 Insert the connection cables laid by the customer through the threaded cable glands and se- cure. Remove the converter bridge and connect the wires to the terminal strip according to the connection diagram. Use the terminal number shown in the connection overview on the cover. Installation and operating instructions • Wilo-Control EC-L • Ed.04/2022-09...
- Page 21 6.5.10 “Extern OFF” connection: Remote CAUTION deactivation Do not apply external voltage! An external voltage which is applied destroys the component. Installation and operating instructions • Wilo-Control EC-L • Ed.04/2022-09...
- Page 22 There is a risk of fatal injury! • Disconnect external power supply before any work! • Electrical work must be carried out by a qualified electrician! • Observe local regulations! Installation and operating instructions • Wilo-Control EC-L • Ed.04/2022-09...
- Page 23 The number shown in location “x” on the symbol indicates which pump it refers to: • 1 = pump 1 • 2 = pump 2 Fig. 21: Connection overview symbol • 3 = pump 3 Installation and operating instructions • Wilo-Control EC-L • Ed.04/2022-09...
- Page 24 Mains-independent alarm The alarm sounds as soon as the rechargeable battery is inserted. The alarm can only be switched off by removing the rechargeable battery again or by connecting the power supply. Installation and operating instructions • Wilo-Control EC-L • Ed.04/2022-09...
-
Page 25: Operation
Once the deactivation point has been reached, both pumps are switched off after the deac- tivation delay has elapsed. To optimise pump running times, pump cycling is carried out every time the pump is switched off. Installation and operating instructions • Wilo-Control EC-L • Ed.04/2022-09... - Page 26 If the min. water level is monitored by a separate float switch, the system can continue running in emergency operation. The activation and deactivation points are defined by the hysteresis of the float switch. Installation and operating instructions • Wilo-Control EC-L • Ed.04/2022-09...
-
Page 27: Operating Modes
The float switch should be equipped with a NO contact: Once the switching point has been reached, the contact is closed. Fig. 24: Illustration of the switching points with a float switch or electrode in the “drain” operating mode using the example of two pumps Installation and operating instructions • Wilo-Control EC-L • Ed.04/2022-09... - Page 28 The float switch should be equipped with a NO contact: Once the switching point has been reached, the contact is closed. Extern OFF Fig. 26: Illustration of the switching points with a float switch or electrodes in the “fill” operating mode using the example of one pump Installation and operating instructions • Wilo-Control EC-L • Ed.04/2022-09...
-
Page 29: Menu Control
Quick access to “Easy Actions” The following functions can be called up using the Easy Actions menu: Reset the current error message NOTICE! Menu point is only shown when an error is present! Installation and operating instructions • Wilo-Control EC-L • Ed.04/2022-09... -
Page 30: Factory Settings
The switchgear does not have its own explosion protection class and must always be installed outside of potentially explosive areas! The con- nection must be made by a qualified electrician. Installation and operating instructions • Wilo-Control EC-L • Ed.04/2022-09... -
Page 31: Connection Of Signal Transmitters And Pumps Within Po
If float switches are used, set the switching points correctly. ✓ Motor protection is preset according to the pump data. Turn the main switch to the “ON” position. Switchgear starts. All LEDs light up for 2 s. Installation and operating instructions • Wilo-Control EC-L • Ed.04/2022-09... -
Page 32: Start Initial Configuration
This may lead to gaps in the menu structure. As standard, the values are only displayed. To change the values, the parameter input in 8.5.1 Enable parameter input Menu 7.01 must be enabled: Installation and operating instructions • Wilo-Control EC-L • Ed.04/2022-09... - Page 33 The menu is enabled and can be changed. Turn the operating button until the end of menu 7 appears. Press the operating button. ⇒ Back to the main menu level. ▶ Start initial configuration. Fig. 31: Enable parameter input Installation and operating instructions • Wilo-Control EC-L • Ed.04/2022-09...
- Page 34 Explanation Definition of the signal transmitters for level measurement: • Float = float switch/electrode • Level = level sensor • Bell = dynamic pressure bell • Opt01 = NW16 level monitor Installation and operating instructions • Wilo-Control EC-L • Ed.04/2022-09...
- Page 35 Select whether a pump kick may take place or not if the Extern OFF input is active: Fig. 39: Menu 5.41 • off = pump kick deactivated if Extern OFF is active. • on = pump kick activated if Extern OFF is active. Installation and operating instructions • Wilo-Control EC-L • Ed.04/2022-09...
- Page 36 Fig. 45: Menu 5.57 After three change cycles, the collective fault signal (SSM) is activated. The setting “0 min” switches the running time monitoring off. Installation and operating instructions • Wilo-Control EC-L • Ed.04/2022-09...
- Page 37 Alarm dry-running protection (via float switch) Alarm manual reset (anti-reactivation lock)! • Alarm thermal motor monitoring Alarm manual reset (anti-reactivation lock)! Observe the additional requirements in the chapter on explos- ive atmospheres in the appendix! Installation and operating instructions • Wilo-Control EC-L • Ed.04/2022-09...
- Page 38 Fig. 53: Menu 5.68 curs. • off = rotating field monitoring deactivated • on = rotating field monitoring activated NOTICE! When operating the switchgear via a single-phase current connection, switch off this function! Installation and operating instructions • Wilo-Control EC-L • Ed.04/2022-09...
- Page 39 0 … 60 Factory setting Explanation If the max. number of starts has been exceeded, the collective fault signal (SSM) is activated. To deactivate the function, set Fig. 55: Menu 5.70 the value “0”. Installation and operating instructions • Wilo-Control EC-L • Ed.04/2022-09...
- Page 40 “Fill” operating mode: Value must be 0.03 m higher than the “Base-load pump On level” (menu 1.12). NOTICE! The menu item is only visible if the value “Level” or “Bell” have been set in menu 5.07. Installation and operating instructions • Wilo-Control EC-L • Ed.04/2022-09...
- Page 41 (menu 1.14). NOTICE! The menu item is only visible if the value “Level” or “Bell” have been set in menu 5.07. Installation and operating instructions • Wilo-Control EC-L • Ed.04/2022-09...
- Page 42 In this case, the switchgear works as a Modbus slave. An overview of individual parameters and a description of the data types used are shown in the appendix. Installation and operating instructions • Wilo-Control EC-L • Ed.04/2022-09...
- Page 43 During the initial configuration, a direction of rotation check must be performed on the pumps and the motor current monitoring set exactly. Use the following settings to perform the initial configuration: • Switch off the pumps: Set menu 3.02 to 3.04 to “off”. Installation and operating instructions • Wilo-Control EC-L • Ed.04/2022-09...
- Page 44 Menu 4.25: Shows the set motor current for pump 1. ⇒ Menu 4.26: Shows the set motor current for pump 2. ⇒ Menu 4.27: Shows the set motor current for pump 3. Installation and operating instructions • Wilo-Control EC-L • Ed.04/2022-09...
-
Page 45: Start Automatic Mode
Automatic mode is set for the selected pump. Alternatively, setting can be per- formed in Menu 3.02 to 3.04. ▶ Automatic mode switched on. Automatic mode after shutdown ✓ The switchgear is closed. ✓ Checked configuration. Installation and operating instructions • Wilo-Control EC-L • Ed.04/2022-09... -
Page 46: During Operation
123.7, unit: d • From 1000 days: Display in days, unit: d Running time: Pump 2 The time is stated in minutes (min), hours (h) or days (d) depending on the unit. Installation and operating instructions • Wilo-Control EC-L • Ed.04/2022-09... -
Page 47: Shut-Down
• Train the personnel on how the system operates. • When working in enclosed spaces, a second person must be present for safety reasons. • Ensure enclosed spaces have sufficient ventilation. Installation and operating instructions • Wilo-Control EC-L • Ed.04/2022-09... -
Page 48: Shut-Down
Risk of fatal injury due to electrical current! Improper conduct when carrying out electrical work can lead to death due to electric shock! • Electrical work must be carried out by a qualified electrician! • Observe local regulations! Installation and operating instructions • Wilo-Control EC-L • Ed.04/2022-09... -
Page 49: Maintenance Intervals
Do not use any aggressive or scouring cleaners or fluids! Check electrical-mechanical components for wear Have electrical-mechanical components checked for wear by an electrician. If wear is as- certained, have the affected components replaced by an electrician or by the Wilo Cus- tomer Service. General overhaul During a general overhaul, all of the components, wiring and the housing are checked for wear. -
Page 50: Faults, Causes And Remedies
Status icon of the respective pump flashes on the display. 11.3 Fault acknowledgement Switch off the alarm display by pressing the operating button. Acknowledge the fault via the main menu or Easy Actions menu. Installation and operating instructions • Wilo-Control EC-L • Ed.04/2022-09... -
Page 51: Fault Memory
Min. water level, below minimum value E066 High water alarm active High water level reached • Check inlet and system parameters. • Check that the float switch is working correctly, replace the defective compo- nent. Installation and operating instructions • Wilo-Control EC-L • Ed.04/2022-09... -
Page 52: Further Steps For Troubleshooting
Affected rechargeable batteries are marked with this symbol. The identi- fier for the heavy metal they contain is displayed beneath the graphic: • Hg (mercury) • Pb (lead) • Cd (cadmium) Installation and operating instructions • Wilo-Control EC-L • Ed.04/2022-09... -
Page 53: Information On The Collection Of Used Electrical And Elec
Observe the locally applicable regulations! Please consult your local municipality, the nearest waste disposal site, or the dealer who sold the product to you for information on proper disposal. See www.wilo‑recycling.com for more information about recycling. Subject to change without prior notice! Appendix 13.1... - Page 54 Menu 5.01 appears. Turn the operating button until menu 5.64 appears. Press the operating button. Change the value to “on”: Turn the operating button. Press the operating button. ▶ Ex-mode switched on. Installation and operating instructions • Wilo-Control EC-L • Ed.04/2022-09...
-
Page 55: System Impedances
A pump has been set as the standby pump. There is at least one current (unacknowledged) error message. “Extern OFF” input active: All pumps switched off The device communicates using a field bus sys- tem. Installation and operating instructions • Wilo-Control EC-L • Ed.04/2022-09... -
Page 56: Terminal Diagram Overview
Output: Analogue output for displaying the actual level value 15/16 Output: Individual fault signal pump 3 63/64 Input: Leakage detection pump 1 17/18/19 Output: Collective run signal 65/66 Input: Leakage detection pump 2 Installation and operating instructions • Wilo-Control EC-L • Ed.04/2022-09... -
Page 57: Modbus: Data Types
1, since 8 = 8. The remainder will be 0. The remaining bits 2 to 0 will thus all be 0. 13.6 ModBus: Parameter overview Holding register Name Data type Scale & unit Elements Access* Added (Protocol) 40001 Version communica- UINT16 0.001 31,000 tion profile 40002 Wink service BOOL 31,000 Installation and operating instructions • Wilo-Control EC-L • Ed.04/2022-09... - Page 58 0. Off 31,000 (41) 1. Hand 2. Auto 40043 Pump 3 mode ENUM 0. Off 31,000 (42) 1. Hand 2. Auto 40062 Switch box state BITMAP 0: SBM 31,000 (61) 1: SSM Installation and operating instructions • Wilo-Control EC-L • Ed.04/2022-09...
- Page 59 UNIT16 1 cm 31.102 (213) level 3 40220 Dry run level UNIT16 1 cm 31.102 (219) 40222 High water level UNIT16 1 cm 31.102 (221) * R = read-only, RW = read- and write-accessible Installation and operating instructions • Wilo-Control EC-L • Ed.04/2022-09...
- Page 64 Local contact at www.wilo.com/contact WILO SE Wilopark 1 44263 Dortmund Germany T +49 (0)231 4102-0 T +49 (0)231 4102-7363 wilo@wilo.com Pioneering for You www.wilo.com...
Need help?
Do you have a question about the Control EC-L1 Series and is the answer not in the manual?
Questions and answers