Table of Contents
Advertisement
Quick Links
INSTALLATION AND
USER MANUAL
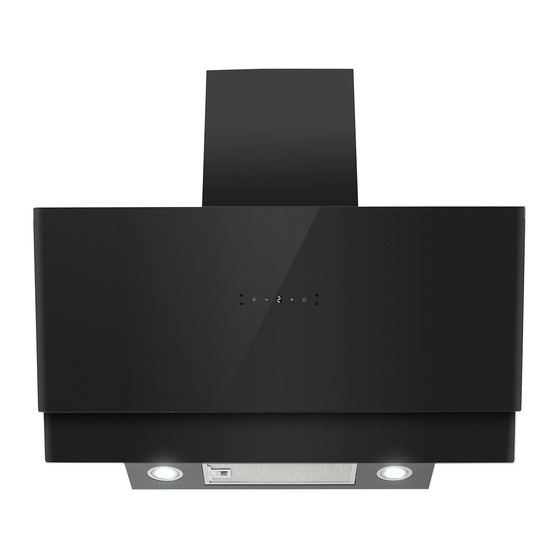
ANGLED COOKER HOOD
eiQ60ANMB
eiQ90ANMB
Thank you for choosing your electriQ cooker hood.
This instruction manual provides all required instructions related to the appliance's installation,
use, and maintenance. Please read it carefully before installation and usage to operate the unit
correctly and safely.
Advertisement
Table of Contents

Related Manuals for ElectrIQ eiQ60ANMB


Summary of Contents for ElectrIQ eiQ60ANMB
- Page 1 ANGLED COOKER HOOD eiQ60ANMB eiQ90ANMB Thank you for choosing your electriQ cooker hood. This instruction manual provides all required instructions related to the appliance's installation, use, and maintenance. Please read it carefully before installation and usage to operate the unit...
-
Page 3: Table Of Contents
CONTENTS SAFETY WARNINGS PARTS PRODUCT OVERVIEW V-FLAP INSTALLATION OPTIONS FOR VENTING INSTALLATION INSTALLING THE FILTERS OPERATION CLEANING AND MAINTENANCE LIGHT BULB REPLACEMENT TROUBLESHOOTING PRODUCT FICHE SUPPORT... -
Page 4: Safety Warnings
SAFETY WARNINGS Whilst this product is compliant with all safety requirements, incorrect or inappropriate use can lead to both personal injury and potential damage to property. Please read the contents of this instruction booklet thoroughly before fitting or using this appliance. •... - Page 5 • When the hood is vented externally and used with appliances which burn fuel (e.g., gas, oil, wood), the area must be sufficiently ventilated to ensure safe operation. Fresh air must be allowed to enter the room freely to prevent a partial vacuum.
-
Page 6: Parts
PARTS Description Illustration Qty. Cooker hood Chimney Exhaust Pipe (150mm*2m) Adaptor Cable Tie Outside Chimney Bracket Inside Chimney Bracket Screw (ST4*40mm) Screw (ST4*30mm) Screw (ST4*8mm) Wall Plugs V-Flap Pair TOOLS REQUIRED • Drill and 5mm Drill bit. • Pencil. • Spirit Level. •... -
Page 7: Product Overview
PRODUCT OVERVIEW V-FLAP INSTALLATION To mount the V flap: • Place one flap (2) into the body (6) with the pin (3) facing upwards. • Insert the axis (4) into the holes (5) on the body. • Repeat with the other flap. V-Flaps are used to prevent backdraft from outside and are only required when externally venting the appliance. -
Page 8: Options For Venting
OPTIONS FOR VENTILATION This hood can be set up for either external venting or recirculation of the air. The type of setup should be decided before commencing installation. EXTERNAL VENTING If you have an outlet outside, your cooker hood can be connected, as shown in the diagram, using a flexible exhaust duct. -
Page 9: Installation
INSTALLATION If you have an outlet to the outside, your cooker hood can be connected, as in the picture below, through an exhaust pipe. NOTE: Please ensure the unit is turned off and unplugged from the main supply. A = Inside Chimney Bracket B = Outside Chimney Bracket C = Mounting Screws D = Security Screws... - Page 10 10. Using a long screwdriver, secure the hood to the wall using two ST4*40mm screws through the inside of the hood into holes ‘D’. 11. Secure the outside chimney to the wall using two ST4*30mm screws. If externally venting, then run the exhaust to the outside.
-
Page 11: Installing Grease Filters
INSTALLING GREASE FILTERS To install the filters: Angle the filter into slots on the hood. • Push the button on the handle of the filter. • Release the handle once the filter fits into a resting position. • Repeat to install all filters. •... -
Page 12: Operation
OPERATION POWER Once connected to power, the unit will power on, beep, and light up the power indicator. Then, it will enter standby. Press the power button to turn the light and extractor on at the lowest speed. The power, speed and lamp indicators will light up. -
Page 13: Cleaning And Maintenance
CLEANING AND MAINTENANCE Before cleaning, switch the unit off, pull out the plug, or switch off at the relevant mains switch if the appliance has been hard-wired. Make sure the unit has no power being fed to it. REGULAR CLEANING Use a soft cloth moistened with warm, mildly soapy water or household cleaning detergent to clean the unit. -
Page 14: Light Bulb Replacement
LIGHT REPLACEMENT IMPORTANT: The light fitting must be replaced by a competent person. Please do not attempt the replacement if you do not understand the instructions. IMPORTANT: Always switch off the electricity supply before operating the appliance. When handling the light fitting, ensure it has completely cooled down before making direct contact with the hands. -
Page 15: Product Fiche
PRODUCT FICHE eiQ60ANMB & eiQ90ANMB Model Identification Symbol Value Unit Annual Energy Consumption AEChood 20.1 kWh/A Time increase factor Fluid Dynamic Efficiency FDEhood 29.4 Energy Efficiency Index EEIhood 43.9 (A+) Measured air flow rate at best QBEP 239.7 m3/h efficiency point... -
Page 16: Support
Do not dismantle the appliance in a way that is not shown in the user manual. The user could not dismantle the appliance. At the end of life, the appliance should not be disposed of with household waste. Check with your local authority or retailer for advice on recycling. electriQ UK SUPPORT www.electriQ.co.uk/support Call: 0330 390 3061 Office hours: 9 AM - 5 PM, Monday to Friday...
Need help?
Do you have a question about the eiQ60ANMB and is the answer not in the manual?
Questions and answers