Table of Contents
Advertisement
Quick Links
Advertisement
Table of Contents

Related Manuals for Korg M50-73


Summary of Contents for Korg M50-73
- Page 1 Owner’s Manual...
-
Page 2: Handling Of This Product
Incorrect operation or malfunction may cause the contents of memory to be lost, so we recommend that you save important data on media. Please be aware that Korg will accept no responsibility for any damages which may result from loss of data. -
Page 3: About This Manual
Thank you for purchasing the Korg M50 Music Workstation. To help you get the most out of your new instrument, please read this manual carefully. About this manual The owner’s manuals and how to use them The manuals and how to use them The M50 comes with the following operation manuals. -
Page 4: Table Of Contents
Handling of this product ......ii Data handling ........ii About this manual . - Page 5 Creating songs (Sequencer mode) ... . . 51 Overview....... . . 51 About the M50’s Sequencer .
- Page 6 Appendices ....97 Restoring the factory settings ... . . 97 Loading the preloaded data ..... .97 Troubleshooting .
-
Page 7: Quick Start
This Quick Start is provided for those who just want to get started trying out the sounds right away. It explains how to set up the M50, how to select programs and control the sound, and how to listen to the demo songs. -
Page 8: Playing Programs And Combinations
Quick Start Playing Programs and Combinations With the factory settings, Program mode will be selected when you turn on the power. When you play the keyboard, you’ll hear the sound of program number 000 in PROG Bank A. Note: If you don’t hear any sound when you play the keyboard or press a chord trigger switches: Check the connections once again. -
Page 9: Using Controllers To Modify The Sound
You can press the q switch or u switch to select the program with the next higher or lower number. When you’ve chosen the program you want to play, press the OK button or the ENTER switch. Categories also have sub-categories, and you can press the Jump to Sub button of the Category/Program Select menu to choose programs from a sub-category list. - Page 10 Quick Start You can recall the saved settings by holding down the RESET CONTROLS switch and turning each knob of the control surface (see page 21). 2. Below the control surface there are four chord trigger switches. You can use these to trigger chords (of up to eight notes).
-
Page 11: Listening To The Demo Songs
Listening to the demo songs Loading the demo song data 1. Press the MODE GLOBAL switch (the LED will light) to enter Global mode. 2. Access the Global P0: Basic Setup page. If another page is displayed, press the EXIT switch. 3. - Page 12 Quick Start Playing back a cue list Songs can be assigned to a cue list, and will playback in the specified order. You can also specify the number of times that each song will be repeated. Here’s how to play back the demo songs assigned to a cue list. 1.
-
Page 13: Introduction To The M50
The M50 takes this classic Korg feature even further, via the AMS Mixers. These let you create even more detailed modulation designs by mixing two modulation sources together,... - Page 14 Editor. In order to maintain compatibility of the display in the edit window, please download and use the most recent version of the editor. You can download the most recent versions of the editor, plug-in editor, and Korg USB-MIDI driver from the following website. Korg website: “http://www.korg.com/”...
-
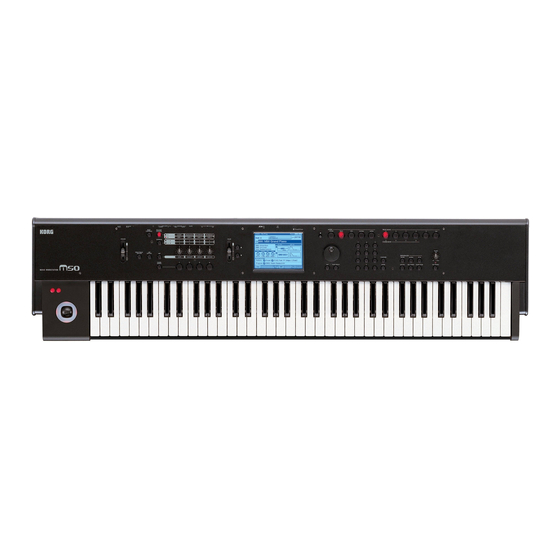
Page 15: Front And Rear Panels
Front and rear panels Front panel 1. Volume VOLUME slider This slider adjusts the volume of the AUDIO OUTPUT L/MONO, R outputs, as well as the volume of the headphone jack. (See page 23) 2. SW1, 2 and Joystick SW1 and SW2 These switches are used to control the programs or effect parameters, or to turn the joystick lock function on/off. - Page 16 Introduction to the M50 4. DRUM TRACK DRUM TRACK ON/OFF switch This switch turns the Drum Track function on or off. When the DRUM TRACK ON/OFF switch is off (the LED will go dark), pressing this switch will make the LED light or blink.
-
Page 17: Rear Panel
Rear panel 1. Power supply Be sure to see “Turning the power on/off” on page 23 and follow the correct procedure described there. Power switch This switch turns the power on/off. (See page 23) AC adapter connector The included AC adapter is connected here. (See page 1 and page 23) Connections must be made with the power turned off. -
Page 18: Objects In The Display
Introduction to the M50 Objects in the display The M50 uses Korg’s TouchView graphical user interface. By touching on objects shown in the display, you can select pages, set parameter values, rename programs and combinations, write data, and perform many other operations. - Page 19 * Dialog box A dialog box may appear, depending on the currently selected menu command. Text edit button Cancel button OK button * Text edit button When you press this button, the text edit dialog box appears for changing the names of Programs, Combinations, Songs, etc.
-
Page 20: Basic Information
Introduction to the M50 Basic Information About the M50’s modes The M50 has numerous functions that let you play and edit programs or combinations, record and play back sequence data, and manage media. These functions are grouped into “modes.” The M50 has five modes. Program mode Programs are the basic sounds of M50. - Page 21 GLOBAL MODE DRUM KIT DS1 Drumsample Assign DS2 Drumsample DS3 Drumsample DS4 Drumsample ARPEGGIO PATTERN Preset Pattern: P0 - 4 User Pattern MEDIA MODE PCG / SNG Basic Information About the M50’s modes PROGRAM Insert / Master / Final Effect OSC 1 MS1 (Multisample) IFX 1...
-
Page 22: Basic Operations
Introduction to the M50 Basic operations After you’ve turned on the M50, here’s how to perform basic operations such as selecting modes and pages. Selecting modes • In order to use a particular function on the M50, you must first select the appropriate mode. Press one of the front panel mode switches to enter the corresponding mode. - Page 23 Using the EXIT switch to move between pages If you’re in a page other than page 0 (e.g., Prog P0: Play) of each mode, pressing this switch will take you to page 0. This switch makes it easy to return to the main page of the current mode: •...
-
Page 24: Compare Function
Introduction to the M50 Other PROG BANK A, B, C, D, E, GM/ COMBI BANK A, B, C, D switches Use these switches to change banks when selecting Programs or Combinations. The LEDs in the switches light up to show the current bank. In Program mode, these switches select the Program bank. -
Page 25: Using Controllers
When selecting a program or combination number in a dialog box, you can also use the BANK SELECT switch to enter the bank as an alternative to using the VALUE controllers. 4. To execute, press the OK button or the ENTER switch. - Page 26 Introduction to the M50 For details, please see “Controller settings for the program” on page 29. When you write a Program or Combination, the on/off status of the SW1 and SW2 switches is saved. For details, please see “Setting the functions of SW1 and SW2”...
-
Page 27: Value Slider
Resetting the controller settings You can reset the controllers of the control surface, or switch to saved values. To reset an individual control, hold down the RESET CONTROLS switch and operate the control surface knob that you want to reset. 1. -
Page 28: Foot Switch
Foot Switch Assignable Foot Switch This lets you use a simple footswitch, such as the Korg PS-1, as an assignable controller. The footswitch can perform a wide variety of functions, such as: • An assignable source for modulating sounds and effects •... -
Page 29: Setup
Turning the power on/off Connecting the AC adapter Connect the AC adapter to the M50. For details on this connection, please see “Setup” on page 1. You must use only the included AC adapter. Using any other AC adapter may cause malfunctions. Turning the power on 1. -
Page 30: Connections
Setup Connections Connections must be made with the power turned off. Please be aware that careless operation may damage your speaker system or cause malfunctions. Connections to computers Computer MIDI IN Connections to MIDI equipment Pedal connections etc. ASSIGNABLE PEDAL ASSIGNABLE SWITCH DAMPER MIDI OUT... -
Page 31: Connecting Audio Equipment
Connecting a damper pedal This pedal can provide a damper effect as you play. This instrument also supports half-damping. Here’s how to connect an optional Korg DS-1H damper pedal to the DAMPER jack and use it to control the half- damper effect. -
Page 32: Connecting The M50 To A Computer
Setup Connecting a foot pedal If you connect a optional EXP-2 foot controller or XVP- 10 expression/volume pedal to the ASSIGNABLE PEDAL jack, you can use it to apply modulation to sounds or effects, or to adjust the overall volume. This pedal will always function in the same way regardless of the Program, Combination, or Song you’ve selected. -
Page 33: Playing And Editing Programs
Playing and editing Programs About the M50’s Programs Programs are the basic sounds of the M50. You can play them by themselves, layer them together in Combinations, or play a different Program on each of the 16 MIDI tracks, either from the internal sequencer or from external computer-based sequencers. - Page 34 Playing and editing Programs • Turn the VALUE dial. • Use numeric keys 0–9 to enter the program number, and press the ENTER switch. 5. Press one of the PROG BANK A–GM switches to select a bank. When you select a different Bank, the switch’s LED will light, and the selected bank will appear on the left side of the display.
-
Page 35: Using Controllers
Selecting by Category/Program Select menu You can select Programs from within a category, such as keyboard, organ, bass, and drums. When shipped from the factory, the preloaded Programs are organized into 16 categories, each with several sub-categories. 1. Press the Category Select popup button. The Category/Program Select menu appears. -
Page 36: Easy Program Editing
Playing and editing Programs Easy Program editing Simple editing using the sliders and knobs All of the M50’s programs can be edited. You can start by editing a preloaded program, or you can initialize a program and create your own from scratch. It is a lot of work to create the sound you want by starting with an initialized program. - Page 37 3. There are two modes of realtime control, A and B; these will alternate each time you press the REALTIME CONTROL switch. Each mode lets you use knobs 1–4 to control the assigned parameters. In A-mode, knobs 1–4 are assigned dedicated functions corresponding to MIDI control changes.
-
Page 38: Using Tone Adjust
Playing and editing Programs Using Tone Adjust The Tone Adjust function lets you edit the parameters of the program. The program parameters that are most effective for editing will be assigned to the controllers in the display. 1. Access the Prog P0: Play– Tone Adjust page. This page shows and reflects data generated by the tone adjust, letting you view the parameter assignments and their precise values. -
Page 39: Saving Your Edits
Easy Program editing Saving your edits Saving your edits After you’ve edited a program, you must save it if you want to keep the changes you’ve made. If you re-select the program or turn off the power after editing, your edits will be lost. -
Page 40: Detailed Editing With Programs
Playing and editing Programs Detailed Editing with Programs Creating your own Programs You can create original sounds by editing a preloaded program or by editing an initialized program. The programs you create can be saved in banks A–E. For details, please see “Saving your edits” on page 33. About the edit pages In the Prog P0: Play page you can select and play programs. - Page 41 processed sound) recorded at a specific pitch. A multisample is a collection of similarly voiced samples, used to create the same type of sound - piano, bass, guitar, strings, organ - across the entire keyboard, as the basis of a program. The oscillators of single and double programs use multisamples.
-
Page 42: Using Lfos And Envelopes (Egs)
Playing and editing Programs 3. Select a drum kit in the Prog P2: OSC/Pitch– OSC1 Basic page. 4. Specify the basic pitch of the oscillator. For a drum kit, set “Octave” to +0 [8']. Using LFOs and Envelopes (EGs) Using LFOs Each Oscillator has two LFOs: LFO1 and LFO2. -
Page 43: Using Alternate Modulation (Ams)
Detailed Editing with Programs Using Alternate Modulation (AMS) and the AMS Mixers Using Alternate Modulation (AMS) and the AMS Mixers Alternate Modulation AMS (Alternate Modulation Source) refers to any of the assignable modulation sources in M50, including: • Controllers of the M50 itself, such as the joystick, SW 1/2, and the realtime knobs •... -
Page 44: Using Filters
Playing and editing Programs JS+Y Int specifies the amount of vibrato that the LFO will produce when the joystick is pushed away from you. Intensity (AMS Intensity) specifies the depth of vibrato that will be applied by the LFO when modulated by the selected AMS (Alternate Modulation Source). - Page 45 Filter Types and Cutoff Frequency Low Pass High Pass Band Pass Band Reject Cutoff Frequency Resonance Resonance emphasizes the frequencies around the cutoff frequency, as shown in the diagram below. When this is set to 0, there is no emphasis, and frequencies beyond the cutoff will simply diminish smoothly.
-
Page 46: Using The Amp Section
Playing and editing Programs Keyboard Track Most acoustic instruments get brighter as you play higher pitches. At its most basic application, keyboard tracking re-creates this effect by increasing the cutoff frequency of a lowpass filter as you play higher on the keyboard. - Page 47 Keyboard Track This lets you vary the volume relative to the note you play. For details, please see “Keyboard Track” on page 40. Amp Modulation Velocity Intensity is used by most programs to decrease the volume of softly played notes and increase the volume of strongly played notes, and the Amp Modulation parameter adjusts the depth of this control.
-
Page 48: Arpeggiator Settings
Playing and editing Programs Arpeggiator settings According to the note data received from the keyboard or from the MIDI IN connector, the arpeggiator will automatically generate a wide range of phrases or patterns including arpeggios, guitar or keyboard backing riffs, bass phrases, or drum patterns. When the control surface ARP is selected, you can use the knobs to vary the duration and dynamics of the arpeggiated notes. -
Page 49: Playing And Editing Combinations
Playing and editing Combinations About the M50’s combination Combinations let you split and layer up to 16 Programs at once. A Combination is made up of 16 Timbres (Note that you don’t have to use all 16 Timbres!). Each Timbre is assigned a Program, along with parameters for key range and velocity zones, mixer settings, MIDI channel and controller filtering, and so on. -
Page 50: Performing With The Arpeggiator Or Drum Track
Playing and editing Combinations • Turn the VALUE dial. • Use numeric keys 0–9 to enter the combination number, and press the ENTER switch. 5. Press a COMBI BANK A–D switch to switch banks. When you select a different Bank, the switch’s LED will light, and the selected bank will appear on the left side of the display. -
Page 51: Easy Combination Editing
Easy Combination editing You can edit any of the Combinations shipped with M50. You can create your own combinations by editing a preloaded combination, or by starting from an initialized combination. Even without moving to the various pages for detailed editing, you can make dramatic changes just from within the Combi P0: Play page. -
Page 52: Saving A Combination You've Edited
Playing and editing Combinations Saving a Combination you’ve edited After you’ve edited a combination, you must save it if you want to keep the changes you’ve made. If you re- select the combination or turn off the power before saving, your edits will be lost. For details, please see “Writing a Program or Combination”... -
Page 53: Detailed Editing With Combinations
Detailed Editing with Combinations You can edit the preloaded combinations (Banks A–C) with which the M50 is shipped, or start with an initialized Combination to create your own original sounds. You can use the factory Programs to create new Combinations, or use your own custom Programs. Note: If you’re in the process of editing a Program in Program mode, and you use that Program in a Combination, you’ll hear the edited version in... -
Page 54: Layers, Splits, And Velocity Switches
Playing and editing Combinations Layers, Splits, and Velocity Switches Within a Combination, you can use note range and velocity level to define the “zone” in which a specific timbre will play. The Programs assigned to each Timbre can be played in three ways: as part of a layer, a split, or a velocity switch. -
Page 55: Midi Settings
Creating Velocity Switches Next, let’s create a simple velocity switched Combination, like the diagram below: Timbre 1 Brass Timbre 2 Strings 1. Access the Combi P0: Play– Program T01–08 page. 2. Select a brass sound for Timbre 1, and a strings sound for Timbre 2. -
Page 56: Altering Programs To Fit Within A Combination
Playing and editing Combinations The MIDI filters don’t turn the functions themselves on or off. Instead, the filter just controls whether or not that MIDI message will be transmitted and received. For example, if portamento is on, portamento will be applied to the internal M50 sound even if Enable Portamento SW is unchecked. -
Page 57: Creating Songs (Sequencer Mode)
Creating songs (Sequencer mode) Overview About the M50’s Sequencer The M50’s 16-track MIDI sequencer can hold up to 128 songs and 210,000 MIDI events. You can record and play back MIDI data using sixteen MIDI tracks and one master track (containing tempo data, etc.) to control the internal sound generator and your external sound modules. -
Page 58: Functions Of Each Switch
Creating songs (Sequencer mode) Patterns There are two types of patterns: preset patterns and user patterns. Preset patterns: Patterns suitable for drum tracks are preset in internal memory, and can be selected for any song. User patterns: Each song can have up to 100 patterns. When using a pattern in a different song, use the Utility menu commands Copy Pattern or Copy From Song etc. -
Page 59: Playing Songs
Playing Songs Playback In order to play back song data in the sequencer, you must first record, load or dump song data into the M50. Let’s start by loading and playing the demo song data. For details, please see “Listening to the demo songs” on page 5. - Page 60 Creating songs (Sequencer mode) Exclusive Solo Normally, the Solo function operates in “Exclusive Solo off” mode, where you can solo more than one track at a time (as in the example above). In contrast, “Exclusive Solo on” mode allows only one track/ channel to be soloed at a time, making it easy to switch between soloed tracks.
-
Page 61: Midi Recording
MIDI recording Preparations for recording Before you begin recording, make sure that the memory protect setting in Global mode is turned off. For details, please see “Memory protect” on page 90. Creating a Song Before we can begin this example, we need to select an empty song where we can record. - Page 62 Creating songs (Sequencer mode) INT: During playback, the M50’s internal tone generator will play the MIDI data recorded on that track. When you operate the M50’s keyboard or controllers, you will be playing and controlling the track selected by Track Select. MIDI data will not be transmitted to an external device.
-
Page 63: Recording Midi In Real Time
If you executed this operation with Copy Pattern to Track too? checked in step 3, the Copy Pattern To Track dialog box will appear. This dialog box is the same as the one that appears for the Copy To Track (P10: Pattern/RPPR– Pattern Edit) menu command. -
Page 64: Step Recording
Creating songs (Sequencer mode) Auto punch-in Select this method when you wish to automatically re- record selected portions of a previously-recorded track. Then, recording will occur only over the specified area (Auto Punch In Start Measure–Auto Punch In End Measure), rewriting it with the newly recorded data. Loop All Tracks Select this method when you wish to repeatedly record over a specified area of a track, while continuing to add... - Page 65 5. In “Step Time,” use “Select” to specify the basic timing value at which you will input notes and rests. Input the first C3 note as . (dotted eighth note). Use the popup button at the left to select . You can choose a note value ranging from a whole note ( ) to a 32nd note ( ).
-
Page 66: Recording Variation
Creating songs (Sequencer mode) Recording variation Recording the sound of a Combination or Program Here’s how you can easily copy the settings of a Combination or Program, and then record using that sound. When you’re performing in Program or Combination mode, you can use the Auto Song Setup function to automatically transfer the settings of that program or combination into a song. -
Page 67: Recording Patterns In Real Time
Recording multiple MIDI tracks from an external sequencer The playback from an external MIDI sequencer connected to the M50 can be recorded simultaneously using multi-recording. For details, please see “Recording multiple MIDI tracks from an external sequencer” on page 140 of the Parameter Guide. -
Page 68: Song Editing
Creating songs (Sequencer mode) Press the SEQUENCER REC/WRITE switch, and then press the SEQUENCER START/STOP switch. After the pre-count, pattern recording will begin. Play the keyboard and operate the joystick and other controllers to record your performance. When you reach the end of the pattern, the sequencer will return to the beginning of the pattern and continue recording. -
Page 69: Creating An Rppr Pattern
Creating an RPPR pattern RPPR stands for Realtime Pattern Play/Recording, and is a function that lets you assign pattern data to each key, and then play back that pattern simply by pressing the key to which it is assigned. You can realtime-record this performance. -
Page 70: Rppr Playback
Creating songs (Sequencer mode) RPPR playback Let’s use the RPPR you created to perform in the P0–1: Play/REC– Program T01–08 page. 1. Access the P0–1: Play/REC– Program T01–08 page. 2. Check the “RPPR” check box. The RPPR function will be turned on. Set the RPPR on/off for each song. -
Page 71: Creating And Playing A Cue List
Creating and playing a Cue List A cue list allows you to play multiple songs in succession. For example you can create a separate song for each portion (introduction, melody A, melody B, chorus, and ending) of a composition, and use the cue list to specify the order of each portion and the number of times that it will be repeated to complete the song. -
Page 72: Converting A Cue List To A Song
Creating songs (Sequencer mode) Converting a cue list to a song The Convert to Song menu command lets you convert a cue list to a single song. For details, please see “Convert to Song (Convert Cue List to Song)” on page 209 of the Parameter Guide. Saving your song To ensure that the data you’ve created will be reproduced faithfully, we recommend that you use... -
Page 73: Using Effects
Using Effects An overview of the M50’s effects You can choose from 170 different types of high-quality digital effects. The M50 provides five insert effects, two master effects, and one total effect, together with a mixer section that controls the routing of these effects. All of these are stereo in/out. -
Page 74: Effects In Each Mode
Using Effects Effects in each mode Program mode For programs, you can use insert effects to process the final sound in the same way that you use the Filter, Driver, Amplifier, and EQ (equalizer) to process the sound from the oscillators (OSC 1 & 2). Next, the master effects are used to create overall ambience such as reverb, and you use the total effect to make final adjustments. -
Page 75: Routing Effect Settings
Routing effect settings The insert effects, master effects, and total effect have the same structure in all modes, but the routing settings will determine how the oscillators of a program or the timbres of a combination or track of a song will be sent to each insert effect, master effect or total effect. -
Page 76: Master Effects
Using Effects 10.Access the P8: IFX– IFX page, and edit the parameters of the insert effect you selected. Press the IFX 1–5 tabs and edit the parameters. Effect Parameters Effect On/Off Wet/Dry Effect 1 On/Off: Turns the insert effect on/off. This is linked with the on/off setting in the Insert FX Setup page. -
Page 77: Using Effects In Combinations And Songs
For details, please see “Double-size effects” on page 70. 20.Press the On/Off button to turn the total effect on. The total effect will toggle on/off each time you press the button. If this is Off, the result will be the same as if 000: No Effect is selected. -
Page 78: Dynamic Modulation (Dmod)
Using Effects Dynamic modulation (Dmod) Dynamic modulation (Dmod) lets you use MIDI messages or the M50’s controllers to modulate specific effect parameters in real-time. For details, please see “Dynamic modulation (Dmod) and Tempo Synchronization” on page 272 of the Parameter Guide. Common FX LFO Two Common FX LFOs are available for modulation effects, such as choruses, filters, phasers, etc. -
Page 79: Arpeggiator Function
Arpeggiator function Using the arpeggiator while you play The arpeggiator is a function that automatically generates arpeggios (patterns of individual notes derived from a chord). Most arpeggiators produce an arpeggio when you play a chord on the keyboard. The chord you played on the keyboard is sounded as an arpeggio (broken chord) The M50’s arpeggiator is also polyphonic, and can... - Page 80 Arpeggiator function Adjusting the length of the arpeggiated notes • Press the control surface ARP switch and turn knob 1 to adjust the duration of the arpeggiated notes. Rotating the knob toward the left will shorten the duration of the notes, and rotating it toward the right will lengthen the duration of the notes.
- Page 81 Using the arpeggiator while you play Using the arpeggiator in Program mode P3: ALT2 ALT2 P4: RANDOM RANDOM Changing the note value of the arpeggiated notes The Reso (Resolution) parameter lets you set the note value of the arpeggiated notes, over a range from 3 – •...
-
Page 82: Using The Arpeggiator In Combination Mode
Arpeggiator function Using the arpeggiator in Combination mode In Combination mode the M50 provides dual arpeggiators, allowing you to run two arpeggio patterns simultaneously. 1. Press the COMBI switch to enter Combination mode, and select a combination. For details, please see “Selecting Combinations”... -
Page 83: Other Settings For The Arpeggiator
Using the arpeggiator while you play Other settings for the arpeggiator Other settings for the arpeggiator You can also set Gate, Velocity, Swing, and Scan Zone. These parameters are set in Prog P7: ARP/DT– ARP Setup page, Combi P7: ARP/DT– Arpeggiator A, B page (see PG page 59, page 107 and page 168). - Page 84 Arpeggiator function...
-
Page 85: Drum Track Function
Drum Track function Performing with the Drum Track function The Drum Track function makes it easy to play the M50’s high-quality drum programs using a wide variety of Drum Track patterns. It provides a convenient way for you to hear Drum Track patterns while you try out various phrases on a program or combination, or work out the outline of your song. -
Page 86: Using The Drum Track Function In
Drum Track function and the M50 will be synchronized to an external MIDI device. In this case, you won’t be able to change the tempo by operating the M50. Selecting a Drum Track pattern and Drum Track program 1. Access the Prog P0: Play– Main page. Pattern Bank/No. -
Page 87: Other Settings For The Drum Track
2. Specify the MIDI channel of the drum track timbre. Be aware that if another timbre uses the same MIDI channel, that timbre will also be played. 3. Access the Combi P7: ARP/DT– Drum Track page. Specify the drum track’s MIDI channel Output. Set this to match the MIDI Channel of the timbre you specified in step 2. - Page 88 Drum Track function...
-
Page 89: Settings For The Entire M50
Settings for the entire M50 How Global mode is structured In Global mode, you can make settings that apply to the entire M50, such as master tuning, key transpose, effect global switch, and global MIDI channel. In addition, you can create user drum kits, user arpeggio patterns, and scales, make settings for the damper pedal and assignable foot switches/pedals, and specify category names for programs and... -
Page 90: Midi Basic/Routing
Settings for the entire M50 Recalling the last-selected mode and page at power-on The state of M50 when the power is turned on will depend on the setting of the Power On Mode. If the Power On Mode is set to Reset (factory setting), M50 will automatically select the Program mode P0: Play. -
Page 91: External Control
Various preloaded external setups are provided as factory settings. For instance, some external setups let you control software synthesizers such as those in the Korg Legacy Collection. Other external setups let you control level and pan settings of your DAW software in real time. - Page 92 Settings for the entire M50...
-
Page 93: Loading & Saving Data
Loading & saving data Saving data Types of data that can be saved You can save the various types of data in the M50 by writing it to internal memory, by saving it to an SD card (commercially available), or by sending it as a MIDI data dump. -
Page 94: Writing To Internal Memory
Loading & saving data Writing to internal memory Writing a Program or Combination The Program and Combination settings you’ve made in the various editing pages can be saved to internal memory. This action is referred to as “writing a program” or “writing a Combination.” If you want your edited data to be preserved after the power is turned off, you must perform a Write operation. - Page 95 • Relative: This type of Tone Adjust parameter controls two or more program parameters simultaneously. For example, “Filter/Amp EG Attack Time” controls a total of six program parameters. The value of a relative parameter indicates the amount of change that is applied to the value of each program parameter it’s affecting.
-
Page 96: Memory Protect
Loading & saving data When you press the OK button, the display will ask “Are you sure?” Press the OK button once again to write the data. Using the (SEQUENCER) REC/WRITE switch to write 1. In the following pages of Global mode, press the SEQUENCER REC/WRITE switch. -
Page 97: Editing Names
Editing names You can modify the name of an edited program, combination, song, drum kit, or user arpeggio patterns etc. You can also modify the category names for programs and combinations. These renaming operations can be performed in the following pages. Item Page Prog P0…9 menu command: Write... -
Page 98: Using The M50 As A Data Filer
Loading & saving data Refer to the owner’s manual included with your card, and observe the guidelines for handling and use. How to save data Access the Media- Save page, and select the appropriate menu command according to the data that you’re saving to media. -
Page 99: Loading Data
Loading data Data that can be loaded Loading from media You can load the following data from media. • .PCG file: Programs, Combinations, Drum Kits, Global settings, User Arpeggio Patterns, and User Drum Track patterns • .SNG file: Song and cue list. •... - Page 100 Loading & saving data “Append” will load the song into the song number that follows the song(s) currently existing in internal memory, without leaving a vacant number. “Clear” will erase all songs from internal memory, and load the songs into the numbers from which they were saved.
- Page 101 Loading M50 system update data You can update the M50’s system by downloading the most recent version of the system file from the Korg website (http://www.korg.com) to your computer, and loading it into the M50. For details on the procedure, refer to the Korg website and to “Update...
-
Page 102: Media Utility
Loading & saving data Media utility Formatting media Newly purchased media or media that has been used by another device cannot be used “as is;” you must format the media before you can use it with the M50. When you format media, all data that had been saved on that media will be erased. -
Page 103: Appendices
Restoring the factory settings Loading the preloaded data The original preload data is backed up in the M50, so you can restore any or all of the Programs, Combinations, Drum Kits, User Arpeggio Patterns, and Global settings to their original factory settings. The original demo songs can also be re-loaded at any time. -
Page 104: Troubleshooting
Appendices Troubleshooting If you experience problems, please see the relevant item and take the appropriate measures. Power supply Power does not turn on Is the AC adapter connected to an outlet? → p.1 Is the rear panel POWER switch turned on? → p.23 Display The power is turned on, but nothing is shown on the display. -
Page 105: Programs And Combinations
Could the level of the Master Volume following the total effect have been lowered? → PG p.71, p.118, p.180 Could the total polyphony be exceeding the maximum polyphony of 80 voices? → PG p.21, p.234 Notes do not stop In Prog P1: Basic/Ctrls– Key Zone/Scale, select the Program Basic page, make sure that the Hold check box is unchecked. -
Page 106: Arpeggiator
Appendices Is the MIDI Clock (Global P1: MIDI) set to Internal or Auto? → PG p.221 A combination copied using “Copy From Combi” doesn’t record via arpeggiator as it did when you were playing it in Combination mode Is Multi REC (Seq P0: Play/REC) checked? → p.58, PG p.139 Are the settings in the Copy from Combination dialog box correct? →... -
Page 107: Midi
• The driver must be installed for each USB port you use. If you connect the M50 to a USB port other than the port you used when installing the KORG USB-MIDI Driver for Windows, you’ll need to reinstall the KORG USB-MIDI Driver. -
Page 108: Included Cd-Rom
You can download the most recent versions of the editor, plug-in editor, and Korg USB-MIDI driver from the following website. Korg website: “http://www.korg.com/” Initialization If operation of the M50 should become unstable, you can initialize it. -
Page 109: Error Messages
Error messages Error and confirmation messages Are you sure ? Meaning: This message asks you to confirm execution. To execute press the OK button. To cancel, press the Cancel button. Can’t calibrate Meaning: Calibration could not be performed correctly. • Try again. Can’t copy/swap double size effect Meaning: When copying or swapping an insertion effect or master effect, you attempted to place a... - Page 110 Appendices File already exists Meaning: When executing a Create Directory or File Rename operation, a directory or file of the same name already exists on the media. Meaning: When executing the Media mode Utility Copy command without using wild cards, the copy destination contained a file of the same name as the copy source.
- Page 111 No data Meaning: When loading a Standard MIDI File, the file contained no events. No medium Meaning: When executing a command in Media mode, no media was inserted in the drive. To solve this problem: • Insert media. No recording track specified Meaning: When performing realtime multi-track recording, you attempted to begin recording with no tracks set to REC.
- Page 112 Appendices Root directory is full Meaning: Your attempt to create a file or directory in the root directory of the media would exceed the maximum number of root directory entries. • Either delete an existing file or directory, or Open a directory to move down one level before creating a file or directory.
-
Page 113: Specifications And Options
20 cue lists. Songs can be arranged consecutively or repeatedly in up to 99 steps. A cue list can be converted back into a song. 671 Presets /100 User Patterns (per Song) RPPR (Realtime Pattern Play/Recording): 1 set per Song. Korg (M50) format, SMF (formats 0 and 1) supported... -
Page 114: Options
6.8 kg/14.99 lbs. M50-88 20.8 kg /45.86 lbs. M50-61 M50-88 AC adapter, Owner’s Manuals CD-ROM (M50 Parameter Guide (PDF), Installation Guide (PDF), External Setups PDF, KORG USB-MIDI driver, M50 Editor/Plug-In Editor etc.) Expression/Volume Pedal Foot Controller Damper Pedal Pedal Switch... -
Page 115: Operating Requirements
Operating requirements KORG USB-MIDI driver Windows Computer: USB port required (a USB host controller made by Intel is recommended) Operating system: Microsoft Windows XP Home Edition/Professional/x64 Edition Service Pack 2 or later (the MIDI driver for the x64 Edition is a Beta... -
Page 116: Midi Implementation Chart
*3: RPN (LSB,MSB)=00,00: Pitch bend range, 01,00: Fine tune, 02,00: Coarse tune *4: Valid if assigned as a MIDI control change in Global P1: External 1, 2 *5: In addition to Korg exclusive messages, Inquiry, GM System On, Master Volume, Master Balance, Master Fine Tune, and Master Coarse Tune are supported. -
Page 117: Index
Index AC adapter 1, 11, 23 Aftertouch Curve 83 Wah 39 Alternate Modulation 37 Amp 40 EG 41 Modulation 41 AMS (Alternate Modulation Source) 37 AMS Mixer 37 Arpeggiator 4, 7, 10, 73, 83, 87, 100, 107 Performance 4 ASSIGNABLE PEDAL jack 11, 22, 26 ASSIGNABLE SWITCH jack 11, 22, 25... - Page 118 Appendices Insert effect 67, 69, 71 Intensity 37 Internal memory 87 Joystick 19 Lock 20 Vibrato 38 Wah 39 Keyboard 20 Keyboard Track 40, 41 Layer 35, 48 LFO 36 Modulation 39 Speed 36, 72 LFO1, LFO2 36 Load 93 Individual data 94 Preload data 97 Song (.SNG) 94...
- Page 119 Speed Arpeggiator 73 LFO 72 Playback 52 Split 48 Status 49, 55 Step recording 58 SW1, SW2 19 Tab 12 Select 17 TAP TEMPO 21 Template song 56, 57 Tempo 56, 73, 79 Time signature 56, 61 Tone Adjust 50 Assigned the parameter 32 Total effect 67, 70 Track 55...
- Page 120 Please also retain your receipt as proof of purchase otherwise your product may be disqualified from the manufacturer’s or distributor’s warranty. 4015-2 Yanokuchi, Inagi-city, Tokyo 206-0812 Japan 2008 KORG INC.
Need help?
Do you have a question about the M50-73 and is the answer not in the manual?
Questions and answers