Table of Contents
Advertisement
Quick Links
Advertisement
Table of Contents

Related Manuals for QMS 860

Summary of Contents for QMS 860
- Page 1 ® 860 Print System User’s Guide 1800261-001D...
-
Page 2: Trademark Acknowledgements
WordPerfect /WordPerfect Corporation. WordStar /MicroPro International Corporation. Proprietary Statement The digitally encoded software included with your QMS 860 Print System is Copyrighted © 1994 by QMS, Inc. All Rights Reserved. This software may not be reproduced, modified, displayed, transferred, or copied in any form or in any manner or on any media, in whole or in part, without the express written permission of QMS, Inc. -
Page 3: Table Of Contents
Introduction Printer Overview ......1-1 Features ........1-2 About the Documentation. - Page 4 Menu Structure......4-1 Printer Control Panel ......4-2 Control Panel Indicators .
- Page 5 Online/Offline Key ..... . . 4-5 Cancel Key ......4-5 Status Page Key .
- Page 6 K Disk Cache ......4-44 MB Printer Mem ......4-45 Image Alignment.
- Page 7 Cancelling a Print Job......5-43 Caring for the Printer ......5-45 Handling the Printer.
- Page 8 Bibliography ....... . 7-15 Chapter 8 Printer Options Introduction........8-1 Additional Paper Cassettes .
- Page 9 Status Messages ......9-2 Printer Problem Checklist..... . . 9-6 IBM PC and Compatible Computer Checklist .
- Page 10 No Start-up Page ......9-10 Printer Resets ......9-11 Blank Pages .
- Page 11 Printer ........E-1...
- Page 12 Disk Cache ....... F-15 MB Printer Mem ......F-15 x i i Calculating the Frame Buffer Size .
- Page 13 Example ....... . F-18 End Job Mode on Your QMS 860 Printer ..F-19 Common Reasons to Use End Job Mode .
- Page 14 Glossary Index x i v...
- Page 15 Chapter 1 Introduction Chapter highlights: Printer overview Documentation overview User’s guide overview...
-
Page 17: Introduction
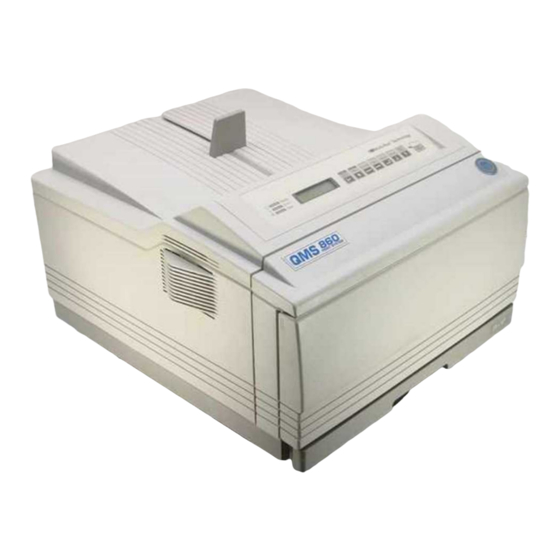
Printer Overview The QMS 860 Print System (fig. 1.1) Prints 8 pages per minute (letter/A4 paper size) and is the highest quality 600 x 600 print resolution desktop printer available with 11" x 17" print capability. Is the most powerful printer in its class, offering the unique... -
Page 18: Features
Chapter 1 Features The major features of the QMS 860 Print System are listed below: Exceptional print quality Produces 8 pages per minute (ppm) of high-quality letter/A4 output at 600 x 600 print resolution. The QMS 86 0 Prin t Sys tem is a desktop p rin ter with multiple-resolution capability. - Page 19 “hot port,” only one port actively receives data at a time. Your QMS 860 Print System is unique because SIO allows all three interface ports—AppleTalk, parallel, and serial—to be active and to receive data at the same time.
- Page 20 (area where data sent from the computer is stored). Large data-intensive files can be sent to the printer, freeing the host for other tasks. Your printer’s ROM includes 2 MB of system and 2 MB of font memory.
- Page 21 Increase the printer’s functionality. Extra fonts allow you to create more distinctive documents. Emulations allow you to print documents created in a wide range of printer languages. Fonts (such as the ProCollection for the HP emulation on your printer) and printer emulations are contained on small printer circuit boards called cards.
-
Page 22: About The Documentation
The “About This Manual” section later in this chapter, details the contents of the user’s guide. QMS 860 Print System Control Panel Guide Keep this fold-out card near your printer so you can quickly get to it when you need a guide to the control panel or Configuration menu. - Page 23 Con tro l Panel Guide, see chapter 4, “Printer Configuration,” in this user’s guide. QMS Crown Network Notes Refer to this manual for tips on using your QMS 860 printer on a network. It discusses 3Com 3+Open, Banyan VINES, LAN Manager-based LANs, Novell NetWare, TCP/IP, UNIX, and VMS/DECnet.
-
Page 24: Optional Purchase Documentation
Chapter 1 Optional Purchase Documentation The following manuals are optional purchases and are included with your printer only if you ordered them. (If you did not order them and decide you want them, you can obtain them from your QMS vendor.) -
Page 25: Related Documentation
About This Manual This user’s guide provides information on how to install, operate, and maintain the QMS 860 Print System. Each chapter begins with highlights of its contents. The appendixes contain supplementary information, the glossary defines printing and computing terms, and the index helps you to locate specific topics quickly. - Page 26 Chapter 7 - Professional Printing Provides information on typefaces and page design. Chapter 8 - Printer Options Explains how to install optional printer hardware, such as the paper cassette, paper feeder, cassette supporter, font and emulation cards, security cards, and external hard disks.
- Page 27 Appendix B - Technical Specifications Provides printer specifications and lists consumable supplies and replacement parts. Appendix C - Character Encoding Tables Provides character location tables for the printer’s typeface families. Appendix D - QMS Customer Support Provides product sales and support telephone numbers and describes how to communicate with QMS through the QMS Bulletin Board, CompuServe, and Q-FAX.
-
Page 28: Conventions
Text you type, and messages and information displayed on the screen Variable text you type; replace the italicized word(s) with information specific to your printer or computer Information displayed in the printer message window File and utility names Press the Enter key (PC) or Return key (Mackintosh) -
Page 29: Printer Installation
Chapter 2 Printer Installation Chapter highlights: Selecting your printer’s location Unpacking your printer Installing your printer... -
Page 31: Selecting Your Printer's Location
Selecting Your Printer’s Location Your QMS 860 Print System operates in almost any computing environment. However, when selecting your printer’s location, use the guidelines in the “Location Requirements” and “Power Requirements” sections of this chapter. Location Requirements Your printer’s locations should... - Page 32 Have enough space (with less than .04"/1 mm degree slope) to hold the four printer legs and have enough space in front of the printer for you to open the front cover, to access the multipurpose tray, and to slide out the paper cassette.
-
Page 33: Power Requirements
Your printer requires a properly grounded AC outlet with a power range of 10 % of the rated voltage. Noise-generating equipment should not be connected to the same electrical outlet as the printer. The recommended frequency is 50/60 Hz 2 Hz. - Page 34 Chapter 2 Lift the printer out of the shipping carton. The printer is heavy, so two people should be available to lift it. Hold the printer by the carrying grips located on the bottom of the printer. Remove the tape from the printer body.
- Page 35 Chapter 2 Push up on the release button and open the printer’s front cover (fig. 2.3). Release Button Fig. 2.3 Open the Front Cover P r i n t e r I n s t a l l a t i o n...
- Page 36 Chapter 2 Remove the two orange shipping spacers from inside the printer (fig. 2.4). Fig. 2.4 Remove the Shipping Spacers Remove the packing materials from inside the paper cassette. 2 - 6 P r i n t e r I n s t a l l a t i o n...
-
Page 37: Checking Shipment Contents
Rear cassette cover Power cord Warranty card Toner cartridge QMS 860 Print System User’s Guide and binder QMS 860 Print System Control Panel Guide QMS Crown Network Notes PS Executive Series Utilities documentation and software Dataproducts (short-line only) adapter kit (boxed... -
Page 38: Completing Qms Product Registration
Installing the Toner Cartridge The toner cartridge contains the toner and photosensitive drum needed to operate the laser printer. You may purchase additional cartridges from your QMS vendor. NOTE: The toner cartridge is sensitive to bright light. Do not remove the cartridge from its protective bag until you are ready to install it. - Page 39 Chapter 2 Place the cartridge on a flat, stable surface. Then remove the black protective sheet (fig. 2.5) and discard it. Fig. 2.5 Remove the Protective Sheet P r i n t e r I n s t a l l a t i o n 2 - 9...
- Page 40 Chapter 2 Hold the cartridge with both hands, and gently rock it from side to side five or six times to distribute the toner (fig. 2.6). Fig. 2.6 Distribute the Toner 2 - 1 0 P r i n t e r I n s t a l l a t i o n...
- Page 41 Chapter 2 Hold the cartridge in place with one hand, and using your other hand grasp the orange tab on the right side of the tape seal. Keep the cartridge parallel with the flat surface and pull the orange tab (26.4"/67 cm) straight out (fig. 2.7). Discard the orange tab and tape seal.
- Page 42 Chapter 2 Grasp the green tabs on the toner cartridge and place the cartridge on the rails inside the printer (fig. 2.8). Fig. 2.8 Place Toner Cartridge on Rails 2 - 1 2 P r i n t e r I n s t a l l a t i o n...
- Page 43 Lift the green tabs slightly and slide the cartridge straight back into the printer until it is firmly seated (fig. 2.9). Fig. 2.9 Install the Toner Cartridge Close the front cover and close the multipurpose tray (if it is not being used).
-
Page 44: Loading The 250-Sheet Paper Cassette
Chapter 2 Loading the 250-Sheet Paper Cassette The QMS 860 Print System comes standard with two 250-sheet paper cassettes (letter/A4 and 11" x 17"/A3). Load paper in either 250-sheet paper cassette as follows. NOTE: Use the paper size that matches the paper cassette size. - Page 45 Chapter 2 Insert the paper cassette into the paper cassette installation slot (fig. 2.11). Fig. 2.11 Insert the Paper Cassette P r i n t e r I n s t a l l a t i o n 2 - 1 5...
- Page 46 Chapter 2 Push the filled paper cassette straight into the installation slot until it is firmly seated (fig. 2.12). Fig. 2.12 Seat the Paper Cassette 2 - 1 6 P r i n t e r I n s t a l l a t i o n...
- Page 47 Adjust the paper stop to fit the paper size (fig. 2.13). The printer delivers your output, print-side down, to the output tray at the top of the printer. The paper stop keeps the paper positioned in the output tray. Fig. 2.13 Adjust the Paper Stop...
- Page 48 NOTE: If using the 11" x 17"/A3 or the optional legal/B4 paper cassette. Place the rear cassette cover on the end of the cassette at the rear of the printer (fig. 2.14). Fig. 2.14 Attach the Rear Cassette Cover 2 - 1 8...
-
Page 49: Connecting The Power Cord
Connecting the Power Cord The power cord connector is located at the rear of the printer. The power switch is located at the lower right of the printer. CAUTION: Make sure that the printer power switch is turned off (the O is pressed down). -
Page 50: Printing A Start-Up Page
Chapter 2 Printing a Start-up Page When you turn on the printer, a start-up page prints. This page gives you an overview of your QMS 860 Print System. Information printed on the start-up page follows: Printer product name Cumulative number of printed sheets... -
Page 51: Enabling/Disabling The Start-Up Page
Support needs to solve your printer problems. If you only need a start-up page occasionally, use the PS Executive Series Utilities or the printer control panel to print a status page instead of a start-up page. See the “Printing a Status Page” section of this chapter, for more information on printing a status page. - Page 52 Prompts you to save changes. Advances to the next Save Changes option. Finishes printing any print jobs in process, saves changes, and idles or reini- tializes the printer. Turns on the indicator and puts the printer in a ready state.
-
Page 53: Printer-Host Interface
Chapter 3 Printer-Host Interface Chapter highlights: Simultaneous Interface Operation (SIO) Emulation Sensing Processor (ESP) technology Connecting via the AppleTalk port Connecting via the parallel port Connecting via the serial port... -
Page 55: Introduction
Optional Network Interfaces In addition to the three standard interfaces—AppleTalk, parallel, and serial—the QMS 860 Print System has the option of using another network interface, such as DECnet, TCP/IP, and EtherTalk on Ethernet networks, and Novell NetWare on Ethernet and Token-Ring networks. -
Page 56: Simultaneous Interface Operation (Sio)
Simultaneous Interface Operation (SIO) Simultaneous Interface Operation (SIO), a standard feature of QMS Crown architecture, enables your QMS 860 Print System to communicate simultaneously with hosts through the AppleTalk, parallel, serial, and optional network interface (if installed) ports. -
Page 57: Esp Technology
(number of copies, page margins, fonts). The QMS 860 Print System prints almost any file sent in a language ESP technology understands, whether you have one, two, or more hosts, and whether you are communicating through a AppleTalk, parallel, serial, or optional network interface. -
Page 58: Communication Modes
Sprint, SuperPaint, Ventura Publisher, WingZ, WordPerfect, and WordStar. Communication Modes You can either allow your printer to operate in its default ESP mode or configure its ports to accept jobs in only a particular emulation mode (for example, PostScript emulation only, HP PCL only, or HP-GL emulation only). -
Page 59: Connecting Via The Appletalk Port
Macintosh SE, II, IIci, IIfx, IIcx, or Quadra. The instructions in this chapter explain how to connect a Macintosh to the QMS 860 Print System. Your host is an IBM PC or compatible microcomputer, workstation, minicomputer, or mainframe computer that connects through a print network (such as TOPS or AppleShare) using LocalTalk-type connectors and boxes. -
Page 60: Making The Connection
Plug the DIN-8 connector from the other transformer box into the Macintosh printer port. Plug one end of the RJ11 cable into the transformer box at the printer and the other end of the cable into the transformer box at the host. 3 - 6... -
Page 61: Macintosh Printing Software
Insert terminating resistors into any open sockets in the connector boxes. This ensures proper communication and helps speed up transmission. Turn on the printer. A start-up page should print if it has not been disabled. Macintosh Printing Software Once the Macintosh and printer are physically connected by the... -
Page 62: Macintosh Printer Drivers
If a LaserWriter icon appears in the Chooser window, click the icon to display a list of available printers. Highlight QMS 860 Print System to select your printer; then close the Chooser window. If a LaserWriter icon does not appear in the Chooser window,... -
Page 63: Printer Description Files
I. The driver version number appears in the Info window on the second to last line. LaserWriter 7.xx does not require a Laser Prep file to work correctly with your printer. The Laser Prep information is located within the LaserWriter driver itself. -
Page 64: Quarkxpress
Aldus PageMaker 4.2 and higher use PPD and PDX files. The PDX works in conjunction with the standard PPD to expand printer capabilities. The PPD and PDX must be placed in the PPDs folder within the Aldus folder inside your System Folder. -
Page 65: Testing Macintosh Communication
If you do not install these files for your printer, you can still print from the applications using other printer options. However, you may get some error messages informing you to change the name of the printer, and you may not have all your printer capabilities available to you. -
Page 66: Testing Parallel Communication
“Printer Configuration,” if you need more information. Testing Parallel Communication To test communication between your printer and host, first create a short file that ejects a page from the printer. Then send the file to the printer. 3 - 1 2... -
Page 67: Creating The Test File
If prompted for the name of the list device, type lpt1 or type the name of the parallel port that the printer is connected If the printer and host are communicating, a blank page ejects from the printer. -
Page 68: Connecting Via The Serial Port
You want the printer to return information to the host The standard serial cable has a 25-pin male (DB-25) connector on the printer end and either a 9-pin female connector or a 25-pin female connector on the host. See appendix A for pinouts. - Page 69 Insert the 25-pin male printer end of the cable into the printer’s serial port (fig. 3.4); then tighten the screws on the cable to attach it to the printer. Host 9-Pin Male Port Fig. 3.4 Host and Printer Serial Interface Ports Plug the other end of the cable into the host’s serial port.
-
Page 70: Testing Serial Communication
To test communication between your printer and host, first create a short file that ejects a page from the printer and then send it to the printer. Creating the Test File To create the test file, type the following commands at the DOS prompt (you can use either uppercase or lowercase letters;... -
Page 71: Changing Serial Parameters
Chapter 3 If the printer and host are communicating, a blank page ejects from the printer. If a blank page does not eject and you typed the file correctly, see chapter 9, “Troubleshooting.” You may also want to check your AUTOEXEC.BAT file in DOS to make sure that the printer’s serial port settings match those of the PC. - Page 72 If you need to change other serial parameters, refer to chapter 4, “Printer Configuration,” for complete information. NOTE: The printer must be off line and idle to change printer configuration. How to Access Serial Mode...
- Page 73 SELECT How to Change the Baud Rate NEXT SELECT NEXT SELECT How to Change the Parity NEXT SELECT P r i n t e r - H o s t I n t e r f a c e SERIAL MODE SERIAL BAUD RATE...
- Page 74 Chapter 3 NEXT SELECT How to Change Data Bits NEXT SELECT NEXT SELECT 3 - 2 0 PARITY TYPE TYPE IS SELECTED SERIAL PARITY SERIAL DATA BITS DATA BITS 8 BITS DATA BITS 7 BITS 7 BITS IS SELECTED SERIAL DATA BITS P r i n t e r - H o s t I n t e r f a c e Advances through the Par-...
- Page 75 Changes option. Advances through the Save Changes options. Finishes printing any print jobs in process, saves changes, and idles or reini- tializes the printer. Turns on the indicator and puts the printer in a ready state. 3 - 2 1...
-
Page 76: Special Pc Concerns
Special PC Concerns PC Printer Drivers To communicate with your printer, a printer driver that supports PostScript and the QMS 860 Print System must be installed in your application. A printer driver converts generic printer commands from applications into printer-specific commands. Many applications have drivers built in, and you only have to choose a driver from a menu. -
Page 77: Pc Screen Fonts
QMS 860 Print System driver. Sometimes drivers are available from application manufacturers. Some drivers for QMS printers are also available through the QMS Corporate Bulletin Board System and through CompuServe; see appendix D, “QMS Customer Support,”... -
Page 79: Printer Configuration
Chapter 4 Printer Configuration Chapter highlights: Printer control panel operation Printer menu structure... -
Page 81: Introduction
Introduction Now that you have your QMS 860 Print System set up (chapter 2), connected to a host computer, and ready to print (chapter 3), you need to learn more about how to control the printer and the printing process. This chapter describes the printer’s menu structure, which you access through the printer’s control panel. -
Page 82: Printer Control Panel
Seven control panel keys (three function keys and four menu keys) that allow you to access frequently used printer options. Fig. 4.1 Printer Control Panel 4 - 2... -
Page 83: Control Panel Indicators
P r i n t e r C o n f i g u r a t i o n Flashes when the printer is warming up. Remains on when the printer is ready to receive a print job and during printer operation unless an error is encountered. -
Page 84: Control Panel Display
Control Panel Function Keys The three function keys (Online/Offline, Cancel, and Status Page) access frequently used printer options. The four menu keys (Menu, Select, Next, and Previous) access the Configuration menu and select options. Keep in mind that some of the function keys may be used in combination with the menu keys. -
Page 85: Online/Offline Key
If the printer is not idle, jobs may be lost. Online/Offline Key When the printer is on line, the indicator on the key is lighted. Press the key once to take the printer off line (the indicator goes out). You must take the printer off line before using all other keys except the Cancel key and the Status Page key. - Page 86 How To End a Print Job Press the control panel keys in the order shown in the following instructions to send an end-of-job indicator. The printer responds by displaying a status message in the message window. You may need to press the Next key one or more times to advance through the list of selections or options.
-
Page 87: Status
See chapter 5, the “Printing a Status Page” section, for information on the status page contents. It is not necessary to take the printer off line to print a status page. How to Print a Status Page Press the control panel keys in the order shown in the following instructions to print a status page. -
Page 88: Control Panel Menu Keys
Printer Response When the printer is on line, the indicator on this key lights. Press the key once to take the printer off line (the indicator goes out). You must take the printer off line before going into the control panel menu for all keys except the Cancel key and the Status Page key. -
Page 89: Menu Structure
Menu Structure Use the Configuration menu to access printer configuration selections. The Configuration menu is organized into groups by logical function. The three functions are Installation, Operator Control, and Administration (fig. 4.2). The menu allows you to select a function using the Select key, then another menu appears that displays the list of selections for that function. - Page 90 Administration Use this f unction to maintain host computer communication information for selecting and configuring printer emulations, configuring special pages, printing engine calibration, and configuring hard disks (if installed). 4 - 1 0 P r i n t e r C o n f i g u r a t i o n...
-
Page 91: Accessing The Configuration Menu
Panel Keys ONLINE/ OFFLINE MENU NOTE: The printer must be off line and idle to change printer configuration. Using Passwords The Operator Control and Administration menus may be password protected using an optional security card. If a password is required, the message window displays ENTER PASSWORD when you use the Select key to enter the menu. -
Page 92: Accessing Selections And Options
Chapter 4 the Configuration menu. If you specify the correct password, access to the selected menu is granted. Accessing Selections and Options Menus list each selection available within a functional group. For example, in figure 4.3 the Administration menu has a Communications submenu that has a Parallel selection. - Page 93 Press the control panel keys in the order shown in the following instructions to select Configuration menu options. The printer responds by displaying a status message in the message window. The top line of the message window displays the name of the current menu, and the second line displays the name of the current selection.
-
Page 94: Entering Character Information
ONLINE/ OFFLINE Entering Character Information Use the printer control panel to enter character information in the message window. A character is any letter, digit, or symbol. A field is a group of characters that have meaning. The maximum length of the message window is 16 characters. - Page 95 If the current character information is longer than the value that you need to enter, replace each extra character with a space. The printer interprets a space at the end of character information as a blank. Press the control panel keys in the order shown in the following instructions to change the HP-GL emulation scaling percent.
- Page 96 HP-GL SCALING PERCENT SCALING PERCENT P r i n t e r C o n f i g u r a t i o n Printer Response Turns off the indicator. Accesses the Configura- tion menu. Advances to the Admini- stration menu.
-
Page 97: Saving Configuration Changes
SELECT and PREVIOUS SELECT Saving Configuration Changes Before the printer can accept print jobs with configuration changes, the changes must be saved. How to Save Configuration Menu Changes Press the control panel keys in the order shown in the following instructions to save Configuration menu changes. - Page 98 ONLINE/ OFFLINE NOTE: Some Administration menu changes require that the printer be restarted before they take effect; usually the printer does this automatically if necessary. However, if you make configuration changes and they do not take effect, wait until the current jobs have ended, then try turning the printer off and on.
-
Page 99: Installation Menu
Installation Menu Use the Installation menu to password-protect the Operator Control and Administration menus. The Installation menu (fig. 4.4) appears when an optional security card is installed in your printer. Fig. 4.4 Installation Menu Operator Passwrd Maintains the Operator Control menu password. -
Page 100: Use Operator Pwd
Chapter 4 Use Operator Pwd Sets the Use Operator Pwd value. Use Operator Admin Password Maintains the Administration menu’s password. Prerequisite Admin Password Use Admin Pwd Sets the Use Admin Pwd value. Use Admin Pwd (default off; range on, off) 4 - 2 0 (default off;... -
Page 101: Operator Control Menu
Operator Control Menu Use the Operator Control menu (fig. 4.5) to maintain document processing and paper source values. These values are print job specific and should be specified within the print job. However, if there is no way of passing these values to your application’s print program, use the control panel to change the values, print the job, and then change the values back to their defaults. -
Page 102: Copies
Orientation Portrait Landscape NOTE: When printing a landscape image, let the application determine the orientation. If you change the printer’s orientation setting, your image may not print correctly. 4 - 2 2 (3 digits; default 001; range 001 - 999) Specifies the number of copies for each print job. -
Page 103: Inputbin
Inputbin Maintains the default tray or paper cassette from which paper is taken. To change the default input bin, select the appropriate input bin through the printer control panel, then turn the printer off and back on again. Inputbin Chain Inputbins Maintains the chain input bin value. -
Page 104: Administration Menu
(when installed). The printer must restart itself for some of the Administration menu values to take effect. The options within this menu are seldom changed after the initial system installation. -
Page 105: Administration / Communications
Administration/Communications Fig. 4.7 Administration/Communications Administration / Communications / Timeouts Sets amount of time the printer waits on transmission from the host for various types of data. PS Wait Timeout Emul Timeout (5 digits; default 00005; range 00000-99999) - Page 106 A 00000 value does not turn off the serial interface’s spooling buffer. If the value is 00000, the printer calculates the Min K Spool value at initialization. Prerequisite: Value must be less than K Mem for Spool.
- Page 107 Enables or disables data stream sensing for the end-of-document (EOD) command. See appendix F, “Additional Technical Information,” for details on how to implement this feature on your QMS 860 Print System. None PostScript ^D (CTRL D) command...
- Page 108 (default normal; range normal, normal fixed, binary, binary fixed) Sets the binary communications protocol (BCP) for communicating over a serial interface to a PostScript printer. See appendix F, “Additional Technical Information,” for more information. Normal Enables standard, ASCII hex proto- col.
-
Page 109: Administration / Communications / Parallel
Enables or disables data stream sensing for the end-of-document (EOD) command. See appendix F, “Additional Technical Information,” for details on how to implement this feature on your QMS 860 Print System. Chapter 4 4 - 2 9... -
Page 110: Administration / Communications / Appletalk
(default enabled; range enabled, disabled) Enables or disables the communication interface. You must turn the printer off and back on again before changes take effect. P r i n t e r C o n f i g u r a t i o n... - Page 111 Establishes one-way AppleTalk com- munication from the host to the printer. Disabled Turns off the AppleTalk interface, and the printer stops accepting AppleTalk interface print jobs. (default conventional; range conventional, spool) Connection allows you to enable or disable print spooling.
-
Page 112: Administration / Emulations
ESP is unable to identify the language of a print job. This default allows the system administrator to select alternate default emulations. You must turn the printer off and back on again for the changes to take effect. - Page 113 Plotter Scaling Percent (default 100; range 001-150) Origin Reverse Image (default off; range off, on) Enhanced Mode (default off; range off, on) Expand Mode Paper Type P r i n t e r C o n f i g u r a t i o n (default 7550A;...
- Page 114 Chapter 4 Pen 1 Pen 2 Pen 3 Pen 4 Pen 5 Pen 6 Pen 7 Pen 8 4 - 3 4 210 x 297 mm (closest metric value for letter) 297 x 420 mm (closest metric value for 11" x 17") Width and color for pen 1 of the plotter.
- Page 115 (default Courier 12; range Courier 12, Courier 12 Bld, Courier 12 Itl, Courier 10, Courier 10 Bld, Courier 10 Itl, Lineprinter) Sets the printer’s default font. (default Roman 8; range Roman 8, PC-850, PC8-US, PC8-DN, ECMA-94, HP German, HP Spanish, ISO 2,...
- Page 116 Chapter 4 Administration / Emulations / PostScript Allows you to select a PostScript emulation level. Emulation Level 4 - 3 6 (default Level 2; range Level 2, Level 1 color, Level 1 B/W) Level 2 For PostScript Level 2 files and most Level 1 files.
-
Page 117: Administration / Special Pages
Header Inputbin Trailer Page Trailer Inputbin (default no; range no, yes) Status page lists printer identification information, c urrent mem ory configura ti on, ti meouts, communication settings, input buffer sizes, and available fonts. Does not print a status page. - Page 118 Chapter 4 Header Inputbin Trailer Page Trailer Inputbin 4 - 3 8 Does not print a header banner page. Prints a header banner page before each print job. (default inputbin 1 name; range inputbin 1 name, inputbin 2 name, inputbin 3 name) Input bin to select paper from when printing the header page.
-
Page 119: Administration / Startup Options
Administration / Startup Options Use the Administration /Startup Options menu (fig. 4.10) to configure your printer to run certain options automatically when the printer is turned on. Administration/Startup Options Fig. 4.10 Administration/Startup Options Do Start Page P r i n t e r C o n f i g u r a t i o n inputbin 3 (optional). - Page 120 Indicator that opens a PostScript file named SYS/START, if a hard disk is attached, that is used to custom configure and initialize PostScript-selectable capabilities when the printer is turned on. The Do Sys/Start file does not print. Opens the SYS/START file.
-
Page 121: Administration /Memory
However, misallocated memory may hinder the performance level of the printer. On your QMS 860 Print System you can maintain memory in one of two ways: allocate each client’s memory individually through the Administration / Memory menu or use Quick Config to easily configure your frame buffer. - Page 122 Quick Config uses the resolution and the paper size to configure the printer’s frame buffer memory for the most complicated conditions in a particular environment. The printer sets values that are guaranteed to work with the amount of RAM currently installed in the printer.
-
Page 123: K Mem For Ps Heap
3. The other half of the remaining memory is called float memory and it may be used by any interface that needs to spool additional data, but has exceeded its allocation. Interfaces have access to float memory on a first-in-first-out basis, only when it is available and not being used. -
Page 124: K Mem Display
Number of kilobytes of RAM to be used by non-PostScript emulations for storing downloaded (“soft”) fonts, forms, or macros. Data in this client disappears when the printer is turned off. This client is listed as Temporary on the status page. Increasing this client’s memory increases the amount of PCL downloaded... -
Page 125: Mb Printer Mem
The size of this client’s memory limits the number of jobs which may be queued simultaneously. When this client’s memory is exhausted, the printer slows down and the hosts are forced to wait. This client is listed as System Use on the status page. -
Page 126: Administration / Engine
Chapter 4 Administration / Engine Use the Administration /Engine menu (fig. 4.12) to set print engine defaults. Fig. 4.12 Administration/Engine Image Alignment Adjusts the horizontal and vertical offset for placing a printed image on the page. Horiz Offset Vertical Offset (3 digits; default 100; range 000-300) Use the calibration tickmarks on the last page of the status page to adjust these pixel (dot) values. -
Page 127: Default Paper
Chapter 4 Default Paper (default letter; range letter, A4) Specifies a paper size for the printer to use if it does not recognize the paper size specified for a job. Inputbin 1 Name (16 characters; default multipurpose) Name for Inputbin 1 (multipurpose tray) to display at the control panel and to be used with DOC commands. -
Page 128: Def Resolution
Chapter 4 Def Resolution (default 600 dpi; range 300 dpi, 600 dpi) Sets the print engine’s default resolution. Gamma Correction (default 0; range 0-3) Sets the print engine’s gamma correction. See chapter 6, “Print Quality,” for more information on gamma correction. Enable Buzzer (default off;... -
Page 129: Administration / Miscellaneous
Administration / Miscellaneous Use the Administration / Miscellaneous menu (fig. 4.13) to restore defaults or to change the printer’s keypad (control panel) language. Administration/Miscellaneous Fig. 4.13 Administration/Miscellaneous Restore Defaults (default no; range yes, no) Keypad Language (default English; range English, French, German, Spanish) Sets the control panel display language. -
Page 130: Administration /Disk Operations
Fig. 4.14 Administration/Disk Operations CAUTION: If you connect to this printer an external hard disk you previously used with an earlier QMS Crown printer (QMS 860 release 1, QMS-PS 1700, QMS-PS 2000, QMS-PS 3200, or QMS ColorScript 210/230 release 1), this QMS 860 software release will automatically reorganize the files on the hard disk when the printer is turned back on again. -
Page 131: Install Option
The printer advances through the list of available hard disk locations. (The # symbol represents the disk number). Turn the printer off and back on again for the value to take effect. Location P r i n t e r C o n f i g u r a t i o n (default DSK#;... -
Page 132: Spool Overflow
RAM. The printer attempts to realize as much of this value as it can. Turn the printer off and back on again for this value to take effect. (The # symbol represents any hard disk). -
Page 133: Daily Operations
Chapter 5 Daily Operations Chapter highlights: Using print media Loading paper Chaining input bins Clearing paper jams Replacing the toner cartridge Cancelling and ending print jobs Caring for the printer... -
Page 135: Introduction
Universal 11.7 x 17.0 *The printer uses 11 x 17" print media in landscape orientation to support ledger. Table 5.1 Page Sizes and Imageable Regions D a i l y O p e r a t i o n s... -
Page 136: Working Within Imageable Regions
QMS vendor. Working Within Imageable Regions The imageable regions for print media on your QMS 860 Print System are not centered vertically on their respective pages and may vary You can align the image in several different ways: Adjust margins or page size through your application. -
Page 137: Paper
NOTE: Do not leave paper unwrapped or in a place where heat and humidity can damage it. Loading the 250-Sheet Paper Cassette The QMS 860 Print System comes standard with two 250-sheet paper cassettes (letter/A4 and 11" x 17"/A3). The printer automatically pulls paper from the paper cassette. You may purchase optional paper cassettes from your QMS vendor. - Page 138 Chapter 5 Load paper in either 250-sheet paper cassette as follows: Remove the paper cassette from the printer (fig. 5.1). Fig. 5.1 Remove the Paper Cassette 5 - 4 D a i l y O p e r a t i o n s...
- Page 139 Align the paper stack on a flat surface. Insert the paper stack into the paper cassette so that it lies flat, does not exceed the top limit mark (fig. 5.2), and rests under the retaining clips. The cassette holds about 250 sheets of 20 lb (75 g/m Fig.
- Page 140 Chapter 5 Insert the paper cassette into the paper cassette installation slot (fig. 5.3). Fig. 5.3 Insert the Paper Cassette 5 - 6 D a i l y O p e r a t i o n s...
- Page 141 Chapter 5 Push the filled paper cassette straight into the installation slot until it is firmly seated (fig. 5.4). Fig. 5.4 Seat the Paper Cassette D a i l y O p e r a t i o n s 5 - 7...
- Page 142 Chapter 5 Adjust the paper stop to fit the paper size (fig. 5.5). The printer delivers your output print-side down, to the output tray at the top of the printer. The paper stop keeps the paper positioned in the output tray.
- Page 143 Install the rear cassette covers (fig. 5.6) for both paper cassettes (only when using 11" x 17"/A3 or legal/B4 paper cassettes). Attach one to the rear of the printer and attach the other to the rear of the optional paper feeder.
-
Page 144: Loading Print Media In The Multipurpose Tray
(input bin 1). If the printer supports the paper size you want, insert the correct paper size in the multipurpose tray. If the printer does not support the paper size you want, select the universal paper size to clear the error. - Page 145 Open the multipurpose tray using both hands (fig. 5.7). The tray opens to about a 65° angle. Fig. 5.7 Open the Multipurpose Tray Adjust the multipurpose tray extension to fit the paper size. Pull out the tray extension by the metal area of the tray edge (fig.
- Page 146 Chapter 5 Adjust the paper guides to the size of the paper (fig. 5.9). Fig. 5.9 Adjust the Paper Guides 5 - 1 2 D a i l y O p e r a t i o n s...
- Page 147 (long edge first). Insert the print media straight in between the paper guides (fig. 5.10) as far as possible. The paper is automatically fed into the printer and the printed paper is forwarded to the output tray.
- Page 149 Chapter 5 If you are loading letterhead or memo paper in the multipur- pose tray, load it face down, lengthwise (long edge first) with the top of the page on the left side of the tray (fig. 5.11). Top of Page Letterhead/Memo Fig.
- Page 150 NOTE: Make sure that the print media does not exceed the limit mark on the paper guide and that the middle plate at the multipurpose tray’s paper entrance (fig. 5.12) is lowered before inserting the paper. If the middle plate is raised, turn the power off and then back on again before inserting the print media.
- Page 151 Chapter 5 Adjust the paper stop to the correct paper size (fig. 5.13). Fig. 5.13 Adjust the Paper Stop 5 - 1 6 D a i l y O p e r a t i o n s...
-
Page 152: Printing On Both Sides
Chapter 5 Printing on Both Sides You can print on both sides of the paper using the multipurpose tray. After printing one side, insert the paper in the tray with the side you want to print next facing down (fig. 5.14). -
Page 153: Transparencies
Chapter 5 Transparencies Use only transparencies recommended for laser printers. See appendix B, the “Consumable Supplies” section, for transparency specifications and vendors. Storing Transparencies Storing transparencies improperly increases the chance of jams during printing and can affect the print quality of your transparencies. -
Page 154: Labels
“Caring for the Printer” section of this chapter for instructions on how to clean the paper path. Remove each transparency from the output tray before the next sheet is printed to prevent jams or misfeeds. -
Page 155: Loading Labels In The Multipurpose Tray
Load upto 40 labels at a time in the multipurpose tray. Paper Cassette Chaining The QMS 860 Print System comes standard with two 250-sheet paper cassettes: letter/A4 and 11" x 17"/A3. You can insert only one of these paper cassettes at a time in the printer unless you purchase the optional paper feeder. - Page 156 How To Chain Paper Cassettes Press the control panel keys in the order shown in the following instructions. The printer responds by displaying a status message in the message window. You may need to press the Next key one or more times to advance through the list of selections or options.
-
Page 157: Clearing Media Jams
Clearing Media Jams With most printers, if a jam occurs, you must remove the jammed media and then reprint the job. However, the QMS 860 Print System provides automatic jam recovery. If a media jam occurs, remove the jammed media, and the printing automatically resumes from the page the printer stopped at when the jam occurred. -
Page 158: Locating Print Media Jams
Locating Print Media Jams When print media jams occur, a PAPER JAM message displays in the message window. Frequent jams in any area indicate that area should be checked, repaired, or cleaned. Repeated jams may also happen if you are using the wrong weight print media. (See appendix B, the “Print Media”... -
Page 159: Clearing Front Inside Area Jams
Drucker in Betrieb ist; bei Berührung dieser Partien besteht Verletzungsgefahr! Open the multipurpose tray, using both hands. Push up on the printer’s release button and open the front cover. 5 - 2 4 D a i l y O p e r a t i o n s... - Page 160 (fig. 5.16). Pull the print media in the opposite direction of that arrow (toward the printer) only if the end of the paper has passed completely through the fixing assembly. Print...
- Page 161 Chapter 5 Check the output tray. If the print media has passed through to the output tray, pull the print media in the direction of the arrow (fig. 5.17). After checking all print media paths in the fixing assembly area, close the front cover and the multipurpose tray. If the jam has been cleared, printing will restart.
-
Page 162: Clearing Paper Cassette Area Jams
Clearing Paper Cassette Area Jams Determine which paper cassette is currently being used and remove it. Check the paper cassette pick-up roller area and remove any jammed print media by pulling in the direction of the arrow (fig. 5.18). After replacing the paper cassette, open and close the front cover. -
Page 163: Clearing Front Upper Door Area Jams
Chapter 5 Clearing Front Upper Door Area Jams WARNING: The inside of the front upper door becomes ex- tremely hot when the printer is used. Personal injury could result if you touch that area. ACHTUNG: Die Innenseite der oberen Abdeckklappe wird im Betrieb sehr heiß;... -
Page 164: Clearing Multipurpose Tray Area Jams
Clearing Multipurpose Tray Area Jams NOTE: Leaving print media in the multipurpose tray can cause the print media position to shift during removal of the jam. This may result in a paper feed failure and another jam when printing is restarted. Open the multipurpose tray, using both hands. -
Page 165: Replacing The Toner Cartridge
Sometimes you may increase the life of the cartridge by taking it out of the printer and redistributing the toner in the cartridge as described in the “Installing the Toner Cartridge” section of this chapter. If the TONER OUT message remains in the message window, the toner cartridge must be replaced. - Page 166 NOTE: We recommend that you do not use refilled toner cartridges. Due to variations in toner quality and reliability, your print quality may be reduced. In addition, toner leaks affect your warranty. Replace the toner cartridge as follows: Open the multipurpose tray, using both hands. Push up on the release button and open the front cover.
- Page 167 Chapter 5 CAUTION: Do not touch or insert anything in the metal contacts or the opening circled in figure 5.22. Corrosion or obstruction in this area could cause the printer to malfunction. Metal Contacts Fig. 5.22 Toner Cartridge Area CAUTION: Put the old toner cartridge in the trash receptacle. Do not dispose of the old toner cartridge by placing it in fire.
-
Page 168: Installing The Toner Cartridge
See appendix B, the “Print Engine” section, for toner specifications. WARNING: The fixing assembly and print delivery guide areas become extremely hot when the printer is used. Personal injury could result if you touch those areas when opening the front cover or installing the toner cartridge. ACHTUNG: Sowohl die Fixiereinheit als auch die Papier- führung werden im Druckbetrieb extrem heiß. - Page 169 Chapter 5 Place the cartridge on a flat-stable surface, remove the black protective sheet (fig. 5.23), and discard it. Fig. 5.23 Remove the Protective Sheet 5 - 3 4 D a i l y O p e r a t i o n s...
- Page 170 Chapter 5 Hold the cartridge with both hands, and gently rock it from side-to-side five or six times to distribute the toner (fig. 5.24). Fig. 5.24 Distribute the Toner D a i l y O p e r a t i o n s 5 - 3 5...
- Page 171 Chapter 5 Hold the cartridge in place with one hand, and using your other hand grasp the orange tab on the right side of the tape seal (fig. 5.25). Keeping the toner cartridge parallel to the flat surface, pull the orange tab straight out (26.4"/67 cm). Discard the orange tab and tape seal.
- Page 172 Chapter 5 Grasp the green tabs on the toner cartridge, and place the cartridge on the rails inside the printer (fig. 5.26). Fig. 5.26 Place Toner Cartridge on Rails D a i l y O p e r a t i o n s...
- Page 173 Chapter 5 Hold the green tabs slightly lifted and slide the cartridge straight back into the printer until it is firmly seated (fig. 5.27). Fig. 5.27 Install the Toner Cartridge Close the front cover, and close the multipurpose tray (if it is not being used).
-
Page 174: Collating Output
Collating Output Collation is printing of multiple copies of a print job in numeric order. The QMS 860 Print System can deliver multiple copies of your files in collated order to the output tray. Figure 5.28 shows the collated and uncollated stacking for two copies of a four-page file. - Page 175 Each copy of the print job exists as a whole unless chunk collation has occurred. There is no offset stacking feature on your QMS 860 Print System, so it may be best to use a header and trailer page for determining the beginning and end of your print job.
-
Page 176: Printing A Status Page
Printing a Status Page Use the Status Page key to print a page listing the current printer settings. The status page (fig. 5.30) lists Printer identification (the printer’s name, firmware information, number of sheets printed) Printer settings (printer set-up options for paper handling) -
Page 177: Status Page
Chapter 5 Printer Identification Current Memory Configuration Communications Settings & Input Buffer Sizes Available Typeface Outlines Fig. 5.30 Printer Status Page 5 - 4 2 Status Page Printer Settings Timeouts D a i l y O p e r a t i o n s... -
Page 178: Cancelling A Print Job
It not necessary to press the Online/Offline key to take the printer off line before using the Cancel key. There are no equivalent functions in the control panel menu structure. - Page 179 Message Window WAITING FOR IN- END JOB? CANCELLING JOB? END JOB END JOB IS SELECTED Printer Response Displays the Cancelling Job confirmation message. Confirms that jobs which are printing or compiling data are to be deleted from the job queue.
-
Page 180: Caring For The Printer
Printer parts that require cleaning are the transparent sheet area and the outside surface of the printer. Handling the Printer Handle the printer with care to preserve its life. Abuse may cause damage. Do not place anything on the top of the printer. -
Page 181: Cleaning The Printer
Remove the toner cartridge from inside the printer. After removing the cartridge from the printer, return it to the aluminum bag in which it was originally packaged or wrap it in a thick cloth to protect it from direct sunlight or any other bright light. - Page 182 Remove the old toner cartridge as described in the “Replacing the Toner Cartridge” section of this chapter. Wipe the transparent sheet area clean (fig. 5.31) with a soft cloth soaked in water. Then wipe dry with another soft cloth. Fig. 5.31 Clean Transparent Sheet Area D a i l y O p e r a t i o n s Transparent Sheet...
-
Page 184: Print Quality
Chapter 6 Print Quality Chapter highlights: Testing the print quality Adjusting the print quality Changing the gamma correction... -
Page 186: Introduction
This chapter describes how to improve print quality. Density, gamma correction, screen frequency, and screen angles are some of the factors that affect print quality. Your QMS 860 Print System is a multi-resolution printer. This technology gives you more flexibility to control the print quality factors. - Page 187 Chapter 6 Locate the density adjustment dial that is inside the printer on the right side (fig. 6.1). The scale on the density adjustment dial shows the density setting; the dark marking increases density, and the light marking reduces density.
-
Page 188: About Gamma Correction
Halftone is a printed copy of a scanned image as a set of tiny, evenly spaced spots of variable diameter that, when printed, visually blur together to appear as shades of gray. Your QMS 860 Print System creates halftone cells by mapping each gray level onto a collection of dots. -
Page 189: Gray Levels
Chapter 6 The higher the resolution of the printer, the smoother the resulting spots, and the greater the number of gray levels possible because each spot is represented by a wider range of dots. The laser beam is part of the print engine, so it is not a factor that the user can adjust. -
Page 190: Screen Angle
Screen Angle is the angle at which a halftone screen prints. The default screen angle for your QMS 860 Print System is 45°. This is the normal angle for a black and white printer. You can change the screen angle through the PostScript setscreen operator. - Page 191 Chapter 6 Gamma 1 Gamma O Uncorrected Low Contrast Gamma O Gamma 2 Uncorrected Medium Contrast Gamma O Gamma 3 High Contrast Uncorrected 6 - 6 Change from Gamma 0 to Gamma 1 Gamma correction 1 provides low contrast. It provides a continuous tone of gray values from all white to all black.
-
Page 192: Gamma Correction Application
NOTE: You may want to use the settransfer PostScript operator to set gamma correction values not predefined in the printer. (See the QMS Crown Technical Reference Manual, which is an optional purchase available from you QMS vendor, for more information on settransfer.) -
Page 194: Professional Printing
Chapter 7 Professional Printing Chapter highlights: Introduction to typefaces and fonts Introduction to page design... -
Page 196: Introduction
Introduction Now you are ready to explore the potential of your QMS 860 Print System. This chapter displays the printer’s resident typefaces, offers suggestions for using them, and includes page design tips. A bibliography for graphic design, desktop publishing, and PostScript printing can be found at the end of this chapter. -
Page 197: Typeface Classification
Chapter 7 Character Typeface Classification One way of classifying the different typefaces is to group them into the following categories: Serif Sans serif Script Pi or symbol Serif—A serif is a decorative line or tail on the ends of the strokes of a letter. -
Page 198: Resident Postscript Fonts
Symbol and ITC Zapf Dingbats are pi typefaces. Resident PostScript Fonts The following 39 PostScript fonts come resident in your printer. See your QMS vendor if you are interested in expanding your printer’s typeface families. - Page 199 Chapter 7 Sans Serif 7 - 4 Courier Courier Oblique Courier Bold Courier Bold Oblique New Century Schoolbook Roman New Century Schoolbook Italic New Century Schoolbook Bold New Century Schoolbook Bold Italic Palatino Roman Palatino Italic Palatino Bold Palatino Bold Italic Times Roman Times Italic Times Bold...
- Page 200 Script Pi or Symbol All of these typeface families are authentic: they are licensed, they carry the true name, and they have multilingual character sets. P r o f e s s i o n a l P r i n t i n g Helvetica Narrow Helvetica Narrow Oblique Helvetica Narrow Bold...
-
Page 201: Hp Pcl Fonts
Chapter 7 HP PCL Fonts Your printer has the following resident HP PCL fonts: Typeface Courier Courier Courier Courier Courier Courier Line Printer *Fonts can be automatically rotated to Landscape 7 - 6 Pitch Point Style Regular Bold Italic Regular... -
Page 202: Postscript Typeface Sampler
PostScript Typeface Sampler Following are some tips on using your printer’s resident PostScript typefaces appropriately and effectively. Helvetica—Helvetica is a popular typeface, a modification of a kind of sans serif typeface called Grotesque. It is used widely in publishing and is admired for its clean lines, although it can be repetitive to the eye, ESPECIALLY WHEN IN ALL CAPS. - Page 203 Chapter 7 Courier—Courier typeface designed for electric typewriters by IBM. Courier has a bold form that is thick and stylish. The oblique form has its merits and uses, too, as does the bold oblique form. The Courier family may be used for counterpoint with Times and Helvetica.
- Page 204 Chapter 7 need a strong style. ITC Bookman has a bold form that is somewhat playful while the light italic and bold italic forms are more elegant. ITC Zapf Chancery Medium Italic—Dating from 1979, ITC Zapf Chancery Medium Italic is a graceful typeface that has the look of calligraphy. Designed by Hermann Zapf, it is useful for invitations, announcements, and text that needs elaborate flourishes.
-
Page 205: Page Design
Chapter 7 Page Design One rule to remember when designing documents is keep it simple. Avoid cluttering your documents with unnecessary font changes. It takes experience and talent to blend a wide range of typefaces skillfully, and using too many typefaces detracts from a document’s effectiveness. -
Page 206: Point Size
There are many words with meanings that apply only to typography (fig. 7.1). The following sections explain point, pitch, monospacing, proportional spacing, character set, family, orientation, stroke weight, italic, and oblique. Uppercase Character (CAPS) Cap Height (Key Size) Base Line Fig. -
Page 207: Pitch
Chapter 7 Pitch Pitch is the number of characters in a horizontal inch. Ten-pitch Courier prints ten characters per inch. Therefore, ten-pitch type is wider than twelve-pitch type since only ten characters fill a horizontal inch rather than twelve. Another name for this measurement is cpi (characters per inch). -
Page 208: Character Set
readability. The following example shows the difference between a fixed-pitch (monospaced) font and a proportionally spaced font: Character Set A character set is a collection of symbols designed for various printing applications. Many character sets are composed of the alphabet, the numbers zero through nine, and an assortment of other symbols, such as the dollar sign and the ampersand. -
Page 209: Italic And Oblique Forms
Chapter 7 Italic and Oblique Forms Italic typeface derives from the early sixteenth century and was the printed form of cursive writing. Italic forms are individually crafted typefaces. Oblique (or slanted) type forms, however, are not designed and crafted individually but are mechanically slanted versions of the upright (or Roman) form from which they derive. -
Page 210: Bibliography
Bibliography For more information on PostScript printing, graphic design, and desktop publishing, refer to the following publications: Adobe Serial and Parallel Communications Protocols Specification. Adobe Developer Support. Adobe Systems, Inc., February 14, 1992. Adobe Systems, Inc. PostScript Language Program Design. Reading, MA: Addison-Wesley, 1988. - Page 211 Chapter 7 PostScript Language Reference Manual. Supplement for Version 2011 Adobe Systems, Inc., January 24, 1992. Smith, Ross. Learning PostScript: A Visual Approach. Berkeley: Peachpit Press, 1990. ISBN 0-938151-12-6. 7 - 1 6 P r o f e s s i o n a l P r i n t i n g...
-
Page 212: Printer Options
Chapter 8 Printer Options Chapter highlights Additional printer options Installation procedures for printer options... -
Page 214: Introduction
Introduction QMS offers many options that expand the QMS 860 Print System’s capabilities. The following are available for purchase from your QMS vendor: Paper cassettes in the sizes shown in appendix B, the “Consumable Supplies” section Paper feeder Paper cassette supporter... - Page 215 Keep replacement cassettes close by, and you can easily change paper by slipping one cassette out and another in. The QMS 860 Print System has three user-installable paper input configurations. Standard Configuration (250 x 1)
-
Page 216: About The Paper Feeder
Save the packing material in case you ever have to move or ship the printer to a new location. Installing the Paper Feeder CAUTION: Turn off the printer before installing the optional paper feeder. Install the paper feeder as follows: Disconnect the power cord and all printer interface cables. - Page 217 Chapter 8 Lift the back side of the printer with your left hand and remove the connector cover on the lower-right side (fig. 8.1) by pulling the connector cover away from the printer. Fig. 8.1 Remove the Connector Cover Place the paper feeder on a stable, flat surface, and turn the paper cassette installation slot toward you.
- Page 218 Chapter 8 Pull the green lock levers, located on the right and left of the paper feeder bottom (fig. 8.2), toward you (lock released condition). Lock Claws Paper Cassette Installation Slot Lock Levers Fig. 8.2 Release the Lock Levers P r i n t e r O p t i o n s 8 - 5...
- Page 219 Chapter 8 Move the connector cable located at the inner left of the paper feeder to the outside of the paper feeder (fig. 8.3). Fig. 8.3 Move the Connector Cable 8 - 6 P r i n t e r O p t i o n s...
- Page 220 Place the printer so that the extrusions on the paper feeder are inserted into the holes on the bottom of the printer (fig. 8.4). Be careful that the connector cable is not caught between the printer and the paper feeder.
- Page 221 Chapter 8 Plug the connector cable located at the inner left of the paper feeder into the printer’s connector at the back of the printer (fig. 8.5). Fig. 8.5 Plug in the Connector Cable 8 - 8 Connector Cable P r i n t e r O p t i o n s...
- Page 222 P r i n t e r O p t i o n s...
-
Page 223: Removing The Paper Feeder
Remove the paper feeder from the printer as follows: Turn off the printer. Disconnect the power cord and all interface cables. Remove any installed paper cassettes from the printer. -
Page 224: Unpacking The Cassette Supporter
Installing the Cassette Supporter The cassette supporter is installed on the paper feeder, and then the paper feeder is installed on the printer. If the paper feeder is already attached to the printer, first remove the paper feeder as described in the “Removing the Paper Feeder”... - Page 225 Chapter 8 Locate the lock buttons on the bottom left and right of the cassette supporter (fig. 8.7). Pull the lock buttons out until you hear them click. Then place the cassette supporter on a flat, stable surface. Fig. 8.7 Pull Out the Lock Buttons 8 - 1 2 Lock Buttons P r i n t e r O p t i o n s...
- Page 226 Chapter 8 Fit the holes on the bottom of the paper feeder onto the extrusions on the cassette supporter (fig. 8.8). Extrusions Fig. 8.8 Place Paper Feeder on Cassette Supporter P r i n t e r O p t i o n s 8 - 1 3...
- Page 227 Lock Buttons Fig. 8.9 Lock Paper Feeder to Cassette Supporter Attach the paper feeder to the printer. See the “Installing the Paper Feeder” section earlier in this chapter for instructions. 8 - 1 4...
-
Page 228: Removing The Cassette Supporter
Removing the Cassette Supporter If you find it necessary to remove the cassette supporter from the printer, use the following procedure: Turn off the printer. Disconnect the power cord and all interface cables. Remove any installed paper cassettes from the printer. -
Page 229: Dual Paper Cassettes
Chapter 8 Dual Paper Cassettes Dual paper cassettes increase your printer’s paper feed capacity and give you expanded flexibility to change paper size and color. When using two paper cassettes that are attached with the paper feeder, both cassettes must be inserted in order to print. There are... -
Page 230: Loading The 500-Sheet Paper Cassette
Loading the 500-Sheet Paper Cassette Load paper in the 500-sheet letter/A4 sheet paper cassette in increments so that all 500 sheets fit in the cassette and the paper stack is properly leveled out. Use the procedure that follows to load the paper cassette: Fan the paper stack and align the paper on a flat surface. - Page 231 Chapter 8 Ensure that the paper stack lies flat, does not exceed the top limit mark, and is positioned under the retaining clips (fig. 8.11). Fig. 8.11 Position Paper in 500-Sheet Paper Cassette 8 - 1 8 Retaining Clips P r i n t e r O p t i o n s...
- Page 232 Insert the paper cassette in the paper installation slot (fig. 8.12). Fig. 8.12 Insert the 500-Sheet Paper Cassette Push the filled paper cassette straight into the installation slot until it is firmly seated. P r i n t e r O p t i o n s Chapter 8 8 - 1 9...
- Page 233 Adjust the paper stop to fit the paper size (fig. 8.13). The printer delivers your output, print-side down, to the output tray at the top of the printer. The paper stop keeps the paper positioned in the output tray. Fig. 8.13 Adjust the Paper Stop...
-
Page 234: Font And Emulation Cards
CAUTION: The printer must be off line (the Online/Offline indi- cator is off) before you insert or remove cards. Press the Online/Of- fline key once to take the printer off line. If you insert a font or emulation card in one of the card slots without taking the printer off line, you cannot use the printer’s resident fonts and data stored... -
Page 235: Removing Font And Emulation Cards
(fig. 8.14). Fig. 8.14 Insert the Font or Emulation Card Press the Online/Offline key to put the printer back on line. NOTE: If you are using a font card, you should also make sure that the printer driver you have installed for each application supports the fonts on the card. -
Page 236: Security Cards
A security card uses the same slots as font and emulation cards. The card slots are located on the right side of the printer above the power switch. Use a security card as follows: Take the printer off line. - Page 237 After you have password-protected the menus, remove the security card from the slot, and press the Online/Offline key to put the printer back on line. 8 - 2 4 P r i n t e r O p t i o n s...
- Page 238 INSTALLATION OPERATOR PASSWRD INSTALLATION USE OPERATOR USE OPERATOR IS SELECTED Chapter 8 Printer Response Accesses the Configura- tion menu and advances to the Configuration/Installa- tion menu. Accesses the Configura- tion/Installation menu and a dva nc es t o Operat or Passwrd.
- Page 239 Finishes printing any print jobs in process, saves changes, and idles or reini- tializes the printer. Turns on the indicator and puts the printer in a ready state. Printer Response Accesses the Configura- tion menu and advances to the Configuration/Installa- tion menu.
- Page 240 Advances to the next Save Changes option. Finishes printing any print jobs in process, saves changes, and idles or reini- tializes the printer. Turns on the indicator and puts the printer in a ready state. 8 - 2 7...
-
Page 241: Removing The Printer And Controller Board Covers
Umrüstungen nur durch einen qualifiz- ierten QMS Servicetechniker durchgeführt werden. The printer and controller board covers must be removed when a SIMM or an optional network interface is installed. CAUTION: Eliminate static by putting on the anti-static wristband provided with your printer option accessory kit and grounding it to any base metal surface (such as the bottom of your telephone). - Page 242 Chapter 8 may build up static and you will have to repeat the grounding process. P r i n t e r O p t i o n s 8 - 2 9...
- Page 243 (parallel, serial, AppleTalk, and the optional interface) from the printer. Open the multipurpose tray, using both hands. Push up on the release button and open the printer’s front cover. Remove and set aside the two screws on each end of the front inside of the printer (fig.
- Page 244 Lift the printer’s cover, using both hands. Then hold the cover with your right hand while you unplug the connector cable from the printer (Fig. 8.17). This allows access to the printer’s controller board. Fig. 8.17 Remove the Printer’s Cover...
- Page 245 Chapter 8 Remove and set aside the 15 screws on the metal controller board cover (fig. 8.18). Then remove the metal cover to access the controller board. Fig. 8.18 Remove the Controller Board Cover 8 - 3 2 P r i n t e r O p t i o n s...
-
Page 246: Replacing The Printer And Controller Board Covers
Replacing the Printer and Controller Board Covers The printer and controller board covers must be reinstalled after a SIMM or an optional network interface is installed. CAUTION: Eliminate static by putting on the anti-static wristband provided with your printer option accessory kit and grounding it to any base metal surface (such as the bottom of your telephone). - Page 247 Chapter 8 Hold the printer’s plastic cover over the top of the printer and slide the connector cable back into the printer’s connector (fig. 8.20). Fig. 8.20 Plug Connector Cable into the Printer 8 - 3 4 Connector Cable P r i n t e r O p t i o n s...
- Page 248 Lower the printer cover and position it firmly on the printer. Secure the cover to the printer by replacing the two screws you removed earlier (fig. 8.21). Fig. 8.21 Replace Front Inside Screws Reconnect all interface cables and the power cord, and then turn on the printer.
-
Page 250: Simms
Additional printer memory allows you to download more fonts and increase the printer’s buffer (area where data sent from the computer is stored while it is waiting to be printed). Your printer comes with 12 MB RAM and is upgradable to 32 MB through user-installable 4 MB or 8 MB SIMMs (Single In-Line Memory Modules). - Page 251 Follow the steps in the “Removing Printer and Controller Board Covers” section of this chapter to access the controller board. Remove the SIMM from the anti-static bag. Hold the SIMM at a 45° angle to the controller board, with the notch on the left side.
- Page 252 Repeat steps 2-4 for each additional SIMM you are installing. Replace the printer and controller board covers by following the steps in the “Replacing the Printer and Controller Board Covers” section found earlier in this chapter. 8 - 3 7...
-
Page 253: Removing A Simm
12 MB of RAM installed. CAUTION: Eliminate static by putting on the anti-static wristband provided with your printer option accessory kit and grounding it to any base metal surface (such as the bottom of your telephone). - Page 254 45° angle away from the SIMM connector (fig. 8.24). Fig. 8.24 Remove the SIMM Follow the steps in the “Replacing the Printer and Controller Board Covers” section of this chapter to replace the covers. 8 - 3 9...
-
Page 255: Optional Network Interface Assembly Kit
An optional network interface is installed as follows. CAUTION: Eliminate static by putting on the anti-static wristband provided with your printer option accessory kit and grounding it to any base metal surface (such as the bottom of your telephone). Avoid walking around after grounding yourself because your body may build up static and you will have to repeat the grounding process. - Page 256 Chapter 8 Follow the steps in the “Removing the Printer and Controller Board Covers” section of this chapter to access the controller board. Install the two support posts that came with the daughterboard into the two holes on the controller board. The support posts have a larger diameter at one end and are tapered at the other end.
- Page 257 Covers” section found earlier in this chapter. Remove the screws from the optional interface plate on the back of the printer and save for reuse later or discard. P r i n t e r O p t i o n s...
-
Page 258: Using An Optional Network Interface
Chapter 8 Place the optional interface board on the optional interface connector at the back of the printer and push gently to seat it properly. Secure the optional interface board to the printer with the four screws provided in the kit (fig. 8.27). -
Page 259: Centronics To Dataproducts Conversion
PS Protocol Centronics to Dataproducts Conversion Your printer is shipped with a Centronics parallel port, but a kit for converting it to Dataproducts is available from your vendor. Make sure you have all the parts necessary for the conversion. The... - Page 260 A 50-pin to 36-pin cable Follow the instructions in the “Removing the Controller Board and Printer Covers” section earlier in this chapter, being careful to follow the directions for eliminating static before you begin. Face the controller board so that the side where the SIMMs are is closest to you and the parallel port is located on your right side.
- Page 261 Chapter 8 Place the two shunts on the two jumpers (JP1 and JP2) nearest the parallel port (fig. 8.28). (Orientation of the shunts is not important.) Fig. 8.28 Place the Shunts on the Jumpers P r i n t e r O p t i o n s 8 - 4 6...
- Page 262 330-ohm SIP resistor prongs in the RN4 socket (fig. 8.29). Fig. 8.29 Insert the SIP Resistors Follow the instructions in the “Replacing the Printer and Controller Board” section earlier in this chapter, being careful to follow the directions for eliminating static.
-
Page 263: External Hard Disks
External Hard Disks Your QMS 860 Print System supports up to seven optional external hard disks through the SCSI port on the rear of the printer (fig. 8.30). These hard disks provide storage space for optional emulations and permanent downloading of fonts. -
Page 264: Identifying Hard Disks
External hard disks are identified by their device numbers (fig. 8.31). These seven numbers range from DSK0 to DSK6 and can be configured by the installer. Before turning on the printer, make sure the hard disk is turned on. Disk Online prints on the status page. - Page 265 After you have accessed the Administration/Disk Operations menu, press the control panel keys in the order shown in the following instructions to format a hard disk. The printer responds by displaying a status message in the message window. You may need to press the Next key one or more times to advance through the list of selections or options.
-
Page 266: Installing An Optional Font Or Emulation
Installing an Optional Font or Emulation CAUTION: If you connect to this printer an external hard disk you previously used with an earlier QMS Crown printer (QMS 860 release 1, QMS-PS 1700, QMS-PS 2000, QMS-PS 3200, or QMS ColorScript 210/230 release 1), this QMS 860 software release will automatically reorganize the files on the hard disk when the printer is turned back on again. - Page 267 After you have accessed the Administration/Disk Operations menu, press the control panel keys in the order shown in the following instructions to install an option. The printer responds by displaying a status message in the message window. You may need to press the Next key one or more times to advance through the list of selections or options.
-
Page 268: Removing An Optional Font Or Emulation
After you have accessed the Administration/Disk Operations menu, press the control panel keys in the order shown in the following instructions to remove an option. The printer responds by displaying a status message in the message window. You may need to press the Next key one or more times to advance through the list of selections or options. - Page 269 SELECT SELECT MENU After the option is removed, remove the card from the slot and place the printer back on line. P r i n t e r O p t i o n s REMOVE SOURCE CAR#: REMOVE OPTION...
-
Page 271: Troubleshooting
Chapter 9 Troubleshooting Chapter highlights: Preventing jams Responding to status messages Problem checklist Print quality problems Placing a service call... -
Page 273: Introduction
Preventing Print Media Jams Many printer problems are caused by improper handling of paper. The following sections provide information about using consumables properly. -
Page 274: Status Messages
Status Messages Status messages in the message window provide information about your printer and help you locate many problems. They are displayed in order of importance. If a message is only one line long, it can be displayed along with another message (with the highest priority message on the top line). - Page 275 IDLE T r o u b l e s h o o t i n g Indicates that the printer is on line and the number of jobs displayed (x equals number of jobs in the queue) are in process.
- Page 276 TONER OUT WAITING FOR IDLE 9 - 4 Indicates that the printer is on line and print- ing jobs that are already in the queue; no new jobs are arriving at the communication inter- faces. Indicates that system is getting ready to go on line.
-
Page 277: Postscript Error With Error Handler Enabled
If you receive a PostScript error when printing a new file from a new application, check the “Other Common Printer Problems” section that appears later in this chapter for a solution. If no solution is found, see the PostScript Language Reference Manual (Adobe Systems, Inc.,... -
Page 278: Printer Problem Checklist
Printer Problem Checklist This section contains a list of possible printer problems and solutions. If you have just installed your printer and are having problems, be sure you have correctly followed the steps outlined in chapter 2, “Printer Installation,” and chapter 3, “Printer-Host Interface.”... - Page 279 Is the printer off line before you try to enter the menu? It should be. Does the paper cassette or tray have paper? If it is out of paper, the message PUT SIZE PAPER IN INPUTBIN is displayed in the control panel message window and the Error indicator is lit.
-
Page 280: Ibm Pc And Compatible Computer Checklist
Chapter 9 If you still cannot identify the problem, contact your QMS vendor. Is the printer printing codes or not printing at all when in ESP mode? Reconfigure the port to the specific printer language of the file you are trying to print. See chapter 3, “Printer-Host Interface,”... -
Page 281: Apple Macintosh Checklist
System Folder or Extensions Folder? Have you used the Chooser to select “LaserWriter,” “QMS 860 Print System,” or another PostScript driver? Is AppleTalk active in the Chooser dialog box? Are the screen fonts installed? (See chapter 3, “Printer-Host Interface.”) -
Page 282: No Start-Up Page
If the start-up page is turned on, go to step Turn the printer off. From a cold start, it takes a minute for the printer to warm up. Be sure you wait long enough for a start-up page before suspecting a problem. -
Page 283: Printer Resets
Printer Resets Occasionally, Macintosh applications interfere with each other. Applications send a printer prep file to the printer at the beginning of each document. Other prep files cannot be sent without resetting the printer. Monitor your activities to see if there is a correlation between your use of a certain driver version and the printer resetting. -
Page 284: Not All Pages Print
If the message is still there, try opening and closing the top of the printer again. As a last resort, try turning the printer off and on (this causes jobs to be lost). PostScript Emulation Job Does Not Print If the print job is set for PostScript or ESP emulation, increase the PS Heap value to at least 1536 KB and reprint the job. -
Page 285: Multiple Pages Problem
PostScript level set to Level 2. See chapter 4, the “Administration / Emulations / PostScript” section, for more information. Multiple Pages Problem If you are experiencing unexpected results when printing multiple pages, try turning the collation feature off so that the memory used for compressed pages can be released after it has been used. -
Page 286: Printer Does Not Print 600 Dpi
(including 3 hole punched). Perforated and 3-hole punched paper are not recommended for your QMS 860 Print System. Generates a PAPER SIZE MISMATCH error. Partially prints the page (approximately other part of the page blank). -
Page 287: Ledger Versus 11 X 17" Problem
1. Check the syntax and spelling of the EOD command in your file or network job separator, depending on your environment. 2. Check that the end job mode on the printer’s control panel and the EOD command in your file or network job separator, depending on your environment match. -
Page 288: General Print Quality Problems
Chapter 9 commands may cause the printer to select the incorrect emulation or to print the EOD command on your print job. General Print Quality Problems Print quality problems are those related to the appearance of the pages you print. Print quality problems include white lines on the page, uneven blacks, and other print distortions. -
Page 289: White Or Light Lines
Light Image (Entire Page) Increase the print density by adjusting the print density control lever inside the printer to the thick end of the wedge-shaped scale. Remove the toner cartridge and rotate it as you would when installing a new cartridge. This redistributes toner inside the cartridge. -
Page 290: Stain Along The Edge Of The Page
Chapter 9 Contact your QMS vendor. Stain along the Edge of the Page Install a new toner cartridge. Stains on the Back of the Page The paper path may be dirty. Clean the paper path area. See chapter 5, “Daily Operations,” for more information. Image Smears when Rubbed Place a service call. - Page 291 CALL FOR SERVICE ENGINE ERROR 6 CALL FOR SERVICE ENGINE ERROR 7 CALL FOR SERVICE ENGINE ERROR 8 CALL FOR SERVICE ENGINE ERROR 9 If you have technical questions your QMS vendor is unable to answer, you may call QMS Customer Technical Service. See appendix D, “QMS Customer Support,”...
-
Page 293: Cable Pinouts
Appendix A Cable Pinouts... -
Page 295: Appletalk
AppleTalk The table below gives the correct pinouts for the printer end of the 8-pin LocalTalk cable used to connect a computer and printer: Pinout: AppleTalk C a b l e P i n o u t s Pin No. -
Page 296: Centronics Parallel
Appendix A Centronics Parallel This table gives the correct pinouts for the Centronics parallel interface cable that can be used with your printer. (See “Notes to the Centronics Parallel Cable Pinouts Table” on the next page for more information.) Pinout:... -
Page 297: Notes To The Centronics Parallel Cable Pinouts Table
To prevent noise effectively, these cables should be shielded and connected to the chassis of the system unit and printer, respectively. All interface conditions are based on Transistor-Transistor Logic (TTL) level. Both the rise and fall times of each signal must be less than 0.2 microseconds. -
Page 298: Dataproducts Parallel
Appendix A Dataproducts Parallel This table gives the correct pinouts for the Dataproducts parallel interface cable that can be used with your printer. Pinout: Dataproducts Parallel A - 4 Signal Return Signal Pin No. Pin No. Description Data Bit 3... -
Page 299: Serial
Serial This table gives the correct pinouts for the printer end of the 25-pin serial cable used to connect a computer and printer: Pinout: Serial C a b l e P i n o u t s Pin No. Name... -
Page 300: Ibm Pc/Xt, Pc/At, And Compatible Computers
The following tables show the suggested pinouts for IBM PC/XT, PC/AT, and compatible computers. Pinout: IBM PC/XT Pinout: IBM PC/AT A - 6 Printer IBM PC/XT DB-25S DB-25P Printer IBM PC/AT DB-25S DB-9P 1 (No Connection) C a b l e P i n o u t s... -
Page 301: Technical Specifications
Appendix B Technical Specifications... -
Page 303: Print Engine
Print Engine Maximum Duty Cycle Print Method Print Speed Resolution Toner Toner Cartridge Life Warm-Up Time T e c h n i c a l S p e c i f i c a t i o n s 10,000 pages per month Laser beam scanning and dry electrophotographic printing Up to 8 pages per minute using letter or A4 paper... -
Page 304: Physical Characteristics
4.76"/121 mm with optional paper feeder and cassette supporter Highest quality and performance 8 ppm 600 dpi desktop printer with 11" x 17" print capability About 50 lbs (22.68 kg) PostScript - Levels 2 and Level 1 compatibility mode... -
Page 305: Simms
QMS Order Number Electrical Mechanical Size Additional memory installed in your QMS 860 Print NOTE: System will not be allocated until you allocate memory through Quick Config or through the memory clients. See chapter 4 the, “Administration / Memory” section, and appendix F, the “Memory Management”... -
Page 306: Interfaces
Many minicomputers and mainframes There are subtle differences in the command sets of SCSI hard disks from different vendors; therefore, not all SCSI hard disks are compatible with this printer. The following 40 MB disk drives have been successfully tested:... -
Page 307: Electrical
Power Requirements Environmental Requirements Noise Level Ozone Density The printer emits less than 0.1 ppm maximum with a Relative Humidity Temperature Range T e c h n i c a l S p e c i f i c a t i o n s 50/60 Hz ( 2 Hz) 1 KW 68°... -
Page 308: Print Media
5.06 x 7.17 Executive 10.50 x 7.25 Universal* 11.70 x 17.00 *Maximum paper size **The printer uses 11 x 17" print media in landscape orientation to support ledger. Table B.1 Paper Sizes B - 6 Face down Paper cassette About 250 sheets of 20 lb (75 g/m... -
Page 309: Printer Manuals
Your QMS vendor provides the following optional manuals for purchase: Consumable Supplies Your QMS vendor provides the following options and consumables for the QMS 860 Print System: Options Paper Cassettes T e c h n i c a l S p e c i f i c a t i o n s Your printer can handle special paper, including labels and transparencies. -
Page 310: How Consumables Affect Your Warranty
QMS will not repair the printer free of charge. In this case, standard time and material charges will be applied to service your printer for that particular failure or damage. QMS recommends that you use only QMS consumables and accessories to support your printer. -
Page 311: Character Encoding Tables
Appendix C Character Encoding Tables... -
Page 313: Standard Encoding
Character Encoding Tables The tables on the following pages are examples of the character encoding used by the fonts available on your printer. The first table (titled “Standard Encoding”) is the standard encoding for all but two (Symbol and ITC Zapf Dingbats) fonts. The numbers at the far left of the table are the first two digits of the octal code values. -
Page 314: Standard Encoding
Appendix C Standard Encoding C h a r a c t e r E n c o d i n g T a b l e s c - 2... -
Page 315: Symbol
Appendix C Symbol c - 3 C h a r a c t e r E n c o d i n g T a b l e s... -
Page 316: Itc Zapf Dingbats
Appendix C ITC Zapf Dingbats... -
Page 317: Qms Customer Support
Appendix D QMS Customer Support... - Page 319 Your QMS printer vendor Your local vendor (the one from whom you bought the printer) may be best equipped to help you. Your vendor has specially trained service technicians available to answer questions, and the equipment to analyze your printer problems.
- Page 320 3 of that forum go qmsprint takes you directly to the QMS library section The QMS library section contains application notes, printer drivers, utilities, technical information, and announcements. Internet The QMS server provides access to technical reports, new product announcements, a trade show schedule, and other general information about QMS.
- Page 321 The application and version you are using The emulation you are using Your printer firmware version (listed on the status and start-up pages) Q M S C u s t o m e r S u p p o r t...
-
Page 322: Qms World-Wide Offices
Appendix D QMS World-wide Offices United States Asia-Pacific Canada Europe D - 4 QMS, Inc. One Magnum Pass Mobile, AL 36618 (205) 633-4300 Product Information: (800) 631-2692 or 2696 OEM Information: (800) 631-2692 Consumables: (800) 777-7782 Fax: (205) 633-4866 E-mail: info@qms.com QMS Asia-Pacific Auckland 64 (9) 630 7912 Hong Kong (852) 511 5300... -
Page 323: Document Option Commands
Appendix E Document Option Commands... -
Page 325: Document Option Commands (Doc
Document Option Commands (DOC) This appendix lists the supported Document Option Commands for your QMS 860 Print System. The commands are grouped in sections by feature type. Within each section the commands are alphabetized by the task being accomplished. Each command is preceded by a statement. -
Page 326: Hp-Gl Emulation
Appendix E HP-GL Emulation Expand plot Scale the image Select enhanced resolution Select original paper size Select pen width and color Select plotter Shift the origin Reverse image HP PCL Emulation Reset to PCL defaults Select font Select symbol set Set carriage return Set linefeed Set lines per page... -
Page 327: Additional Technical Information
Appendix F Additional Technical Information... -
Page 329: Introduction
The memory is divided among blocks or “memory clients,” each of which is dedicated to a specific printing and application purpose. Your QMS 860 Print System allows you to distribute the printer’s memory among the various memory clients where it can best serve your specific printing needs. -
Page 330: Qms Memory Management
Memory configuration affects these things as well as the number of jobs that can be accepted by the printer, the number of options available simultaneously, the number of downloadable fonts and emulations that can be stored, and overall printer performance. -
Page 331: Memory Terms
The frame buffer is the excess memory client on your QMS 860 Print System. Storage Storage is a device in or on which information can be kept. There are three main types of storage, ROM, RAM and hard disk drives. -
Page 332: Rom (Read Only Memory
ROM (Read Only Memory) This type of memory contains data and/or machine-executable instructions that can be read but not modified. On your QMS 860 Print System, the operating system code, resident fonts, and resident emulations are stored in ROM. This information is not lost when the printer’s power is turned off. -
Page 333: Non-Volatile Memory
This means that when you turn off your printer’s power, you do not lose this information. Volatile Memory This type of memory can be lost when the printer loses power. For example, most RAM is volatile. Physical Memory The physical memory on your printer is equal to the amount of RAM installed. -
Page 334: Spool (Simultaneous Print Operations On Line
Appendix F Spool (Simultaneous Print Operations On Line) Spooling is temporary storage to hold print jobs until the printer is available to process them. Evaluation of Your Printing Environment The first step in allocating your printer’s memory is to define your printing needs. -
Page 335: Quick Configuration
Quick Configuration This option is also known as Quick Config on the control panel. If you are uncertain about how to configure your printer’s memory, use only the quick configuration option. Or use quick config as a starting point before trying to manually configure your printer’s memory. -
Page 336: Memory Clients
Any extra memory is allocated to the printer’s excess memory client. NOTE: The printer does not allow you to choose features that do not work with the amount of memory currently installed on your printer. -
Page 337: Frame Buffer
divisible by 4 KB, it is automatically converted to the next lower value that is divisible by 4 KB. For example, if you enter 102 KB, the actual value is lowered to 100 KB, assuming there is enough memory available to allocate to this client. -
Page 338: Calculating The Frame Buffer Size
(bytes) x number of scanlines = total frame buffer memory (bytes) Bytes 1024 = KB For example, if you are printing a 8 with the short edge of the page fed into the printer first, your equations would look like this: 8.5 x 600 8 = 638 bytes (scanline width) -
Page 339: Display List
Your printer takes approximately 64 KB of memory from the display list for each compressed block. -
Page 340: Ps Heap
There is no specific formula to use in figuring the amount of memory required by the font cache, but after a certain point, large font caches cause the printer to take longer to print than smaller font caches because of the search time through the cache. -
Page 341: Emulation
Appendix F print jobs are completed, leading to virtual memory errors. If not enough memory is allocated to the PS heap, the job cannot print. Increasing the memory allocated to this client allows more complex jobs to print and increases the number of fonts that can be downloaded to virtual memory. -
Page 342: Temporary Emulation
By dedicating a portion of memory to this client, your printer can perform “context switching,” which is the ability to retain downloaded fonts and forms even after the printer changes from one emulation to another. Context switching prevents unnecessary repetitive downloading and traffic congestion on networks. -
Page 343: Disk Cache
Hard Disk Management You can add up to seven external hard disks to your printer. These hard disks serve as secondary storage places for such items as downloaded fonts, emulations, and spooled data. External hard disks also increase the number of pages that can be collated before chunk collation begins. -
Page 344: Virtual Memory Support
Operations menu. This option specifies the maximum space reserved for spooling overflow on the hard disk. When a print job is sent to your printer, a portion of that job is stored in the spooling buffer (K Mem for Spool) while the rest of the job is being printed. -
Page 345: Collation
For example, if all the collation memory is consumed by 50 pages of a 90-page job, the printer may print and collate pages 1 through 50 before continuing with pages 51 through 90. -
Page 346: Example
Appendix F Example A QMS 860 Print System with 12 MB of RAM and no hard disk. As many as 35 people use this printer, sending text and graphics PostScript files to be printed on 8 They have configured their printer to print at 600 dpi. -
Page 347: End Job Mode On Your Qms 860 Printer
EOD command. This becomes even more problematic when you are printing to a QMS 860 Print System an emulation sensing processor (ESP) where print jobs of any supported emulation can be intermixed. -
Page 348: Common Reasons To Use End Job Mode
Multiple print jobs of the same printer language have been sent to the printer and they print on the same page. (For example, you send the AUTOEXEC.BAT file with no EOD command followed with little or no time delay by the CONFIG.SYS file, and they both print on the same page.) -
Page 349: Using The Eod Commands
EOD automatically, due to a lack of an EOD command in some printer languages, you can insert an EOD command at the end of your file to tell the printer where your print job ends. QMS Crown printers recognize two end-of-document commands: QMS EOD and HP EOD. -
Page 350: Stand-Alone Pc
Appendix F Stand-Alone PC Set the end job mode from the printer’s control panel. Add the EOD command to your file. NOTE: If using steps 1 and 2 are not feasible in your stand-alone PC environment, you can alternatively use a program that either causes an emulation timeout or that inserts an EOD command between each print job. - Page 351 NOTE: If you print both serial and parallel protocol jobs, then you must set the end job mode for each protocol. Wait for the printer to go idle, and then press the control panel keys in the order shown in the following instructions to access the End Job Mode option.
-
Page 352: Adding An Eod Command To Your File
Exits from the End Job Mode menu and prompts you to save changes. Advances to the next save changes option. Saves the changes and re- turns the printer to idle. Turns on the indicator and puts the printer back on line. - Page 353 QMS EOD HP EOD When the QMS EOD or the HP EOD is set, the printer does not recognize the Ctrl-D EOD command. Add your organization’s standard EOD command to the end of your print file, or add it to a...
-
Page 354: Creating A Network Job Separator
PS Protocol Your QMS 860 Print System supports a new protocol for communication between the printer and a host computer over a serial, parallel, or optional interface connection. This new protocol is called PS protocol. - Page 355 0x01 0x54 (^a T) instead. (ASCII “T” is the result of XORing ^T with 0x40). This method of quoting guarantees that whenever the printer receives any of the eight control characters, the control function is intended regardless of whether the preceding character is a ^A. Any data byte not equal to one of the eight special control characters is transmitted by sending the data byte.
-
Page 356: Advantages
A pen and a pen color are selected to draw images. This emulation supports 8 pens and pen colors. Since your QMS 860 Print System is a monochrome (black and white) printer, the pen colors are converted to shades of gray. - Page 357 Committee (NTSC) standard equation for encoding color. This equation converts a given set of CMYK values to grayscale. For the 8 pen colors assigned to pens 1 - 8, the printer uses the designated grayscale; for any other pen color, the printer uses the following equation: [(C*0.3) + (M*0.59) + (Y*0.11) + K]...
- Page 358 Appendix F [(96*0.3) + (128*0.59) + (224*0.11) + 0] 255 = [(28.80) + (75.52) + (24.64) + 0] 255 = 50% F - 3 0 A d d i t i o n a l T e c h n i c a l I n f o r m a t i o n...
-
Page 360: Manual Notices
Appendix G Manual Notices... -
Page 362: Manual Notice
Laser Safety This printer is certified as a Class 1 laser product under the U.S. Department of Health and Human Services (DHHS) Radiation Performance Standard according to the Radiation Control for Health and Safety Act of 1968. - Page 363 Consult the dealer or an experienced/TV technician for help. WARNING! To prevent electrical shock, do not remove any covers from your printer unless you are a qualified QMS service technician. ACHTUNG! Zur Vermeidung von Verletzungen durch Stromschläge dürfen die Abdeckungen im Drucker nicht ent-...
-
Page 364: Canadian Users
Übereinstimmung und der Regierung zu bestätigen, wurde der Deutschen Bundespost gegeben. Bescheinigung des Herstellers/Importeurs Hiermit wird bescheinigt, daß QMS 860 Print System in Übereinstimmung mit den Bestimmungen der Vfg 1046/1984 funkentstört ist. Der Deutschen Bundespost wurde das Inverkehrbri ngen dieses Gerätes angezeigt und die Berechtigung... -
Page 365: Declaration Of Manufacturer/Importer
Appendix G Declaration of Manufacturer/Importer We hereby certify that the QMS 860 Print System is in compliance with Vfg 1046/1984 and is RFI suppressed. The marketing and sale of this equipment was reported to the German Postal Service. The right to retest this equipment to verify compliance with the regulation was given to the German Postal Service. - Page 366 Appendix G M a n u a l N o t i c e s G - 5...
- Page 367 AUTOEXEC.BAT. Baud Rate or Baud printer. The computer and the printer must be configured at the same baud rate. It can be set from 300 to 38,400 baud, depending upon the type of computer used.
- Page 368 A collection of characters. Command An instruction that tells the printer to perform a certain function. Commands are sent from the host computer to the printer via the interface cable when the printer is on line. Controller The software that controls the engine of a printer. The controller is the intelligence of the printer.
- Page 369 They disappear from the printer’s memory when the printer is turned off. An acronym for dots per inch, which is a measurement unit used to indicate printer resolution. Your QMS 860 Print System has 300 and 600 print resolution. DTR/DSR An acronym for data terminal ready and data signal received, DTR/DSR is a hardware-controlled protocol.
- Page 370 Excess Memory Client other memory clients with their specified amounts of memory is automatically added to the excess memory client. The frame buffer is the excess memory client for your QMS 860 Print System. Expansion, RAM See memory upgrade. Factory Default Factory defaults refer to the printer settings that are programmed into the printer at the factory.
- Page 371 Handshake, Handshaking communications protocol, to establish a data communications path. Devices must be able to communicate with each other. Your printer uses either XON/XOFF or DTR/DSR protocol to communicate with a computer. An acronym for hard disk drive.
- Page 372 HP PCL (Hewlett-Packard Printer Control Language) is the printer control language native to the HP Laser Jet Series II and IIP printer. Your QMS 860 Print System has a resident HP PCL emulation. Icon A pictorial symbol indicating a printer function.
- Page 373 Menu Key The control panel key that accesses the printer Configuration menu when the printer is off line. Use this key to advance through the menus or to return to a previous position in the menu. When changing printer setup, press this key to cancel a change (before pressing the Select key) or to return to previous menus one level at a time.
- Page 374 Not accepting data from the computer. The printer is taken off line by pressing the Online/Offline key. When the Online indicator is off, the printer is off line. The printer must be off line to enter the Configuration menu. On line Accepting data from the computer.
- Page 375 See HP PCL. Permanent Soft Fonts into the printer’s memory that remain resident there, even if the printer is reset, until the printer is powered off or the fonts are deleted by software printer commands. (See download.) Persistent Remaining in the printer’s memory after you turn it off. Persistent parameters appear each time you turn on the printer.
- Page 376 Criteria of print quality include the darkness, clearness, and sharpness of the printed page. Printer Driver A printer driver is a program that translates the file you are printing into a language that the printer understands. Usually, the printer driver is installed within an application.
- Page 377 Resolution A measurement of the dots per inch (dpi) in output material, either printed or visual, as in a high-resolution monitor. Your printer features a 300 and 600 dpi resolution. An acronym for Read Only Memory, ROM is a more stable kind of memory than RAM.
- Page 378 Soft Font Soft fonts are fonts created or stored on disks. They can be transferred to the printer’s memory and remain available to be used until the printer is turned off. See also download. Spacing All fonts are designed with either fixed or proportional spacing. In fixed spacing, all characters are the same width.
- Page 379 Trailer Page A special page printed after a print job that identifies the print job and helps users sort out the print jobs in the printer’s output tray. Trailer pages contain the following information: printer name, selected interface, job identification, title, submitting computer, job owner, routing message,...
- Page 380 Volatile Used to reflect printer parameters which remain in the printer’s memory only during the current power cycle. They are lost when you turn off the printer. XON/XOFF Control characters used for flow control in data transmission. G - 1 4...
- Page 381 K Mem PS Fonts ....4-43 MB Printer Mem ....4-45 Quick Config .
- Page 382 APD file ..... 3-9 - 3-10 AppleTalk Cable pinouts..... A-1 Connection .
- Page 383 On ......4-22 Overflow ..... . . F-17 Size (meg) .
- Page 384 Optional purchase ....1-8 Printer option ..... 1-7 PS Executive Series Utilities .
- Page 385 Error Change Printer Name ... . . 3-11 Engine error 1 ....9-3 Engine error 2 .
- Page 386 Warning......5-24 Font Caching ......1-4 Card .
- Page 387 Enable/Disable the start-up page..2-21 End a print job....4-6, 5-44 Enter character information..4-14 Format a disk .
- Page 388 Printer description files ... . . 3-7 Printer driver ....3-10 PrintMonitor .
- Page 389 Margins See also Imageable region MB Printer Mem....4-45 Media Sizes ......5-1 Memo .
- Page 390 Printer configuration ....3-18 Printer driver ....3-23 Printer emulation, changing .
- Page 391 Operator Control menu ..4-19 - 4-20 Printer driver ....3-23 Screen fonts ..... 3-23 Software.
- Page 392 Portrait orientation ... . 4-22, 7-13 Ports Printer ......1-6 PostScript Bibliography .
- Page 393 Printer description files ... . . 3-7 Printer driver ..... 3-7 Problem checklist .
- Page 394 Normal fixed ... 4-28, 4-30, 8-44 Optional network interface ..8-44 Parallel interface ....4-30 Quoted character .
- Page 395 Rcv Sw Flow Ctl ....4-27 Spool Timeout....4-27 Stop Bits .
- Page 396 Troubleshooting ....9-10 Startup Options ....4-39 Status Control panel .
- Page 397 Print media jams ....9-1 Printer resets ....9-11 Problem checklist .
- Page 398 Weight Printer ......2-1 White lines......9-17 Windows .
Need help?
Do you have a question about the 860 and is the answer not in the manual?
Questions and answers