Table of Contents
Advertisement
Quick Links
A l l t e s t I n s t r u me n t s , I n c .
5 0 0 C e n t r a l A v e .
F a r mi n g d a l e , N J 0 7 7 2 7
P : ( 7 3 2 ) 9 1 9 - 3 3 3 9
F : ( 7 3 2 ) 9 1 9 - 3 3 3 2
a l l t e s t . n e t
s s a l e s @ a l l t e s t . n e t
T h e t e s t & me a s u r e me n t
e q u i p me n t y o u n e e d a t
t h e p r i c e y o u w a n t .
A l l t e s t c a r r i e s t h e w o r l d ' s l a r g e s t s e l e c t i o n o f
u s e d / r e f u r b i s h e d b e n c h t o p t e s t & me a s u r e me n t
e q u i p me n t a t 5 0 % t h e p r i c e o f n e w .
O O u r e q u i p me n t i s g u a r a n t e e d w o r k i n g , w a r r a n t i e d , a n d
a v a i l a b l e w i t h c e r t i f i e d c a l i b r a t i o n f r o m o u r i n - h o u s e s t a f f
o f t e c h n i c i a n s a n d e n g i n e e r s .
• 1 0 + f u l l t i me t e c h n i c i a n s w i t h o v e r 1 5 0 y e a r s o f
s p e c i a l i z a t i o n
• 9 0 d a y w a r r a n t y & 5 d a y r i g h t o f r e t u r n o n a l l
e q u i p me n t
• • 1 - 3 y e a r w a r r a n t i e s f o r n e w a n d
p r e mi u m- r e f u r b i s h e d e q u i p me n t
• E v e r y u n i t t e s t e d t o O E M s p e c i f i c a t i o n s
• S a t i s f a c t i o n g u a r a n t e e d
Y o u h a v e p l a n s , w e w i l l h e l p y o u a c h i e v e t h e m.
A n y p r o j e c t . A n y b u d g e t .
t
G e t a q u o t e t o d a y !
C C a l l ( 7 3 2 ) 9 1 9 - 3 3 3 9 o r e ma i l s a l e s @a l l t e s t . n e t .
Advertisement
Table of Contents
Troubleshooting

Related Manuals for Agilent Technologies 53150A


Summary of Contents for Agilent Technologies 53150A
- Page 1 T h e t e s t & me a s u r e me n t e q u i p me n t y o u n e e d a t t h e p r i c e y o u w a n t . A l l t e s t I n s t r u me n t s , I n c .
- Page 2 Assembly Level Service Guide This guide describes how to service the Agilent 53150A, 53151A, and 53152A Microwave Frequency Counters. The information in this guide applies to instruments having the number prefix below, unless accompanied by a “Manual Updating Changes” package indicating otherwise.
- Page 3 Technologies, Inc. 1999, 2002 (cont’d) Certification Disconnect the product from All Rights Reserved. operating power before WARNING Agilent Technologies, Inc. Reproduction, adaptation, or cleaning. certifies that this product met BODILY INJURY OR DEATH translations without prior its published specification at the...
-
Page 4: Table Of Contents
Contents How to Use This Guide vii Repair Strategy Instrument Identification viii Instruments Covered by this Guide viii Assembly-Level Service Guide Organization viii How to Order Guides Description of the Microwave Frequency Counter Options Hardware Support Accessories Supplied and Available Accessories Supplied Accessories Available Manuals Supplied... - Page 5 1-32 Performance Test Record (Page 4 of 4) 1-33 Service Introduction Returning the Counter to Agilent Technologies for Service Providing Repair Information Packing Counter in Original Packaging Materials Packing Counter in Other Packaging Materials Calibration Procedure Equipment Required Assembly Level Service Guide...
- Page 6 Contents Pre-Troubleshooting Information Safety Considerations Recommended Test Equipment Repair Considerations Electrostatic Discharge Surface Mount Repair 2-10 Disassembly and Reassembly Specifics 2-10 After Service Considerations 2-10 Product Safety Checks 2-10 Product Performance Checks 2-11 Assembly Identification and Location 2-11 Troubleshooting the Counter 2-13 Power Supply Check 2-13...
- Page 7 Contents Replaceable Parts Introduction Replaceable Parts How To Order A Part Contacting Agilent Technologies Parts Identification Reference Designations Cabinet Parts and Hardware Accessories and Miscellaneous Items Backdating Introduction Specifications Introduction Measurement Specifications and Characteristics Typical power measurement uncertainty at 25°C for various input levels Typical power measurement uncertainty at −25 dBm input level...
-
Page 8: How To Use This Guide
Repair Strategy This service guide is designed to isolate failures to the assembly level only. The Agilent 53150A/151A/152A Counter can be returned to Agilent for all service work, including troubleshooting, and verifying specifications. Contact your nearest Agilent Sales and Service Office for more details. -
Page 9: Instrument Identification
Instruments Covered by this Guide This guide applies directly to Agilent 53150A, 53151A, and 53152A Counters that have the same serial number prefix(es) shown on the title page. If the serial number prefix of your Counter differs from that listed on the title page of this guide, there may be differences between this guide and your instrument. -
Page 10: How To Order Guides
(to be provided when required). Chapter 6 Specifications lists all the specifications and operating characteristics for the Agilent 53150A/151A/152A Counter. How to Order Guides The part number for this guide is listed on the Certification and Warranty page (on the back of the title page) and on the back cover of this guide. -
Page 11: Description Of The Microwave Frequency Counter
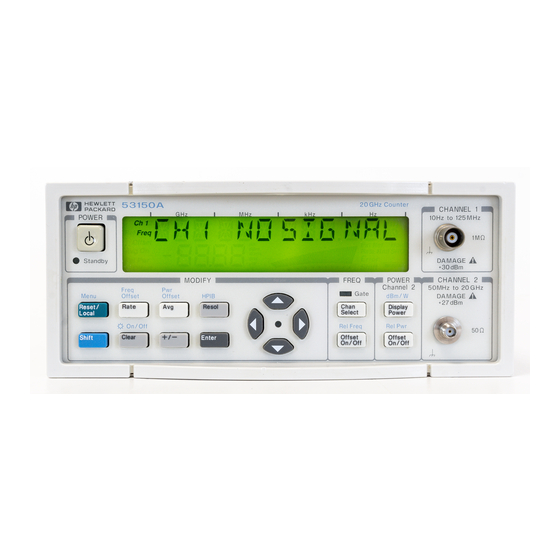
The Agilent 53150A, 53151A, and 53152A Microwave Frequency Counters are capable of measuring frequencies from 10 Hz to 125 MHz on Channel 1 and from 50 MHz to 20 GHz (53150A), 26.5 GHz (53151A), and 46 GHz (53152A) on Channel 2. These frequency counters are also capable of measuring power on Channel 2 (in the same frequency ranges). -
Page 12: Options
In This Guide Options The options available for the Agilent 53150A/151A/152A are listed following this paragraph. Specifications for the options are listed in Chapter 6, “Specifications.” Options ordered with the Counter are installed at the factory and are ready for operation on delivery. -
Page 13: Accessories Supplied And Available
• Rack Mount Kit (Agilent P/N 53150-67001) — same as Option 1CM Manuals Supplied Agilent 53150A/151A/152A Operating Guide (Agilent P/N 53150-90013) Agilent 53150A/151A/152A Programming Guide (Agilent P/N 53150-90014) Agilent 53150A/151A/152A Assembly-Level Service Guide (Agilent P/N 53150-90015) Assembly Level Service Guide... - Page 14 Performance Tests Verifying Specifications...
-
Page 15: Performance Tests Introduction
Chapter 1 Performance Tests Introduction Introduction This chapter provides procedures to test the electrical performance of the Agilent 53150A/151A/152A. These procedures are based on the Counter specifications in Chapter 6, “Specifications.” Two types of testing are provided: • Operational Verification Complete Performance Tests •... -
Page 16: Complete Performance Tests
Chapter 1 Performance Tests Introduction Complete Performance Tests The Complete Performance Tests verify the specifications listed in Chapter 6, “Specifications.” All tests can be performed without opening the instrument. Recommended Calibration Cycle The Counter requires periodic verification of operation. Depending on the type of use, environmental conditions, aging, and measurement accuracy required, the Counter should be checked using the operational verification procedure at least once every year after the unit is first placed in... -
Page 17: Equipment Required
Chapter 1 Performance Tests Equipment Required Equipment Required Table 1-1 lists the test equipment and accessories needed to perform the tests. Table 1-1. Recommended Test Equipment and Accessories Model Quantity Instrument Type Required Characteristics Recommended * Required Use ** Synthesized Signal Generator 10 Hz to 20 MHz Agilent 3325A/B OV, P, T... - Page 18 These procedures should be followed in the order in which they appear. Power-On Self Tests NOTE This test is appropriate for the Agilent 53150A, 53151A, and 53152A Counters. Inspect the Counter for damage. Make sure no cables are connected to the Counter’s inputs.
-
Page 19: Operational Verification
Chapter 1 Performance Tests Operational Verification Verify that the front-panel display shows the following: • All segments of the front-panel display are temporarily activated. • TESTING is displayed. SELF TEST OK is displayed. • The model number of the Counter is displayed (a four-digit hex number •... -
Page 20: Run Self Test
Chapter 1 Performance Tests Operational Verification Run Self Test NOTE This test is appropriate for the Agilent 53150A, 53151A, and 53152A Counters. Disconnect all signal cables from the input and Reference 10MHz connectors. Press and release the Shift key, and then press and release the Menu (Reset/Local) key. -
Page 21: External Timebase Test
This allows the internal temperatures of the equipment to stabilize. • These tests are appropriate for the Agilent 53150A, 53151A, and 53152A Counters. 10 MHz External Timebase Input Test Connect an Agilent 10503 series coaxial cable between the output of the first Agilent 3325A/B Synthesizer and the Reference 10MHz connector on the Counter’s rear panel (see Figure 1-2). - Page 22 To Reference 10 MHz Connector (Rear Panel) Output Channel 1 Agilent 53150A/51A/52A Agilent 3325A/B Synthesizer Counter Output Figure 1-1. External Timebase Test Setup Cycle the POWER button to preset the Counter. Press the Shift key on the Counter’s front panel.
- Page 23 Chapter 1 Performance Tests Operational Verification Set the first Synthesizer (the one connected to the Counter’s rear-panel Reference 10MHz connector) to output a 10 MHz, 1V rms, sine-wave signal. Set the second Synthesizer (the one connected to the CHANNEL 1 input) to output a 2 MHz, 100 mV rms, sine-wave signal.
-
Page 24: Complete Performance Tests
Complete Performance Tests The Complete Performance Tests verify the specifications of the Agilent 53150A/151A/152A Counter listed in Chapter 6, “Specifications.” All of these tests can be performed without opening the instrument. Table 1-2 lists a summary of the performance tests. -
Page 25: Test 1: External Timebase Input Test
This allows the internal temperatures of the equipment to stabilize. • These tests are appropriate for the Agilent 53150A, 53151A, and 53152A Counters. 1 MHz External Timebase Input Test Connect an Agilent 10503 series coaxial cable between the output of the first Agilent 3325A/B Synthesizer and the Reference 10MHz connector on the Counter’s rear panel (see Figure 1-2). - Page 26 To Reference 10 MHz Connector (Rear Panel) Output Channel 1 Agilent 53150A/51A/52A Agilent 3325A/B Synthesizer Counter Output Figure 1-2. External Timebase Test Setup Cycle the POWER button to preset the Counter. Press the Shift key on the Counter’s front panel.
-
Page 27: Mhz External Timebase Input Test
Chapter 1 Performance Tests Test 1: External Timebase Input Test Set the first Synthesizer (the one connected to the Counter’s rear-panel Reference 10MHz connector) to output a 1 MHz, 1V rms, sine-wave signal. Set the second Synthesizer (the one connected to the CHANNEL 1 input) to output a 2 MHz, 100 mV rms, sine-wave signal. -
Page 28: 10 Mhz External Timebase Input Test
Chapter 1 Performance Tests Test 1: External Timebase Input Test 10 MHz External Timebase Input Test Change the frequency of the first Synthesizer (connected to the Counter’s rear-panel Reference 10 MHz connector) to 10 MHz. Press and release the Counter’s Reset/Local key. Verify that the Counter displays a reading of approximately 2 MHz and that the Ext Ref annunciator is activated. -
Page 29: Test 2: Channel 1 Frequency Sensitivity
Agilent 10503 Series Coaxial Cable (BNC m to m) 2 mm (m) to 2 mm (f) Cable (2) Test 2a: 10 Hz to 20 MHz Frequency Sensitivity This test is appropriate for the Agilent 53150A, 53151A, and 53152A NOTE Counters. - Page 30 (Rear Panel) To Reference 10 MHz Output Connector (Rear Panel) Agilent 53150A/51A/52A Counter Channel 1 Figure 1-3. 10 Hz to 20 MHz Frequency Sensitivity Test Setup Verify that the Counter is still set to use an external reference signal (refer to steps 5 through 10 on page 1-13).
-
Page 31: Test 2B: 50 Mhz To 125 Mhz Frequency Sensitivity
Figure 1-4. 50 MHz to 125 MHz Frequency Sensitivity Test Setup NOTE If the 10 MHz reference output of the 53650B Synthesizer is not sufficient to drive the 53150A/51A/52A, reverse the test setup so that you drive the 83650B from the Counter. 1-18... - Page 32 Chapter 1 Performance Tests Test 2: Channel 1 Frequency Sensitivity Connect the Agilent 1250-2015 BNC (m) to SMA (f) Adapter to the Agilent 10100C Feedthrough Terminator on the Counter’s CHANNEL 1 connector. Connect the Agilent 11904A 2.92 mm (m) to 2.4 mm (m) Adapter to the Agilent 1250-2015 Adapter.
- Page 33 Chapter 1 Performance Tests Test 2: Channel 1 Frequency Sensitivity Record the frequency value read on the Counter (±1 count) for Test 2b in the Performance Test Record on page 1-30. Set the output of the Synthesizer to 125 MHz, and repeat steps 11 through 13.
-
Page 34: Test 3: Channel 2 Frequency Sensitivity
2.4 mm (m) to 2.4 mm (m) Cable (2) Test 3a: 50 MHz to 20 GHz Frequency Sensitivity NOTE This test is appropriate for the Agilent 53150A, 53151A, and 53152A Counters. Connect the Agilent 11904D 2.92 mm (m) to 2.4 mm (f) Adapter to the Counter’s CHANNEL 2 input connector (refer to Figure 1-5 for steps 1... - Page 35 Repeat steps 6, through 8 for each of the remaining frequencies specified for Test 3a. Don’t forget to change the power level when performing the 400 MHz and 19 GHz tests (53150A, 53151A, and 53152A) and the 16 GHz and 19 GHz tests (53152A only).
-
Page 36: Test 3B: 22 Ghz To 26.5 Ghz Frequency Sensitivity
Chapter 1 Performance Tests Test 3: Channel 2 Frequency Sensitivity If all of the frequency values you recorded for Test 3a are correct, mark Pass in the Performance Test Record. If any of the frequency readings you recorded are incorrect, mark Fail in the Performance Test Record. Test 3b: 22 GHz to 26.5 GHz Frequency Sensitivity This test is appropriate for the Agilent 53151A and 53152A Counters. -
Page 37: Test 3C: 30 Ghz To 46 Ghz Frequency Sensitivity
Chapter 1 Performance Tests Test 3: Channel 2 Frequency Sensitivity Test 3c: 30 GHz to 46 GHz Frequency Sensitivity NOTE This test is appropriate for the 53152A Counter only. Use the same test setup as described for Test 3a on page 1-21. Set the output of the Agilent 83650B Synthesizer to the first frequency specified for Test 3c in the Performance Test Record on page 1-31 (30 GHz). -
Page 38: Test 4: Channel 2 Power Measurement
Test 4a: 50 MHz to 20 GHz Power Measurement (–20 dBm) NOTE This test is appropriate for the Agilent 53150A, 53151A, and 53152A Counters. Verify that the cable (with Adapter) is still connected to the RF output of the Agilent 83650B Synthesizer. - Page 39 Connect the unused output of the Microwave Splitter to the Adapter on the Counter’s CHANNEL 2 input connector. Agilent 83650B Synthesizer Agilent 437B Power Meter RF Output Agilent 83051A Microwave Amplifier Agilent 53150A/51A/52A Input Counter Agilent 11667C Power Splitter Agilent 8487A/D Power Sensor Agilent 11900B Adapter Channel 2 Figure 1-6.
-
Page 40: Test 4B: Channel 2 22 Ghz To 26.5 Ghz Power Measurement (-20 Dbm)
Chapter 1 Performance Tests Test 4: Channel 2 Power Measurement Repeat steps 8 through 10 for each of the remaining frequency values listed for Test 4a. Mark Pass or Fail for Test 4a in the Performance Test Record. Test 4b: Channel 2 22 GHz to 26.5 GHz Power Measurement (–20 dBm) This test is appropriate for the Agilent 53151A and 53152A Counters. -
Page 41: Test 4C: Channel 2 26.5 Ghz To 46 Ghz Power Measurement (-20 Dbm)
Test 4d: Channel 2 50 MHz to 20 GHz Power Measurement (0 dBm) NOTE This test is appropriate for the Agilent 53150A, 53151A, and 53152A Counters. Use the same test setup as described for Test 4a on page 1-25. Adjust the power output of the Synthesizer so that the power output of the Microwave Amplifier is 0 dBm. -
Page 42: Test 4E: Channel 2 22 Ghz To 26.5 Ghz Power Measurement (0 Dbm)
Chapter 1 Performance Tests Test 4: Channel 2 Power Measurement Test 4e: Channel 2 22 GHz to 26.5 GHz Power Measurement (0 dBm) This test is appropriate for the Agilent 53151A and 53152A Counters. NOTE Use the same test setup as described for Test 4a on page 1-25. With the power output of the Microwave Amplifier still at 0 dBm (adjust the power output of the Synthesizer, if necessary), set the Synthesizer to the first frequency value listed for Test 4e in the... -
Page 43: Performance Test Record (Page 1 Of 4)
Chapter 1 Performance Tests Performance Test Record (Page 1 of 4) Performance Test Record (Page 1 of 4) Agilent 53150A/151A/152A Microwave Frequency Counter Serial Number: Repair/Work Order No. Test Performed By: Temperature: Date: Relative Humidity: Notes: ❏ ❏ Pre Calibration Test... -
Page 44: Performance Test Record (Page 2 Of 4)
Performance Test Record (Page 2 of 4) Test Complete Test Results Number Performance Tests Specifications Pass Fail ❏ ❏ Channel 2 Frequency Sensitivity 53150A 53151A 53152A 50 MHz –20 dBm –20 dBm –20 dBm 100 MHz " " " 250 MHz "... -
Page 45: Performance Test Record (Page 3 Of 4)
Performance Test Record (Page 3 of 4) Test Complete Test Results Number Performance Tests Specifications Pass Fail ❏ ❏ Power Measurement (–20 dBm): 53150A 53151A 53152A 50 MHz ±1.5 dB ±1.5 dB ±1.0 dBm 500 MHz " " " 1 GHz "... -
Page 46: Performance Test Record (Page 4 Of 4)
Performance Test Record (Page 4 of 4) Test Complete Test Results Number Performance Tests Specifications Pass Fail ❏ ❏ Power Measurement (0 dBm): 53150A 53151A 53152A 50 MHz ±1.5 dB ±1.5 dB ±1.0 dB 500 MHz " " " 1 GHz "... - Page 47 Chapter 1 Performance Tests Performance Test Record (Page 4 of 4) 1-34 Assembly Level Service Guide...
- Page 48 Service...
-
Page 49: Service Introduction
Agilent Technologies Service Center. If the instrument is under warranty, return it to Agilent for service. Refer to “Returning the Counter to Agilent Technologies for Service” on Page 2-3. If you decide to troubleshoot the instrument yourself, refer to the section titled “Troubleshooting the Counter”... -
Page 50: Returning The Counter To Agilent Technologies For Service
Chapter 2 Service Returning the Counter to Agilent Technologies for Service Returning the Counter to Agilent Technologies for Service Providing Repair Information Before shipping the Counter to an Agilent office for service or repair, call the nearest Agilent Sales Office to make arrangements. Then, tag and package the Agilent 53150A/151A/152A for shipment. - Page 51 Chapter 2 Service Returning the Counter to Agilent Technologies for Service Packing the Counter in the Original Packaging Materials To prevent shipping damage, it is best to repack the Counter in its original packaging. In any correspondence, refer to the Counter by the model number and the complete serial number.
- Page 52 Chapter 2 Service Returning the Counter to Agilent Technologies for Service Add a layer of shock-absorbing material that is 3 to 4 inches (70 to 100 mm) thick around all sides of the instrument cushion it and to prevent it from moving within the container Seal the shipping container securely.
-
Page 53: Calibration Procedure
Chapter 2 Service Calibration Procedure Calibration Procedure There is only one calibration procedure that can be performed outside of an Agilent authorized service facility. The following procedure describes how to calibrate the Counter’s timebase. NOTE The Counter should be powered on for at least 30 minutes prior to beginning the calibration procedure. - Page 54 Chapter 2 Service Calibration Procedure Calibration Access Hole Figure 2-1. Calibrating the Counter Insert a non-metallic slotted adjustment tool through the hole in the lower-right side of the Counter’s cover and into the slot in the timebase calibration screw. Turn the calibration screw clockwise to increase the Counter’s reading or counter-clockwise to decrease the reading until the frequency value displayed on the Counter’s front panel is exactly 10,000,000 Hz.
-
Page 55: Pre-Troubleshooting Information
Chapter 2 Service Pre-Troubleshooting Information Pre-Troubleshooting Information This section contains the following pertinent troubleshooting information: • Safety Considerations • Recommended Test Equipment • Repair Considerations • After Service Considerations Assembly Identification and Location • Safety Considerations Although this instrument has been designed in accordance with international safety standards, this guide contains information, cautions, and warnings which must be followed to ensure safe operation and to retain the instrument in a safe condition. -
Page 56: Recommended Test Equipment
Pre-Troubleshooting Information Recommended Test Equipment Test equipment recommended for testing and troubleshooting the Agilent 53150A/151A/152A is listed in Chapter 1, “Performance Tests.” Substitute equipment may be used if it meets or exceeds the required characteristics listed in Table 1-1. Repair Considerations... -
Page 57: Surface Mount Repair
Chapter 2 Service Pre-Troubleshooting Information Surface Mount Repair None of the assemblies in the Counter that use surface-mount components can be repaired outside of authorized Agilent Service Centers. Any attempt to repair these assemblies voids the Agilent factory warranty and makes the assemblies ineligible for return credit. -
Page 58: Product Performance Checks
Chapter 1 of this guide, “Performance Tests.” Assembly Identification and Location The assembly number, name, and Agilent part number for each of the Agilent 53150A, 53151A, and 53152A assemblies are listed in Table 2-1. Figure 2-2 illustrates the replaceable assemblies in the Agilent 53150A/ 151A/152A. - Page 59 Chapter 2 Service Pre-Troubleshooting Information Figure 2-2. Replaceable Assembly Locations — Top Internal View 2-12 Assembly Level Service Guide...
-
Page 60: Troubleshooting The Counter
Chapter 2 Service Troubleshooting the Counter Troubleshooting the Counter Power Supply Check WARNING HAZARDOUS VOLTAGES ARE PRESENT ON THE POWER SUPPLY ASSEMBLY. ONLY TRAINED AND QUALIFIED SERVICE PERSONNEL SHOULD PERFORM THE FOLLOWING PROCEDURE. Remove the power cord from the back of the instrument. Remove the cover as described in Chapter 3. -
Page 61: Adjusting The +5 Vdc Output
Chapter 2 Service Troubleshooting the Counter Table 2-2 lists A4 Power Supply’s input and output voltages, the corresponding wire color for each input and output, and the tolerances specified for these voltages. Table 2-2. A4 Power Supply Inputs and Outputs Input/Output Voltage Connector and Pin Designation Wire Color Tolerance AC-input (neutral) 0 VAC*... -
Page 62: Self-Test
Chapter 2 Service Troubleshooting the Counter Self-Test The Counter performs a Self-Test procedure when it is powered on. The Self-Test can also be invoked from the Counter’s Menu. Running the Self Test Disconnect all cables connected to the Counter’s front and rear signal connectors. -
Page 63: Self Test Error Messages
Chapter 2 Service Troubleshooting the Counter Self Test Error Messages Table 2-3 lists and describes messages that are generated by the Counter during Self-Test to indicate whether a component passed or failed its test. These messages are sent via the RS-232 serial output only—they do not appear on the Counter’s front-panel display. - Page 64 Chapter 2 Service Troubleshooting the Counter Tables 2-4 and 2-5 list and describe the messages that are generated by the Counter during Self-Test or during operation to indicate that a problem has been detected. These messages are displayed on the Counter’s front-panel display and are also sent via the RS-232 serial output (in many cases, the exact message text that is displayed on the front panel is a condensed form of the message that is sent via RS-232).
- Page 65 Chapter 2 Service Troubleshooting the Counter Table 2-5. RS-232 Error Messages Message Description 12V FAIL The +12 VDC output from the power supply is not within specifications. –12V FAIL The –12 VDC output from the power supply is not within specifications. –5V FAIL The –5 VDC output from the power supply is not within specifications.
- Page 66 Replacing Assemblies Disassembly and Reassembly...
-
Page 67: Replacing Assemblies Introduction
Chapter 3 Replacing Assemblies Introduction Introduction This chapter provides instructions for removing major assemblies in the Agilent 53150A/151A/152A. To install an assembly, apply the removal instructions in reverse. The following disassembly and repair procedures are provided: Removing the Bumpers pg. 3-4 •... -
Page 68: Tools Required
Chapter 3 Replacing Assemblies Tools Required Tools Required The following tools are required for the removal/replacement procedures in this chapter: • #1 Phillips screwdriver • #2 Phillips screwdriver ® TORX 15 (T15) hand screwdriver • • 1/4-inch open-end or box wrench •... -
Page 69: Removing The Bumpers
Chapter 3 Replacing Assemblies Removing the Bumpers Removing the Bumpers Use the following procedure to remove the front and rear bumpers: To remove the front bumper, lift the center of the top of the bumper upward, stretch a corner of the bumper diagonally, then slide it off the front of the Counter. -
Page 70: Removing The Handle And Handle Mounts
Chapter 3 Replacing Assemblies Removing the Handle and Handle Mounts Removing the Handle and Handle Mounts Use the following procedure to remove the carrying handle and handle mounts: Rotate the handle to the vertical position above the Counter, pull the ends of the handle outward at the mounts to detach it, and set it aside. -
Page 71: Removing The Rear Bezel
Chapter 3 Replacing Assemblies Removing the Rear Bezel Removing the Rear Bezel Use the following procedure to remove the rear bezel: Remove the rear bumper (see “Removing the Bumpers” on page 3-4). NOTE The rear bumper can be used as a holder for hardware and other small parts while they are temporarily removed from the Counter. - Page 72 Chapter 3 Replacing Assemblies Removing the Rear Bezel Shroud Screws Figure 3-5. Top Rear Shroud Screws Turn the Counter upside-down, and remove the three 4-40 x 3/16-inch countersunk shroud screws on the bottom of the Counter near the back edge of the shroud (see Figure 3-6). Shroud Screws Figure 3-6.
-
Page 73: Removing The Shroud
Chapter 3 Replacing Assemblies Removing the Shroud Removing the Shroud Use the following procedure to remove the shroud: WHEN THE SHROUD IS REMOVED FROM THE COUNTER, WARNING DANGEROUS LINE VOLTAGES THAT CAN CAUSE SERIOUS INJURY ARE EXPOSED. ALWAYS DISCONNECT THE POWER CORD BEFORE REMOVING THE SHROUD. - Page 74 Chapter 3 Replacing Assemblies Removing the Shroud Shroud Screws Figure 3-7. Top Front Shroud Screws Turn the Counter upside-down, and remove the three 4-40 x 3/16-inch countersunk shroud screws on the bottom of the Counter near the front edge of the shroud (see Figure 3-8). Shroud Screws Figure 3-8.
- Page 75 Chapter 3 Replacing Assemblies Removing the Shroud With the Counter resting upside-down on your work surface, grip the front edge of the shroud in the cutout of the front bezel with the fingers of one hand, and push the Counter’s rear panel toward the front of the shroud with your other hand.
-
Page 76: Removing The Front Bezel
Chapter 3 Replacing Assemblies Removing the Front Bezel Removing the Front Bezel Use the following procedure to remove the front bezel: Remove the shroud hardware and slide the shroud back far enough to fully expose the front bezel, or remove the shroud completely (see “Removing the Shroud”... -
Page 77: Removing The Rear Panel Assembly
If the Battery Option is installed, remove the battery sled from the Counter (for instructions on removing the battery sled, see Appendix C of the Agilent 53150A/151A/152A Operating Guide). If the Battery Option is installed, remove the four 4-40 x 3/16-inch... - Page 78 Chapter 3 Replacing Assemblies Removing the Rear Panel Assembly The screw in the lower-left corner of the rear panel assembly (as viewed NOTE from the rear of the Counter) may be covered by the serial-number sticker. If it is, carefully cut away the lower-left corner of the sticker to expose the screw head.
- Page 79 Chapter 3 Replacing Assemblies Removing the Rear Panel Assembly Use a 5/16-inch spin tight to remove the self-locking hex nut that attaches the rear panel assembly grounding wire (green/yellow) to the right wall of the chassis. Slide the grounding lug off the welded stud on the chassis wall, and thread the lock nut back onto the stud a few turns until it is finger-tight.
-
Page 80: Removing The Cooling Fan
Chapter 3 Replacing Assemblies Removing the Cooling Fan Removing the Cooling Fan Use the following procedure to remove the cooling fan: Remove the shroud (see “Removing the Shroud” on page 3-8). Disconnect the two-wire cooling-fan power cable (blue and red wires) from J16 on the main board. -
Page 81: Replacing The Power Supply
Chapter 3 Replacing Assemblies Replacing the Power Supply Replacing the Power Supply Use the following procedure to replace the power-supply circuit board: Remove the shroud (see “Removing the Shroud” on page 3-8). Disconnect the two power-supply connectors (one at the front and one at the rear of the power supply). - Page 82 Chapter 3 Replacing Assemblies Replacing the Power Supply Insert the two screws removed in step 7 into the holes on both sides of the power-supply nameplate. Do not tighten these screws at this time. ¼ Use a pair of needle-nose pliers to position one of the -inch spacers removed in step 6 between the circuit board and the power-supply chassis, and align the spacer with the mounting holes in the circuit board and the...
- Page 83 Chapter 3 Replacing Assemblies Replacing the Power Supply 3-18 Assembly Level Service Guide...
- Page 84 Replaceable Parts...
-
Page 85: Replaceable Parts Introduction
Table 4-2 lists all replaceable assemblies and parts. Figure 4-1 is an exploded view of the Agilent 53150A/151A/152A’s internal parts, Figure 4-2 is an exploded view of the cabinet and other external parts, and Figure 4-3 is a top view of the chassis with the shroud removed. -
Page 86: How To Order A Part
How To Order A Part How To Order A Part Agilent Technologies wants to keep your parts ordering process as simple and efficient as possible. To order parts, perform the following steps: Identify the part and the quantity you need. -
Page 87: Contacting Agilent Technologies
Depending on where you are in the world, there are one or more ways to obtain parts or parts information from Agilent Technologies. • Outside the United States, contact your local Agilent Technologies sales office. Within the United States, we encourage you to order replacement parts •... -
Page 88: Parts Identification
To identify the part(s) you need, refer to the exploded views in Figures 4-1 and 4-2 and the top view of the chassis in Figure 4-3. When ordering from Agilent Technologies, the important numbers to note from the Parts List are the Agilent Part Number, the part-number check digit (in the “CD”... - Page 89 Chapter 4 Replaceable Parts Parts Identification H3, H4 Figure 4-1. Agilent 53150A/151A/152A Exploded View — Internal Parts Assembly Level Service Guide...
- Page 90 Chapter 4 Replaceable Parts Parts Identification MP7 H16 Figure 4-2. Agilent 53150A/151A/152A Exploded View — Cabinet and External Parts Assembly Level Service Guide...
- Page 91 Chapter 4 Replaceable Parts Parts Identification P/O A10 P/O A10 P/O A10 P/O A10 P/O A10 Figure 4-3. Agilent 53150A/151A/152A Top View Assembly Level Service Guide...
- Page 92 Chapter 4 Replaceable Parts Parts Identification Table 4-2. Agilent 53150A/151A/152A Replaceable Parts Reference Agilent Mfr. Part Designation Part Number Qty. Description Number 53152-80001 ADAPTER, 2.92 mm FEMALE 2610181-00 53150-80012 FAN, COOLING 2011151-01 53150-80013 SWITCH ASSY., FRONT PANEL POWER 2010306-01 53150-00002 HOUSING ASSY., BATTERY...
- Page 93 Chapter 4 Replaceable Parts Parts Identification Table 4-2. Agilent 53150A/151A/152A Replaceable Parts (Continued) Reference Agilent Mfr. Part Designation Part Number Qty. Description Number 0590-0157 NUT, HEX, SELF-LOCKING, 6-32 5000046-00 0515-1101 SCREW, TORX, FLATHEAD, m4x8 5138007-01 2200-0164 SCREW, FLATHEAD, SELF-LOCKING, 4-40x3/16...
- Page 94 Chapter 4 Replaceable Parts Parts Identification Table 4-3. Agilent 53150A/151A/152A Accessories and Miscellaneous Items Description Agilent Part Number 53150-80010 BATTERY 12 V 53150-60214 CABLE ASSY., EXT. DC POWER 8120-0696 CABLE ASSY., POWER (AUSTRALIA) 8120-1692 CABLE ASSY., POWER (CANADA) 8120-2957 CABLE ASSY., POWER (DENMARK) 8120-1703 CABLE ASSY., POWER (ENGLAND)
- Page 95 Chapter 4 Replaceable Parts Parts Identification 4-12 Assembly Level Service Guide...
- Page 96 Backdating...
-
Page 97: Backdating Introduction
Chapter 5 Backdating Introduction Introduction Since this is the first edition of this guide, this chapter does not contain any information for adapting this guide to apply to older instruments. As engineering changes are made, newer instruments may have higher serial prefix numbers than the ones shown on the title page of this guide. -
Page 98: Specifications
Specifications... -
Page 99: Introduction
Chapter 6 Specifications Measurement Specifications and Characteristics Introduction The specifications of the Agilent 53150A, 53151A, and 53152A are provided in this chapter. Assembly Level Service Guide... -
Page 100: Measurement Specifications And Characteristics
Chapter 6 Specifications Measurement Specifications and Characteristics Measurement Specifications and Characteristics All measurement specifications are over the full signal and temperature ranges unless otherwise noted. Input Characteristics Agilent 53150A Agilent 53151A Agilent 53152A Frequency Range 10 Hz–125 MHz 10 Hz–125 MHz 10 Hz–125 MHz... - Page 101 Chapter 6 Specifications Measurement Specifications and Characteristics Input Characteristics Agilent 53150A Agilent 53151A Agilent 53152A Acquisition Time (1 MHz FM rate) Channel 1 125 ms/100 ms 125 ms/100 ms 140 ms/115 ms Channel 2 (FM Auto/FM Off) Resolution 1 Hz to 1 MHz...
-
Page 102: Typical Power Measurement Uncertainty At 25°C For Various Input Levels
Chapter 6 Specifications Measurement Specifications and Characteristics Typical* power measurement uncertainty at 25°C for various input levels *Typical means approximately 2/3 of all units will meet these characteristics. Assembly Level Service Guide... -
Page 103: Typical Power Measurement Uncertainty At −25 Dbm Input Level
Chapter 6 Specifications Measurement Specifications and Characteristics Typical* power measurement uncertainty at −25 dBm input level *Typical means approximately 2/3 of all units will meet these characteristics. Assembly Level Service Guide... - Page 104 Chapter 6 Specifications Measurement Specifications and Characteristics Timebase Power Supply ac: 90–132 Vac; 47.5–66 Hz or 360–440 Hz Frequency: 10 MHz Output: 10 MHz sine wave, 1 Vp-p into 50 Ω 216–264 Vac; 47.5–66 Hz line selection: automatic External Timebase Input:1, 2, 5, 10 MHz; 1 to 5 Vrms into 50 Ω...
- Page 105 Chapter 6 Specifications Measurement Specifications and Characteristics Power Supply ac: 90–132 Vac; 47.5–66 Hz or 360–440 Hz 216–264 Vac; 47.5–66 Hz line selection: automatic power requirements: 75 VA max. (25 W typ.) dc: (Option 002 only): 11–18 Vdc; 2A max. Battery (Option 002): Type: VHS camcorder, lead acid (2 each) Charge Time: 8 hours in unit...
- Page 106 50 MHz to 20 GHz Power Measurement Channel 2 Power Measurement 1-25 (–20 dBm) 1-25 Characteristics Complete Performance Tests 1-11 1-30 Accessories 4-11 Contacting Agilent Technologies Available Cooling Fan 3-15 Supplied correspondence Supplied and Available address adjusting the +5 VDC output 2-14 DC Power Supply Assembly...
- Page 107 Index INSTCFG FAIL 2-17 2-18 OVERTEMP 2-17 Manual Updating Changes PATH FAIL 2-17 Manuals Supplied PWR CAL FAIL 2-17 2-18 Measurement Specifications PWR CKT FAIL 2-17 messages 2-16 2-17, 2-18 RAM FAIL 2-17 2-18 Miscellaneous Items 4-11 SAV SET FAIL 2-17 2-18 SERVICE FAIL...
- Page 108 Index Removing the Shroud Test 3c Channel 2 26.5 GHz to 46 GHz repair Power Measurement (–20 dBm) 1-28 replaceable assemblies Test 3d Channel 2 50 MHz to 20 GHz Replaceable Parts Power Measurement (0 dBm) 1-28 , 4-2, Replacing Assemblies Test 3e Channel 2 22 GHz to 26.5 GHz required equipment Power Measurement (0 dBm)
- Page 109 Index Index-4 Assembly Level Service Guide...
- Page 110 Service and Support Contacting Agilent Technologies: For more information about Agilent test and measurement products, applications, and services, visit our web site at http://www.agilent.com/services/English/index.html. Agilent’s Test and Measurement Fax Service for United States and Canada: Technical information for test and measurement products and services is available 24 hours a day, 7 days a week, by...
- Page 111 Continued from front matter. . . Warranty (cont’d) Agilent will be liable for damage Safety Considerations For continued protection to tangible property per incident against fire, replace the line (cont’d) Agilent does not warrant that up to the greater of $300,000 or fuse(s) with fuses of the same the operation of Agilent the actual amount paid for the...