
Related Manuals for HIKVISION DS-2DF6C431-CX(T5/316L)


Summary of Contents for HIKVISION DS-2DF6C431-CX(T5/316L)
- Page 1 Explosion-proof Dome·Quick Start Guide Explosion-proof Dome Quick Start Guide...
- Page 2 WARRANTIES, EXPRESS OR IMPLIED, INCLUDING WITHOUT LIMITATION, MERCHANTABILITY, SATISFACTORY QUALITY, OR FITNESS FOR A PARTICULAR PURPOSE. THE USE OF THE PRODUCT BY YOU IS AT YOUR OWN RISK. IN NO EVENT WILL HIKVISION BE LIABLE TO YOU FOR ANY SPECIAL, CONSEQUENTIAL, INCIDENTAL, OR INDIRECT...
- Page 3 Explosion-proof Dome·Quick Start Guide YOU AGREE TO USE THIS PRODUCT IN COMPLIANCE WITH ALL APPLICABLE LAWS, AND YOU ARE SOLELY RESPONSIBLE FOR ENSURING THAT YOUR USE CONFORMS TO THE APPLICABLE LAW. ESPECIALLY, YOU ARE RESPONSIBLE, FOR USING THIS PRODUCT IN A MANNER THAT DOES NOT INFRINGE ON THE RIGHTS OF THIRD PARTIES, INCLUDING WITHOUT LIMITATION, RIGHTS OF PUBLICITY, INTELLECTUAL PROPERTY RIGHTS, OR DATA PROTECTION AND OTHER PRIVACY RIGHTS.
- Page 4 Explosion-proof Dome·Quick Start Guide Regulatory Information FCC Information Please take attention that changes or modification not expressly approved by the party responsible for compliance could void the user’s authority to operate the equipment. FCC compliance: This equipment has been tested and found to comply with the limits for a Class A digital device, pursuant to part 15 of the FCC Rules.
- Page 5 Explosion-proof Dome·Quick Start Guide 이 기기는 업무용 환경에서 사용할 목적으로 적합성평가를 받은 기기로서 가정용 환경에서 사용하는 경우 전파간섭의 우려가 있습니다. Intended Use of the Dome ATEX: II 2GD Ex db IIC T6 Gb /Ex tb IIIC T80℃ Db IECEx: Ex db IIC T6 Gb /Ex tb IIIC T80℃ Db Hazardous Area Classification: Zone 1, Zone 2, Zone 21, Zone 22 IP Degree: IP68 (1m, 1h) Ex Standards:...
- Page 6 Explosion-proof Dome·Quick Start Guide Safety Instruction Warnings Laws and Regulations The device should be used in compliance with local laws, electrical safety regulations, and fire prevention regulations. Electrical Safety CAUTION: To reduce the risk of fire, replace only with the same type and rating of fuse. The equipment must be connected to an earthed mains socket-outlet.
- Page 7 Explosion-proof Dome·Quick Start Guide The equipment has been designed, when required, modified for connection to an IT power distribution system. Fire Prevention No naked flame sources, such as lighted candles, should be placed on the equipment. The serial port of the equipment is used for debugging only. Hot Surface CAUTION: Hot parts! Burned fingers when handling the parts.
- Page 8 Explosion-proof Dome·Quick Start Guide A few device components (e.g., electrolytic capacitor) require regular replacement. The average lifespan varies, so periodic checking is recommended. Contact your dealer for details. To ensure explosion-proof performance, do not damage explosion-proof surface. Use the provided glove when open up the dome cover, and avoid direct contact with the dome cover, because the acidic sweat of the fingers may erode the surface coating of the dome cover.
-
Page 9: Table Of Contents
Explosion-proof Dome·Quick Start Guide Table of Contents 1 Overview ...................... 1 1.1 Explanation of Model Naming ................. 1 1.2 Power Supply ......................1 1.3 Explosion-proof Parameters ..................1 1.4 Mechanical Specification ..................1 1.5 Working Environment ....................1 2 Installation ....................3 2.1 Preparation ...................... -
Page 10: Overview
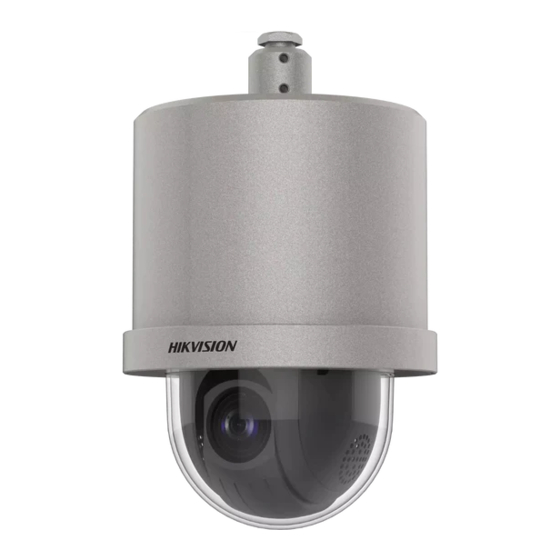
Explosion-proof Dome·Quick Start Guide 1 Overview The explosion-proof dome captures high quality colored images in dim light environment with its low illumination and offers more details over expansive areas. It is equipped with explosion-proof enclosure made of stainless steel. It can be widely used in places such as port, wharf, petrochemical industry, and military industry. - Page 11 Explosion-proof Dome·Quick Start Guide Humidity: Within 95%. Temperature: Refer to Explosion-proof Dome Nameplate. Note: To ensure safety of the users and explosion-proof performance of the speed dome, your installation environment must meet the installation requirements of the speed dome you purchased.
-
Page 12: Installation
Explosion-proof Dome·Quick Start Guide 2 Installation 2.1 Preparation 2.1.1 Basic Requirement All the electronic operation should be in strictly compliance with the electrical safety regulations, fire prevention regulations and other related regulations in your local region. Make sure the device in the package is in good condition and all the assembly parts are included. -
Page 13: Cable Description And Routing
Explosion-proof Dome·Quick Start Guide 2. Check if the device performs power-up action. If not, contact the technical support. Normally, the power-up action should include the device movement of automatically panning and tilting. 3. Check if the image can be displayed normally. If not, contact the technical support. 4. -
Page 14: Installing The Explosion-Proof Dome
Explosion-proof Dome·Quick Start Guide Cable Entry Junction Box Connect the cable through cable trunk or cable tray. Figure 2-2 Cable Wiring Diagram 2.3 Installing the Explosion-proof Dome Before you start: Make sure the device in the package is in good condition and all the assembly parts are included. -
Page 15: Wall Mounting
Explosion-proof Dome·Quick Start Guide Disconnect the cables DO NOT disconnect the network cable. Figure 2-3 Disconnecting the cables 2.3.2 Wall Mounting Before you start: Make sure that the wall is thick enough to withstand the expansion screws. Make sure that the wall is strong enough to withstand more than eight times the weight of the dome and the accessories. - Page 16 Explosion-proof Dome·Quick Start Guide Route the cables into the bracket body. Insert three preassemble screws into the preassemble screw holes on the cable joint (do not tighten the preassemble screws) as shown in Figure 2-5. Figure 2-5 Insert the Screws Note: The grounding stud is used for grounding connection to avoid the accumulation of static electricity...
- Page 17 Explosion-proof Dome·Quick Start Guide Three Fixing Screws Three Preassemble Screws Figure 2-7 Secure the Speed Dome Install the bracket to the installation plate. Hang the safety rope to the speed dome and the hook on the bracket. Route the cables of the speed dome through the bracket and connect the corresponding cables.
-
Page 18: Pendant Mounting
Explosion-proof Dome·Quick Start Guide Explosion-proof Junction Box (Optional) Figure 2-9 Secure the Bracket Remove the protective film on the bubble after the installation is finished. 2.3.3 Pendant Mounting Before you start: Make sure the ceiling is thick enough to withstand the expansion screws. ... - Page 19 Explosion-proof Dome·Quick Start Guide Figure 2-10 Install the Installation Plate Route the cables into the bracket body. Insert three preassemble screws into the preassemble screw holes on the cable joint (do not tighten the preassemble screws) as shown in Figure 2-11. Figure 2-11 Insert the Screws Note: The grounding stud is used for grounding connection to avoid the accumulation...
- Page 20 Explosion-proof Dome·Quick Start Guide Screw three fixing screws into the fixing screws holes on the bracket. Then tighten three preassemble screws to secure the speed dome as shown in Figure 2-13. Three Fixing Screws Three Preassemble Screws Figure 2-13 Secure the Speed Dome Install the bracket to the installation plate.
-
Page 21: Cable Entry Installation
Explosion-proof Dome·Quick Start Guide Explosion-proof Junction Box (Optional) Figure 2-15 Secure the Bracket Remove the protective film on the bubble after the installation is finished. 2.3.4 Cable Entry Installation Purpose: To ensure the explosion-proof performance of the speed dome, you shall route the cable through the cable entry to protect the cables after speed dome installation. -
Page 22: Protective Measures For Outdoor Installation
Explosion-proof Dome·Quick Start Guide 2.4 Protective Measures for Outdoor Installation If the device is installed outdoors, necessary protective measures should be taken to ensure safety. Scan the following QR code to get protective measures for outdoor installation. -
Page 23: Activate And Access Network Camera
Explosion-proof Dome·Quick Start Guide 3 Activate and Access Network Camera Scan the QR code to get Activate and Visit Network Camera. Note that mobile data charges may apply if Wi-Fi is unavailable. - Page 24 Explosion-proof Dome·Quick Start Guide UD15563B-A...
Need help?
Do you have a question about the DS-2DF6C431-CX(T5/316L) and is the answer not in the manual?
Questions and answers