
Subscribe to Our Youtube Channel
Related Manuals for HIKVISION DS-2DF6223-CX


Summary of Contents for HIKVISION DS-2DF6223-CX
- Page 1 Explosion-proof Dome·Quick Start Guide Explosion-proof Dome Quick Start Guide...
- Page 2 WARRANTIES, EXPRESS OR IMPLIED, INCLUDING WITHOUT LIMITATION, MERCHANTABILITY, SATISFACTORY QUALITY, OR FITNESS FOR A PARTICULAR PURPOSE. THE USE OF THE PRODUCT BY YOU IS AT YOUR OWN RISK. IN NO EVENT WILL HIKVISION BE LIABLE TO YOU FOR ANY SPECIAL, CONSEQUENTIAL, INCIDENTAL, OR INDIRECT...
- Page 3 Explosion-proof Dome·Quick Start Guide YOU AGREE TO USE THIS PRODUCT IN COMPLIANCE WITH ALL APPLICABLE LAWS, AND YOU ARE SOLELY RESPONSIBLE FOR ENSURING THAT YOUR USE CONFORMS TO THE APPLICABLE LAW. ESPECIALLY, YOU ARE RESPONSIBLE, FOR USING THIS PRODUCT IN A MANNER THAT DOES NOT INFRINGE ON THE RIGHTS OF THIRD PARTIES, INCLUDING WITHOUT LIMITATION, RIGHTS OF PUBLICITY, INTELLECTUAL PROPERTY RIGHTS, OR DATA PROTECTION AND OTHER PRIVACY RIGHTS.
- Page 4 Explosion-proof Dome·Quick Start Guide Regulatory Information FCC Information Please take attention that changes or modification not expressly approved by the party responsible for compliance could void the user’s authority to operate the equipment. FCC compliance: This equipment has been tested and found to comply with the limits for a Class A digital device, pursuant to part 15 of the FCC Rules.
- Page 5 Explosion-proof Dome·Quick Start Guide ATEX: II 2GD Ex db IIC T6 Gb /Ex tb IIIC T80℃ Db IP68 IECEx: Ex db IIC T6 Gb /Ex tb IIIC T80℃ Db IP68 Hazardous Area Classification: Zone 1, Zone 2, Zone 21, Zone 22 IP Degree: IP68 (2m, 2h) Ex Standards: IEC 60079-0: 2011...
- Page 6 Explosion-proof Dome·Quick Start Guide Safety Instruction These instructions are intended to ensure that user can use the product correctly to avoid danger or property loss. The precaution measure is divided into Warnings and Cautions: Warnings: Neglecting any of the warnings may cause serious injury or death. Cautions: Neglecting any of the cautions may cause injury or equipment damage.
- Page 7 Explosion-proof Dome·Quick Start Guide Do not drop the speed dome or subject it to physical shock, and do not expose it to high electromagnetism radiation. Avoid installation on vibrations surface or places subject to shock (ignorance can cause device damage). ...
-
Page 8: Table Of Contents
Explosion-proof Dome·Quick Start Guide Table of Contents 1 Overview ...................... 1 1.1 Explosion-proof Dome Overview ................1 1.2 Explanation of model naming ................1 1.3 Power Supply ...................... 2 1.4 Explosion-proof Parameters ................. 2 1.5 Mechanical Specification ..................2 1.6 Working Environment ..................2 2 Installation .................... -
Page 9: Overview
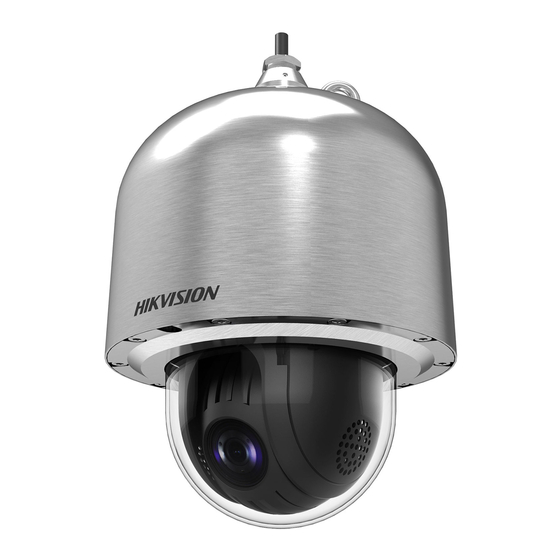
Explosion-proof Dome·Quick Start Guide 1 Overview 1.1 Explosion-proof Dome Overview The explosion-proof dome captures high quality colored images in dim light environment with its low illumination and offers more details over expansive areas. It is equipped with explosion-proof enclosure made of stainless steel. It can be widely used in places such as: port, wharf, petrochemical industry, military industry. -
Page 10: Power Supply
Explosion-proof Dome·Quick Start Guide Figure 1-3 Product Naming Rule 2 1.3 Power Supply For detailed information about the power supply, refer to Explosion-proof Dome Nameplate. 1.4 Explosion-proof Parameters For detailed information about explosion-proof parameters, refer to Explosion-proof Dome Nameplate. 1.5 Mechanical Specification ... -
Page 11: Installation
Explosion-proof Dome·Quick Start Guide 2 Installation 2.1 Preparation 2.1.1 Basic Requirement All the electronic operation should be in strictly compliance with the electrical safety regulations, fire prevention regulations and other related regulations in your local region. Make sure the device in the package is in good condition and all the assembly parts are included. - Page 12 Explosion-proof Dome·Quick Start Guide Note: If there is no network in the safe area, connect CVBS cable to a monitor via auxiliary video cable to test if the device displays image normally. Auxiliary Video Cable CVBS Cable Figure 2-1 Auxiliary Video Cable Connection 2.
-
Page 13: Cable Description And Routing
Explosion-proof Dome·Quick Start Guide 2.2 Cable Description and Routing Power Cord RS-485 Cable Alarm Cable Audio Cable CVBS Cable Network Cable Figure 2-2 Cable Description Notes: The cables vary depending on different speed dome models. The three cables of the power cord should be connected to corresponding wires. The red cable should be connected to live wire. -
Page 14: Installing The Explosion-Proof Dome
Explosion-proof Dome·Quick Start Guide Cable Entry Junction Box Connect the cable through cable trunk or cable tray. Figure 2-3 Cable Wiring Diagram 2.3 Installing the Explosion-proof Dome Before you start: Check the package contents and make sure that the device in the package is in good condition and all the assembly parts are included. -
Page 15: Wall Mounting
Explosion-proof Dome·Quick Start Guide Disconnect the cables Do not disconnect the CVBS and Network cables Figure 2-4 Disconnecting the cables 2.3.2 Wall Mounting Before you start: Make sure that the wall is thick enough to withstand the expansion screws. ... - Page 16 Explosion-proof Dome·Quick Start Guide 3. Route the cables into the bracket body. Insert three preassemble screws into the preassemble screw holes on the cable joint (do not tighten the preassemble screws) as shown in Figure 2-6. Figure 2-6 Insert the Screws 4.
-
Page 17: Pendant Mounting
Explosion-proof Dome·Quick Start Guide Hang the safety rope to the speed dome and the hook on the bracket. Route the cables of the speed dome through the bracket and connect the corresponding cables. Hang the speed dome to the bracket by aligning the holes of bracket with the screws and move the speed dome downward to secure the speed dome as shown as Figure 2-9. - Page 18 Explosion-proof Dome·Quick Start Guide 1. Drill four screw holes for φ16 expansion screws in the wall, and fix the installation plate onto the wall by inserting the four M12×130 expansion screws into the wall. Make sure that mark is at the cable outlet and is upward. 2.
- Page 19 Explosion-proof Dome·Quick Start Guide Figure 2-13 Rotate the Bracket 5. Screw three fixing screws into the fixing screws holes on the bracket. Then tighten three preassemble screws to secure the speed dome as shown in Figure 2-14. Three Fixing Screws Three Preassemble Screws Figure 2-14 Secure the Speed Dome...
-
Page 20: Cable Entry Installation
Explosion-proof Dome·Quick Start Guide 7. Secure the bracket by putting in the flat washer and the spring washer. Then tighten the gland nut. Explosion-proof Junction Box (Optional) Figure 2-16 Secure the Bracket 8. Remove the protective film on the bubble after the installation is finished. 2.3.4 Cable Entry Installation Purpose: To ensure the explosion-proof performance of the speed dome, you shall route the cable... -
Page 21: Protective Measures For Outdoor Installation
Explosion-proof Dome·Quick Start Guide 2.4 Protective Measures for Outdoor Installation If the device is installed outdoors, necessary protective measures should be taken to ensure safety. Scan the following QR code to get protective measures for outdoor installation. -
Page 22: Setting The Speed Dome Over The Lan
Explosion-proof Dome·Quick Start Guide 3 Setting the Speed Dome over the LAN Notes: You shall acknowledge that the use of the product with Internet access might be under network security risks. For avoidance of any network attacks and information leakage, strengthen your own protection. -
Page 23: Activation Via Web Browser
Explosion-proof Dome·Quick Start Guide You are required to activate the speed dome first by setting a strong password for it before you can use the speed dome. Activation via web browser, activation via SADP, and activation via client software are supported. -
Page 24: Activation Via Sadp Software
Explosion-proof Dome·Quick Start Guide 3.2.2 Activation via SADP Software SADP software is used for detecting the online device, activating the device, and resetting the password. Get the SADP software from the supplied disk or the official website, and install the SADP according to the prompts. -
Page 25: Modifying The Ip Address
Explosion-proof Dome·Quick Start Guide 3.3 Modifying the IP Address Purpose: To view and configure the speed dome via LAN (Local Area Network), you need to connect the network speed dome in the same subnet with your PC. Use the SADP software or client software to search and change the IP address of the device. -
Page 26: Accessing Via Web Browser
Explosion-proof Dome·Quick Start Guide 4 Accessing via Web Browser System Requirement: Operating System: Microsoft Windows XP SP1 and above version / Vista / Win7 / Server 2003 / Server 2008 32bits CPU: Intel Pentium IV 3.0 GHz or higher RAM: 1G or higher Display: 1024×768 resolution or higher Web Browser: Internet Explorer 8 to 11, Google Chrome 31 to 44, and Mozilla Firefox 30 to 51... - Page 27 Explosion-proof Dome·Quick Start Guide Figure 4-1 Login Interface 5. Install the plug-in before viewing the live video and managing the network speed dome. Follow the installation prompts to install the plug-in. Note: You may have to close the web browser to finish the installation of the plug-in. Figure 4-2 Download Plug-in 6.
- Page 28 UD06979B-A...
Need help?
Do you have a question about the DS-2DF6223-CX and is the answer not in the manual?
Questions and answers