
Related Manuals for Casio QT-8000


Summary of Contents for Casio QT-8000
- Page 1 SERVICE MANUAL (without price) 15” TFT LCD POS Terminal QT-8000 (EX-964) NOV. 2004 QT-8000 Ver.1 : AUG. 2005 INDEX...
-
Page 2: Table Of Contents
CONTENTS QT-8000 PAGE 1. EXPLANATION OF PRODUCT ................1 1-1. GENERAL DESCRIPTION ..................1 1-2. SYSTEM OVERVIEW ....................1 1-3. MAJOR COMPONENT ....................2 1-4. SPECIFICATIONS ....................... 4 1-5. I/O OUTLETS ....................... 6 1-6. OPTION ........................7 2. DISASSEMBLY .......................8 3. INSTALLATION .....................17 4. -
Page 3: Explanation Of Product
A unique cable management device is also provided to trim the operation environment. In conformity to IPX1 standard, water-resistant system design is adopted. Designed by the PC and POS experts for the POS professionals, the QT-8000 is virtually the ultimate solution for hospitality applications. -
Page 4: Major Component
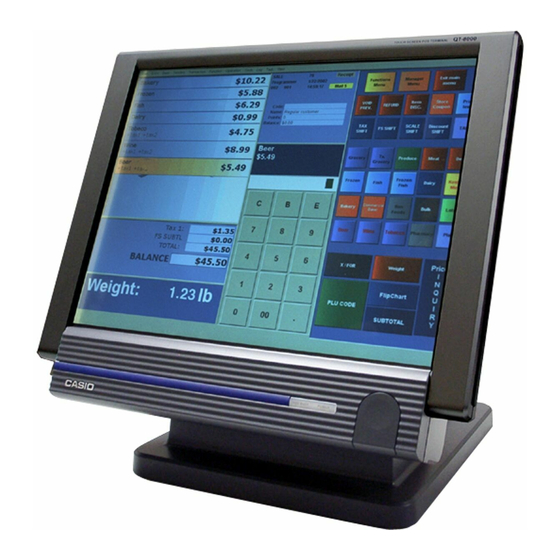
1-3. Major Component 1. Touch Panel: The QT-8000 features a quick-response touch screen for keyboardless operation. The standard touch adapted in this system is 15 " analog resistive type touch screen. Its durability is 10 million touches in life. 2. LCD Panel : To provide the best visual resolution and viewing angle, the standard display panel adapted in the QT-8000 is 15"... - Page 5 8. CF Cover Lock: The CF cover lock is used to hold the items inside the CF cover. 9. Rotate Cover: The rotate cover is made of a mixture of PC and ABS material and it is used to prettify the back of the LCD panel by covering the hangers.
-
Page 6: Specifications
1-4. Specifications Core System (Motherboard) • Intel® Celeron™ 1.2GHz, Socket 370 processor with CPU: FC-PGA2 package type • VIA CLE266 (VT8623) North Bridge and VT8235 South System Chipset: Bridge • Phoenix Award PnP BIOS, 4M bits Flash ROM with VGA BIOS: BIOS •... - Page 7 Built-in Peripherals • 2.5” Hard disk (designed 30GB) • 15” 5-wire resistive type touch screen via USB interface • MSR Card Reader (Optional) System Specification • 15” TFT LCD display, resolution 1024 x 768 • One Compact flash socket with Type I / II •...
-
Page 8: I/O Outlets
1-5. I/O Outlets The following diagram shows the I/O arrangement. Bottom Panel 1) Ethernet 10/100 Base-T 5) Mouse 9) Parallel port 2) MIC 6) 4 x USB 2.0 10) DC-In jack 3) Audio Out 7) 4 x COM ports 11) Power switch 4) Keyboard 8) Second VGA Side Panel... - Page 9 1-6. Option DEVICE NAME MODEL NOTE • Display set for customer QT-6060D • Display cable for customer QT-6061CB (for mounting to the base) • Display 5-meter cable for QT-6062CB customer • Remote printer UP-360 • Printer cable PRT-CB-8A (Length 3m) •...
-
Page 10: Disassembly
2. DISASSEMBLY STEP 1: Remove HDD Cover. Release the 4 screws. STEP 2: Remove HDD. Pull out the HDD cable. - 8 -... - Page 11 STEP 3: Remove Card Reader Cover. Release the 3 screws. STEP 4: Remove Back Cover. Release the 15 screws. - 9 -...
- Page 12 STEP 5: Remove Chassis_T. Release the 6 screws. STEP 6: Remove CF Board, MSR Board. Release the 5 screws. - 10 -...
- Page 13 STEP 7: CF Board, MSR Board. CF Board MSR Board STEP 8: Release the I/O connectors’ copper pillars. Release the 12 copper pillars. - 11 -...
- Page 14 STEP 9: Remove Main Board. Release the 5 copper pillars. Release the 4 screws STEP 10: Main Board. - 12 -...
- Page 15 STEP 11: Remove Inverter Board. Release the 2 screws. STEP 12: Inverter Board. - 13 -...
- Page 16 STEP 13: Remove the Control Board of Touch Panel. Release the 2 screws. STEP 14: Control Board of Touch Panel. - 14 -...
- Page 17 STEP 15: Remove Base. Remove 14 screws. STEP 16: Remove LCD Panel. Remove 4 screws from both side of system base. - 15 -...
- Page 18 STEP 17: Remove Touch Panel. Remove Touch Panel. - 16 -...
-
Page 19: Installation
3. INSTALLATION Unpacking The QT-8000 along with its accessories are packed in carton box. After unpacking the carton, place the system on a raised surface and carefully inspect the system for any damage that might have occurred during shipment. If there are damaged or missing parts, contact your dealer immediately. - Page 20 - 18 -...
- Page 21 NOTES: 1. The QT-8000 do not equip any operating system. An operating system must be loaded first before installing any software into the QT-8000. 2. Be sure to ground yourself to keep from any static charge when you install the internal components.
-
Page 22: Option Installation
4. OPTION INSTALLATION 4-1. Installing the display set for customer (QT-6060D) There are two types for the display set for customer (QT-6060D). Type A Type B To install Type A 1. Remove two screws at the bottom and then the cover. 2. - Page 23 5. Fix QT-6060D to the main unit with four screws. 6. Connect the cable to QT-8000 (COM4). 7. Fix the metal bracket which was removed in the above step 2. To install Type B 1. Remove five screws at the bottom and then the metal bracket.
-
Page 24: Installing The Long Pole
4-2. Installing the LONG POLE It is possible to attach the long pole in QT-6060D. Please arrange the following parts at your side when you need them. Status in 4). Attachment parts (arranged by dealers) LONG-POLE (arranged by dealers) 1) Turn the QT-6060D over. 2) Remove four pan-head screws which are fixed in STD-POLE. -
Page 25: System Installation
5. SYSTEM INSTALLATION This chapter describes the installation of the overall system of the QT-8000. See Chapter 4 for more details on the motherboard in detail. The QT-8000 has a Celeron/Pentium III based motherboard. It already builds in an Intel Celeron CPU, 256MB of DRAM and a 2.5”... -
Page 26: Dram
5-3. HDD The standard QT-8000 already builds in a 2.5” hard disk drive. To maintain the HDD, follow the installation instructions below and check the list of HDD tested as the QT-8000. 1. Take out the screws, the IDE cable and remove the HDD. -
Page 27: Vga
5-6. VGA The QT-8000 has an analog RGB interface connector installed on the rear side. It is able to connect to an expansion CRT monitor, and the system can display on both the LCD display and the CRT individually or simultaneously. However, as the LCD display adapted is of the resolution of 1024 x 768, therefore, to support a CRT monitor simultaneously, the CRT’s... -
Page 28: System O/S And Software Installation
5-10. System O/S and Software Installation The QT-8000 is not equipped with any operating system. It builds in a 2.5” HDD as memory storage device. As both devices are built in the system chassis, to load Win98/Win98SE or Win2000 O/S or application software into the system, an external device is needed to act as a bridge. - Page 29 The Award BIOS Setup options described in this section are selected by choosing the appropriate high-level icon from the Award BIOS Setup main menu selection screen. Default setting for the QT-8000 is described in < > next to each option. (i.e. <AUTO>) 5-11-2-1. Standard CMOS Setup <...
- Page 30 IDE Primary Master / Slave: IDE Secondary Master / Slave: The BIOS can automatically detect the specifications and optimal operating mode of almost all IDE hard drives. When you select type AUTO for a hard drive, the BIOS detect its specifications during POST, every time system boots. If you do not want to select drive type AUTO, other methods of selecting drive type are available: 1.
- Page 31 VIDEO: This category selects the type of video adapter used for the primary system monitor. Although secondary monitors are supported, you do not have to select the type in Setup. Available Options are as follows: EGA/VGA Enhanced Graphics Adapter/Video Graphics Array. For EGA, VGA, SEGA, SVGA or PGA monitor adapters.
- Page 32 5-11-2-2. BIOS Features Setup < Screen shows all default setting > Phoenix - AwardBIOS CMOS Setup Utility Advanced BIOS Features CPU Internal Cache [Enabled] Item Help External Cache [Enabled] „ Menu Level CPU L2 Cache ECC Checking [Enabled] Quick Power On Self Test [Enabled] First Boot Device [HDD-0]...
- Page 33 QUICK POWER ON SELF-TEST: This item allows you to speed up Power On Self Test (POST) after power-up the computer. When enabled, the BIOS will shorten or skip some check items during POST. FIRST/SECOND/THIRD/OTHER BOOT DEVICE: The BIOS attempt to load the operating system from the devices in the sequence selected in these items.
- Page 34 SECURITY OPTION: This category allows you to limit access to the system and Setup, or just to Setup. System The system will not boot and access to Setup will be denied if the correct password is not entered at the prompt. Setup The system will boot, but access to Setup will be denied if the correct password is not entered at the prompt.
- Page 35 DRAM CLOCK/DRIVE CONTROL: The options for these items are found in its sub menu. By pressing the <ENTER> key, you are prompt to enter the sub menu of the detailed options as shown below: Phoenix – AwardBIOS CMOS Setup Utility DRAM Clock/Drive Control Current FSB Frequency 133 MHz...
- Page 36 5. DRAM CAS Latency When synchronous DRAM is installed, the number of clock cycles of CAS latency depends on the DRAM timing. AGP & P2P Bridge Control: The options for these items are found in its sub menu. By pressing the <ENTER> key, you are prompt to enter the sub menu of the detailed options as shown below: Phoenix –...
- Page 37 CPU & PCI BUS CONTROL: The options for these items are found in its sub menu. By pressing the <ENTER> key, you are prompt to enter the sub menu of the detailed options as shown below: Phoenix – AwardBIOS CMOS Setup Utility CPU &...
- Page 38 VIDEO RAM CACHEABLE: Select Enabled allows caching of the video RAM , resulting in better system performance. However, if any program writes to this memory area, a system error may result. 5-11-2-4. Integrated Peripherals <Screen shows all default setting > Phoenix –...
- Page 39 Phoenix – AwardBIOS CMOS Setup Utility VIA On-Chip IDE Device OnChip IDE Channel 0 [Enabled] Item Help OnChip IDE Channel 1 [Enabled] Menu Level }} Primary Master PIO [Auto] Primary Slave PIO [Auto] Secondary Master PIO [Auto] Secondary Slave PIO [Auto] Primary Master UDMA [Auto]...
- Page 40 5. IDE HDD Block Mode Block mode is also called block transfer, multiple commands, or multiple sector read/write. If your IDE hard drive supports block mode (most new drives do), select Enabled for automatic detection of the optimal number of block read/writes per sector the drive can support.
- Page 41 SUPER IO DEVICE: The options for these items are found in its sub menu. By pressing the <ENTER> key, you are prompt to enter the sub menu of the detailed options as shown below: Phoenix – Award CMOS Setup Utility SuperIO Device Onboard Serial Port 1 [3F8/IRQ4]...
- Page 42 4. Parallel Port Mode Select an operating mode for the onboard parallel (printer) port. Select Normal, Compatible, or SPP unless you are certain your hardware and software both support one of the other available modes. 5. ECP Mode Use DMA Select a DMA channel for the parallel port for use during ECP mode.
- Page 43 SUSPEND MODE: When enabled and after the set time of system inactivity, all devices except the CPU will be shut off. VIDEO OFF OPTION: When enabled, this feature allows the VGA adapter to operate in a power saving mode. Always On Monitor will remain on during power saving modes.
- Page 44 5-11-2-6. PNP/PCI Configuration < Screen shows all default setting > Phoenix – Award CMOS Setup Utility PnP/PCI Configurations PNP OS Installed [No] Item Help Reset Configuration Data Disabled „ Menu Level Resources Controlled By [Auto(ESCD)] X IRQ Resources Press Enter Select Yes if you are X DMA Resources Press Enter...
- Page 45 DMA RESOURCES: You may assign each system DMA a type, depending on the type of device using the DM Channel. PCI/VGA PALETTE SNOOP: Leave this field at disabled. ASSIGN IRQ FOR VGA: This item Enable/Disable to assign IRQ for VGA. ASSIGN IRQ FOR USB: This item Enable/Disable to assign IRQ for USB.
- Page 46 CPU/SYS FAN SPEED: Show you the current CPU/System FAN speed. VCORE: This item shows you the current system voltage. +3.3V/+5V/+12V: This item shows you the voltage of +3.3V/+5V/+12V. SHUTDOWN TEMPERATURE: This item allows you to set the CPU shutdown Temperature. This function is only effective under Window 98 ACPI mode.
-
Page 47: Touch Screen
QT-8000 system. 5-12-2. Installation This section describes the installation procedure for the Windows Driver Disk. There are two steps to install the touch screen drivers into the QT-8000 system. Step 1: Driver installation Step 2: Calibration 5-12-2-1. -
Page 48: Ethernet Introduction
5-13. Ethernet Introduction 5-13-1. Introduction The QT-8000 is equipped with high performance Plug & Play Ethernet interface which is fully compliant with IEEE802.3 standard, and consisting of RJ-45 connector. 5-13-2. Network Driver Installation under Windows XP This describes in detail the important steps when installing the VIA VT6103 network drivers under WinXP. - Page 49 5. Capping the installation • Enter the appropriate drive for your disk media, and click on OK. • Click on OK then select Device dialog box. • The Update Wizard display the message that it has found the driver. Click on Next>.
-
Page 50: Diagnostic Operation
6. DIAGNOSTIC OPERATION 6-1. Inspection of a LAN * Make sure that the OS (Windows XP, 2000) is installed on the computer before performing the diagnostic program. * Download the diagnostic program from the latest service CD. Diagnostic Program: TestLANSv.exe, TestLAN.exe Perform the inspection of a LAN port. -
Page 51: Inspection Of Com (Rs232C)
6-3. Inspection of COM (RS232C) * Make sure that the OS (Windows XP, 2000) is installed on the computer before performing the diagnostic program. * Download the diagnostic program from the latest service CD. Diagnostic Program: TestCOM.exe Connect the inspection loop back devices to the (four) COM ports respectively in advance. Check that the LEDs of the inspection devices are not lit after they are connected. -
Page 52: Inspection Of The Touch Panel
6-5. Inspection of the touch panel * Make sure that the OS (Windows XP, 2000) is installed on the computer before performing the diagnostic program. * Download the diagnostic program from the latest service CD. Diagnostic Program: TestTP.exe Perform the touch panel inspection. Touch the center of the five marks which appear in the screen without fail. -
Page 53: Inspection Of Rtc
6-7. Inspection of RTC * Make sure that the OS (Windows XP, 2000) is installed on the computer before performing the diagnostic program. * Download the diagnostic program from the latest service CD. Diagnostic Program: TestHDD.exe Perform the RTC (time-keeping function) inspection. Check that the “Time”... -
Page 54: Circuit Explanations
7. CIRCUIT EXPLANATIONS 7-1. Explanations of each block System Major Parts Refer to the following diagram to identify the major parts that make up the QT-8000. - 52 -... - Page 55 Name Part No. Description 1 FRONT PANEL 30-002-12830001 Plastic front panel 2 IBUTTON EC-94-J-03-01 Magnetic probe 3 PANEL_DECORATION 30-052-06130001 Side panel decoration 4 IBUTTON_COVER 30-002-12330001 Cover of magnetic probe 5 LENS 30-021-02130001 Plastic lens 6 MSR_RUBBER 30-13010206300 Dust resist 7 PANEL_RUBBER 30-13010106300 Panel rubber 8 TOUCH PANEL...
- Page 56 32 FAN HF-45-45-10-1 45 x 45 x 10 system fan 33 LOGO 20-030-01107001 CASIO Logo 34 SPEAKER KS-6300 2W internal speaker 35 HDD CUSHION (A) 30-013-15130001 Side HDD cushion 36 HDD CUSHION (B) 30-013-15230001 Side HDD cushion 37 HDD CUSHION (C)
-
Page 57: Block Diagram
7-2. Block diagram (1) System Connection Diagram - 55 -... - Page 58 (2) System block diagram - 56 -...
-
Page 59: Jumper Setting
7-3 Jumper Setting The default setting of the motherboard for QT-8000 is as follow: EX964 Overview and Jumper switch - 57 -... - Page 60 7-3-1 Jumper Settings You can configure your board by setting the jumpers. Jumper is consists of two or three metal pins with a plastic base mounted on the card, and by using a small plastic "cap", Also known as the jumper cap (with a metal contact inside), you are able to connect the pins.
- Page 61 JUMPER SETTINGS 7-3-2 COM PORT RI & VOLTAGE SELECTION JP2 : COM1(PIN9), COM2(PIN9), COM3(PIN9), and COM4(PIN9), RI and 5V/12V Voltage Selection The selections are as follows: JUMPER SELECTION SETTING JUMPER ILLUSTRATION (Pin Closed) 13-14 COM1 COM2 15-16 - 59 -...
- Page 62 17-18 COM3 9-11 19-20 COM4 8-10 10-12 - 60 -...
- Page 63 7-3-3 RS232/422/485 (COM2) SELECTION JP3 : RS-232/422/485 (COM2) Selection COM2 is selectable for RS-232, 422, 485 function. The jumper settings are as follows : COM 2 JUMPER SETTING JUMPER ILLUSTRATION FUNCTION (pin closed) RS-232 Open 1-2, 5-6, 7-8, 9-10 RS-422 11-12, 13-14, 15-16 17-18, 19-20 1-3, 4-6, 7-8, 9-10...
- Page 64 7-3-5 LCD PANEL VOLTAGE SELECTION JP8: LCD Panel Voltage Selection The selections are as follows : JUMPER SETTING JUMPER SELECTION (Pin Closed) ILLUSTRATION 3.3V (default) Default 3.3V 7-3-6 EPPCI IRQ SELECTION JP5: EPPCI IRQ Selection The selections are as follows: SELECTION JUMPER SETTING JUMPER...
-
Page 65: Troubleshooting
POS PC system. To assist you in fully analyzing the problem, the following table also includes an up-to-date list of symptoms and probable cause(s). In case you encounter problems or discover causes not included in this section, we highly recommend you to consult CASIO engineers . Symptoms Probable Causes Loose power cable connection at the bottom of the front panel ¢... - Page 66 Defective CPU card ¢ Replace the CPU card of the system. Incorrect BIOS version ¢ Upgrade the BIOS version. Consult CASIO engineers for the latest version. Please check the COM port connection ¢ Pull out the COM port cable from the system, then replace it COM Port is not back.
- Page 67 Loose touch connection on J3 of the touchscreen control board. ¢ Pull out the touch cable on J3 then re-install it back. If not functioning properly symptoms persist, consult CASIO engineers. Defective touchscreen control board ¢ Replace the touchscreen control board of the system.
-
Page 68: Data Sheet
9. DATA SHEET 9-1. Power Supply (1) 120 Watt AC Adapter which can support UPS with rectangular waveform output (2) AC Input: a. Rated input voltage: 100V/ 240V b. Input voltage range: 90 VAC ~ 264 VAC c. Input frequency range: 47 Hz ~ 63 Hz (3) Output: a. -
Page 69: Part List
2. As for spare parts order and supply, refer to the “GUIDEBOOK for Spare Parts Supply”, published separately. 3. The numbers in item column corespond to the same numbers in drawing. 4. CASIO does not supply the spare parts without parts code. 5. Remarks Q'ty :... - Page 70 EXPLODED VIEW (QT-8000) — 68 —...
- Page 71 1 1019 1034 IBUTTON COVER 30-002-12330001 2 1019 1039 MSR_RUBBER 30-013-01230001 3 1019 1036 LENS 30-021-02130001 4 1016 6384 MAGNET PROBE 94-J-04 5 1019 1700 CASIO LOGO 20-030-01107001 6 1019 1040 PANEL_DECORATION 30-052-06130001 7 1019 1031 FRONT PANEL 30-002-12830001 8 1019 1044 PANEL_RUBBER 30-13010106300...
- Page 72 EXPLODED VIEW (DL-3401) 29 30 32 31 — 70 —...
- Page 73 PARTS LIST (DL-3401) P r i c e I t e m Code No. Parts Name Specification Q t ' y R a n k c o d e CASE/MAIN V012K00008 NOT SUPPLY 9487 0975 LOCK SUB ASSY ZD52842 9487 0976 SOLENOID SUB ASSY ZD53541 1907 7942...
- Page 74 Ver.1 : Aug. 2005 • Correction of model (cover, page 67) CASIO COMPUTER CO.,LTD. Overseas Service Division 6-2, Hon-machi 1-Chome Shibuya-ku, Tokyo 151-8543, Japan...
Need help?
Do you have a question about the QT-8000 and is the answer not in the manual?
Questions and answers