Table of Contents
Advertisement
Quick Links
Packing List
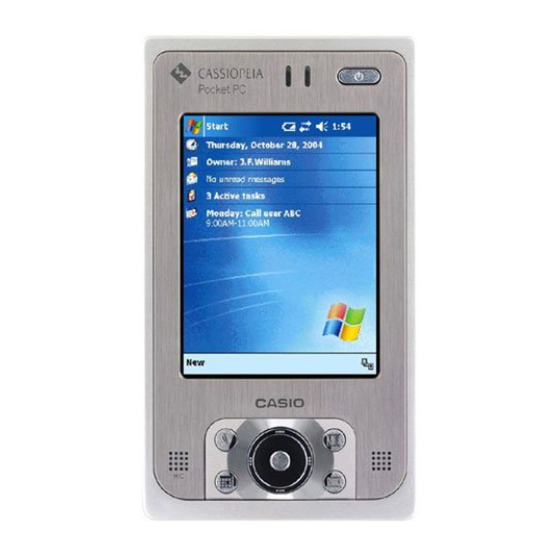
Thank you for purchasing the Pocket PC "the Rugged PDA". A list of the items included with
this product is given below. Confirm that nothing is missing or damaged.
If anything is missing or damaged, contact the dealer from which you purchased this product.
Rugged PDA
Stylus
×1
Printed materials other than those listed here may be included with the product also.
Do not dispose of the box and packing materials. Use the box and packing materials for
storage and transport.
Battery Pack
×1
CD-ROM
Companion
CD
AC Adaptor
×1
×2
(Two power cords, one for
North America and one for Europe.)
However the IT-10M30B provided
with only one power cord.
User's Guide
1
Advertisement
Table of Contents

Related Manuals for Casio IT-10M20


Summary of Contents for Casio IT-10M20
-
Page 1: Packing List
Packing List Thank you for purchasing the Pocket PC "the Rugged PDA". A list of the items included with this product is given below. Confirm that nothing is missing or damaged. If anything is missing or damaged, contact the dealer from which you purchased this product. Rugged PDA Battery Pack AC Adaptor... - Page 2 6. Termination This license is effective until terminated. You may terminate this license at any time by informing CASIO in writing of your intention to do so, and destroying the Software CD-ROM and Documentation so that they are unusable.
- Page 3 Pocket PC Software 2003 End User License Agreement • You have acquired a device ("DEVICE") that includes software licensed by CASIO COMPUTER CO,. LTD. ("CASIO") from Microsoft Licensing Inc. or its affiliates ("MS"). Those installed software products of MS origin, as well as associated media, printed materials, and "online"...
- Page 4 Corporation, or their affiliates or subsidiaries. For product support, please refer to CASIO support number pro- vided in the documentation for the DEVICE. Should you have any questions concerning this EULA, or if you desire to contact CASIO for any other reason, please refer to the address provided in the documentation for the DEVICE.
-
Page 5: Safety Precautions
• Always observe the warnings and cautions indicated on the product. • If this Guide is misplaced or damaged so as to be unreadable, you can access "http://www.casio.co.jp/English/system/" for the online guide or downloading the guide into your PC. About the icons... - Page 6 AC adaptor from the power outlet. Contin- ued use creates the danger of fire and electric shock. Contact your original dealer or authorized CASIO dis- tributor. Do not place containers of liquids near the Rugged PDA and do not allow any foreign matter to get into it.
- Page 7 Continued use creates the danger of shorting, fire and electric shock. Attempting to repair the Rugged PDA yourself is ex- tremely dangerous. Contact your authorized CASIO distributor for repair and maintenance. The liquid inside the LCD is harmful to humans.
- Page 8 Contact your authorized CASIO distributor whenever the power cord or plug requires repair or maintenance. Use only the AC adaptor specified by CASIO for this product. Use of other type of AC adap- tor creates the danger of fire.
- Page 9 Use only the battery pack that comes with the Rugged PDA. When the battery pack reaches the end of its life, replace it with a new battery pack as specified by CASIO. Other types of the battery pack have different voltage rating Battery...
- Page 10 Caution! the Rugged PDA Do not place the Rugged PDA on an unstable or uneven surface. Doing so can cause the Rugged PDA to fall, creating the danger of mal- function, fire, and electric shock. Do not leave the Rugged PDA in the following areas.
- Page 11 Caution! Power Cord and Peripherals Do not overly bend the power cord, do not al- low it to be caught between desks or other fur- niture, and never place heavy objects on the power cord. Doing so can cause shorting or breaking of the power cord, creating the dan- ger of fire and electric shock.
- Page 12 Latvia, Lithuania, Cyprus, Malta EFTA: Switzerland, Iceland, Norway Member states with restrictive use NONE Manufacturer CASIO COMPUTER CO., LTD. Brand CASIO Type IT-10M20, IT-10M20BR are tested and found to conform with the essential requirements for protection of health and the...
- Page 13 • Consult the dealer or an experienced radio/TV technician for help. FCC WARNING Changes or modifications not expressly approved by the party responsible for compliance could void the user’s authority to operate the equipment. Declaration of Conformity Model Number: IT-10M20 Trade Name: CASIO Responsible party: CASIO INC. Address: 570 Mt.
- Page 14 Industry Canada “This digital apparatus does not exceed the Class B limits for radio noise emissions from digital apparatus as set out in the interference-causing equipment standard entitled “Digital Appara- tus”, ICES-003 of the Department of Communications.” Industrie Canada “Cet appareil numérique respecte les limites de bruits radioélectriques applicables aux appareils numeriques de Classe B prescrites dans la norme sur le matériel brouilleur : “Appareils Numériques”, NMB-003 édictée par le ministre des Communica-...
-
Page 15: Before Using The Rugged Pda
AC adaptor from the power outlet. Contact your original dealer or authorized CASIO distributor. • CASIO COMPUTER CO., LTD. shall not be held liable for any loss or claims due to the use of this product. • CASIO COMPUTER CO., LTD. shall not be held liable for any loss or claims (lost profits, interruption of business, corruption or loss of memory data, etc.) by you or... - Page 16 • When the Rugged PDA or the AC adaptor is warmer than usual, shut down the power, unplug the power cord of the AC adaptor and remove the battery pack. Contact your original dealer or authorized CASIO distributor. Do not continue operating the Rugged PDA until the battery completely discharges.
- Page 17 • Check with each manufacturer for compatibility before using any non-CASIO op- tions with this product. • CASIO assumes no responsibility for any loss (including but not limited to personal injury, material loss, damage to the Rugged PDA) suffered by you or other arising out of the use of a non-CASIO option.
- Page 18 Notes on transfer of ownership of this product Transferring ownership (selling) this product should be done in compliance with item 1 below. Accepting ownership (buying) this product should be done in compliance with item 2 below. 1) If you transfer ownership of this product When transferring ownership of this device to a third party, hand over everything that was included with it (including CD-ROMs, manuals, END-USER LICENSE AGREEMENT, and any backup copies) and completely dispose of all copies of any...
-
Page 19: Maintenance And Care
Rugged PDA's case, and even malfunction of the Rugged PDA. Never use such agents when cleaning. • Use only the stylus accompanied with the Rugged PDA (or specified by CASIO) for inputting on the LCD screen. Before using the stylus, remove any dirt from the tip of it and on the screen. -
Page 20: Storage
Consumables The following items are consumables. You will need to inform your original dealer or authorized CASIO distributor of the model number of your unit when purchasing the stylus and battery pack. Stylus • Purchase a new stylus whenever the tip of your stylus becomes damaged. -
Page 21: Table Of Contents
Various Screen Adjustments ................ 43 When Initial Setup Is Finished ..............44 Button Operation Settings ................64 Connecting to a Computer ..............65 Compatible Computers ................65 Connecting to a Computer ................66 Using the CASIO Companion CD ..............66... - Page 22 Chapter 2 Basic Operations PIM ....................68 About Pocket Outlook ................. 68 Calender ...................... 70 Contacts ....................... 72 Tasks ......................73 Programs ................... 74 Programs Covered in this Section ............... 74 Adding Programs ..................75 Pockets Word ....................75 Pocket Excel ....................76 Windows Media ....................
- Page 23 Chapter 3 Connecting Peripherals AC Adaptor ..................102 Connecting the AC Adaptor to the Rugged PDA ........102 Connecting the AC Adaptor to the Basic Cradle ........102 Specifications .................... 103 Basic Cradle ..................104 General Guide ................... 104 To Mount the Rugged PDA onto the Basic Cradle ........105 To Remove the Rugged PDA from the Basic Cradle .........
-
Page 25: Chapter 1 Getting Ready
Getting Ready... -
Page 26: Names Of Parts And Their Functions
Names of Parts and Their Functions Names of Parts and Their Functions Front !7 C F card slot !6 S D card slot !8 S tylus holder !5 E ject button qPower switch !4 S trap hole wIndicator lamps eLCD screen !3 H eadphone jack !2 R eset switch !1 A ction button... - Page 27 t Speaker Sounds such as the alarm come out of the speaker. Sound does not come out of the speaker when earphones or headphones are connected to the head- phone jack. y Program buttons Pushing the program buttons starts the program assigned to that button. The four default settings are, from the upper left, Menu [ ], Calendar [ Contacts [...
- Page 28 Rear !9 S tylus !9 S tylus @0 S trap hole @7 P ower adaptor port @2 B attery pack cover lock switch @1 B attery pack cover @6 S erial connector cover @3 I nfrared communication port @5 P ower terminals @4 S erial connector !9 Stylus Use this pen for entering items on the touch panel screen.
-
Page 29: Operating The Rugged Pda
@6 Serial connector cover Use this rubber cover when not using the serial I/F. @7 Power adaptor port ( Connect the power cord from the AC adaptor to this port. Remove the rubber cover to use it. (See page 37) Operating the Rugged PDA About Buttons on the Side The buttons on the side of the Rugged PDA can be used for the following opera-... - Page 30 • Take care to avoid misplacing the stylus. Be sure to put back the stylus into its holder when you are not using it. • Take care to avoid damaging or breaking the tip of the stylus. • Never use pen, pencil, or other writing tool to avoid scratches on the screen.
-
Page 31: Connecting The Strap
Connecting the Strap It is possible to attach a commercially available strap. See the illustration below. Attaching the Screen Protect Sheet Follow the procedure below to attach the optional screen protect sheet (HA- C90PS5B). Do not press strongly on the LCD screen when attaching the screen protect sheet. - Page 32 r With the adhesive side facing down, put the edge of the protect sheet along the edge of the screen frame as shown in Fig. 3. * Do not put it too far under the edge. Edge Protect sheet Protect Clear film sheet Fig.
-
Page 33: Power Supply
Power Supply The Rugged PDA uses an AC adaptor to connect to an outside power source or to recharge the batteries. Attach the battery pack and charge the Rugged PDA's battery until it is full to do the initial setup when using it for the first time or after not using it for a long period, and when the battery is low. -
Page 34: Attaching And Removing The Battery Pack
Attaching and Removing the Battery Pack Attaching Turn off the Rugged PDA, and turn it over. Slide the battery pack cover lock switches with the end of the stylus to FREE (q), and remove the battery pack cover. q LOCK FREE Align the battery pack with the slot and insert it into the slot (w). - Page 35 Removing Turn off the Rugged PDA, and turn it over. Slide the battery pack cover lock switches with the end of the stylus to FREE (q), and remove the battery pack cover. Next, remove the battery pack (w). w Remove the battery pack q LOCK FREE •...
-
Page 36: Charging The Battery Pack
Charging the Battery Pack The AC adaptor is used not only to supply power from the AC power outlet but also to charge the battery pack. The battery pack is also charged while the Rugged PDA is in use (power is on) if the AC adaptor (provided) is connected with the battery pack inserted in the Rugged PDA. - Page 37 Warning! Use the AC adaptor specified by CASIO. Using the AC adaptor that is not specified may cause a fire. Remove the AC adaptor cable in the following order q...
- Page 38 Checking Remaining Battery Power • You can check the remaining power level in the batteries on the "Power" screen. The battery loses power slowly even if the Rugged PDA is not being used. The battery may lose all power if the Rugged PDA is stored for a long period of time. We recommend checking the power level in the battery from time to time.
-
Page 39: Using The Ac Adaptor
Rugged PDA to the card). Warning! Use the AC adaptor specified by CASIO. Using the AC adaptor that is not specified may cause a fire. • Be careful not to trip on the AC adaptor's power cord. -
Page 40: Initial Setup
Initial Setup Initial Setup Procedure The first time you use the Rugged PDA, fully charge the battery, then perform the following procedure (if possible connect the AC adaptor to the Rugged PDA during this operation) according to the instructions appeared on the screen to set the initial setup. - Page 41 Set the time zone in which the Rugged PDA is used. Initial setup is finished. Tap the appropriate area on the screen. Initial Setup...
- Page 42 The "Today" screen appears, you can start using the Rugged PDA. • After initial setup, or after Full reset, set the q"Clock&Alarms," w"Owner information" or e"Password" if necessary. qClock&Alarms On the "Today" screen, tap the date q, and then use the buttons to input the your world’s time zones, time, and date.
-
Page 43: Various Screen Adjustments
Various Screen Adjustments Do the following adjustments, if the screen is difficult to see or to operate after the initial setup. Adjusting the Screen Brightness You can adjust the screen brightness with the Action button and the Cursor button to make the screen easier to see when operating the Rugged PDA in dark loca- tions. -
Page 44: When Initial Setup Is Finished
When Initial Setup Is Finished This section describes the Rugged PDA's basic operations after initial setup is fin- ished. Today Screen When you turn on the Rugged PDA for the first time each day (or after 4 hours of inactivity), you'll see the Today screen. You can also display it by tapping the Today's icon. - Page 45 Status Icons Status icons in the navigation bar* or the command bar* indicate the current status of the Rugged PDA. Clicking a status icon displays the applicable setting screen, which you can use to configure settings. * The bar along the top of the display is the navigation bar, while the bar along the bottom of the display is the command bar.
- Page 46 Navigation Bar and Command Bar The navigation bar is located at the top of the screen. It displays the active program and current time, and allows you to switch to programs and close screens. Use the command bar at the bottom of the screen to perform tasks in programs. The command bar includes menu names, buttons, and the Input Panel button.
- Page 47 Pop-up Menus With pop-up menus, you can quickly choose an action for an item. For example, you can use the pop-up menu in the contact list to quickly delete a contact, make a copy of a contact, or send an e-mail message to a contact. The actions in the pop-up menus vary from program to program.
- Page 48 Enter Information on the Rugged PDA You have several options for entering new information: • Use the input panel to enter typed text, either by using the soft keyboard or other input method. • Write directly on the screen. • Draw pictures on the screen. •...
- Page 49 When you use the input panel, the Rugged PDA anticipates the word you are typing or writing and displays it above the input panel. When you tap the dis- played word, it is inserted into your text at the insertion point. The more you use the Rugged PDA, the more words it learns to anticipate.
- Page 50 Word Completion options: The Rugged PDA intelligently will attempt to guess at or predict the full word that you're entering by doing a dictionary lookup. When you purchase the Rugged PDA, a default set of words is installed. However, as you begin using the Rugged PDA and begin using words not in that dictionary, they are automatically added to a custom user dictionary that is also searched by the word completion feature.
- Page 51 To type with the soft keyboard: Tap the arrow next to the Input Panel button and then Keyboard. On the soft keyboard that is displayed, tap the keys with your stylus. The soft keyboard can be used in two modes: large and small. Large mode gives the advantage of larger keys and therefore higher accuracy;...
- Page 52 To space forward, swipe horizontally in a forward direction with stylus on the keyboard. To move backwards, swipe horizontally in a backwards direction with stylus on the keyboard. To carriage return, swipe vertically downwards with stylus on the keyboard. To shift + key, swipe vertically upwards with stylus on the keyboard and hit any key on the keyboard.
- Page 53 To use Letter Recognizer: With Letter Recognizer you can write letters using the stylus just as you would on paper. Tap the arrow next to the Input Panel button and then Letter Recog- nizer. Write a letter in the box. As you can see, the screen has been broken into three segments.
- Page 54 To adjust Letter Recognizer options: Select the arrow icon in the SIP chooser area and tap Options. Be sure Letter Recognizer is selected as the input method. Select the Options button. Quick Stroke lets you write all letters using one stroke. While this method will allow you to write faster, it requires learning how to form letters in a new way.
- Page 55 To use Block Recognizer: With Block Recognizer you can input character strokes using the stylus that are similar to those used on other devices. Tap the arrow next to the Input Panel button and then Block Recog- nizer. Write a letter in the box. When you write a letter, it is converted to typed text that appears on the screen.
- Page 56 To select typed text If you want to edit or format typed text, you must select it first. • Drag the stylus across the text you want to select. You can cut, copy, and paste text by tapping and holding the selected words and then tapping an editing command on the pop-up menu, or by tapping the command on the Edit menu.
- Page 57 Writing on the Screen In any program that accepts writing, such as the Notes program, and in the Notes tab in Calendar, Contacts, and Tasks, you can use your stylus to write directly on the screen. Write the way you do on paper. You can edit and format what you've written and convert the information to text at a later time.
- Page 58 If you accidentally write on the screen, tap Tools, then Undo and try again. You can also select text by tapping the Pen button to deselect it and then dragging the stylus across the screen. You can cut, copy, and paste written text in the same way you work with typed text: tap and hold the selected words and then tap an editing command on the pop-up menu, or tap the command on the Edit menu.
- Page 59 Tips for getting good recognition: • Write neatly. • Write on the lines and draw descenders below the line. Write the cross of the "t" and apostrophes below the top line so that they are not confused with the word above.
- Page 60 Drawing on the Screen You can draw on the screen in the same way that you write on the screen. The difference between writing and drawing on the screen is how you select items and how they can be edited. For example, selected drawings can be resized, while writing cannot.
- Page 61 To select a drawing: If you want to edit or format a drawing, you must select it first. • Tap and hold the stylus on the drawing until the selection handle appears. To select multiple drawings, deselect the Pen button and then drag to select the drawings you want.
- Page 62 Recording a Message In any program where you can write or draw on the screen, you can also quickly capture thoughts, reminders, and phone numbers by recording a message. In Cal- endar, Tasks, and Contacts, you can include a recording in the Notes tab. In the Notes program, you can either create a stand-alone recording or include a record- ing in a written note.
- Page 63 Using My Text When using Inbox or MSN Messenger, use My Text to quickly insert preset or frequently used messages into the text entry area. To insert a message, tap My Text and tap a message. You can add text after inserting a My Text message before sending To edit a My Text message, in the Tools menu, tap Edit and then tap My Text Messages.
-
Page 64: Button Operation Settings
Button Operation Settings Pushing the Program button on the front of the Rugged PDA while it is turned off automatically turns the power on. You can use the "Program Button" to set whether or not pushing the Program button turns on the power. Using the Program button to disable the power on operation can be used to prevent the power from coming on if the Program button is accidentally pressed when the Rugged PDA is in your bag or pocket. -
Page 65: Connecting To A Computer
Connecting to a Computer Connecting to a computer allows you to share data with the computer, transfer files to and from the computer and back up files to the computer. Compatible Computers Computers must meet the following minimum conditions to connect to and exchange data with the Rugged PDA. -
Page 66: Connecting To A Computer
For more information refer to Help for the Rug- ged PDA. Using the CASIO Companion CD The Companion CD-ROM contains software. Put the CD-ROM into the CD drive of the computer and it will start automatically and display a menu. - Page 67 Basic Operations...
-
Page 68: Pim
The letters "PIM" stand for "Personal Information Manager," which is a program for control- ling personal information. The Rugged PDA comes with Microsoft Pocket Outlook (Pocket Outlook) built in. Pocket Outlook is the pocket version of Microsoft Outlook, which is used as the PIM on many of today's personal computers. - Page 69 Syncing with a PC The Rugged PDA can be connected to a PC for syncing the program contents of the Rugged PDA Pocket Outlook with Outlook or Exchange running on the PC. This data can also be directly synced with an Exchange server. Notification Settings The following settings can be used to set up the Rugged PDA to notify you of upcoming tasks and appointments.
-
Page 70: Calender
Calender Calendar is a program that helps you manage your schedule. Appointments and meetings in Calendar can be viewed using a variety of different formats, and you can set alarms to notify you of upcoming appointment times. Command bar buttons are used to select the Calendar view you want.. - Page 71 Week View Week View shows appointments for a full week. The details of the ap- pointment you tap ap- pear here. Month View / Year View Month View shows a full month calendar, while Year View shows calendars for a full year.
-
Page 72: Contacts
Contacts Use Contacts to store and manage the names, addresses, phone numbers, and e- mail addresses of friends, co-workers, customers, etc. The Contacts screen lists the names and phone numbers of the entries, as shown below. Each line of the list represents one record of "Contacts data." Typing characters here im- mediately recalls the names that contain the characters. -
Page 73: Tasks
Tasks Tasks lets you keep track of jobs and tasks you need to do. The list shown below appears first whenever you start up Tasks. Click here to select the cat- You can use this menu to egory ("Pending," "Com- sort the displayed tasks list pleted,"... -
Page 74: Programs
Programs Programs Covered in this Section In addition to Inbox and other programs that let you use the Internet, and PIM programs and Calendar, the Rugged PDA also comes bundled with the programs described below. Pocket Word This is the pocket version of Microsoft Word word processing program. Pocket Excel This is the pocket version of the Microsoft Excel spreadsheet program. -
Page 75: Adding Programs
• In order to add programs to the Rugged PDA, the PC connected to it must have ActiveSync installed. For information about using ActiveSync, see ActiveSync help. • Note that CASIO does not provide any support for commercially available programs, etc. Contact the developer of the program or your retailer for support. Pocket Word With Pocket Word, you can store typed characters, drawings made with the stylus, and sounds within the same file. -
Page 76: Pocket Excel
Four Pocket Word Modes Pocket Word has the fours modes described below. You can switch between modes as required to input text into a document. Typing Mode ....Use this mode to input and edit text using the input panel. In this mode, you can also use a variety of text styles and attributes, including bold, italic, text color, numbering and bullets, etc. -
Page 77: Windows Media
Pocket Excel Screen • To maximize the amount of data on the display, tap View and then Full Screen. This will hide the tool bar, scroll bars, and other display elements, and use the entire display area to display data. •... - Page 78 Using the Player Screen After starting up Windows Media, you can use onscreen buttons that are similar to those found on a CD player to control playback. Shows the progress of the track that is currently play- ing. Use (+) and (-) to adjust the volume level.
-
Page 79: Msm Messenger
MSN Messenger The MSN ® Messenger of the Rugged PDA is a program that uses instant messages. The following functions are supported. • Checking to see who is online • Sending and receiving instant messages • Using instant message to chat within a contact group A Microsoft Passport account or Microsoft Exchange mail account is required to use the MSN Messenger service. -
Page 80: Calculator
Calculator You can operate the nine-digit on-screen calculator by tapping its keys. Input box • Tap [=] to execute a calculation. • You can also use the input panel to input values for calculation. Game Solitaire The object of Solitaire is to use all the cards in the deck to build up the four suit stacks in ascending order, beginning with the aces. -
Page 81: Card Backup
Card Backup The Rugged PDA data can be backed up to a Compact Flash (CF) card, and SD/ MMC card, or to the Rugged PDA's FlashDisk. Backed up data can be restored to the Rugged PDA when required. Periodic backup is recommended to protect against the corruption or loss of important data. -
Page 82: File Explorer
File Explorer You can use File Explorer to perform the following operations on files stored in main memory or on a memory card. • Create a new folder. • Delete a file or folder. Note that a file or folder delete operation cannot be undone. •... - Page 83 Using File Explorer Programs File Explorer to start up File Explorer. This will initially display a list of files and folders located in the My Documents folder in the Rugged PDA main memory. Tap here to move up one level from the currently dis- played level.
-
Page 84: Flce
FLCE FLCE is a program for transferring a specified file to a specified folder. In addition, file transfer can be performed not only between two Rugged PDAs but also between the Rugged PDA and a PC connected via the cradle or via USB cable directly. -
Page 85: Find And Help
Starting Up a Program from Menu • To start up a program assigned to a Menu button, tap the button. To start up a program assigned to a button on a sub-menu, first tap the sub-menu button and then tap the program button on the sub-menu that appears. •... - Page 86 Viewing Help Help is your source of useful information about how to use the Rugged PDA. You can reference help to learn the basics you need to know in order to use the Rugged PDA's built-in programs. It is the perfect way to look up operational information when you are on the road and don't have your user's guide with you.
-
Page 87: Setup Overview
Setup Overview The basic operating environment of the Rugged PDA can be configured, and its hard- ware, system, and other components can be adjusted as required. Tapping Settings displays a screen like the one shown below. Tapping an icon dis- Settings are grouped on three tabs named plays the setting screen... -
Page 88: System Tab Settings
Items Description Sounds & Use this item to adjust the audio volume level, and to Notifications customize the different sounds produced for various specific events. Today Use this item to select the information you want to appear on the Today screen. System Tab Settings The System tab contains various setting for the Rugged PDA hardware and system settings. - Page 89 Items Description CF Power Use this item to configure Compact Flash card and wireless LAN settings, and power saving settings. Clock & Alarms Use this item to specify a home city and a visiting city, and to configure date and time settings. This item can also be used to configure alarm settings.
-
Page 90: Connections Tab Settings
Connections Tab Settings The Connections tab includes setting items that control the Rugged PDA connection to the Internet or an external computer using a cable or modem. Items Description Beam Use this item to enable and disable receipt of infrared communication. -
Page 91: Infrared Communication
Infrared Communication Infrared Communication The Rugged PDA has an infrared communication port that can be used for IR transfer of data between two Rugged PDAs, or between the Rugged PDA and other type of Pocket PC. You can also use infrared communication to transfer data and perform data synchronization between the Rugged PDA and a PC. - Page 92 To Transfer Data Perform the following procedure to transfer data. Position the two Rugged PDAs no further than about 30 cm from each other, and so their infrared communication ports are facing each other. On the original side, tap and hold the data item or file you want to send. Then on the shortcut menu that appears, tap Beam File..
- Page 93 To send from a program Start up the program whose data you want to send. • To send Contacts data, for example, tap Contacts. Tap and hold the data you want to send. On the pop-up menu, tap Beam Contact..To send from File Explorer Start up File Explorer.
-
Page 94: Bluetooth
® Bluetooth ® Bluetooth is wireless communication technology that uses the 2400MHz to 2483.5MHz ® band to transfer data. The Rugged PDA comes with Bluetooth technology built in, which provides it with the capability of performing high-speed, high-stability short-range wireless communication. - Page 95 Tips to Help Ensure Successful Communication ® Note the following information, which can help you ensure successful Bluetooth data communication. • Make sure the Rugged PDA is visible from and within about 3 meters of the ® other Bluetooth devices. The communication range may be shorter depend- ing on the local environment (if there are walls and furniture in the path, or ®...
-
Page 96: Wireless Lan
Wireless LAN The IT-10M20BR* supports connection to an 802.11b wireless LAN, or to a wireless LAN compatible peripheral. For example, you could connect to a hot spot at a train station or other public facility, access the Internet and send or receive e-mail, or access a company network. -
Page 97: Reset And Full Reset
Reset and Full Reset Reset You should reset the Rugged PDA whenever it stops operating correctly due to user mis-operation or some abnormality. The following are examples of symptoms that indicate reset is required. • Nothing happens when you tap the screen or press a button. •... -
Page 98: Full Reset (Memory Initialization)
The Rugged PDA restarts and displays the Today screen. • The reset process starts as soon as you press the reset switch. • If there is no problem with memory data, the Today screen will appear a few seconds after the startup screen. All saved data in memory and all settings in effect prior to the reset will remain unchanged, and you should be able to access them normally. - Page 99 • The screen will change as shown below. Configure the Rugged PDA initial settings. (1) Startup Screen (2) Calibrate Screen After configuring settings, press the power button to turn off the Rugged PDA. • If you have back up data, you can restore it after performing the above procedure and confirming that the Rugged PDA is operat- ing normally.
-
Page 101: Chapter 3 Connecting Peripherals
Connecting Peripherals... -
Page 102: Ac Adaptor
AC Adaptor (AD-S15050AE) The AC adaptor can be used with the Rugged PDA or the optional Basic Cradle (HA- C60IO). Before using the AC adaptor, be sure to read "Safety Precautions" (page 5) to ensure you use it correctly. The case of the AC adaptor may become warm during use. This does not indicate malfunction. -
Page 103: Specifications
Specifications Items Specifications Rated Voltage/Frequency Input 100 to 240V 50/60Hz Rated Output Voltage DC5V Power Cord Length 200cm(Input) 150cm(Output) Dimensions 40(W) × 94(D) × 31(H) mm Weight Approx. 250g (with power cords) Operating environment Temperature 0 - 40˚C, Humidity 30 - 80% (no condensation) Two power cords are provided with the Rugged PDA, use the power cord that is appropriate for your region. -
Page 104: Basic Cradle
Basic Cradle (HA-C60IO) Data can be transferred between a PC and the Rugged PDA using the Basic Cradle's USB interface or RS-232C interface. Also, the Rugged PDA charges while it is mounted on the Basic Cradle. Warning Never bring in Rugged PDA a bathroom or any other location where the possibility of splashing or high humidity exists. -
Page 105: To Mount The Rugged Pda Onto The Basic Cradle
To Mount the Rugged PDA onto the Basic Cradle Place the Basic Cradle on a desk or some other flat, stable surface. Turn off the Rugged PDA. Rotate the serial connector cover on the bottom of the Rugged PDA one turn, and store it on the opposite side. -
Page 106: To Remove The Rugged Pda From The Basic Cradle
To Remove the Rugged PDA from the Basic Cradle While holding the Basic Cradle with one hand, remove the Rugged PDA straight up. Specifications Items Specifications Interface USB × 1port (TYPE-B) RS-232C × 1port Charging Charging system Fixed voltage (with current limiter) Charging time Approx. -
Page 107: Bridge Satellite Cradle
Bridge Satellite Cradle (HA-C61IO) Data can be transferred between a PC and the Rugged PDA using the Bridge Satellite Cradle's USB interface or RS-232C interface, and the Rugged PDA's infrared communica- tion port. The Bridge Satellite Cradle also can be used to charge the Rugged PDA. warning Never bring in Rugged PDA a bathroom or any other location where the possibility of splashing or high humidity exists. - Page 108 q Infrared communication port Align this port with the infrared communication port of the Rugged PDA for IrDA data communication. w The Rugged PDA detection switch This switch detects when the Rugged PDA is correctly mounted on the Bridge Satellite Cradle.
-
Page 109: Using The Bridge Satellite Cradle
Using the Bridge Satellite Cradle The optional AC adaptor (AD-S42120AE) is used to supply power to the Bridge Satellite Cradle. Note that you cannot use the AC adaptor (AD-S15050AE) that comes with the Rugged PDA. Turn off the Bridge Satellite Cradle and the PC you will be connecting to Connect the specified AC adaptor to the Bridge Satellite Cradle connec- tor. -
Page 110: Linking Multiple Bridge Satellite Cradles
• If the system is operational and the communication mode is entered successfully, the LINE (system indicator) lamp will light green. • When communication starts, the DATA (communication indicator) lamp will flash green while data communication is being per- formed. The Rugged PDA is charged while it is mounted on the Bridge Satellite Cradle, regardless of whether the power on the Rugged PDA is off or on. -
Page 111: Configuring Dip Switch Settings
Switch Number 115,200bps OFF* * Initial default setting Though it is possible for the user to configure DIP switch settings, it is recommended that this operation be left up to qualified personnel of your authorized CASIO distributor. Bridge Satellite Cradle... -
Page 112: Specifications
Specifications Items Specifications Interface USB × 1port (TYPE-B) RS-232C × 1port RS-422 × 2port (IN/OUT port) Infrared (IrDA) Charging Charging system Fixed voltage (with current limiter) Charging time Approx. 5 hours Power AC adaptor (AD-S42120AE) AC100 - 240V 50/60Hz, DC12V Dimensions 110(W) ×... -
Page 113: Dual Battery Charger
Dual Battery Charger (HA-C32DCHG) A battery pack (HA-C21BAT) can be charged by loading it into the Dual Battery Charger. Warning Use only the specified AC adaptor (AD-S42120AE) with the Dual Battery Charger. Use of other type of AC adaptor creates the risk of fire. -
Page 114: Handling Precautions
Handling Precautions Battery Charger • Water or any other liquid on the power contacts creates the risk of electric shock and fire. Dirt causes poor contact and decreases charging efficiency. After unplugging the AC adaptor from the battery charger to ensure safety, wipe the power contacts with a dry cloth, cotton swab, etc. -
Page 115: Charging A Battery Pack
Turn over the battery chargers, and secure them together with the coupling plate and screws that come with the chargers. Charging a Battery Pack The optional AC adaptor (AD-S42120AE) is used to supply power to the battery charger. A battery pack can be inserted into either of the slots, or two battery packs can be charged at the same time. -
Page 116: Specifications
The charge status indicator lamp will light red, indicating that charging has started. A green flashing charge status indicator lamp while a battery pack is inserted in the battery charger indicates charge standby. The indicator lamp will turn red and charging will start when the ambient temperature returns to the range of 0˚... -
Page 117: Communication Card Cover
Communication Card Cover (HA-C92TCV) Loading a communication card into the card slot of the Rugged PDA makes it possible to perform mobile Internet browsing in a train station, hotel, etc. A communication card cover is provided to cover the raised card antenna to avoid unexpected accidents, to protect the antenna from impact, and to keep out dust and rain while using the card. -
Page 118: Cards
Cards Using a Compact Flash (CF) Card The Rugged PDA supports use of Type I and Type II (3.3V) Compact Flash cards. The following are the types of Compact Flash cards supported by the Rugged PDA. Memory Card A memory card works the same way as the data storage memory of the Rugged PDA. -
Page 119: Loading And Removing A Compact Flash Card
Accessing Files on a Memory Card In order for the Rugged PDA's built-in programs to access files on a memory card, a folder named "My Documents" must be created on the memory card (using File Explorer), and the files to be accessed must be moved to the "My Documents" folder. - Page 120 Attaching Check to make sure that the Rugged PDA is turned off. • If it is turned on, press the power button to turn it off. Carefully note which side of the card is the front and which side is the back.
-
Page 121: Using An Sd Card Or A Multimedia Card
Using an SD card or a MultiMedia Card The Rugged PDA supports use of SD cards and MultiMedia cards. For information about using a memory card, see "Accessing Files on a Memory Card" on page 119. Precautions when Loading and Removing Cards •... - Page 122 Removing Stop access of the card and turn off the Rugged PDA. Use your finger to press gently in on the card until you hear a click, and then release it. This will cause the card to pop out part way. Grasp the card with your fingers and pull it the rest of the way out.
-
Page 123: Appendix
ppendix... -
Page 124: Specifications
Specifications Item IT-10M20 IT-10M20BR ® Microsoft Windows Mobile 2003 second edition software for Pocket PC ® Intel PXA270 Application Processor 416MHz Display functions 640 dots 3.7-inch transflective TFT color LCD (65,536 colors) Resistive film touch panel with built-in LED backlight... - Page 125 The model is not available in the USA and Canada. Though TFT screens are made using extremely high-grade technology, uneven brightness or fine dots sometimes occurs on these screens. Also, some dots on the screen do not light or stay continually lit. These, however, are not malfunctions. The distance varies depending on the surrounding environment (such as walls, appliances and other sources of radio waves).
-
Page 126: Options List
Options List The dedicated options shown below are available for use with the Rugged PDA. Basic Cradle: HA-C60IO AC Adaptor: AD-S15050AE • Connect AC adaptor (AD-S15050AE) to use Bridge Satellite Cradle: HA-C61IO Battery Pack: HA-C21BAT AC Adaptor: AD-S42120AE Dual Battery Chager: HA-C32DCHG •...
Need help?
Do you have a question about the IT-10M20 and is the answer not in the manual?
Questions and answers