
Related Manuals for LifeSpan COMMANDER


Summary of Contents for LifeSpan COMMANDER
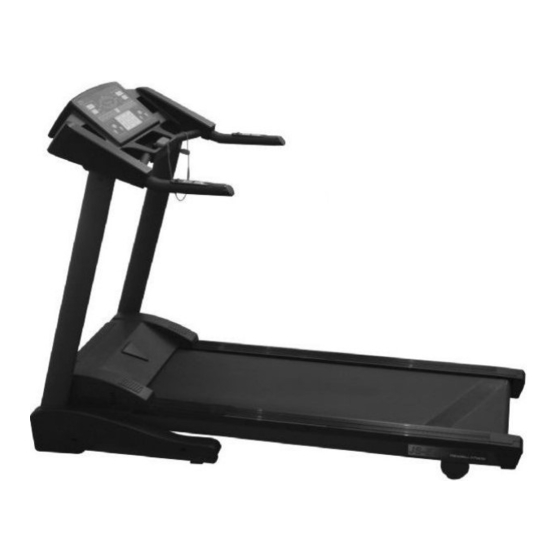
- Page 1 COMMANDER USER’S MANUAL Product may vary slightly from the item pictured due to model upgrades LIFESPAN COMMANDER Page 0...
-
Page 2: Table Of Contents
GENERAL CARE ……………………………………………….. BELT/DECK/ROLLER LUBRICATION HOW TO CHECK THE RUNNING MAT FOR PROPER ……………………………………………….. LUBRICATION ……………………………………………….. BELT ADJUSTMENT ……………………………………………….. BELT TRACKING ADJUSTMENT TROUBLESHOOTING ……………………………………………….. ……………………………………………….. ALARM SIGNALS EXERCISE GUIDE ……………………………………………….. ……………………………………………….. WORKOUT GUIDELINES WARRANTY REGISTRATION ……………………………………………….. LIFESPAN COMMANDER Page 1... -
Page 3: Important Safety Instructions
The treadmill is intended for in-home use only and not suitable for long time running. To disconnect, turn all controls to the off position, remove the safety key, and then remove the plug from the outlet. LIFESPAN COMMANDER Page 2... -
Page 4: Important Electrical Information
In order to prevent losing balance and suffering unexpected injury, NEVER mount or dismount the treadmill while the belt is moving. This unit starts with at a very low speed. Simply standing on the belt during slow acceleration is proper after you have learned to operate this machine. LIFESPAN COMMANDER Page 3... -
Page 5: Key Components Of The Treadmill
1.3 KEY COMPONANTS OF TREADMILL Display Safety Key Pulse Grip Quick speed and incline buttons Motor Cover Running mat Deck- Underneath the running mat Belt Adjustment Transportation Wheels Plastic Ornaments LIFESPAN COMMANDER Page 4... -
Page 6: Assembly Instructions
2 ASSEMBLY INSTRUCTIONS WE RECOMMEND YOU HAVE SOMEONE TO ASSIST YOU IN LIFTING AND ASSEMBLING YOUR LIFESPAN TREADMILL. FOLLOW THESE INSTRUCTIONS CAREFULLY AND IT WILL MAKE IT EASIER TO ASSEMBLE YOUR LIFESPAN TREADMILL Step 1. Remove all parts from the carton, and place the treadmill onto the floor. - Page 7 Allen key (see right). Step5 Install the plastic ornaments onto both sides of base with (4x) 4mmx16mm threaded bolts using appropriate tool (see right). Ensure all fixings are tightly secured and the treadmill is soundly constructed. LIFESPAN COMMANDER Page 6...
-
Page 8: Folding Instructions
Apply slight forward pressure on the treadmill running deck. Pull the black control knob, and slowly lower the running deck to the floor. Control Knob Transport Carefully lift the treadmill at the rear roller area, grasping the two side end caps, and roll the treadmill away. LIFESPAN COMMANDER Page 7... -
Page 9: Display Panel Operations
Ensure that the safety key is installed, as the treadmill will not power on without it. When the power is turned on, all the lights on the display will light for a short time. LIFESPAN COMMANDER Page 8... -
Page 10: Self-Checking
The 400 Meters Track will be displayed on the simulation running track. The flashing dot indicates your progress, but only to show an approximate speed of effort. Once the 400 meter is complete, the buzzer will sound three times, this feature will begin again. LIFESPAN COMMANDER Page 9... -
Page 11: Pulse Grip Feature
In the resetting state, select P1, P2 and P3 by pressing the ‘mode’ key once. Then press ‘set’ and ‘clear’ simultaneously, the window for ‘time’ and ‘speed’ will be flashing at the same time. (Note: the incline window will show the time temporally). LIFESPAN COMMANDER Page 10... -
Page 12: Preset Program
(NOTE: THIS PROGRAM WILL BE SAVED TO THE TREADMILL MEMORY FOREVER). 3.12 Preset Programs Time (min) Speed (Km/h) Time (min) Speed (Km/h) Time (min) Speed (Km/h) Time (min) Speed (Km/h) Time (min) Speed (Km/h) Time (min) Speed (Km/h) LIFESPAN COMMANDER Page 11... -
Page 13: Speed Program Graphs
3.13 Speed Program Graphs Speed 1 2 3 4 5 6 7 8 9 10 11 12 13 14 15 16 17 18 19 20 21 22 23 24 25 26 27 28 29 30 Time (mins ) LIFESPAN COMMANDER Page 12... - Page 14 9 10 11 12 13 14 15 16 17 18 19 20 21 22 23 24 25 26 27 28 29 30 Time (min s) S peed 9 10 11 12 13 14 15 16 17 18 19 20 21 22 23 24 25 26 27 28 29 30 Tim e (mins ) LIFESPAN COMMANDER Page 13...
- Page 15 8 9 10 11 12 13 14 15 16 17 18 19 20 21 22 23 24 25 26 27 28 29 30 Time (mins) Speed 9 10 11 12 13 14 15 16 17 18 19 20 21 22 23 24 25 26 27 28 29 30 Time (mins) LIFESPAN COMMANDER Page 14...
-
Page 16: Speed+Incline Program Graphs
3.14 Speed+Incline Program Graphs LIFESPAN COMMANDER Page 15... -
Page 17: Maintenance
Pay particular attention to the fixing knobs and make sure they are tight. • Always replace the mat if worn and any other defective parts. • If in doubt do not use the treadmill and contact our helpline. LIFESPAN COMMANDER Page 16... -
Page 18: Belt/Deck/Roller Lubrication
2. Fold the treadmill up into the storage position. 3. Feel the back surface of the running mat. the surface is slick when touched, then no further lubrication is needed. If the surface is dry to the touch, apply a suitable silicone lubricant. LIFESPAN COMMANDER Page 17... -
Page 19: Belt Adjustment
Lifespan Treadmill. This Can be purchased from your local sports Retailer or a local hardware store. 4.5 Belt Adjustment Belt Tension Adjustment -It is very important for joggers and runners in order to provide a smooth, steady running surface. -
Page 20: Belt Tracking Adjustment
O ver adjusting the belt ca n cause damage to the mat. If the belts has drifted to the RIGHT If the belts has drifted to the LEFT LIFESPAN COMMANDER Page 19... -
Page 21: Troubleshooting
. If the running belt moves then displays the E1 error replace the speed sensor. 4. If the running belt do es not move replace the controller. : Controller p roblem 1. Replace the controller LIFESPAN COMMANDER Page 20... - Page 22 2. Check power outlet (Plug someth ing else into the power outlet to ensure that the power outlet is working correctly). 3. Check Power Cable (You may need to take t to an electrician). LIFESPAN COMMANDER Page 21...
-
Page 23: Exercise Guide
It will pump a lot fewer times per minute, reducing the wear and tear of your heart. o as you can see, the fitter you are, the healthier and greater you will feel. LIFESPAN COMMANDER Page 22... -
Page 24: Workout Guidelines
Finish each workout with a light jog or walk for at least 1 minute. Then complete 5 to 10 minutes of stretching to cool down. Thi s will increase the flexibility of your muscles and will help prevent post-exercise problems. LIFESPAN COMMANDER Page 23... -
Page 25: Warranty Registration
Please visit http://www.lifespanfitness.com.au/modules/liaise/index.php?form_id=1 PLEASE NOTE: YOUR WARRANTY IS ONLY VALID IF YOU CAN PROVE YOU ARE HE ORIGINAL PURCHASER ON THIS ITEM (i.e. A copy of the receipt, invoice, delivery date or internet confirmation). LIFESPAN COMMANDER Page 24...
Need help?
Do you have a question about the COMMANDER and is the answer not in the manual?
Questions and answers