Table of Contents
Advertisement
TORQUE II OWNER'S MANUAL
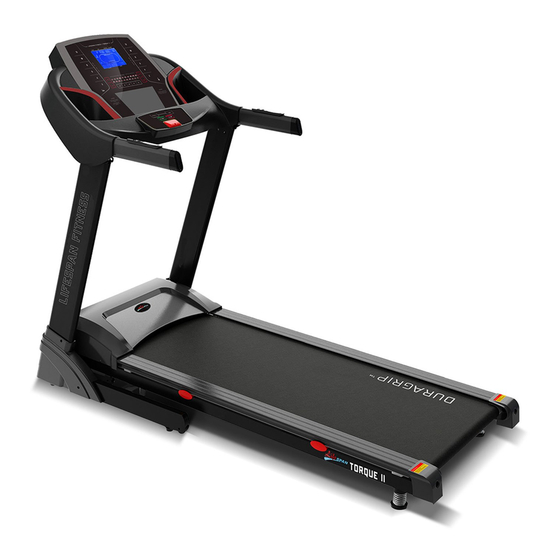
Product may vary slightly from the item pictured due to model upgrades
Read all instructions carefully before using this product. Retain this owner's manual for
future reference.
NOTE: This manual may be subject to updates or changes. Up to date manuals are available through our website at www.lifespanonline.com.au
Advertisement
Table of Contents

Subscribe to Our Youtube Channel
Related Manuals for LifeSpan TORQUE II


Summary of Contents for LifeSpan TORQUE II
- Page 1 TORQUE II OWNER’S MANUAL Product may vary slightly from the item pictured due to model upgrades Read all instructions carefully before using this product. Retain this owner’s manual for future reference. NOTE: This manual may be subject to updates or changes. Up to date manuals are available through our website at www.lifespanonline.com.au...
-
Page 2: Table Of Contents
TABLE OF CONTENTS IMPORTANT SAFETY INSTRUCTIONS IMPORTANT ELECTRICAL INFORMATION IMPORTANT OPERATING INSTRUCTIONS ASSEMBLY INSTRUCTIONS FOLDING INSTRUCTIONS OPERATION GUIDE WITH PROGRAM CHART EXERCISE GUIDE MAINTENANCE INSTRUCTIONS EXPLODED DIAGRAM PARTS LIST WARRANTY TORQUE II... -
Page 3: Important Safety Instructions
Do not operate where aerosol spray products are being used or where oxygen is being administered. Sparks from the motor may ignite a highly gaseous environment. • Never drop or insert any object into any openings. • The treadmill is intended for in-home use only and not suitable for long time running. TORQUE II... -
Page 4: Important Electrical Information
• This is high-power item; please do not share the same outlet with other high power machines such as, fridges, air conditioning etc. Please choose an outlet exclusively for the machine and make sure the fuse is 10A. TORQUE II... -
Page 5: Important Operating Instructions
A safety key is provided with this machine. Remove the safety key will stop the walking belt immediately; the treadmill will shut off automatically. Inserting the safety key will reset the display. • Do not use excessive pressure on console control keys. They are precision set to function properly with little finger pressure. TORQUE II... -
Page 6: Assembly Instructions
Left back cover Lock washer ST4.2*19 Right back cover Bolt M8*40 Bolt FIXING TOOLS: 5# Allen Wrench 5mm 1pc #6 Allen Wrench 6mm 1pc Wrench s/screw Driver S=13, 14, 15 1pcs Note: Do not get connect power before completing assembly. TORQUE II... - Page 7 1. Position the display according to the below illustration, screw in Bolts M8*16 (74) into the Left Upright and Right Upright. Lock the Computer frame to Left Upright and Right Upright securely using Bolt M8*16(74) and Lock washer (86). TORQUE II...
- Page 8 (86) to the base frame through base and right upright tube. Reference the picture left. 3. Repeat these steps for the Left Upright Tube Note: Please support the upright with your hand to prevent it falling and causing injury. TORQUE II...
- Page 9 Left back cover (27) and ST4.2*19 Bolt (91) to the base frame and Left back cover. Repeat this process for the right side STEP 6: 1. Place the safety key (49) onto the treadmill to start your workout TORQUE II...
-
Page 10: Folding Instructions
(B), the marked area on the air pressure bar, with your foot. The base frame will descend automatically. (Please keep people and any pets away the machine during descent) Video Tutorial Available at: http://youtu.be/TcuPbJ7KuxQ Lifespan Fitness YouTube Channel: http://www.youtube.com/user/treadmillsvideos TORQUE II... -
Page 11: Operation Guide With Program Chart
6. OPERATION GUIDE 1. OVERVIEW TORQUE II... - Page 12 8. “INCL: 2, 4, 6, 8, 10, 12” Incline adjustment shortcut key. ▲, ▼ “Music ” Changes the song, press these buttons to adjust the song when playing ▲, ▼ ” Changes the volume up or down. “Volume - Mute button TORQUE II...
- Page 13 Upon completion of the segments, the program will end, slowing the treadmill down to a stop. During the operation speed can be adjusted but the next segment will be automatically adjusted to the program defaults. Built-in program data is listed on the table. TORQUE II...
-
Page 14: Program Chart
SPEED INCLINE SPEED INCLINE SPEED INCLINE SPEED INCLINE SPEED INCLINE SPEED INCLINE SPEED INCLINE SPEED INCLINE SPEED INCLINE SPEED INCLINE SPEED INCLINE SPEED INCLINE SPEED INCLINE SPEED INCLINE SPEED INCLINE SPEED INCLINE SPEED INCLINE SPEED INCLINE SPEED INCLINE TORQUE II... - Page 15 INCLINE SPEED INCLINE SPEED INCLINE SPEED INCLINE SPEED INCLINE SPEED INCLINE SPEED INCLINE SPEED INCLINE SPEED INCLINE SPEED INCLINE SPEED INCLINE SPEED INCLINE SPEED INCLINE SPEED INCLINE SPEED INCLINE SPEED INCLINE SPEED INCLINE SPEED INCLINE SPEED INCLINE SPEED TORQUE II...
- Page 16 SPEED INCLINE SPEED INCLINE SPEED INCLINE SPEED INCLINE SPEED INCLINE SPEED INCLINE SPEED INCLINE SPEED INCLINE SPEED INCLINE SPEED INCLINE SPEED INCLINE SPEED INCLINE SPEED INCLINE SPEED INCLINE SPEED INCLINE SPEED INCLINE SPEED INCLINE SPEED INCLINE SPEED INCLINE TORQUE II...
- Page 17 INCLINE SPEED INCLINE SPEED INCLINE SPEED INCLINE SPEED INCLINE SPEED INCLINE SPEED INCLINE SPEED INCLINE SPEED INCLINE SPEED INCLINE SPEED INCLINE SPEED INCLINE SPEED INCLINE SPEED INCLINE SPEED INCLINE SPEED INCLINE SPEED INCLINE SPEED INCLINE SPEED INCLINE SPEED TORQUE II...
- Page 18 4.6. Data display and set range DEFAULT DEFAULT RANGE SET RANGE MODE PROGRAM 15:00 Time (min:sec) 0:00 5:00-99:00 0:00-99:59 Incline (levels) 0-19 0-20 Speed (km/h) 1.0-22 1.0-22 1.00 Distance(km) 0.50-99.9 0.00-99.9 Pulse (beats/min) 50-200 50.0 Calories (kilocalories) 10.0-999 0-999 TORQUE II...
- Page 19 3. Instruction of user define program setting Each program is divided into 10 segments. The machine can only be started when all the speed and incline are finish set for each segment. TORQUE II...
- Page 20 4.10. USB Function (if applicable) Insert any USB memory stick which contains audio files. You can control the playback via the buttons on the display. Please keep the volume at appropriate levels to prevent the speakers from damage TORQUE II...
-
Page 21: Exercise Guide
So as you can see, the fitter you are, the healthier and greater you will feel. Warm-up Start each workout with 5 to 10 minutes of stretching and some light exercises. A proper warm-up increases your body temperature, heart rate and circulation in preparation for exercise. Ease into your exercise. TORQUE II... -
Page 22: Workout Guidelines
The most important factor here is the amount of effort you put in. The harder and longer you work, the more calories you will burn. Effectively this is the same as if you were training to improve your fitness, the difference is the goal. TORQUE II... -
Page 23: Maintenance Instructions
General Care • Check parts for wear before use. • Pay particular attention to the fixing knobs and make sure they are tight. • Always replace the mat if worn and any other defective parts. TORQUE II... -
Page 24: Belt/Deck/Roller Lubrication
3. Periodically lubricate the front and rear rollers to keep them at their peak performance. If the treadmill belt/deck/roller is kept reasonably clean it is possible to expect over 1200 hours before relubricating is necessary. Video Tutorial Available at: Lifespan Fitness Channel: http://youtu.be/cP9NtFHfWlc http://www.youtube.com/user/treadmillsvideos TORQUE II... -
Page 25: How To Check The Running Mat For Proper Lubrication
If the surface is slick when touched, then no further lubrication is needed. If the surface is dry to the touch, apply a suitable silicone lubricant. We recommend that you use a silicone based spray to lubricate your Lifespan treadmill. This can be purchased directly from us or any hardware store. -
Page 26: Adjusting The Running Belt
To adjust the tightness of the belt: Turn the treadmill off. Turn both the left and right adjusting bolts 1/4 turn clockwise. Repeat until the belt correctly tightens. See Picture C If the belt is over tightened, simply do the opposite to loosen. TORQUE II... - Page 27 Simply, if the belt begins to slip during use, this is an indication that the belt still needs tightening. Video Tutorial Available at: Lifespan Fitness Channel: http://youtu.be/vllsamTSvvA http://www.youtube.com/user/treadmillsvideos...
-
Page 28: Replacing Motor Brushes
2. You’ll find the motor brush held in with a clip, with from the sides. the lead plugged in. 3. Pull the clip out from its position. 4. Hold the clip out of the way with a screwdriver or similar object. TORQUE II... - Page 29 10. Slide the motor brush out from its slot. If the is shorter than 2cm on the longest side, you will need brush is shorter than 2cm on the longest side, you to replace both brushes. will need to replace both brushes. TORQUE II...
- Page 30 15. You have now successfully replaced the motor brushes. We also recommend that you remove any dirt and dust from your treadmill motor fan using a vacuum cleaner before replacing the cover. TORQUE II...
-
Page 31: Exploded Diagram
9. EXPLODED DIAGRAM TORQUE II... -
Page 32: Parts List
Rubber Feet Pad washer Lock Washer Pad oblique tube plug Lock Washer Foam grip Lock Washer Console panel Lock Washer Computer top cover Flat Washer Computer bottom cover Bolt ST4.2*45 Hand Pulse with Speed+/- Bolt ST4.2*20 button TORQUE II... - Page 33 Hand pulse with incline +/- Bolt ST4.2*19 button Incline Motor Bolt ST4.2*19 DC Motor Bolt ST4.2*12 Control Board Bolt ST4.2*13 Bolt ST2.9*6.5 47 Computer up wire 48 Computer bottom wire TORQUE II...
-
Page 34: Warranty
2. Check if there is irregular noise coming from the motor or if the motor / bottom control board is burnt out; if burnt out, change to a good motor and bottom control; remember to use the correct voltage. EEPROM with problem Change the bottom control board TORQUE II... - Page 35 Hand Pulse Technology Lifespan Fitness Treadmills come equipped with hand pulse sensors which are used to pick up tiny EKG/ECG signals that run through the body when your heart beats. These electrical EKG/ECG signals are very small and that they must be amplified 1000 times to make the signal useful for the computer to display your pulse.
Need help?
Do you have a question about the TORQUE II and is the answer not in the manual?
Questions and answers