Table of Contents
Advertisement
Quick Links
Advertisement
Table of Contents

Subscribe to Our Youtube Channel
Related Manuals for Microlife B6 Advanced


Summary of Contents for Microlife B6 Advanced
- Page 1 B6 Advanced Connect User manual...
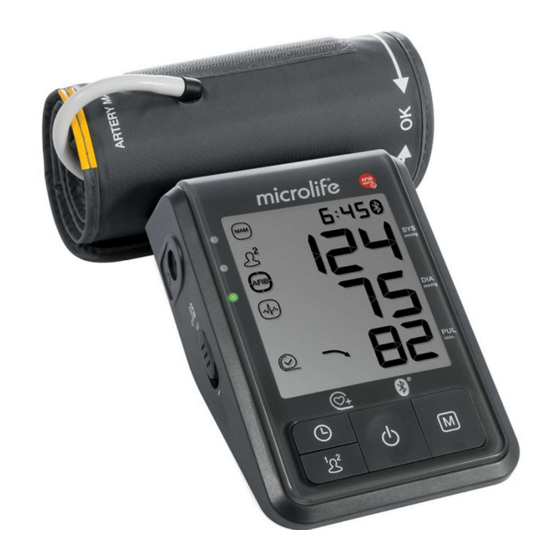
- Page 2 1. ON/OFF Button 2. Display 3. M Button (Memory) 4. Bluetooth/Time Button 5. User Button 6. Cuff Socket 7. MAM Switch 8. Traffic LED Light indicator 9. USB Port 10. Mains Adapter Socket 11. Battery Compartment 12. Cuff 13. Cuff tube 14.
- Page 3 Important Product and Safety Information Follow Instructions for Use. This document provides important product operation and safety information regarding this Blood Pressure Monitor. Please read this document thoroughly before using the device and keep for future reference. Indications for Use The Upper Arm Blood Pressure Monitor, Model BP3KV1-5W is a device intended to measure the systolic and diastolic blood pressure and pulse rate of an adult individual by using a non-invasive oscillometric technique in which an inflatable cuff is wrapped...
- Page 4 When replacing the batteries, ensure all the batteries are replaced simultaneously to avoid battery damage and potential damage to the monitor. Microlife USA does not recommend using rechargeable batteries. To avoid inaccurate measurements and to lessen any discomfort from Cuff ...
- Page 5 Use this device in a moving vehicle; inaccurate measurements may result. Only use this device in a home healthcare environment. Use third party accessories. Only use Microlife authorized accessories, such as cuffs or AC adapters, as those not approved for use with the device may provide inaccurate measurements, injury, and/or damage the device.
- Page 6 Changes or modifications to the product are not approved by Microlife USA and could void the user's authority to operate the equipment under FCC jurisdiction. This equipment has been tested and found to comply with the limits for a Class B digital device, pursuant to Part 15 of the FCC Rules.
-
Page 7: Table Of Contents
• Which batteries and which procedure? • Using rechargeable batteries 6. Using a Mains Adapter 7. Bluetooth® Function • Connecting the «Microlife Connected Health+» App 8. PC-Link Functions 9. Error Messages 10. Safety, Care, Accuracy Test and Disposal • Safety and protection •... -
Page 8: Using The Device For The First Time
Now you can enter the new values as described above Selecting the correct cuff Microlife offers different cuff sizes. Select the cuff size to match the circumference of your upper arms (measured by close fitting in the centre of the upper arm). Cuff size for circumference of upper arm 17 –... - Page 9 •When you select MAM mode, the MAM-symbol 24 appears in the display. •To select standard mode, slide the MAM switch 7 on the side of the device downwards to position «1» and to select MAM mode, slide this switch upwards to position «3».
-
Page 10: Manual Inflation
3. Taking a Blood Pressure Measurement 1. Select standard (single measurement) or MAM (Automatic double measurements); see details in chapter «1». 2. Press the ON/OFF button 1, the backlight will be turn on and to start the measurement. 3. The cuff will now pump up automatically. Relax, do not move and do not tense your arm muscles until the measurement result is displayed. -
Page 11: Average Indicator " Mycheck
The LED traffic light indicator on the left-hand side of the display 8 indicates within which range the measured blood pressure lies. The value is either within the optimum (green), elevated (yellow) or high (red) range. The classification corresponds to the following range defined by ACC, AHA 2017 Guidelines. -
Page 12: Viewing The Average Of The Last 28 Day
However, if the symbol appears on a regular basis (e.g., several times a week with measurements taken daily), we advise you to tell your doctor. Please show your doctor the following explanation: Information for the doctor on frequent appearance of the irregular heartbeat symbol This instrument is an oscillometric blood pressure monitor device that also analyzes pulse frequency during measurement. -
Page 13: Viewing The Stored Single Values
Viewing the stored single values Pressing the M-button again, allows you to see the last performed measurement. The display first shows« M » 25 and a value, e.g. « M17 ».single values in memory. Pressing the M-button again displays the previous value. Pressing the M-button repeatedly enables you to move from on stored value to another. -
Page 14: Using A Mains Adapter
6. Using a Mains Adapter You can operate this device using the Microlife mains adapter (DC 6V, 600 mA). * Only use the Microlife mains adapter available as an original accessory appropriate for your supply voltage. - Page 15 Bluetooth pairing & App setup: 1. Open Microlife Connected Health+ App on the smartphone. (Make sure the App is running on the foreground, not in the background.) 2. Turn on Bluetooth manually to connect device to smartphone.
-
Page 16: Pc-Link Functions
8. PC-Link Functions This device can be used in conjunction with a personal computer (PC) running the Microlife Blood Pressure Analyser (BPA+) software. The memory data can be transferred to the PC by connecting the monitor via a cable. If no download-voucher and cable is included download the BPA software from www.microlife.com/technologies/connect/bpaplus... -
Page 17: Safety, Care, Accuracy Test And Disposal
App on the smartphone. Wait for 1 minute, open the App on the smartphone and manually activate Bluetooth on device, to re-try Bluetooth connection & data transfer. «ERR Bluetooth Bluetooth is malfunctioning. Contact your local Microlife bt» self-check error. distributor. «HI»... -
Page 18: Device Care
WARNING: Do not wash the cuff in a washing machine or dishwasher! Accuracy test We recommend this device is tested for accuracy every 2 years or after mechanical impact (e.g. being dropped). Please contact your local Microlife-Service to arrange the test (see foreword). Disposal Batteries and electronic devices must be disposed of in accordance with the locally applicable regulations, not with domestic waste. -
Page 19: Technical Specifications
Technical alterations reserved. The Bluetooth® word mark and logos are registered trademarks owned by Bluetooth SIG, Inc. and any use of such marks by Microlife Corp. is under license. Other trademarks and trade names are those of their respective owners. - Page 20 How to contact us Distributed by: Microlife USA, Inc. 1617 Gulf to Bay Blvd. Clearwater, FL 33755 Toll Free Help Line: 1-800-568-4147 Email: custserv@microlifeusa.com www.microlifeusa.com...
Need help?
Do you have a question about the B6 Advanced and is the answer not in the manual?
Questions and answers