GLP impression X5 Quick Start And Safety Manual
Hide thumbs
Also See for impression X5:
- User manual (80 pages) ,
- Technical & service manual (22 pages)
Table of Contents
Advertisement
Quick Links
Advertisement
Table of Contents

Related Manuals for GLP impression X5


Summary of Contents for GLP impression X5
- Page 1 X5 Document revision: 20220505-01 Fixture software version 1.0.0...
- Page 2 GLP® impression X5 Quick Start and Safety Manual © 2022 German Light Products GmbH. All rights reserved. The marks ‘GLP’ and ‘German Light Products’ are trademarks registered as the property of German Light Products GmbH in Germany, in the United States of America and in other countries.
-
Page 3: Table Of Contents
Control data ..........................19 Using the fixture ..........................20 Service and maintenance ......................21 Suggested maintenance intervals ................21 Cleaning ............................21 Main fuse ............................ 22 Lubrication ..........................22 GLP Service and Support ....................22 Technical specifications ......................23 Dimensions ............................26... -
Page 4: Safety
Read this manual carefully before installing, operating or servicing the GLP impression X5 lighting fixture. If you have any doubts or questions about how to use the impression X5 safely, contact your GLP® supplier for assistance. Your GLP supplier will be happy to help. -
Page 5: Electrical Safety
● Check the GLP website at www.glp.de and make sure that you have the latest version of this manual. Check the fixture software version indicated on page 2 of this manual and then use the fixture’s control panel to check the version installed... -
Page 6: Fire Safety And Protection From Burns
● Ensure that there is free and unobstructed airflow around the fixture. Provide a minimum clearance of 30 cm (12 in.) around fans and air vents. ● Do not place any optical components other than impression X5 accessories from GLP onto the front of the fixture. -
Page 7: Eye Safety
® Eye safety ● The impression X5 is classified as a Risk Group 2 lighting fixture according to EN 62471. Possibly hazardous radiation emitted. Do not stare into the light output from the fixture. May be harmful to the eyes. - Page 8 – fastened directly to the fixture’s baseplate when installing the fixture hanging vertically only. ● When installing the fixture in any other orientation, you must first fasten an GLP impression X5 Omega Bracket with Handles accessory from GLP (not supplied) to the fixture’s baseplate, then fasten two rigging clamps to this Omega Bracket...
- Page 9 X5 German Light Products ® ● Do not modify the fixture in any way not described in its user documentation. ● Install genuine GLP parts only. impression X5 Quick Start and Safety Manual Rev. 20220505-01...
-
Page 10: Avoiding Damage To The Fixture
● In outdoor applications during daylight, make sure that the front face of the fixture is shielded or points away from the sun, even when the fixture is not in use. impression X5 Quick Start and Safety Manual Rev. 20220505-01... -
Page 11: Avoiding Damage From Dust And Airborne Particles
Before closing the flightcase, check that the protective liner in the flightcase will hold the head and protect it from shocks. ● Store the fixture in a dry location when not in use. impression X5 Quick Start and Safety Manual Rev. 20220505-01... -
Page 12: Overview
(Neutrik powerCON TRUE1) G – Safety cable attachment point: rear is grey, front (stage) is black M – Fuseholder H – DMX IN (5-pin XLR) N – DMX OUT/THRU (5-pin XLR) impression X5 Quick Start and Safety Manual Rev. 20220505-01... -
Page 13: Overview Of Features
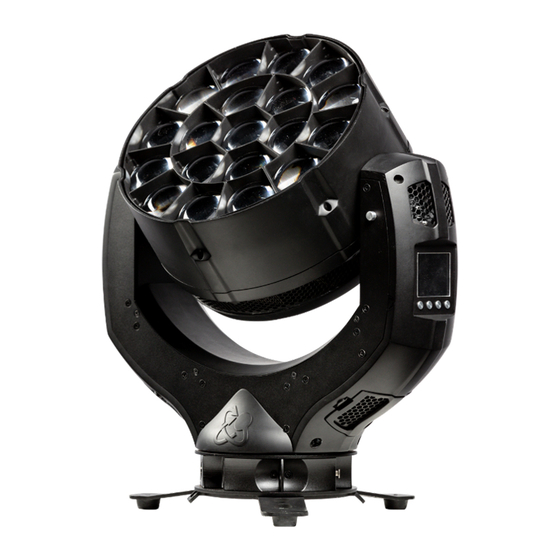
LED light source The impression X5’s light source is a powerful 19 x 40 W RGBL LED engine. Control panel and display The control panel with LCD display and self-charging battery allows you to change fixture settings quickly and intuitively under any conditions, even when the power is off. -
Page 14: Preparation For Use
X5 Tripod floor stand. Lifting and carrying To carry the impression X5, apply the tilt lock and lift the fixture by the yoke. For more convenient handling, install an X5 Omega Bracket with Handles on the baseplate and use this for carrying. -
Page 15: Mounting
German Light Products ® Mounting The impression X5 may be rigged in any orientation or placed on a stable horizontal surface. You must install a secondary attachment such as a safety cable and use the hardware configuration described in this chapter. -
Page 16: Installing Upright On A Horizontal Surface
To mount the X5 on a rigging truss at any other angle than with the head hanging vertically downwards, you must use the X5 Omega Bracket with Handles mounting plate that is available as an accessory from GLP (see Figure 5). Figure 5. X5 Omega Bracket with Handles... - Page 17 Mounting directly with a rigging clamp To suspend the impression X5 from a rigging truss or similar structure with the head hanging vertically downwards only using a rigging clamp bolted directly to the fixture: Obtain a suitable half-coupler type rigging clamp.
-
Page 18: Connections
X5 to power. AC power The impression X5 has a Neutrik powerCON TRUE1 socket for connection to AC mains power from a Neutrik powerCON TRUE1 female cable connector. The autosensing power supply accepts 100-240 V, 50/60 Hz AC power. Do not connect the fixture to AC power at any other voltage. -
Page 19: Control Data
Control data The impression X5 can be controlled via USITT512 DMX over a standard DMX cable link, Art-Net network or sACN network. The fixture’s Protocol Setup control menu lets you configure the fixture for control using one of these protocols (see the impression X5 User Manual available online at www.glp.de for details). -
Page 20: Using The Fixture
Using the fixture For guidance on using the impression X5, see the latest version of the fixture’s User Manual, available for download from www.glp.de. Check that the software version given at the front of the user manual matches the software version installed in the fixture. -
Page 21: Service And Maintenance
● Do not let optical components come into contact with oil or grease. Put on clean, dry lint-free gloves before you touch them. impression X5 Quick Start and Safety Manual Rev. 20220505-01... -
Page 22: Main Fuse
The fixture does not normally need lubrication. If any effects or moving parts show signs of rough movement, consult a GLP service partner. GLP Service and Support Contact information for the nearest GLP service and support is available online at www.glp.de/en/service, by email at info@glp.de, or by telephone at the following numbers: ●... -
Page 23: Technical Specifications
White points: 6500 K (default), 8000 K, 5600 K, 4200 K, 3200 K Focus: Motorized, high-speed system Movement Resolution: 8 - 16 bit Position feedback: Yes Pan: 670° Tilt: 264° Effect movement: Fast, Normal and Smooth performance options impression X5 Quick Start and Safety Manual Rev. 20220505-01... - Page 24 Control panel display: Backlit graphic LCD, manual or automatic inversion Display power: Self-charging buffer battery Control protocols: DMX-512, RDM, Art-Net, sACN GLP FPO (Flexible Protocol Option) Port: Optional LumenRadio CRMX, other options on request Fixture setup and addressing: Integrated control panel, DMX, RDM Effects Color mixing: RGB 16-bit ;...
- Page 25 Standard color: Black (custom on request) Housing: High-impact flame-resistant thermoplastic, aluminum Service-friendly air filter change system GLP iQ.Mesh module with NFC sensor for GLP iQ.Mesh connectivity (linking with for example GLP iQ.Service, GLP Collect&Connect etc.) Accessories supplied X5 Tripod floor stand...
-
Page 26: Dimensions
X5 www.glp.de Dimensions Dimensions are given in millimeters impression X5 Quick Start and Safety Manual Rev. 20220505-01...
Need help?
Do you have a question about the impression X5 and is the answer not in the manual?
Questions and answers