
Related Manuals for GLP impression X4


Summary of Contents for GLP impression X4
- Page 1 1.18/18/12/10/n (Instruction version: 1.0) e-mail: service@glp.de Internet: http://www.glp.de...
- Page 2 Notes: German Light Products GmbH (Instruction version: 1.0) / from software version: 1.18/18/12/10/n...
-
Page 3: Table Of Contents
Table of contents Description of Device ..................... 4 1.1 Safety Instructions.................... 5 Preparation and Installation .................. 6 2.1 Safety information .................... 6 2.2 Mounting ......................7 2.2.1 Mounting on the Floor (Upright) ............8 2.2.2 Mounting in hanging position ..............8 2.2.3 Mounting in sideways Position.............. -
Page 4: Description Of Device
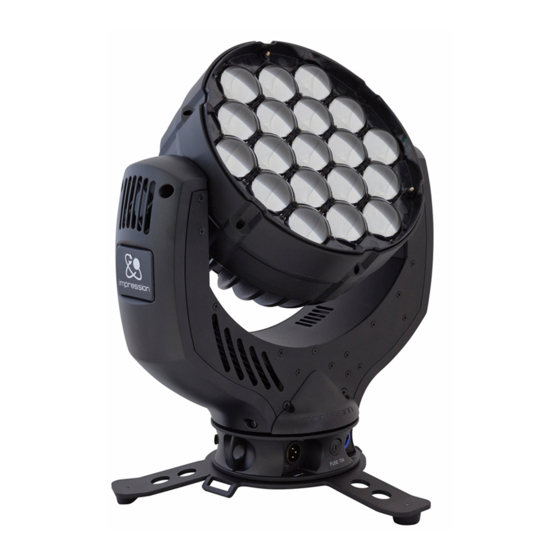
1 Description of Device 1. Moving head (actively and passively cooled) 2. Arm with various cooling vents 3. LCD-Display/Menu (data entry) 4. Base with various connectors and Camlock mounting system b a s e s i d e 1 5. Power On/Off 6. -
Page 5: Safety Instructions
8. Repair, maintenance, and installation work shall be done by qualified or GLP certified staff only. You need to pay attention to the common rules of technology that are not explicitly mentioned in this manual. 9. Use only original GLP spare parts. Any structural modification of the system will terminate all warranty claims. -
Page 6: Preparation And Installation
Should you have any questions about the operation of your fixture then please contact your local GLP office, or their authorized distributor, a list of which can be found at http://www.glp.de. German Light Products GmbH... -
Page 7: Mounting
2.2 Mounting 4 is fully operational whether it hangs or is mounted to the wall. It can also be operated while standing on the floor. Keep a safety distance of min. 0.5 m towards any easily inflammable materials (decoration etc.). Pay attention to the regulations of: BGV C1 (former VBG 70) and DIN VDE 0711-217. -
Page 8: Mounting On The Floor (Upright)
2.2.1 Mounting on the Floor (Upright) To operate the 4 in an upright position, please use the dedicated tri-legged floor stand supplied with your fixture. It is fixed to the base of the fixture with fasteners called Camlock quick-release connectors. Insert the two fasteners and turn each 90° to lock them. Do the opposite to release them again. -
Page 9: Mounting In Sideways Position
2.2.3 Mounting in sideways Position To operate the 4 in a sideways position please use an additional mounting bar. This is fixed by two Camlock quick-release connectors. Two half-couplers (clamps) are used to mount the bar to a standard truss bar. This technique is necessary to cope with the torque which accrues in this mounting position. -
Page 10: Connections
2.4 Connections 2.4.1 Power Supply ~100-240 Volt AC, 50-60 Hz, earth contact type plug - Powercon Connected load 350 VA (W) <=> T5A (micro-fuse 5x20mm) Please see printing on the case for the right electronic supply! Disconnect from the mains supply for changing the fuse and use only the above described micro-fuse type. - Page 11 Pan/Tilt Manual control for Pan/Tilt movements Movements Special White Manual control for Color temperature Temperature Dimmer Manual control for Dimmer Shutter Manual control for Shutter White Manual control for White Blue Manual control for blue Green Manual control for green Manual control for red Color Wheel Manual control for the color wheel...
- Page 12 Pattern Instantaneous value for Pattern channel / bank Zoom Instantaneous value for Zoom Speed Speed adjustment for Pan/Tilt movements Movements see item below Pan/Tilt Instantaneous value for Pan/Tilt movements Movements Special Instantaneous value for Special White Adjustment of the color temperature for WHITE Temperature Dimmer Instantaneous value for Dimmer...
-
Page 13: Dmx Channel Selection (Dmx Protocol)
4 DMX Channel Selection (DMX Protocol) Normal-Mode 20 DMX channels Channel Function Time and Value 1) PAN- 0 .. 660° 0..255 00..FF 0..100 coarse 2) PAN-fine High- Pos ... High- Pos + 2.6° (16 Bit) 0..255 00..FF 0..100 3) Tilt- 0 .. - Page 14 Channel Function Time and Value macros 0° 01..01 01..01 90° 02..03 02..03 180° 04..05 04..05 270° 06..07 06..07 0° 08..09 08..09 90° 10..11 0A..0B 180° 12..13 0C..0D 270° 14..15 0E..0F 0° 16..17 11..11 90° 18..19 12..13 180° 20..21 14..15 270° 22..23 16..17 0°...
- Page 15 Channel Function Time and Value (fixed) Color 01 - Red 8..15 08..0F 3..5.5 Color 02 - Amber 16..23 10..17 6..8.5 Color 03 - Warm Yellow 24..31 18..1F 9..12.5 Color 04 - Yellow 32..39 20..27 13..15.5 Color 05 - Green 40..47 28..2F 16..18.5 Color 06 - Turquoise...
- Page 16 High Resolution (Extended) -Mode 21 DMX Channels Channel Function Time and Value 1) PAN- 0 .. 660° 0..255 00..FF 0..100 coarse 2) PAN-fine High- Pos ... High- Pos + 2.6° (16 Bit) 0..255 00..FF 0..100 3) Tilt- 0 .. 300° 0..255 00..FF 0..100...
- Page 17 Channel Function Time and Value 21) Pattern 0..07 00…07 0..2.5 Direct access to Pattern of LED 17..19 Byte 3 The predefined colors can be used as start-colors for the Rainbow effect. Please select first a desired start-color before you activate the rainbow effect. All will then start from that color and will execute the rainbow effect synchronously.
-
Page 18: Maintaining And Cleaning The 4
5 Maintaining and Cleaning the 4 is a fixture of very low maintenance. It is only necessary to clean the air inlets and outlets as well as the optical LED lenses from time to time. For safe operation it is absolutely essential that the fixture is kept clean and that dust, dirt and smoke-fluid residues must not build up on, or within the fixture. -
Page 19: Technical Specifications
6 Technical Specifications Power supply Power consumption 350 VA (Watt) Power Input ~100-240 V AC, 50-60 Hz (wide range input) Fuse protection Micro-fuse 5x20 mm, T5A Operational Parameters Max. Ambient 5° - 45°C (integrated overheating switch) Temperature Mounting Position Any (see relevant chapter) Lighting System - Additive Color mixing LED Type 19 x Osram Ostar RGBW multi-chip... -
Page 20: Dimensions
7 Dimensions 338,28 310° 270° PAN movement range: 540° German Light Products GmbH (Instruction version: 1.0) / from software version: 1.18/18/12/10/n... -
Page 21: Index
8 Index Mounting in hanging Position......8 Mounting in sidewise Position......9 s ..........6 Mounting on the Floor ........8 BGV C1 ............7 Normal-Mode ..........13 Camlock............8 Cleaning............18 Compress-Mode ........14 Optical parts ..........18 Danger of BURNING........5 Pan- Movement........... -
Page 22: Appendix A
9 Appendix A Patterns are grouped into two sets which can be activated and selected via the DMX channel "Special". Choose the desired pattern by its corresponding DMX value on channel "Pattern". Orientation: Patterns are shown when looking at the front of a standing fixture; Head faced in direction of fixtures front label: DMX Pan @ 128;... - Page 23 Pattern Pattern Pattern Pattern German Light Products GmbH (Instruction version: 1.0) / from software version: 1.18/18/12/10/n...
- Page 24 Pattern Pattern Pattern Pattern German Light Products GmbH (Instruction version: 1.0) / from software version: 1.18/18/12/10/n...
- Page 25 Pattern Pattern Pattern Pattern reserved reserved reserved German Light Products GmbH (Instruction version: 1.0) / from software version: 1.18/18/12/10/n...
- Page 26 Patterns Set 2 Pattern Pattern Pattern Pattern German Light Products GmbH (Instruction version: 1.0) / from software version: 1.18/18/12/10/n...
- Page 27 German Light Products GmbH (Instruction version: 1.0) / from software version: 1.18/18/12/10/n...
Need help?
Do you have a question about the impression X4 and is the answer not in the manual?
Questions and answers