H3C S12500 Installation Manual
Routing switch
Hide thumbs
Also See for S12500:
- Installation manual (170 pages) ,
- Installation instructions manual (126 pages) ,
- Configuration manual (59 pages)

Related Manuals for H3C S12500


Summary of Contents for H3C S12500
- Page 1 H3C S12500 Routing Switch Series Installation Guide New H3C Technologies Co., Ltd. http://www.h3c.com Document version: 6W203-20180530...
- Page 2 The information in this document is subject to change without notice. All contents in this document, including statements, information, and recommendations, are believed to be accurate, but they are presented without warranty of any kind, express or implied. H3C shall not be liable for technical or editorial errors or omissions contained herein.
- Page 3 Preface The H3C S12500 Routing Switch Series Installation Guide describes how to install the H3C S12500 switches. This preface includes the following topics about the documentation: • Audience. • Conventions. • Documentation feedback. Audience This documentation is intended for: •...
-
Page 4: Documentation Feedback
It is normal that the port numbers, sample output, screenshots, and other information in the examples differ from what you have on your device. Documentation feedback You can e-mail your comments about product documentation to info@h3c.com. We appreciate your comments. - Page 5 Contents Preparing for installation ···································································· 1 Safety recommendations ············································································································· 1 General safety recommendations ··························································································· 1 Electricity safety ·················································································································· 1 ESD prevention ··················································································································· 1 Switch moving ···················································································································· 2 Laser safety ······················································································································· 3 Examining the installation site ······································································································· 3 ...
- Page 6 Connecting the switch to the network ··························································································· 49 Connecting the switch to the network through the AUX port ························································ 49 Connecting the switch to the network through a copper Ethernet port ··········································· 49 Connecting the switch to the network through a fiber Ethernet port ·············································· 50 ...
- Page 7 S12504 AC power supply ·································································································· 105 S12504 DC power supply ·································································································· 107 S12508/S12518 AC power supply ······················································································· 108 S12508/S12518 DC power supply ······················································································ 109 Power component specifications ························································································· 110 Power cords ··················································································································· 112 Appendix B LEDs ········································································· 115 ...
- Page 8 Index ························································································· 148 ...
- Page 9 Preparing for installation The figures in this document are for illustration only. Safety recommendations To avoid any equipment damage or bodily injury caused by improper use, read the following safety recommendations before installation. Note that the recommendations do not cover every possible hazardous condition.
-
Page 10: Switch Moving
Switch moving IMPORTANT: For personal safety, at least four people are required to move an S12518 switch. When you move an H3C S12500 switch, follow these guidelines: • Remove all the external cables (including the power cords) before moving the chassis. -
Page 11: Laser Safety
Examining the installation site The H3C S12500 Routing Switch Series can only be used indoors. To ensure that the switch works correctly and to prolong its service lifetime, the installation site must meet the following requirements:... -
Page 12: Operating Altitude
Operating altitude Table 3 Operating altitude requirements Item Specifications ≤ 4000 m (13123.36 ft) (available altitude) Operating altitude ≤ 3000 m (9842.52 ft) (certificated altitude) Cleanliness Dust buildup on the chassis might result in electrostatic adsorption, which causes poor contact of metal components and contact points, especially when indoor relative humidity is low. -
Page 13: Power Supply
Grounding Using a good grounding system to protect your switch against lightning shocks, interferences, and ESD is essential to the operating reliability of your switch. Make sure the resistance between the chassis and the ground is less than 1 ohm. Power supply To meet the power supply requirements: Calculate the system power consumption. - Page 14 Figure 2 Airflow through an S12504 chassis (1) Air intake direction of the chassis (2) Air exhaust direction of the chassis (3) Air intake direction of the power supplies (4) Air exhaust direction of the power supplies...
- Page 15 Figure 3 Airflow through an S12508 chassis (1) Air intake direction of the chassis (2) Air exhaust direction of the chassis (3) Air intake direction of the power supplies (4) Air exhaust direction of the power supplies...
- Page 16 Figure 4 Airflow through an S12518 chassis (1) Air intake direction of the chassis (2) Air exhaust direction of the chassis (3) Air intake direction of the power supplies (4) Air exhaust direction of the power supplies...
- Page 17 Space For easy maintenance, follow these guidelines: Installation method Space requirements • Width of the aisle: ≥ 0.8 m (2.62 ft) Workbench-mounting • Clearance between the rack and walls or other devices: ≥ 0.8 m (2.62 ft) • Clearance between the rack and walls or other devices: ≥ 1.0 m (3.28 ft) Rack-mounting •...
- Page 18 Figure 5 S12504 AC/DC depth 652 mm 95 mm (25.67 in) (3.74 in) (1) Captive screws (2) Cable management bracket...
- Page 19 Figure 6 S12508/S12518 AC depth 759 mm 100 mm (29.88 in) (3.94 in) (1) Power cabling rack (2) Cable management bracket...
-
Page 20: Installation Tools
Figure 7 S12508/S12518 DC depth (1) Ejector lever on the switching fabric module (2) Cable management bracket Installation tools You can use the following tools for installation. Accessories supplied by the switch Item Quantity Purpose Connects the console port and the configuration terminal for switch Console cable login. - Page 21 Item Quantity Purpose M6*12 screw 1 set Secures the switch to the rack. M6 cage nut 1 set ESD wrist strap ESD prevention. Organizes and secures AC power cords. Cable tie Several Supplied with the S12508 and S12518 switches. NOTE: The number of screws, nuts, and cable ties supplied with the switch depends on those shipped from the factory.
-
Page 22: Installing The Switch
Figure 8 Switch installation procedure NOTE: Removal of power frame mounting brackets is not required for the S12504 switch. Confirming installation preparations Before installing an H3C S12500 switch, verify that: • You have read "Preparing for installation" carefully and the installation site meets all the... -
Page 23: Installing A Chassis Air Filter (Optional)
Chassis air filters are installed at the air intake vents to prevent dust from entering the chassis. Chassis air filters of the S12500 switches are optional. You can order them as needed. If you have ordered chassis air filters, H3C recommends you to install the air filters before mounting the switch to the rack. -
Page 24: Installing The Switch In A Rack
Figure 10 Installing an air filter Installing an air filter on an S12518 Use a Phillips screwdriver to loosen the screws at both sides of the plastic panel and remove the panel. Insert the air filter into the rear of the chassis along the slide rails, and then fasten the screws at both sides of the air filter. - Page 25 Make sure the clearance above the slide rail is sufficient for the switch and the slide rails can support the weight of the switch. For the dimensions and weight of the S12500 switch, and the weight of the hardware components, see "Appendix A Technical specifications."...
- Page 26 Figure 12 Locating the installation position of the slide rails (1) Middle of the narrower metal area between holes Install the cage nuts on the rack posts. a. Insert the upper ear (callout 1 in Figure 13) of a cage nut into the corresponding installation hole.
- Page 27 Figure 14 Fastening the screws Use the same method described in step 3 to install the left slide rail to the left rack posts. Keep the two slide rails at the same height so that the switch can be placed evenly. Figure 15 Slide rails installed correctly Installing cage nuts Before mounting the chassis to the rack, install cage nuts to the front square-holed brackets of the...
-
Page 28: Installing The Mounting Brackets
To install cage nuts to the rack: Align the mounting bracket with the left rack post, making sure its bottom edge and the slide rail are level. Mark the positions of the cage nuts on the rack post according to the mounting holes on the mounting bracket. -
Page 29: Mounting The Switch In The Rack
Figure 17 Installing the mounting brackets (for the S12504) Mounting the switch in the rack Before you mount the switch in the rack, make sure you have installed slide rails or a rack shelf on the rack for supporting the switch. To maximize the stability of the rack, mount the heaviest switch at the bottom of the rack when you install multiple switches on the rack. -
Page 30: Installing The Switch On A Workbench
NOTE: If the screw holes on the mounting brackets cannot align with the cage nuts on the rack, verify that the bottom edge of the slide rail aligns with the middle of the narrowest metal area between mounting holes and that the cage nuts are installed in the correct holes. Verifying the installation After the installation is completed, check the installation against the following checklist. -
Page 31: Installation Procedures
Figure 19 Installing the wall anchor (1) Shank (2) Groove (3) Plug (4) Spade-shaped wedge Installation procedures IMPORTANT: Allow 0.8 m (2.62 ft) of clearance around the switch for heat dissipation. To install the switch: Hold the two sides of the switch and steadily move the switch to the workbench. Lift the switch a little higher than the workbench and put it on the workbench. - Page 32 Figure 20 Installing cable management brackets on both sides of the switch (1) Installation holes (2) Cable management brackets Secure the L-shaped bracket to the switch. Move the switch to make sure holes in the L-shaped bracket align with wall anchor holes in the ground.
-
Page 33: Grounding The Switch
Figure 21 Installing L-shaped brackets (1) Anchor bolt (2) L-shaped bracket Grounding the switch WARNING! For the safety of operators and equipment, securely ground the switch. Make sure the resistance reading between the switch chassis and the ground is less than 1 ohm. Most racks are equipped with a grounding strip. -
Page 34: Installing A Power Supply
If there is no grounding point on the rack, you can attach the grounding cable to a grounding strip. The installation procedures are similar. Installing a power supply The S12500 switches supports both AC and DC power supply. You can select either AC or DC power supplies as needed. For how to connect power cords, see "Connecting power cords."... - Page 35 • Installing an AC power module Installing a PEM Loosen the screws on the filler panel of the PEM slot with a Phillips screwdriver to remove the filler panel. Insert a PEM slowly along the slide rails until it touches the backplane connector. NOTE: Gently insert the PEM into the chassis to avoid damaging the connector at the end of the PEM.
-
Page 36: Installing A Dc Power Supply
Figure 24 Installing a power module for the S12508 Repeat steps 1 to 5 to install other power modules and then close the power frame panel. Figure 25 Closing the power frame panel for the S12508 Installing a DC power supply The procedure for installing a DC power module is similar to installing an AC power module. - Page 37 To install a fan tray: Wear an ESD wrist strap and make sure it is correctly grounded. Unpack the fan tray. Remove the blank panel from the slot to be used. Figure 26 Removing the blank panel from the fan tray slot of the S12508 Lift the fan tray and push it into the slot until it is firmly seated in the slot.
-
Page 38: Installing A Card
On an S12504, install at least one MPU, one LPU, and three switching fabric modules. On an S12508 or S12518, install at least one MPU, one LPU, and seven switching fabric modules. The S12500 does not support intermixing of the MPU, LPU, and switching fabric modules. Use one of the following positions to install the card: •... -
Page 39: Installation Procedure
Unpack the card to be installed. NOTE: • Keep the removed the blank panel and protection cover for future use. • All the cards for the S12500 are hot-swappable. Installation procedure IMPORTANT: • Fasten the screws of each card right after you insert it. - Page 40 Figure 30 Removing the protection cover Move the ejector levers on the front panel of the MPU outwards, hold up the MPU by one hand without touching any electronic components on the MPU, and hold the front panel by the other hand to push the MPU into the slot along the slide rails slowly.
-
Page 41: Connecting Power Cords
Figure 31 Installing an MPU (for the S12504) Figure 32 Installing an MPU (for the S12508 and S12518) Connecting power cords Follow these guidelines before connecting power cords:... -
Page 42: Connecting An Ac Power Cord
AC power cord to make the power module operate correctly. The AC power system for the S12500 requires 16A AC power cords. You need to prepare 16A power strips, and make sure the AC power supply system can provide enough power. For AC power cords used in different countries or regions, see "Appendix A Technical specifications."... -
Page 43: Connecting A Dc Power Cord
Figure 34 Installing the power cabling rack Insert the connector of an AC power cord into the power receptacle. Secure the AC power cord to the cabling rack with cable ties. Repeat steps 2 and 3 to organize and secure other AC power cords. Connect the other end of the AC power cords to the power source. - Page 44 Six pairs of wiring terminals (marked PSR1 through PSR6) are available on the DC terminal block of the S12504 switches. Eight pairs of wiring terminals (marked PSU1 through PSU8) are available on the DC terminal block of the S12508/S12518. The wiring terminals correspond to the power modules. The power source provides power to the switch through the wiring terminals.
- Page 45 Figure 37 Connecting the DC power cord to the terminal block Connect the other end of the DC power cord to the power source: Connect the other end of the black DC power cord to the RTN (+) terminal that provides power to the switch.
-
Page 46: Verifying The Installation
Secure the ring terminal of the black power cord to the RTN (+) terminal on the terminal block with screws using a Phillips screwdriver. Figure 39 Connecting the DC power cords to terminals on the power supply Connect the other end of the DC power cord to the power source: Connect the other end of the black DC power cord to the RTN (+) terminal that provides power to the switch. - Page 47 After the installation is completed, verify the installation against the following list. Be sure that all check results are positive. Table 8 Installation checklist Result Item Remarks The grounding cable is correctly grounded. Fan trays are correctly installed and make close contact with the backplane.
-
Page 48: Logging In To The Switch
Connecting the switch to the network Cable routing recommendations Interface cables and power cords should be separately routed. Reasonable cable routing can improve efficiency by facilitating installation and removal of fan trays and some other components. Follow these guidelines when you route the cables: •... - Page 49 Figure 41 Console cable connecting the serial port and the console port Table 9 Pinouts for the console cable connecting the serial port and the console port RJ-45 pin Signal DB-9 pin Signal • Console cables connecting the USB console port on a switch and the USB port on a PC or terminal The console cable consists of one mini-USB A/B connector for connecting to the USB console port on the switch and one USB A connector for connecting to the USB port on the PC or...
- Page 50 Connection procedure Figure 43 Connecting through the console port and the serial port To connect the console cable through the console port: Connect the DB-9 connector of the console cable to the serial port on a PC or terminal. Connect the RJ-45 connector of the console cable to the console port on the MPU of the switch. To connect the console cable through the USB console port: Connect the USB-A connector of the console cable to the USB port on a PC or terminal.
-
Page 51: Setting Up A Configuration Environment
Setting up a configuration environment If you use the Windows 2003 Server operating system on your PC, add a HyperTerminal, and then log in to and manage the switch as described in this document. If you use Windows 2008 Server, Windows 7, Windows Vista, or any other operating system on your PC, use the third party terminal software. - Page 52 Figure 45 Setting the serial port used by the HyperTerminal connection Set Bits per second to 9600, Data bits to 8, Parity to None, Stop bits to 1, and Flow control to None, and click OK. Figure 46 Setting the serial port parameters Select File >...
- Page 53 Figure 47 HyperTerminal window On the Settings tab, set the emulation to VT100 and click OK. NOTE: H3C recommends that you select the Windows keys option. Figure 48 Setting the terminal emulation in Test Properties dialog box...
-
Page 54: Powering On The Switch
Booting Normal Extend BootWare The Extend BootWare is self-decompressing Done! ************************************************************************** H3C S12500 BootWare, Version 2.18 ************************************************************************** Copyright (c) 2004-2013 Hangzhou H3C Technologies Co., Ltd. Compiled Date : Jul 22 2013 CPU Type : MPC8548E CPU L1 Cache : 32KB... - Page 55 Board steady testing... [ PASS ] Board SlotNo... Subcard exist testing... [ PASS ] DX246 testing... [ PASS ] PHY88E1111 testing... [ PASS ] CPLD1 testing... [ PASS ] CPLD2 testing... [ PASS ] NS16550 register testing... [ PASS ] The default switch's Mac address...
-
Page 56: Verification After Power-On
NOTE: • The S12500 routing switches provide a command line interface (CLI). For more information about the CLI, see H3C S12500 Routing Switch Series Fundamentals Configuration Guide. • The output depends on your switch model. Verification after power-on H3C recommends that you check the following conditions after the switch is powered on: •... - Page 57 TIP: After connecting the switch to the network, you can use the ping or tracert command to check the interoperability between the switch and network. For more information, see H3C S12500 Routing Switch Series Network Management and Monitoring Command Reference.
-
Page 58: Connecting The Switch To The Network Through A Fiber Ethernet Port
Connecting the switch to the network through a fiber Ethernet port Use an optical fiber to connect an XFP, SFP, CFP, SFP+, or QSFP+ port on the switch to the network. You must install a transceiver module to the switch, and then insert the fiber connector to the module. Introduction to fiber connector Fiber connectors are indispensable passive components in an optical fiber communication system. - Page 59 Figure 50 Installing an SFP+ module IMPORTANT: Do not remove the dust plug of the SFP+ module port before installing an optical fiber. Installing the CFP module Put on an ESD wrist strap. Make sure it has close skin contact and is correctly grounded. Unpack the CFP module.
- Page 60 Figure 53 MPO fiber connector MPO plug QSFP+ module Connect one end of the fiber to the SFP module of the S12500 switch. Connect the other end of the fiber to the peer device. Connecting an SFP+ cable and a QSFP+ cable (optional) The installation of the SFP+ cable and QSFP+ cable is similar.
- Page 61 Figure 54 Connecting the SFP+ cable (1) Pull latch (2) Connector...
-
Page 62: Hardware Management
DEVICE_NAME : LST1MRPNC1 DEVICE_SERIAL_NUMBER : 210231A9680089000004 MAC_ADDRESS : 000F-E212-3400 MANUFACTURING_DATE : 2009-02-27 VENDOR_NAME : H3C • In Intelligent Resilient Framework (IRF) mode: <Sysname> display device manuinfo chassis 1 slot 0 Chassis 1 Slot 0: DEVICE_NAME : LST1MRPNC1 DEVICE_SERIAL_NUMBER : 210231A9680089000004... - Page 63 NONE Absent NONE NONE Absent NONE LST1GT48LEC1 Normal S12500-CMW710-A732004 NONE Absent NONE NONE Absent NONE NONE Absent NONE NONE Absent NONE NONE Absent NONE NONE Absent NONE LST1SF08B1 Normal S12500-CMW710-A732004 LST1SF08B1 Normal S12500-CMW710-A732004 LST1SF08B1 Normal S12500-CMW710-A732004 LST1SF08B1 Normal S12500-CMW710-A732004 LST1SF08B1...
-
Page 64: Rebooting Your Switch
Field Description Hardware type of a card, which can be: • Specific card model—Type of a card (such as LST1MRPNC1), which is the same as the silkscreen. Brd Type • NONE—No card is in the slot. • UNKNOWN—The card is not supported by the software version and thus cannot start correctly. -
Page 65: Managing The Power Supply System
# Display the electrical label information about power monitoring module 2. <Sysname> display device manuinfo power-monitor 2 Power Monitor unit 2: DEVICE_NAME : PMU DEVICE_SERIAL_NUMBER : 210235A36L1234567890 MAC_ADDRESS : NONE MANUFACTURING_DATE : 2010-01-20 VENDOR_NAME : H3C • In IRF mode:... -
Page 66: Enabling Power Supply Management
MANUFACTURING_DATE : 2010-01-20 VENDOR_NAME : H3C Enabling power supply management If power supply management is not enabled when you add a new card by inserting it into the slot or starting power supply to the card by using the power-supply command, the system directly powers on the card, and the power supply might become unstable or the system might restart because of overloading. - Page 67 To configure the number of redundant power modules: Step Command Remarks Enter system view. system-view • In standalone mode: power-supply policy enable Enable power supply By default, power supply • In IRF mode: management. management is enabled. power-supply policy enable chassis chassis-number •...
- Page 68 • Power management function status • Power supply type, rated input voltage, and rated output power • Number of redundant power modules • Available, redundant, used, and remained power • Operating status of power modules • Power supply status of LPUs # Display detailed information about the power supply system.
- Page 69 None Absent None Absent None Absent PMU 1: normal Protocol: 21 Type: LST1PMUB Vendor: H3C Current Ver: 200 Boot Ver: 205 Low-Area Ver: 200 High-Area Ver: Unknown Current-Area: Low PCB Ver: Ver.A Backplane PCB Ver: Ver.A Backplane Type: LST19KA2PSB PMU Temperature: 30 °C...
-
Page 70: Configuring Temperature Thresholds For A Card
Configuring temperature thresholds for a card You can set temperature thresholds for a card. When the temperature reaches a threshold, the switch generates logs and alarm messages. Configuring temperature thresholds for a card Step Command Enter system view. system-view • In standalone mode: temperature-limit slot slot-number { inflow | hotspot | outflow } sensor-num lowerlimit warninglimit [ alarmlimit ]... -
Page 71: Isolating A Card And Locating Card Faults
Table 14 Command output Field Description • In standalone mode: slot-number—Indicates the card in the specified slot. Vent—Indicates the chassis and fan tray of the switch. • In IRF mode: Slot chassis-number/slot-number—Indicates the card in the specified slot on the specified IRF member switch. chassis-number/Vent—Indicates the chassis and fan tray of the specified IRF member switch. -
Page 72: Configuration Procedure
Configuration procedure To isolate a card and locate card faults: Step Command Remarks Enter system view. system-view • In standalone mode: board-offline slot slot-number Isolate the specified • No card is isolated by default. In IRF mode: card. board-offline chassis chassis-number slot slot-number Configuring in-service hardware failure diagnosis and failure protection... -
Page 73: Displaying The Operating State Of Fans
Configuration procedure To configure in-service hardware failure diagnosis and failure protection: Step Command Remarks Enter system view. system-view Fix actions for hardware failures: • off—Takes no action. • warning—Sends warning messages. Enable in-service • reset—Resets the failed card. hardware failure hardware-failure-detectio •... - Page 74 normal 2400 normal 2700 normal 2700 normal 2400 normal 2400 normal 2700 normal 2400 normal 2700 normal 2400 Type: FCU Current Ver: 204 Boot Ver: 100 Low-Area Ver: 204 High-Area Ver: 204 Current-Area: Low Fan-tray 2: Software version: 101 Hardware version: Ver.A Fan number: 12 Temperature: 29 °C High temperature alarm threshold: 70 °C...
- Page 75 <Sysname> display fan chassis 1 verbose Fan-tray verbose state on chassis 1: Fan-tray 1: Software version: 204 Hardware version: Ver.A Fan number: 12 Temperature: 26 °C High temperature alarm threshold: 60 °C Low speed alarm threshold: 1450 rpm Status Speed(rpm) ---------- ---------- normal...
-
Page 76: Verifying And Diagnosing Transceiver Modules
normal 4200 normal 4100 normal 4300 normal 4350 Type: FCU Current Ver: 204 Boot Ver: 100 Low-Area Ver: 204 High-Area Ver: 204 Current-Area: Low Table 15 Command output Field Description Indicates that the following information is for the fan in tray Fan-tray 1: number 1. -
Page 77: Verifying Transceiver Modules
: 1000_BASE_SX_SFP Connector Type : LC Wavelength(nm) : 850 Transfer Distance(m) : 550(50um),270(62.5um) Digital Diagnostic Monitoring : YES Vendor Name : H3C Ordering Name : SFP-GE-SX-MM850 Table 18 Command output Field Description transceiver information Transceiver information Transceiver Type Transceiver type... -
Page 78: Diagnosing Transceiver Modules
<Sysname> display transceiver manuinfo interface Gigabitethernet 3/0/19 GigabitEthernet3/0/19 transceiver manufacture information: Manu. Serial Number : 213410A0000054000251 Manufacturing Date : 2008-09-01 Vendor Name : H3C Table 19 Command output Field Description Serial number generated during commissioning and testing of the transceiver Manu. Serial Number module... - Page 79 To diagnose transceiver modules: Task Command Remarks display transceiver alarm Display alarms present on the If no error occurs, None is interface [ interface-type transceiver in a specified interface displayed. interface-number ] Display the present measured values of display transceiver diagnosis the digital diagnosis parameters for the interface [ interface-type transceiver in a specified interface...
- Page 80 Field Remarks TX not ready The transmission status is ready. TX CDR loss of lock Transmission CDR loss of lock. Module not ready The module is not ready. APD supply fault Avalanche Photo Diode (APD) supply error. TEC fault Thermoelectric Cooler (TEC) error. Wavelength unlocked Wavelength loss of lock.
-
Page 81: Disabling Alarm Traps For Transceiver Modules
Disabling alarm traps for transceiver modules If you install a transceiver module that has no vendor name or a vendor name other than H3C, the system repeatedly outputs traps and logs to notify the user to replace the module. To continue to use such a transceiver module that is manufactured or customized by H3C but has no vendor information, you can disable alarm traps so the system stops outputting alarm traps. -
Page 82: Replacement Procedures
Cleaning the air filters The air filters of an S12500 switch fall into the following types: • Chassis air filter—No chassis air filter is shipped with the S12500 chassis by default. You can order one as needed. • Power supply air filter—An S12500 chassis is installed with a power supply air filter when shipped by default. - Page 83 Figure 56 Replacing the air filter from the S12518 Cleaning a power frame air filter The power frame air filter of an S12500 switch is right behind the front panel of the power frame to prevent dust from entering the power frame.
- Page 84 Figure 57 Replacing the power frame air filter For an S12508 or S12518 To clean the power frame air filter: Loosen the fastening screws on the air filter and remove the air filter from the power frame.
-
Page 85: Replacing A Power Module
Replacing a power component WARNING! Power modules for the S12500 are hot-swappable. When installing and replacing a power module with the switch powered on, pay attention to the operation procedures and electricity safety issues. To avoid injury, do not touch any wires, terminals, or parts with a high-voltage hazard sign. - Page 86 Gently pull the clip at the bottom left corner of the power module to the left to open the power module cover. Supporting the bottom of the power module with your left hand and holding the power module cover with your right hand, gently pull the power module out of the power frame. Figure 59 Removing a power module from the S12508 Pull the clip at the bottom left corner of the new power module to the left to open the power module cover.
- Page 87 Slowly pull the PEM out along the slide rails, as shown in Figure Put the removed PEM on an antistatic mat or in its original shipping materials. Unpack a new PEM, and slowly insert the PEM along the slide rails until the PEM has close contact with the power frame backplane, as shown in Figure Use a Phillips screwdriver to fasten the screws on the PEM panel.
-
Page 88: Replacing A Card
Figure 65 Installing the power monitoring module in the S12508 or S12518 Replacing a card All cards of the S12500 are hot-swappable. Preparing for the replacement Put on an ESD wrist strap, and make sure the wrist strap makes good skin contact and is correctly grounded. -
Page 89: Replacement Procedure
"Appendix B LEDs." For more information about the reboot and display device commands, see H3C S12500 Series Routing Switches Fundamentals Command Reference. To replace a card: Loosen the captive screws on the card. Move the ejector levers outwards to separate the card from the backplane. - Page 90 Figure 67 Removing a card from the S12508 and S12518 Move the ejector levers on the front panel of the new card outward. Hold up the card by one hand without touching any electronic components on the card, and hold the front panel by the other hand to slowly push the card into the slot along the slide rails.
- Page 91 Figure 68 Installing a card in the S12504 Figure 69 Installing a card in the S12508 or S12518...
-
Page 92: Replacing A Fan Tray
Replacing a fan tray CAUTION: • To avoid injury, do not touch any wires, terminals, and parts with a high-voltage hazard sign. • Fan trays are hot-swappable. To replace a fan tray when the switch is operating, pull out the fan tray after it stops rotating. -
Page 93: Replacing A Cf Card
(3) CF card (4) CF card LED The Compact Flash (CF) card is installed on the MPU of an S12500. To replace the CF card when the CF card memory is insufficient or the CF card is damaged: Check the CF card LED status. - Page 94 After you execute the umount cf command, if you want to continue to use the CF card, execute the mount cf command in user view to mount the CF card again. For more information about the umount and mount commands, see H3C S12500 Routing Switch Series Fundamentals Command Reference.
-
Page 95: Replacing A Transceiver Module
Replacing a transceiver module Replacing the XFP, SFP+, SFP, and QSFP+ modules CAUTION: Do not touch the golden finger of a transceiver module during replacement. The replacement procedures for the XFP, SFP, SFP+, and QSFP+ modules are similar. This section uses an SFP+ module as an example. - Page 96 Replacing the CFP transceiver module Put on an ESD wrist strap. Make sure it has close skin contact and is correctly grounded. Remove the CFP transceiver module. a. Loosen the captive screws on the CFP transceiver module. b. Pull out the CFP transceiver module slowly along the slide rails. Put the removed CFP transceiver module in an antistatic bag or in its original shipping materials.
- Page 97 • If the cable cannot be removed or installed, verify that the removal or installation procedures are correct. • When you remove a cable, pull the pull latch horizontally. Otherwise, the cable cannot be removed smoothly, or even the module or slot could be damaged. To replace an SFP+ cable: Put on an ESD wrist strap, and make sure it has close skin contact and is correctly grounded.
-
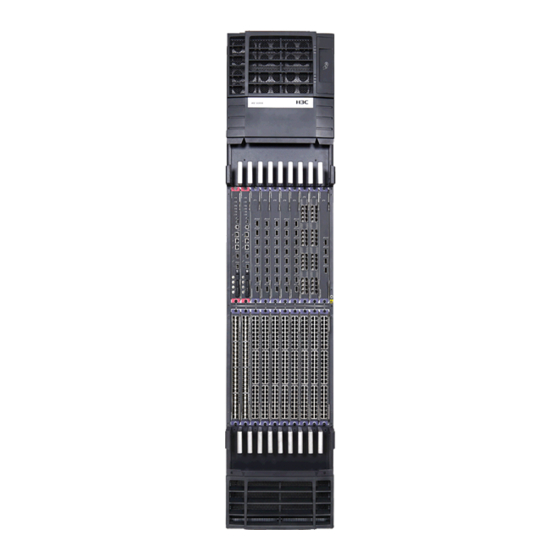
Page 98: Appendix A Chassis Views And Technical Specifications
Appendix A Chassis views and technical specifications Chassis views The chassis views for the AC and DC models are similar. The figures in this chapter are for illustration only. S12504 Figure 80 S12504 front view (1) MPU slots (slots 0 to 1) (2) LPU slots (slots 2 to 5) (3) Power frame cover (4) Power switch cover... - Page 99 Figure 81 S12504 rear view (1) Fan tray (2) Power entry module (PEM) (3) Grounding screw (4) Ventilation panel (5) ESD wrist strap port (6) Switching fabric module slots (slots 6 to 9)
- Page 100 S12508 Figure 82 S12508 front view (1) Power frame cover (2) Upper cabling rack (3) MPU slots (slots 0 and 1) (4) Lower cabling rack (5) Chassis air intake vents (6) ESD wrist strap port (7) LPU slots (slots 2 to 9)
- Page 101 Figure 83 S12508 rear view (1) Power receptacles (2) Upper fan tray (3) Lower fan tray (4) Grounding screw (5) ESD wrist strap port (6) Switching fabric module slots (slots 10 to 18) (7) Chassis air exhaust vents (8) Power switch (9) Power supply air exhaust vents (10) Power monitoring module...
- Page 102 S12518 Figure 84 S12518 front view (1) Power frame cover (2) Upper cabling rack (3) MPU slots (slots 0 and 1) (4) LPU slots (slots 2 to 19) (5) Lower cabling rack (6) Chassis air intake vents (7) ESD wrist strap port...
- Page 103 Figure 85 S12518 rear view (1) Power receptacles (2) Upper fan tray (3) Switching fabric module slots (slots 20 to 28) (4) Lower fan tray (5) Grounding screw (6) ESD wrist strap port (7) Chassis air exhaust vents (8) Power switch (9) Power supply air exhaust vents (10) Power monitoring module...
-
Page 104: Technical Specifications
Technical specifications Chassis Table 23 Chassis specifications Max power system consumpti Heat Switch input Dimensions Height on for dissip input Weight model power (H × W × D) (RU) cards and ation current consum fans ption Net weight: 56.5 kg (124.56 442 ×... - Page 105 Max system input power consumption refers to the maximum input power consumption of the chassis when the chassis is fully configured with cards that have the maximum power consumption. Max power consumption for cards and fans refers to the maximum power consumption of all cards and fans that have the maximum power consumption in the fully configured chassis.
- Page 106 Card Power consumption Net weight Dimensions (H × W × D) 40 × 400 × 467 mm (1.57 × LST1XP40RFD1 287 W to 435 W 5.40 kg (11.90 lb) 15.75 × 18.39 in) 40 × 400 × 467 mm (1.57 × LST1XP40RFD2 287 W to 435 W 5.40 kg (11.90 lb)
- Page 107 15.75 × 18.39 in) 40 × 400 × 467 mm (1.57 × CR-IM-MAC1A 130 W to 160 W 4.5 kg (9.92 lb) 15.75 × 18.39 in) For more information about the S12500 cards, see the relevant datasheet of the cards.
- Page 108 Switching fabric modules IMPORTANT: Use the switching fabric modules of the same model on an S12500. An S12504 needs to be configured with three to four switching fabric modules. An S12508/S12518 needs to be configured with six to nine switching fabric modules. Install all switching fabric modules...
- Page 109 Table 26 Switching fabric module specifications Model BootWare SDRAM Compatible switch • S12508-AC-1 LST1SF08B1 4 MB 128 MB • S12508-DC-1 • S12518-AC-1 LST1SF18B1 4 MB 128 MB • S12518-DC-1 • S12504-AC • S12504-DC LST2SF08C1 4 MB 128 MB • S12508-AC-2 •...
- Page 110 Number Supported modules and Model SDRAM Port type of ports cables • 10-GE SFP+ modules 10GBASE-R • 10-GE SFP+ cables LST1XP20RFD1 4 GB SFP+/LC fiber ports • FE/GE SFP modules • 10-GE SFP+ modules 10GBASE-R • 10-GE SFP+ cables LST1XP20RFD2 4 GB SFP+/LC fiber ports •...
- Page 111 • The LST2XP8LEC2, LST1XP16LEC2, LST2XP32REC2, LST1GP48LEC2, and LST1GT48LEC2 are supported by only Release 18xx, Release 7328 and later. • The LST1XP16LEB1, LST1XP16LEC1 and LST1XP16LEC2 cannot be used on the S12500 that is installed with the LST1SF08B1 or LST1SF18B1. • As a best practice, set the operating mode of an S12508 or S12518 to grand mode if it uses only the FD-suffixed LPUs, FG-suffixed LPUs, or their combination.
- Page 112 Supported modules and Model Descriptions Interfaces cables • 1 console port • 2 USB ports (reserved for • GE SFP modules hardware, not supported LST1FW3A1 Firewall module • RJ-45 cables by software) • 2 GE combo interfaces • 1 console port •...
-
Page 113: Fan Trays
The fan trays for the S12504 are vertically oriented, and those for the S12508 and S12518 are horizontally oriented. Power supply system The S12500 switches provide both AC powered chassis and DC powered chassis. You can select the type of power supply system as needed. S12504 AC power supply S12504-AC switches use the PSE9000-A1 AC power supply system, which comprises an AC power frame, a power monitoring module, a PEM, and AC power modules. - Page 114 Figure 87 Front view of an AC power frame (1) to (6) AC power modules (the serial numbers are identical to the slot numbers) (7) Power monitoring module (8) Power monitoring module LED (9) Power frame switch AC power module Figure 88 AC power module (1) Power input LED (2) Power output LED...
- Page 115 Figure 89 PEM S12504 DC power supply S12504-DC switches use the PSE9000-D DC power supply system, which comprises a DC power frame, a power monitoring module, and DC power modules. DC power frame Each DC power frame can have one power monitoring module and up to six DC power modules. Figure 90 DC power frame front view (1) to (6) DC power modules (7) Power monitoring module...
- Page 116 Figure 91 DC power frame rear view (1) A pair of wire posts (2) Grounding post DC power module Figure 92 DC power module (1) Power input LED (2) Power output LED (3) Over-temperature alarm LED (4) Power module fault LED Power monitoring module The power monitoring module (callout 7 in Figure...
- Page 117 Figure 93 Front view of an AC power frame (1) to (8) AC power modules The power receptacles (callout 1 in Figure 94), which is used for power supply entry, is installed at the rear of the S12508/S12518 AC power frame. Figure 94 Power receptacles and power monitoring module (1) Power receptacles (2) Power monitoring module...
- Page 118 The AC power frames, power receptacles, and power monitoring modules are integrated to the S12508/S12518 AC chassis. You need to order the AC power modules as required. The DC power frames and power monitoring modules are integrated to the S12500 DC chassis. You need to order the DC power modules as required.
- Page 119 Table 30 Weight of the S12504 power components Power supply Weight Power entry module (PEM) 1.61 kg (3.55 lb) Power monitoring module 0.85 kg (1.87 lb) AC power module-2000 W 2.19 kg (4.83 lb) DC power module-1800 W 1.96 kg (4.32 lb) Table 31 Weight of the S12508/S12518 power components Power supply Weight...
-
Page 120: Power Cords
AC power cords connect the AC power modules of the switch with the external AC power source. You need to choose AC power cords based on the power of the power modules. The S12500 adopts the 16A AC power cords. Connectors vary among different countries and regions. For 16A AC power... - Page 121 Countries or regions where the type of Countries or Other countries or Connector Code power cords conforms regions seldom regions using this type type (Length) to local safety using this type of of power cords regulations and can power cords be used legally Holland, Denmark, Sweden, Finland,...
- Page 122 Countries or regions where the type of Countries or Other countries or Connector Code power cords conforms regions seldom regions using this type type (Length) to local safety using this type of of power cords regulations and can power cords be used legally 0404A01A (3 I type...
-
Page 123: Appendix B Leds
Appendix B LEDs Power system LEDs Power monitoring module LEDs Table 36 Power monitoring module LED description for the S12504 Status Description Steady on The power monitoring module is operating correctly. The power monitoring module is faulty. • At least one power module is faulty. •... -
Page 124: Power Module Leds
Power module LEDs Figure 97 Power module LEDs (1) Power input LED (2) Power output LED (3) Over-temperature alarm LED (4) Power module fault LED Table 38 Power module LED description Status Description Steady on The power is being input correctly. Input No power is being input. -
Page 125: Cf Card Status Led
MPU LEDs Figure 98 LST1MRPNC1 LEDs (1) CF card status LED (CFS) (2) Switching fabric module LED (SFC) (3) LPU status LED (LC) (4) Fan status LED (FAN) (5) Power status LED (PWR) (6) MPU status LED (ACT) (7) MPU status LED (RUN) (8) Network management port LED (LINK) (9) Network management port LED (ACT) Figure 99 LST1MRPNE1/LST1MRPNE2 LEDs... -
Page 126: Network Management Port Leds
Network management port LEDs Table 41 Network management port LED description Status Description No link is present. LINK Steady on A link is present. No data is being transmitted or received. Flashing Data is being transmitted and/or received. Switching fabric module LED Table 42 Switching fabric module LED description Status Description... -
Page 127: Power Status Led
Power status LED Table 45 Power status LED description MPU LED Status Description Flashing green All the power frames are operating correctly. Flashing red One or two power frames are faulty. PWR (green-red) Steady on The MPU is faulty. The MPU is faulty. MPU LEDs Table 46 MPU LED description MPU LED... - Page 128 Table 47 Interface LED description Status Description No link is present. LINK Steady on A link is present. No data is being transmitted or received. Flashing Data is being transmitted and/or received. LINK/ACT LED Each interface on the following LPUs has a LINK/ACT LED: •...
-
Page 129: Switching Fabric Module Leds
LINK/ACT No link is present. Flashing Data is being transmitted and/or received on the interface. RUN LED The RUN LED description of different S12500 LPU models is the same. Table 49 RUN LED description Status Description Flashing green The LPU is operating correctly. -
Page 130: Appendix C Transceiver Modules
Figure 100. Figure 100 Loopback operation on a transceiver module The S12500 Routing Switch Series supports the following transceiver modules and cables: • 100-GE CFP transceiver modules • 40-GE QSFP+ transceiver modules •... -
Page 131: Ge Xfp Transceiver Modules
The LSUM1QSFP0 and QSFP-40G-LR4-WDM1300 cannot be connected to the 10-Gbps SFP+ module. 40-GE QSFP+ cables The LSWM1QSTK2 cables are used to connect only S12500 cards rather than connecting the S12500 and other products. Table 54 40-GE QSFP+ cable specifications Model... - Page 132 Central Max transmission Model Connector Fiber wavelength distance 62.5/125 µm 33 m (108.27 ft) multi-mode optical fiber XFP-SX-MM850-D 850 nm 50/125 µm multi-mode 300 m (984.25 ft) optical fiber 9/125 µm single-mode XFP-LX-SM1310 1310 nm 10 km (6.21 miles) optical fiber 9/125 µm single-mode XFP-LX-SM1310-D 1310 nm...
-
Page 133: Ge Sfp+ Transceiver Modules
Central Max transmission Model Connector Fiber wavelength distance 9/125 µm single-mode XFP-LX-SM1544.53 1544.53 nm 80 km (49.71 miles) optical fiber 9/125 µm single-mode XFP-LX-SM1546.12 1546.12 nm 80 km (49.71 miles) optical fiber 9/125 µm single-mode XFP-LX-SM1546.92 1546.92 nm 80 km (49.71 miles) optical fiber 9/125 µm single-mode XFP-LX-SM1547.72... -
Page 134: Ge Sfp+ Cables
Central Max transmission Model Connector Fiber wavelength distance 50/125 µm multi-mode 300 m (984.25 ft) optical fiber 62.5/125 µm multi-mode 33 m (108.27 ft) optical fiber SFP-XG-SX-M 850 nm M850-D 50/125 µm multi-mode 300 m (984.25 ft) optical fiber 62.5/125 µm multi-mode 33 m (108.27 ft) optical fiber SFP-XG-SX-M... - Page 135 FE/GE SFP transceiver modules Table 58 FE/GE SFP transceiver module specifications Central Max transmission Model Connector Fiber wavelength distance 50/125 µm multi-mode 550 m (1804.46 ft) optical fiber SFP-GE-SX-M 850 nm M850-A 62.5/125 µm multi-mode 275 m (902.23 ft) optical fiber 50/125 µm multi-mode 550 m (1804.46 ft) optical fiber...
- Page 136 Central Max transmission Model Connector Fiber wavelength distance SFP-GE-LH70- 9/125 µm single-mode 1570 nm 70 km (43.50 miles) SM1570-CW optical fiber SFP-GE-LH70- 9/125 µm single-mode 1590 nm 70 km (43.50 miles) SM1590-CW optical fiber SFP-GE-LH70- 9/125 µm single-mode 1610 nm 70 km (43.50 miles) SM1610-CW optical fiber...
-
Page 137: Appendix D Lightning Protection
Appendix D Lightning protection Connecting the AC power supply to a power strip with lightning protection If part of the AC power line is routed outdoors, use a power strip with lightning protection to connect the AC power cord of the switch to the AC power line to protect the switch from being damaged by lightning strikes. -
Page 138: Installing A Lightning Protector For A Network Port
If part of the network cable of a 10/100/1000 Mbps RJ-45 copper Ethernet port must be routed outdoors, connect a lightning protector to the cable before you plug the cable into the port. H3C recommends that you install a lightning protector for 10/100/1000 Mbps RJ-45 copper Ethernet ports. - Page 139 Installation procedure To install a lightning protector: Use a double-faced adhesive tape to stick the lightning protector onto the switch chassis, and make sure it is as close to the grounding screw of the switch as possible. Measure the distance between the protector and the grounding screw of the switch, cut the ground wire of the protector as appropriate, and securely tighten the ground wire to the grounding screw of the switch.
-
Page 140: Appendix E Engineering Labels
Appendix E Engineering labels Engineering labels are used to identify cables and devices for easy maintenance after installation. There are two types of engineering labels, labels for cables and labels for devices. Labels for cables Cables include signal cables such as network cables and fibers, and power cords such as AC power cords and DC power cords. -
Page 141: Generic Labels
Figure 103 Label for power cords (1) Cable tie (2) Dividing line on the label Generic labels A generic label is bar-shaped with fixed dimensions. It is applicable to both signal cables and power cords. A mark "TO:" is located at the upper left corner in the right area of the label to identify the peer end of the cable on which the label is affixed. -
Page 142: Labels For Devices
A device label is used to identify the device name, model, address, installation date, and so on. Filling in labels You can print or write desired contents on labels. H3C recommends that you print labels. To print labels, select a label printer and a proper label template as needed. For more information about using a label printer, see the user guide of the printer. -
Page 143: Affixing A Label To A Power Cord
Figure 105 Affixing a label Stick side B02 03 Figure 106 shows the affixed labels when the cable is laid vertically and horizontally. Figure 106 Affixed labels 03 12 Affixing a label to a power cord Stick the label to the recessed rectangular area on the identification plate. You can stick the label to either side of the identification plate. -
Page 144: Affixing A Generic Label
Figure 107 Affixing a label Bind cable ties on both ends of a cable. After the bundling, the finished identification plate should be on top of the cable in horizontal cabling, or on the right side of the cable in vertical cabling. Make sure the label is facing out, as shown in Figure 108. -
Page 145: Affixing A Label To A Device
Figure 109 Affixing a generic label Affixing a label to a device Remove the device label and stick it to the device. You can stick a device label to any desired position on the device. Guidelines • When you print, write, or affix labels, keep the labels clean. •... -
Page 146: Engineering Labels For Optical Fibers
Content Meaning Example Numbered in top-down and left-right order with two digits, for C—Slot number example, 01. D—Ethernet port Numbered in top-down and left-right order with two digits, for number example, 01. • M—Row number of the rack in the equipment room, in the range of A to Z. - Page 147 Table 60 Information on labels affixed to the fiber between two devices Content Meaning Example • M—Row number of the rack in the equipment room, in the range of A to Z. • N—Column number of the rack in the MN—Rack number equipment room, in the range of 01 to 99.
-
Page 148: Engineering Labels For Dc Power Cords
Content Meaning Example B—Row number of the terminal device In the range of 01 to 99, for example, 01-01. C—Column number of the terminal device R—Optical receiving interface T—Optical transmitting interface Figure 111 Example of a label on an optical fiber between two devices •... - Page 149 Table 62 Information on labels affixed to DC power cords Content Meaning • Loaded cabinet side—Only MN is used to identify the cabinet number (row number and column number in the equipment room). MN(BC)-–48Vn • Power cabinet side—MN identifies the row and column number of the power distribution equipment like the control cabinet and distribution box.
-
Page 150: Engineering Labels For Ac Power Cords
Engineering labels for AC power cords These labels are affixed to the AC cords that provide power for cabinets and protection grounding cables, including POWER, RTN, and PGND cables. The 220 VAC cables and related PGND and RTN cables are covered with insulating sheath, so the labels only need to contain "AC" and the cabinet number. - Page 151 Figure 115 Example of a device label...
-
Page 152: Appendix F Cable Management
Appendix F Cable management Label cables before you route or bundle them. For more information about labeling cables, see "Appendix E Engineering labels for cables." Cable management guidelines When you route and bundle up cables, follow these guidelines: • Bind cables neatly for easy maintenance and expansion. •... - Page 153 Figure 117 Binding the cables • When you route cables through sharp sheet metal penetration points or along sharp edges of mechanical parts, use bushings or take any other action to protect the cables from being cut or abraded. The sheet metal penetration points must be smooth and fully rounded. •...
-
Page 154: Cable Management Examples
Cable management examples The devices in the following figures are for illustration only. Figure 119 Network cable management Figure 120 Optical fiber management Use strapping tapes to carefully bind optical fibers. Avoid excessive force. For more information, see the instructions shipped with the strapping tapes. - Page 155 Figure 121 Power cord management...
- Page 156 Index A C D E F G I L M P R S T V Installing a chassis air filter (optional),15 Installing a fan tray,28 Affixing labels,134 Installing a lightning protector for a network port,130 Installing a power supply,26 Installing the switch in a rack,16 Cable management examples,146...
Need help?
Do you have a question about the S12500 and is the answer not in the manual?
Questions and answers