Table of Contents
Advertisement
Quick Links
Advertisement
Table of Contents

Related Manuals for LifeSpan Aqua Rower


Summary of Contents for LifeSpan Aqua Rower
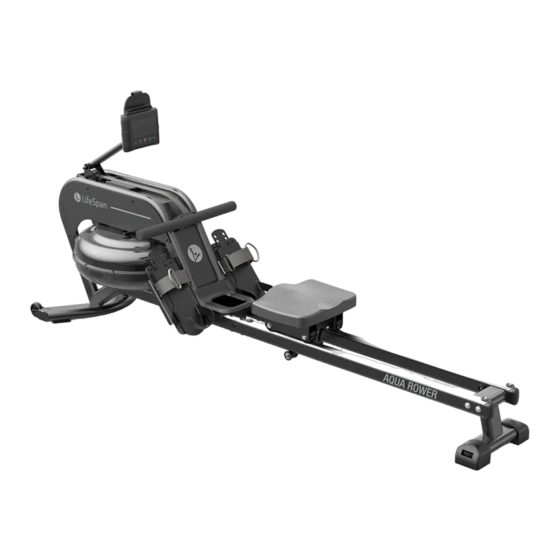
- Page 1 Life’s short. Live longer. Water Resistance Rower Owner’s Manual for Aqua Rower...
- Page 2 Welcome Congratulations on Purchasing Your LifeSpan Rower! At LifeSpan we take pride in the quality, safety, and reliability of our products as well as the professionalism of our sales support and customer service teams. We make it our number one priority that you have an exceptional experience using our products.
-
Page 3: Table Of Contents
Contents About Your Rower ......................Specifications Warranty, Registration Safety First ......................... Safety Tips Safety Clearance Assembling Your Rower ................... Exploded View & Hardware Assembly Instructions Leveling Your Rower ....................Level Adjustment Foot Adjustments ...................... How to Adjust Pedal Foot Strap Adjustments Console Basics ...................... -
Page 4: About Your Rower
About Your Rower Specifications Aqua Rower Resistance System Water Step Height 7.5” - 8” for rail. 13” for seat. Seat Travel 30.5” Max User Height 6’2” (1.87 m) Length x Width x 81.5” L x 20.3” W x 38.2” H Height 207 L x 51.5 W x 97 H cm... - Page 5 In order to insure our product warranty and to ensure the safe and efficient operation of your LifeSpan product, only authorized parts can be used. The warranty is void if any parts other than those provided by LifeSpan are used.
- Page 6 • This warranty is non-transferable from the original owner. Registration You must register your LifeSpan product before a warranty claim can be processed. To complete your registration online go to www.lifespanfitness.com/ support/registration. Registration must be completed within 60 days of delivery to activate the product warranty.
-
Page 7: Safety First
Safety First Important The rower should be used only for its intended purpose. Any other use of the item is prohibited and maybe dangerous. The importer cannot be held liable for damages or injuries caused by improper use of the equipment. The rower has been produced according to the latest safety standards. -
Page 8: Safety Clearance
Safety First • Wear shoes and never exercise barefoot. • Make certain, that other persons are not in the area of the home trainer, because other persons may be injured by the moving parts. • It is not allowed to place the item in rooms with high humidity (bathroom) or on the balcony. -
Page 9: Assembling Your Rower
Assembling Your Rower Exploded View Prior to starting the assembly process take all of the parts out of the box. Remove plastic bags and lay them out on the floor to become familiar with the components. Since your rower is a heavy piece of equipment it is recommended you use two people during assembly and follow these assembly instructions to reduce any problems that could occur. - Page 10 Assembling Your Rower Hardware Included Item# Part Description Tank Frame Rear Support 3R, 3L Rail Set, Right and Left Seat Set Console Set Hand Press Siphon Water Filling Funnel Hardware Bag Contents Item # Qty. Hardware Description M8x45 M8x15 M6x15 M8 Washer M8x57 Carriage Screws M8x27 Carriage Screws...
- Page 11 Assembling Your Rower 5mm Allen Wrench M8 x 45 M8 Washer (x4) (x4) Step 1: Install the Seat Install the Seat(5) with Rail Set(3R/3L), then flip over as picture shows. And assemble the Rear Support(2). Loosely assemble the four M8 Washers(11) and four M8x45 Screws(8). Do not fully tighten yet until the end of Step 2.
- Page 12 Assembling Your Rower 5mm Allen Wrench M8 x 57 M8 x 27 M6 x 15 (x4) (x2) (x6) Step 2: Insert the Rails Set with Tank Frame Insert the Rails Set(3R, 3L) with Tank Frame(1). Loosely screw in two M6x15 Screws(10) with M8 x 27 Carriage Screws(13) from each Rail Side and four M6x15 Screws(10) with M8 x 57 Carriage Screws(12) from bottom of rails, then tighten them all.
- Page 13 Assembling Your Rower 5mm Allen Wrench M8 x 15 M8 Washer (x4) (x8) Step 3: Install the Console Remove the two pre-installed screws The Console Set is pre-assembled (5), place it on the top of Tank Frame(1). Connect the wires as shown above. Use Allen Wrench to attach the Console Set to the frame using four M8x15 Screws(9) and Flat Washers(11).
-
Page 14: Leveling Your Rower
Leveling Your Rower Level Adjustment Adjust the Rear Stabilizers as needed if the machine is unbalanced during use. -
Page 15: Foot Adjustments
Foot Adjustments How to Adjust Pedal Foot size adjustment: Pull the top of the adjustable pedal until the holes are free from being locked around the raised locking pegs. Slide this part to the rear in order to fit bigger shoe sizes. Afterwards, align the holes in the adjustable pedal with the pegs and push back into place. -
Page 16: Foot Strap Adjustments
Foot Adjustments Foot strap adjustment Slide your feet underneath the foot strap. Pull the foot strap tight as shown and attach to Velcro. Release the foot strap: To release the foot strap, pull the D-ring up to release from Velcro. -
Page 17: Console Basics
Console Basics... - Page 18 Console Basics Function Buttons UP▲/ DOWN▼: To press these two buttons through available selection, to adjust the function value upward and downward. ENTER: To confirm selection. During training, press the button to scan each display function. START / STOP: To start or stop your selected workout program RESET: To reset the computer back to the main menu.
-
Page 19: Getting Started
Console Basics Getting Started Install 4 PCS AA batteries ➞ one long beep for 2 seconds. Then, the console will display the type for 2 seconds. The console will ask you to enter your desired level of effort (L1~L6). Use the up and down arrows to make your selection. -
Page 20: Manual Mode
Console Basics When you enter into the sport screen, the words MANUAL & RACE will flash to be selected. ▼ ▼ Press UP or DOWN to select , then press ENTER to confirm your selection. Manual Mode: Enter into the MANUAL mode, press UP to set the TIME. Press ENTER to confirm it. -
Page 21: Race Mode
Console Basics Race Mode Enter into the RACE mode and L9 will flash, the TIME/500M may display with default of 4:00 minutes time. Adjust your desired time by pressing UP or DOWN. Press ENTER to confirm. Where complete, you can set the distance of the race (500m ~ 10000m) while DISTANCE is blinking. - Page 22 Console Basics Press the START KEY to START and STOP will disappear. The USER & PC will display in the matrix. The race is over when the first one reaches the preset distance of the race. The window will display “PC WIN or USER WIN. When the race is over, you can press the START to race.
-
Page 23: Operations
Operations Rowing Guide Problem: Leaning Forward Wrong: The body leans too forward. The head and the shoulders are not in vertical alignment with the back. The body posture is weak. Correct: The body is more erect and pressed up to the legs. The arms are extended and relaxed, with the body tilted slightly forward. - Page 24 Operations Problem: Bending Arms Wrong: The body is positioned to pull with the arms instead of the legs. Arms are bent at the elbows and are not extended. Correct: Start the stroke by pushing with your legs, back braced, and arms extended.
- Page 25 Operations Rowing Guide Problem: Bending Wrist Hand Position Wrong: Bending your wrists at any time during the stroke. Correct: Keep wrists flat through the entire stroke.
- Page 26 Operations Problem: Locking Knees at End of Stroke Wrong: At the end of the stroke the knees are locked. Correct: At the end of the stroke keep legs slightly bent. Avoid locking your knees.
-
Page 27: Maintenance And Tips
Maintenance and Tips Heart Rate Monitoring Seeing your heart rate while exercising will help you understand the intensity of your exercise and corresponding heart rate training zone, and predict health benefits found through repeated bouts of exercise. Refer to the following information to understand your heart rate training zones:... - Page 28 Maintenance and Tips Zone 5 — Performance Redline Zone: 90% - 100% of your Max HR The performance zone involves extreme effort, requiring the heart to beat at or near maximum capacity. Training bouts include intense incline or sprinting, benefiting speed, power, and anaerobic performance competency. Zone 4 —...
-
Page 29: Moving Your Rower
Maintenance and Tips Moving Your Rower Lift up the Aqua Rower from the Rear Support until the two front wheels touch the floor. Then roll to your desired location. -
Page 30: Storage
Fold the console face down to the top of the frame. To store the rower, you have lift it up into a vertical position. WARNING : The seat will slide down/forward when the aqua rower is tilted up. -
Page 31: Regular Maintenance
Maintenance and Tips Regular Maintenance Apply a small amount of grease on the alloy rails and wipe off any grease. Apply grease every 1 month or if there is some noise. -
Page 32: Cleaning
If a change is required contact your local service provider. WARNING: Keep rower stable on flat ground. Over-exercising or inadequate training may result in physical injury. CAUTION: Acidic cleaning detergents may damage painted or powder coated surfaces and should not be used. Such cleaners may void the LifeSpan warranty. - Page 33 Maintenance and Tips Water Cup - Optional Bucket of Water Level Gauge Decal...
-
Page 34: Tank Filling And Water Treatment
Maintenance and Tips Tank Filling and Water Treatment Remove the Rubber Tank Plug from the top of the tank. Insert the Water Filling Funnel(7) into the tank. Place a large bucket of water next to the rower and position the Hand Press Siphon(6) with the rigid hose in the bucket and the flexible hose into the funnel as shown. - Page 35 Maintenance and Tips Rubber Tank Plug Empty Bucket...
-
Page 36: Changing Tank Water
Maintenance and Tips Changing Tank Water Remove the Rubber Tank Plug from the top of the tank. Insert the rigid end of the Hand Press Siphon(6) into the tank, and the flexible hose into a large bucket. The valve on top of the siphon must be closed to allow proper Note: drainage. -
Page 37: Troubleshooting
Maintenance and Tips Troubleshooting If you have a question that isn’t answered in this Owner’s Manual, visit our website at www.LifeSpanFitness.com or call us at 877.654.3837 x4. The rower is designed and manufactured to be reliable and easy-to-use. However, if you have a problem, these troubleshooting steps may help you find the cause. - Page 38 AQUA ROWER Water Resistance Rower LifeSpan Fitness 785 West 1700 South Suite 1 Salt Lake City, UT. 84104 Phone: 877.654.3837 www.LifeSpanFitness.com 2021 Version 1.1...
Need help?
Do you have a question about the Aqua Rower and is the answer not in the manual?
Questions and answers