LifeSpan DT7 Owner's Manual
Workplace
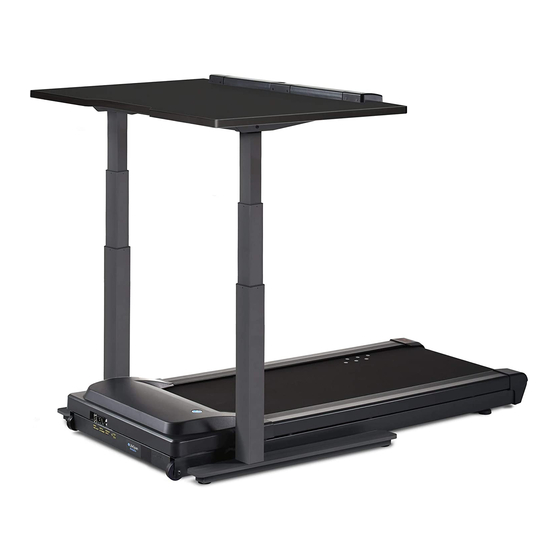
treadmill desk/bike desk
Hide thumbs
Also See for DT7:
- Quick start (2 pages) ,
- Owner's manual (36 pages) ,
- Owner's manual (21 pages)
Table of Contents
Advertisement
Advertisement
Table of Contents
Troubleshooting

Related Manuals for LifeSpan DT7


Summary of Contents for LifeSpan DT7
- Page 1 Treadmill Desk/Bike Desk Owner’s Manual...
- Page 2 If you need to contact LifeSpan customer service, visit our website at www.LifeSpanFitness.com and select customer service. Complete the information requested and we will respond to your inquiry within one business day.
-
Page 3: Table Of Contents
Safety Tips While in Use Grounding Desk Assembly Assembly Instructions Desk Console Assembly Assembly Instructions Treadmill to DT7 Desk Assembly Bike to DT7 Desk Assembly Moving Your Treadmill Desk Treadmill Desk Operations Specifications Setting the Clock Starting the Treadmill Desk Console Buttons Overview Preset Button &... -
Page 4: Getting Started
Getting Started... -
Page 5: Warranty
In order to insure our product warranty and to ensure the safe and efficient operation of your LifeSpan product, only authorized parts can be used. The warranty is void if any parts other than those provided by LifeSpan are used. Exclusions and Limitations: •... -
Page 6: Safety & Usage
• Use this product for its intended use as described in this Owner’s Manual. Do not use attachments that are not recommended by LifeSpan. • Do not leave your treadmill running while not in use. • A complete visual inspection and test of the features and functions of the assembled desk need to be made prior to use. - Page 7 Getting Started Safety Tips While in Use • Always consult a physician before beginning an exercise program. • If you experience chest pains, nausea, dizziness or shortness of breath, stop exercising immediately and consult your physician before continuing. Do not wear clothing or jewelry that might catch on any part of the treadmill.
-
Page 8: Children And Pets
Getting Started Children and Pets • Keep children from playing on your treadmill at all times. • When in use children and pets should be kept at least 10 feet (3m) away. • Cleaning and user maintenance shall not be made by children without supervision. -
Page 9: Grounding
Several power cord options (shown below) are available from LifeSpan. We do our best do include the correct power cord with the standing desk for your area. In the event that the correct power cord is not included in the packaging please contact your local distributor. - Page 10 Desk...
-
Page 11: Desk Assembly
Desk Assembly At LifeSpan we strive to make our equipment easy to assemble and use. Prior to starting the assembly process, take all the parts out of the box, remove plastic bags, and lay everything out on the floor to become familiar with the components. - Page 12 Desk Assembly Hardware Included Item# Part Description Item# Part Description Front Reinforcement Frame Left Desk Support Bracket Back Reinforcement Frame Right Desk Support Bracket Desktop Electronics Control Box Right Motorized Leg Power Cord Left Motorized Leg Height Adjust Cable Adapter Left Base Foot Right Base Foot Bag #...
- Page 13 Desk Assembly Step 1: Attach Right and Left Side Desk Support Brackets LOCATE BAG LABELED STEP 1 Contents: 6 each M8x12L Screws with Washers A. Attach the Left Desk Support Bracket(8) to the Left Motorized Leg(5). Each will have an “LLL” sticker attached for easy identification. Stand the leg on the motor side as shown in the illustration and align the bracket.
- Page 14 Desk Assembly Step 2: Attach Base Foot LOCATE BAG LABELED STEP 2 Contents: 8 each M8x55L Bolts with Washers A. Insert four M8x55L Bolts and Washers through the Left Base Foot (6). Align Left Base Foot(6) labelled "LLL" with the Left Motorized Leg(5) and connect the wires.
- Page 15 Desk Assembly Step 2: Attach Base Foot (Continued) NOTE: If using a 5 or 6 foot desktop you can still use the Desk Position Bumper on one side of your treadmill. 5mm Allen M8x55L (x8) Wrench w/ Phillips D. Connect the Left Base Foot(6) to the Left Motorized Leg(5) with the four installed M8x55L Bolts with Washers(14).
- Page 16 Desk Assembly Step 3: Attach Desktop to Posts LOCATE BAG LABELED STEP 3 Contents: 6 each M6x15L Screws A. Place the right post on top of the Desktop(3) as shown in the illustration. Tighten each of the three M6x15L Screws and Washers(15) as shown.
- Page 17 Desk Assembly Step 4: Attach Reinforcement Frame LOCATE BAG LABELED STEP 4 Contents: 8 each M8x35L Bolts/Washers, 6 each M6x15L Screws, 4 each M8x12L Screws/Lock Washers. A. Locate the Front Reinforcement Frame labelled (1) and the Back Reinforcement Frame labeled (2). Place these frames on Desktop with screw tabs down and facing each other as shown in figure below.
- Page 18 Desk Assembly NOTE: 72" desktop shown for clarity of frame components. When mounting the frame to smaller desktop sizes, the front and back reinforcement frame pieces slide and Front compress into shorter lengths. Using the six M6x15L Screws(17) attach both Reinforcement Frames to the Desktop as shown in the illustration.
- Page 19 Desk Assembly Step 5: Attach Electronics Controller Box LOCATE BAG LABELED STEP 5 Contents: 3 each M4x10L Screws/Washers A. Guide the cable with the square connector(B) to the middle of the desk as shown. Connect the 2 pin Power Cable(C) to the Electronics Controller Box(10). C.
- Page 20 Desk Assembly Step 6: Cable Preparation for Console Connect the 7 pin Data Cable(F) coming from the Front Reinforcement Frame(1) to the 7 pin Data Cable(G) coming from the Right Motorized Leg(4). Connect the 6 pin Height Adjustment Cable(E) coming from the Front Reinforcement Frame(1) to the 6 pin Height Adjustment Cable Adapter(12) included with the Electronics Control Box(10).
-
Page 21: Desk Console Assembly
Desk Console Assembly DT7 Console Assembly DT7 Console Box M4x15L 9 Pin Item # Qty. Part Description Data Cable Screw DT7 Console M4x15L Screw 9 Pin Data Cable... - Page 22 Desk Console Assembly Step 1: Turn Desk Upright A. Use 2 people to lift and turn the desk upright.
- Page 23 Desk Console Assembly Step 2: Console Assembly A. Using the 5mm Allen Wrench with Screwdriver remove the two pre- installed screws from the back and two screws from the bottom of each console end cap so you can remove the end caps. Notice the difference in the screws from the back and bottom as you will be replacing them back into their proper place.
- Page 24 Desk Console Assembly Step 3: Connecting Cables to Console LOCATE BAG LABELED STEP 6 Contents: 4 Cable Ties A. Locate end of Height Adjustment Cable(E) and Console Data Cable(F) coming from the Front Reinforcement Frame(1). B. Connect the cables (E, F) to the corresponding cables coming from bottom of Console(19).
- Page 25 Desk Console Assembly Step 4: Attach Power A. Connect the Power Cord(11) from Left Base Foot(6) to an outlet. Close-up...
-
Page 26: Treadmill To Dt7 Desk Assembly
DT7 Electric Treadmill Desk Assembly Treadmill to DT7 Desk Assembly A. Position the pre-assembled treadmill as shown below. Lift the rear of the treadmill and roll it forward under the desk until the Treadmill Locator Cap(D) located on the treadmill are centered over the Locator Knob(A) at the base of the uprights. -
Page 27: Bike To Dt7 Desk Assembly
DT7 Electric Bike Desk Assembly Bike to DT7 Desk Assembly A. Position the pre-assembled bike as shown below. Tilt the front of the bike up and roll it forward under the desk to the desired position. Roll Forward Tilt Back... -
Page 28: Moving Your Treadmill Desk
DT7 Electric Treadmill Desk Moving Moving Your Treadmill Desk Lift the desk via the frame. If lifting from the desktop or attachments, mounting hardware under the desktop could pull out causing personal or property damage. Move the desk to a level surface and adjust leveling feet as necessary. -
Page 29: Treadmill Desk Operations
Treadmill Desk Operation... -
Page 30: Specifications
Treadmill Desk Operation Specifications CONSOLE Time, Steps, Calories, Readouts Distance, Speed White LED Display Bluetooth Power, Start, Stop, Pre-Set Speed, Buttons Speed Up/Down, Change Display, Bluetooth, Desk Height Up/Down, 2 Desk Height Presets MECHANICS & PERFORMANCE 0.4 - 4.0 mph* Speed Range 0.6 - 6.4 kph 38”... -
Page 31: Setting The Clock
Smartphone Automatic Adjustment The clock will automatically adjust to the correct date and time if you use the LifeSpan phone app when you sync your exercise results via bluetooth. The app can be downloaded in Google Play or the Apple iTunes store. -
Page 32: Starting The Treadmill Desk
Treadmill Desk Operation Starting the Treadmill Desk Turn the On/Off toggle switch located on the front right corner of the treadmill to the On position. If this is already On, press the On/Off button to turn On the console. Make sure the Safety Key is engaged in the console. NOTE: The display will show "–––"... -
Page 33: Console Buttons Overview
Bluetooth: Turns on Bluetooth communications. Phone apps available from LifeSpan can use this system to track your activity. See the Bluetooth section for more details. You can change the function of this button in Settings. -
Page 34: Innovative Features
This feature may be disabled in Settings, setting Preset to OFF. Default is ON. Bluetooth Operation To sync your activity data with your LifeSpan app, press the Bluetooth button, and hold your phone a couple of inches from the console. Syncing will take only a few seconds. - Page 35 • Metric versus Standard Readouts: Change the display readouts for speed and distance to Metric or back to standard readouts. Interlocking Frames – Since the DT7 is designed specifically to be used for walking with our treadmills, we design this with an extra-large base for added...
-
Page 36: Troubleshooting
Problem: The treadmill speed doesn’t feel right (either too fast or too slow). Solution: Go into the Personal Settings section (page 44) and check if you are in Metric or English mode. If you are in the correct mode, contact LifeSpan customer service. - Page 37 Problem: The console isn’t connecting to the app via Bluetooth. Solution: Go to lifespanfitness.com/apps/active-trac-setup. If further assistance is needed, contact LifeSpan Customer Service. Problem: The desktop surface is not level. Solution: Check to make sure the base feet are on a level surface. Run...
-
Page 38: Personal Settings
Treadmill Desk Operation Personal Settings Press and hold Change Display for one second to enter Settings mode. Press the up or down arrows to move through the various settings. Press Start to choose a setting to change. Press the up or down arrows to move through the various choices for that setting. -
Page 39: Display Details
Treadmill Desk Operation Display Details Setting Choice 1 Setting Choice 2 Displayed (Default) Enter Settings SETTG mode: Intelli-Guard GUARD Speed Reset: RESET Beep: BEEP Speed Limit: Pre Set: Preset Speed SPEED +/- 0.1 User Weight: 150/70 +/- 1 Units of Measure: UNITS ENGL (M)TRIC... -
Page 40: Bike Desk Operations
Bike Desk Operation... -
Page 41: Specifications
Bike Desk Operation Specifications COMPARE CONSOLES Time, Revolutions, Calories, Readouts Distance, Speed Display Bluetooth MECHANICS & PERFORMANCE Resistance Level 16 Levels 38” w x 29” d in– (96.52” w x 73.66 d cm) Four Optional 48” w x 29” d in – (120.65 w x 73.66 d cm) Sizes: Dimensions 60”... -
Page 42: Setting The Clock
Smartphone Automatic Adjustment The clock will automatically adjust to the correct date and time if you use the LifeSpan phone app when you sync your exercise results via bluetooth. The app can be downloaded in Google Play or the Apple iTunes store. -
Page 43: Starting The Bike Desk
Bike Desk Operation Starting the Bike Desk Press the On/Off button to turn on the console. Press the Start, and start pedaling. The console will start counting up from 0:00. Press the Up/Down buttons to adjust resistance. -
Page 44: Console Buttons Overview
Bluetooth: Turns on Bluetooth communications. Phone apps available from LifeSpan can use this system to track your activity. See the Bluetooth section for more details. You can change the function of this button in... - Page 45 4.0 or later, also known as Bluetooth Low Energy. All iPhones and most Android phones have this. To sync your activity data with your LifeSpan app, press the Bluetooth button, and hold your phone a couple of inches from the console. Syncing will take only a few seconds.
-
Page 46: Troubleshooting
Solution: Check to make sure the bike is properly plugged in. Make sure the connectors on the bike and under the desktop are fully plugged in. If the problem persists contact LifeSpan customer service. Problem: “UART” appears in the display. -
Page 47: Personal Settings
Bike Desk Operation Personal Settings Press and hold Change Display for one second to enter Settings mode. Press the up or down arrows to move through the various settings. Press Start to choose a setting to change. Press the up or down arrows to move through the various choices for that setting. -
Page 48: Display Details
Bike Desk Operation Display Details Setting Choice 1 Setting Choice 2 Displayed (Default) Enter Settings SETTG mode: Beep: BEEP User Weight: 150/70 +/-1 Units of Measure: UNITS ENGL (M)TRIC Multi-User: USER Bluetooth-Auto: BT-A Sleep SLEEP 10/20... - Page 49 Treadmill/Bike Desk Manufacture Date: LifeSpan Fitness 785 West 1700 South Suite 1 Salt Lake City, UT. 84104 Phone: 877.654.3837 www.LifeSpanFitness.com Version 2.1 - Sept. 2017...
Need help?
Do you have a question about the DT7 and is the answer not in the manual?
Questions and answers