Advertisement
Quick Links
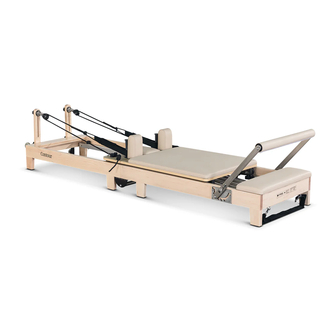
Contour Folding Wooden
Pilates Reformer Bed Set
Product may vary slightly from the item pictured due to model upgrades.
Read all instructions carefully before using this product.
Retain this owner's manual for future reference.
NOTE:
This manual should not be used to guide your purchasing decision. Your product, and the contents inside its carton, may vary
from what is listed in this manual. This manual may also be subject to updates or changes. Updated manuals are available
through our website at
www.lifespanfitness.com.au
USER MANUAL
Advertisement

Related Manuals for LifeSpan Contour Folding Wooden Pilates Reformer Bed Set


Summary of Contents for LifeSpan Contour Folding Wooden Pilates Reformer Bed Set
- Page 1 Contour Folding Wooden Pilates Reformer Bed Set USER MANUAL Product may vary slightly from the item pictured due to model upgrades. Read all instructions carefully before using this product. Retain this owner’s manual for future reference. NOTE: This manual should not be used to guide your purchasing decision. Your product, and the contents inside its carton, may vary from what is listed in this manual.
-
Page 2: Table Of Contents
TABLE OF CONTENTS Important Safety Instructions ....... 03 II. Parts List ............05 III. -
Page 3: Important Safety Instructions
I. IMPORTANT SAFETY INSTRUCTIONS The proper utilization of Pilates equipment can enhance the execution of numerous Pilates exercises in a secure and efficient manner. Nevertheless, it is crucial to exercise care and caution due to the potential risks associated with exercise equipment, particularly when spring resistance is involved. If you lack experience or are using this equipment for the first time, it is essential to have a trained professional supervise your usage. - Page 4 Equipment Usage: 1. Adjust the equipment settings, such as foot bar height and spring tension, according to your instructor’s guidance and your fitness level. 2. Always check that the springs and straps are in good condition and securely attached before use. 3.
-
Page 5: Parts List
II. PARTS LIST Rope (1x) Feet/handle Strap (2x) Risers (2x) and Lock Pin (6x) Carriage Stopper (2x) (Pre-installed on Risers) Carabiner Clips (2x) (Pre-installed on frame) Shoulder Rest Block (2x) Handles (2x) Springs Jump Board (1x) Box (1x) Red (3x), Green (1x), Yellow (1x) PARTS LIST |... - Page 6 Foot Strap (1x) Reformer Frame Allen Keys Wrenches | PARTS LIST...
-
Page 7: Assembly Instructions
III. ASSEMBLY INSTRUCTIONS UNPACK THE CARTON 1. Remove the parts out of the carton. Ensure you have enough space for assembly. WARNING Since no springs are attached, the carriage is not locked in position and may start to roll, be extra cautious when moving the unit. 2. - Page 8 ASSEMBLE THE SPRINGS & ADJUSTING THE GEAR FIG 1 FIG 2 1. Hook the springs under the carriage (Fig 2) and on the Gear Selector (Fig. 1) as pictured. The order of the spring colours does not matter. 2. You have 10 gear slots (Fig. 1) to choose from. Colour Green Yellow...
- Page 9 ASSEMBLE THE CARRIAGE STOPPER 1. Insert the Carriage stopper on the inside of the reformer frame. You can chose from the slots there based off your height. Taller users may need to bring the stopper further away from the foot bar and gear section.
- Page 10 ASSEMBLE THE RISERS AND ROPES FIG 1 FIG 2 1. Unscrew the 2x knobs at the bottom of the Riser. Once the knobs are removed, place the Riser on the frame (next to wheels) and align the holes. Re-tighten with the same knob screws. Repeat for the other side (Fig.
- Page 11 FIG 1 FIG 2 FIG 3 3. Ropes: Attach the looped end of the rope to the handle strap by feeding the loop to the metal hoop (Fig. 1) then with the other end of the rope, feed it into the looped rope hole (Fig 2). Pull the rope until taut (Fig.
- Page 12 7. Then insert them into the rope clamps on the carriage to your preferred length and according to the exercise you wish to perform. NOTE: Longer ropes create less tension and shorter ropes create more tension. FIG 1 FIG 2 8.
- Page 13 ADJUSTING THE FOOT BAR WARNING Ensure that the rod of the foot bar support bar is fully engaged in both of its positioning slots (left and right sides) before beginning any exercise. Failure to do so can result in serious injury.
- Page 14 FIG 2 FIG 3 2. Take off the foot platform by pulling it up and out of slot. 3. Slot the jump board into the same slot and move the foot bar so it rests firmly behind the jump board (Fig.
- Page 15 USING THE LONG/SHORT BOX You can place the box on the Reformer vertically or horizontally under the shoulder rest according to your exercise. ATTACHING THE FOOT STRAP 1. To use the foot strap, clip on the carabiner on the side of the foot platform then attach the (1x) Foot strap to the carabiner.
- Page 16 MOVING THE REFORMER FOLDED: 1. To move the Reformer when it is folded, simply tilt it onto the transportation wheels below and move it to your desired location. REPLACING SPRINGS To replace worn springs simply unhook the springs from both ends. Then simply re-hook the springs back on for the replacements.
-
Page 17: Exercise Guide
IV. EXERCISE GUIDE PLEASE NOTE: Before beginning any exercise program, consult your physician. This is important especially if you are over the age of 45 or individuals with pre-existing health problems. The pulse sensors are not medical devices. Various factors, including the user’s movement, may affect the accuracy of heart rate readings. - Page 18 COOL DOWN Finish each workout with a light jog or walk for at least 1 minute. Then complete 5 to 10 minutes of stretching to cool down. This will increase the flexibility of your muscles and will help prevent post- exercise problems.
-
Page 19: Warranty
Any claim against this warranty must be made through your original place of purchase. Proof of purchase is required before a warranty claim may be processed. If you have purchased this product from the Official Lifespan Fitness website, please visit https://lifespanfitness.com.au/warranty-form For support outside of warranty, if you wish to purchase replacement parts or request a repair or service, please visit https://lifespanfitness.com.au/warranty-form and fill in our Repair/Service... - Page 20 WWW.L IF ESPAN F ITNE S S . COM . A U...
Need help?
Do you have a question about the Contour Folding Wooden Pilates Reformer Bed Set and is the answer not in the manual?
Questions and answers