Table of Contents
Advertisement
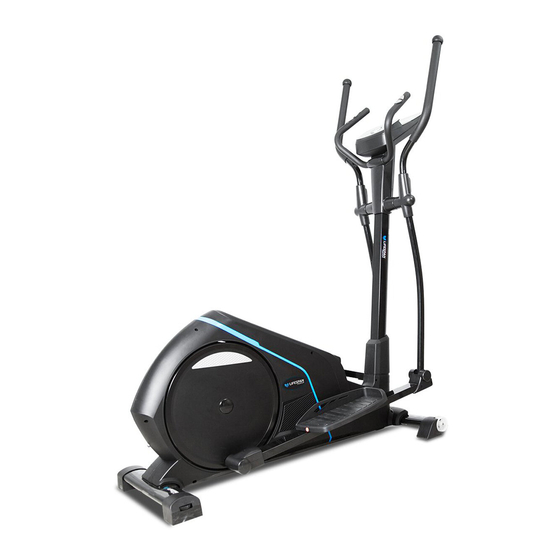
X-41 OWNER'S MANUAL
Product may vary slightly from the item pictured due to model upgrades
Read all instructions carefully before using this product. Retain this owner's manual for
future reference.
NOTE: This manual may be subject to updates or changes. Up to date manuals are available through our website at www.lifespanfitness.com.au
Advertisement
Table of Contents

Related Manuals for LifeSpan X-41


Summary of Contents for LifeSpan X-41
- Page 1 X-41 OWNER’S MANUAL Product may vary slightly from the item pictured due to model upgrades Read all instructions carefully before using this product. Retain this owner’s manual for future reference. NOTE: This manual may be subject to updates or changes. Up to date manuals are available through our website at www.lifespanfitness.com.au...
-
Page 2: Table Of Contents
TABLE OF CONTENTS IMPORTANT SAFETY INSTRUCTIONS CARE INSTRUCTIONS EXPLODED DIAGRAM PARTS LIST ASSEMBLY INSTRUCTIONS COMPUTER OPERATION EXERCISE GUIDE WARRANTY X-41... -
Page 3: Important Safety Instructions
Before using the equipment, check that the nuts and bolts are securely tightened. If you hear any unusual noises coming from the equipment during use and assembly, stop immediately. Do not use the equipment until the problem has been rectified. X-41... -
Page 4: Care Instructions
Lubricate moving joints with grease after periods of usage b. Be careful not to damage plastic or metal parts of the machine with heavy or sharp objects c. The machine can be kept clean by wiping it down using dry cloth X-41... -
Page 5: Exploded Diagram
3. EXPLODED DIAGRAM X-41... -
Page 6: Parts List
Hex screw M8x16 D-shape washer Hand pulse wire Spring washer D10 Sensor wire Hex screw M10x20 Long axle Screw M5x10 57a/b Protective guard 28a/b Protective guard Protective guard Hex bolt M10x55 Extension wire Flat washer D10xΦ20x2 Flat washer D10xΦ20x2 X-41... -
Page 7: Assembly Instructions
Remove the Plastic mat (A), Hex screw (17), Spring washer (18) and Arc washer (16) from the Front bottom tube (2) and Rear bottom tube (3). b) Install the Front bottom tube (2) and Rear bottom tube (3) to the Main frame (1) using removed parts from previous step. X-41... -
Page 8: Main Frame (
Connect the Extension wire (59) with Sensor wire (55). Then attach the Handlebar post (4) onto the Main frame (1) with Hex screw (53), spring washer (18) and Flat washer (12). c) Slide the Protective guard (58) down over the joint. X-41... -
Page 9: D-Shape Washer 4
(38), Flat washer (30) and Nylon nut (31). Then lock Hex screw (26), Screw (37) and Nylon nut (31) tightly. d) Attach the Pedal (34L/R) on the Pedal support (8L/R) tightly with Hex screw (33) and Flat washer (12). X-41... - Page 10 X-41...
- Page 11 Thread the Hand Pulse wire (54) into the hole of Handlebar post (4), then feed it out of computer bracket. c) Attach the fixed handlebar (5) onto the Handlebar post (4) tightly with Hex screw (53) and spring washer (18). X-41...
-
Page 12: Philips Pan Head Screw
Philips pan head screw (41). b) Attach the Protective guard (36L/R) onto the connection of Swing tube (7L/R) and Pedal support (8L/R) with Philips pan head screw (35). c) Attach the Protective guard (28a/b) onto the Pedal tube joint (23L/R) with Screw (27). X-41... - Page 13 X-41...
-
Page 14: Computer
Connect the Extension wire (59) and hand pulse wire (54) with the connecting wire from the Computer (47). b) Attach the computer (47) on the bracket of the Handlebar post (4) with Screw (52). c) Lock the Protective guard (51a/b) on the Handlebar post (4) tightly with Philips pan head screw (35). X-41... -
Page 15: Computer Operation
Display range 0 ~ 99.99;setting range0 ~ 99.00KM DISTANCE CALORIES Display range 0 ~ 9999;setting range 0 ~ 9990Cal. PULSE Display range P-30 ~ 230;setting range 0-30 ~ 230 Display range 999;setting range 10 ~ 350 WATT SPEED 0.0~99.9KM/H 0~999 revolutions X-41... - Page 16 When MANUAL is showing in the program select sequence, press MODE to select. Enter TIME setting using UP/DOWN keys (Image 4) and confirm with MODE. Then set DISTANCE/CALORIES/PULSE (Image 5~8). Press START/STOP to start. Use UP/DOWN keys to adjust LOAD level during workout. Image 5 Image 4 Image 6 Image 8 Image 7 X-41...
- Page 17 Image 12 Image 11 Image 14 Image 13 5. CARDIO Mode: CARDIO Mode uses your age to calculate a target heart rate. LOAD will be applied during your workout. Select CARDIO from the program set options (Image 15). Image 15 X-41...
- Page 18 LOAD according to your settings Select WATT from the program set options (Image 19). Select desired WATT SETTING between 10~340 (default 120). Select desired workout TIME between 1~99 minutes or START directly. Image 19 Image 20 Image 21 X-41...
- Page 19 Press BODY FAT button and use UP/DOWN to set user profile (Images 24~26). Image 25 Image 26 Image 24 Once all values are set, place your hands on the pulse sensors for 8 seconds and the computer will take your reading (Image 27) Image 27 X-41...
- Page 20 5. WATT exceeds setting value- 3 short beeps every second Speaker Function: Plug in your device via the AUX port. USB power charger: Plug data cable into USB port. Power will be supplied while the machine is turned on. X-41...
-
Page 21: Exercise Guide
So as you can see, the fitter you are, the healthier and greater you will feel. Warm-up Start each workout with 5 to 10 minutes of stretching and some light exercises. A proper warm-up increases your body temperature, heart rate and circulation in preparation for exercise. Ease into your exercise. X-41... -
Page 22: Workout Guidelines
This will increase the flexibility of your muscles and will help prevent post-exercise problems. Workout Guidelines TARGET ZONE This is how your pulse should behave during general fitness exercise. Remember to warm up and cool down for a few minutes. X-41... -
Page 23: Warranty
Please visit our website to view our full warranty terms and conditions: http://www.lifespanfitness.com.au/warranty-repairs Warranty and Support: Please email us at support@lifespanfitness.com.au for all warranty or support issues. For all warranty or support related enquiries an email must be sent before contacting us via any other means. X-41... - Page 24 This will eliminate the movement and static electricity factors. If your hands are dry, then wet them slightly (saliva works as a great conductor if this doesn’t bother you). For more information, please contact our Lifespan Technical Support Department www.lifespanfitness.com.au support@lifespanfitness.com.au...
Need help?
Do you have a question about the X-41 and is the answer not in the manual?
Questions and answers