Advertisement
Quick Links
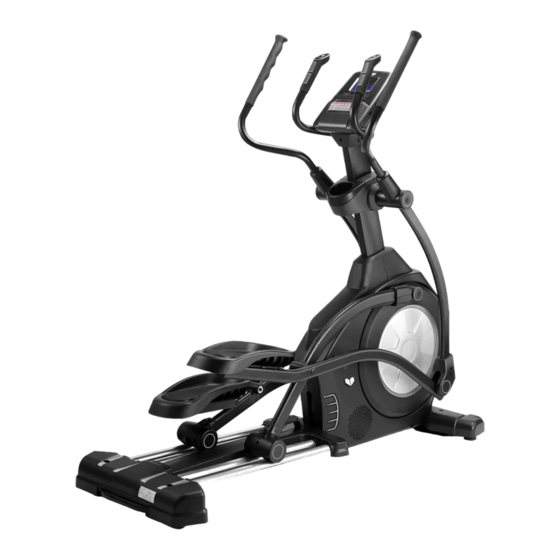
XT-40 ASCENDER INCLINE
CROSS TRAINER
OWNER'S MANUAL
Product may vary slightly from the item pictured due to model upgrades
Read all instructions carefully before using this product. Retain this owner's manual for future
reference.
NOTE: This manual may be subject to updates or changes. Up to date manuals are available through our website at www.lifespanfitness.com.au
Advertisement

Related Manuals for LifeSpan XT-40


Summary of Contents for LifeSpan XT-40
- Page 1 XT-40 ASCENDER INCLINE CROSS TRAINER OWNER’S MANUAL Product may vary slightly from the item pictured due to model upgrades Read all instructions carefully before using this product. Retain this owner’s manual for future reference. NOTE: This manual may be subject to updates or changes. Up to date manuals are available through our website at www.lifespanfitness.com.au...
-
Page 2: Table Of Contents
TABLE OF CONTENTS IMPORTANT SAFETY INSTRUCTIONS CARE INSTRUCTIONS EXPLODED DIAGRAM PARTS LIST ASSEMBLY INSTRUCTIONS COMPUTER OPERATION EXERCISE GUIDE WARRANTY... -
Page 3: Important Safety Instructions
1. IMPORTANT SAFETY INSTRUCTIONS WARNING - Read all instructions before using this machine. It is important your machine receives regular maintenance to prolong its useful life. Failing to regularly maintain your machine may void your warranty. Please keep this manual with you at all times It is important to read this entire manual before assembling and using the equipment. -
Page 4: Care Instructions
This equipment is designed for indoor and family use only. Care must be taken when lifting or moving the equipment so as not to injure your back. 10. Always keep this instruction manual and assembly tools at hand for reference. 11. -
Page 5: Exploded Diagram
3. EXPLODED DIAGRAM... -
Page 6: Parts List
4. PARTS LIST... -
Page 9: Assembly Instructions
5. ASSEMBLY INSTRUCTIONS A. Before assembling make sure that you will have enough space around the item. B. Use the present tooling for assembling. C. Before assembling please check whether all needed parts are available. Above of this instruction sheet you will find an explosion drawing with all single parts (marked with numbers) which this item consists of. - Page 10 FIG. 3 FIG.3: 1. As shown in the figure, remove two 4.2*19 cross groove head tapping screws (21) pre-locked on the main frame assembly (1) and lock the rear cover (41) on the main frame assembly (1). FIG.4 FIG.4: 1. As shown in the figure, the chain cover rear cover (43) and chain cover front cover (43) is assembled on the main frame assembly (1).
- Page 11 FIG. 6 FIG.6: 1. As shown in the figure, three screws (21) which are pre-locked on the instrument tube assembly (44) are removed first. Then, the instrument back cover (49) and the instrument front cover (48) are fixed on the instrument tube assembly (44) with three self-tapping screws (21) with 4.2*19 cross groove disk head.
-
Page 12: Computer Operation
6. COMPUTER OPERATION Function: Program: 21 programs as following A: 1 Manual Program (See fig.1) B: 10 Preset Program Profile: (See fig.2-fig.11) Fig. 2 Fig. 3 Fig.4 Fig. 5 Fig. 6 Fig. 7 Fig. 8 Fig. 9 Fig. 10 Fig. 11 P1: ROLLING P2: VALLEY P3: FAT BURN... - Page 13 D: 4 Heart Rate Control Program: (See fig.13-fig.16) 55% H.R, 75% H.R, 90% H.R AND TARGET H.R Fig. 13 Fig. 14 Fig. 15 Fig. 16 E: 4 User Setting Programs: CUSTOM1 TO CUSTOM4 (See fig.17-fig.20) Fig. 17 Fig. 18 Fig. 19 Fig.
- Page 14 Buttons: ENTER: In "stop" mode (display STOP), press ENTER button to enter program selection and setting value which flash • in related window. A: When you choose the program, press Enter to confirm the one you like. B: When in setting, press ENTER to confirm the value that you would like to preset. During the start mode (display START), press ENTER to choose to display the speed or RPM or switch •...
- Page 15 Operation: Turn on the computer Plug in one end of the adaptor to the AC electrical source and connect the other end to the computer. The computer will beep and enter initial mode. (See fig.24) Program select and value setting •...
- Page 16 Fig.29 Fig. 30 Press START/ STOP to begin exercise. Note: The WATT value is decided by the TORQUE and RPM. In this program, the WATT value will keep at constant value. It means that if you pedal quickly, the load resistance will decrease and if you pedal slowly, the load resistance will increase to ensure you are at the watt value.
- Page 17 Note: During exercise, the user's heart rate value depends on resistance level and speed. The heart rate control program is to ensure your heart rate within the preset value. When the computer detects your current heartrate is higher than preset, it will decrease the resistance level automatically or you may slow down exercise. If your current heart rate is lower than preset, it will increase resistance and you may speed up.
- Page 18 ① During the body fat measurement, place both your palms on the contact pads. The test result is: FAT%, Note: BMR (Basal Metabolic Rate), BMI (Body Mass Index), BODY and body shape. (See fig.40) Fig. 39 Fig. 40 FAT%: The total body fat in our body measured by percentage. BMR: Basal Metabolic Rate (metabolism) is the energy (measured in calories) expended by the body at rest to maintain normal bodily function.
- Page 19 Pulse Measurement Please place both your palms on the contact pads and the computer will show your current heartbeat rate in beats per minute (BPM) on the LCD after 3~4 seconds. During the measurement, heart icon will flash with simulative ECG showing. Remark: During the process of pulse measurement, because of the contact jamming, the measurement value may not be stable when start, then it will return to normal level.
-
Page 20: Exercise Guide
7. EXERCISE GUIDE PLEASE NOTE: Before beginning any exercise program, consult your physician. This is important especially if you are over the age of 45 or individuals with pre-existing health problems. The pulse sensors are not medical devices. Various factors, including the user’s movement, may affect the accuracy of heart rate readings. - Page 21 5. INSIDE UPPER THIGH Sit on the floor and place your feet in such a way that your knees are facing outwards. Pull your feet as close as possible to your groin. Now press your knees carefully downwards. Maintain this position for 30-40 seconds if possible.
-
Page 22: Warranty
8. WARRANTY AUSTRALIAN CONSUMER LAW Many of our products come with a guarantee or warranty from the manufacturer. In addition, they come with guarantees that cannot be excluded under the Australian Consumer Law. You are entitled to a replacement or refund for a major failure and compensation for any other reasonably foreseeable loss or damage. - Page 23 This will eliminate the movement and static electricity factors. If your hands are dry, then wet them slightly (saliva works as a great conductor if this doesn’t bother you). For more information, please contact our Lifespan Technical Support Department www.lifespanfitness.com.au support@lifespanfitness.com.au...
Need help?
Do you have a question about the XT-40 and is the answer not in the manual?
Questions and answers