Advertisement
Quick Links
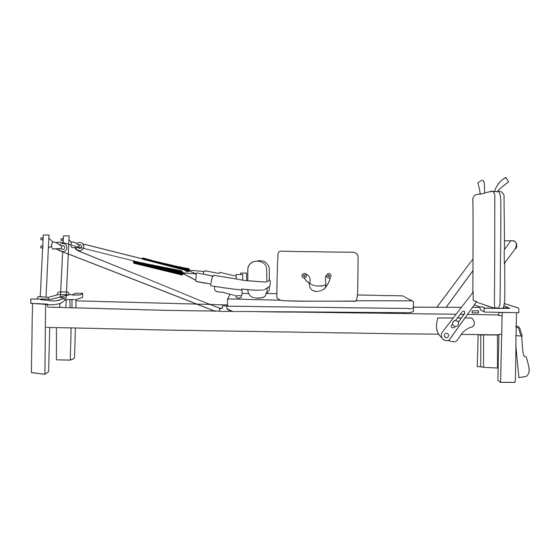
Contour Pro Studio Aluminium
Reformer Pilates Bed Set
Read all instructions carefully before using this product.
Retain this owner's manual for future reference.
IMPORTANT
This manual contains important assembly, safety and warranty information. Read the manual
carefully before using your new equipment and keep the manual on hand for future reference.
UNSAFE OR IMPROPER USE OF THIS EQUIPMENT BY FAILING TO READ AND COMPLY WITH ALL REQUIREMENTS AND WARNINGS COULD
RESULT IN SERIOUS INJURY.
USER MANUAL
Advertisement

Summary of Contents for LifeSpan Contour Pro Studio Aluminium Reformer Pilates Bed Set
- Page 1 Contour Pro Studio Aluminium Reformer Pilates Bed Set USER MANUAL Read all instructions carefully before using this product. Retain this owner’s manual for future reference. IMPORTANT This manual contains important assembly, safety and warranty information. Read the manual carefully before using your new equipment and keep the manual on hand for future reference. UNSAFE OR IMPROPER USE OF THIS EQUIPMENT BY FAILING TO READ AND COMPLY WITH ALL REQUIREMENTS AND WARNINGS COULD RESULT IN SERIOUS INJURY.
-
Page 2: Table Of Contents
TABLE OF CONTENTS Important Safety Instructions ....... 03 II. Parts List ............05 III. -
Page 3: Important Safety Instructions
I. IMPORTANT SAFETY INSTRUCTIONS The proper utilization of Pilates equipment can enhance the execution of numerous Pilates exercises in a secure and efficient manner. Nevertheless, it is crucial to exercise care and caution due to the potential risks associated with exercise equipment, particularly when spring resistance is involved. If you lack experience or are using this equipment for the first time, it is essential to have a trained professional supervise your usage. - Page 4 Equipment Usage: 1. Adjust the equipment settings, such as foot bar height and spring tension, according to your instructor’s guidance and your fitness level. 2. Always check that the springs and straps are in good condition and securely attached before use. 3.
-
Page 5: Parts List
II. PARTS LIST Risers (2x) and Pin (2x) Handle (2x) Shoulder Rest Block Set (2x) Rope (1x) Feet/handle Strap (2x) Foot Strap Attachment Jump Board (1x) Box (1x) Foot Platform (1x, pre-assembled) PARTS LIST |... -
Page 6: Assembly Instructions
III. ASSEMBLY INSTRUCTIONS UNPACK THE CARTON WARNING Since no springs are attached, the carriage is not locked in position and may start to roll, be extra cautious when moving the unit. 1. Remove the parts out of the carton. Ensure you have enough space for assembly. CAUTION: You may need 2 people to lift the frame out of box. - Page 7 ASSEMBLE THE HANDLE 1. Screw in the handles to the Carriage near the head rest. ASSEMBLE THE SHOULDER REST BLOCKS 1. Install the shoulder rest blocks as pictured behind the handle using the washer and nut that pre installed on the blocks. 2.
- Page 8 ASSEMBLE THE ROPES & FEET/HANDLE STRAP 1. Attach the handle strap to the looped end of the rope to form a loop-to-loop knot. Repeat for the other rope then rest your handles on the shoulder blocks. 2. Feed the other end of the rope into the pulley on the risers. | ASSEMBLY INSTRUCTIONS...
- Page 9 3. Then insert them into the rope clamps on the carriage to your preferred length and according to the exercise you wish to perform. NOTE: Longer ropes create less tension and shorter ropes create more tension. 4. For the excess ropes, wrap them around the clamp. NOTE: Make sure that the ropes are adjusted to equal lengths and the ropes are properly secured.
- Page 10 INSERT CARRIAGE STOPPER 1. Carriage stoppers are pre-installed on the frame but you can move them according to your height. WARNING: The carriage stopper must be inserted AT ALL TIMES. Using the Reformer without the carriage stopper may cause damage to the gear bar assembly, rollers or spring holder. ASSEMBLE THE SPRINGS FIG 1 FIG 2...
- Page 11 ASSEMBLE FOOT STRAP ATTACHMENT How to use Foot strap: 1. Attach the strap attachment as pictured. Ensure to fully tighten the clip. JUMP BOARD SET UP 1. Remove the foot platform by lifting it up and out. Then slot in the jump board. ASSEMBLY INSTRUCTIONS |...
- Page 12 BOX SET UP 1. Place the box on the carriage vertically or horizontally under the shoulder pads for your preferred exercise. STORING THE REFORMER UPRIGHT FIG 1 FIG 2 WARNING: You need a height of 2.5m for your ceiling 1. Remove the Risers and Rope from the Reformer. 2.
- Page 13 REPLACING SPRINGS To replace worn springs simply unhook the springs from both ends. Ensure to place the coloured springs in the same spot. ASSEMBLY INSTRUCTIONS |...
-
Page 14: Exercise Guide
IV. EXERCISE GUIDE PLEASE NOTE: Before beginning any exercise program, consult your physician. This is important especially if you are over the age of 45 or individuals with pre-existing health problems. The pulse sensors are not medical devices. Various factors, including the user’s movement, may affect the accuracy of heart rate readings. - Page 15 COOL DOWN Finish each workout with a light jog or walk for at least 1 minute. Then complete 5 to 10 minutes of stretching to cool down. This will increase the flexibility of your muscles and will help prevent post- exercise problems.
-
Page 16: Warranty
Any claim against this warranty must be made through your original place of purchase. Proof of purchase is required before a warranty claim may be processed. If you have purchased this product from the Official Lifespan Fitness website, please visit https://lifespanfitness.com.au/warranty-form For support outside of warranty, if you wish to purchase replacement parts or request a repair or service, please visit https://lifespanfitness.com.au/warranty-form and fill in our Repair/Service... - Page 20 WWW.L IF ESPAN F ITNE S S . COM . A U...


Need help?
Do you have a question about the Contour Pro Studio Aluminium Reformer Pilates Bed Set and is the answer not in the manual?
Questions and answers