
Related Manuals for Parmco PPOV-6S-MULTI-1


Summary of Contents for Parmco PPOV-6S-MULTI-1
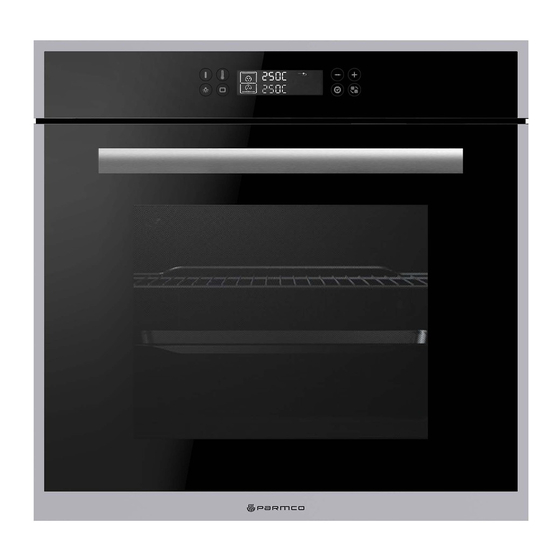
- Page 1 Installation and Operating Instructions Model: PPOV-6S-MULTI-1 Fix your serial number sticker here for easy reference. You will need this serial number should your appliance require servicing. 727626032017...
-
Page 2: Warranty
• Normal or scheduled maintenance including blocked filters or ducting. Please retain this Warranty card together with receipt or other proof of purchase date when seeking service during the warranty period • Consumable items such as light bulbs. • Any damage to hobs caused by spills when cooking. • Any breakage or damage of glass items. • Any damage caused by non recommended product used for cleaning, Please contact Parmco at 09 573 5678 if your maintaining, lubricating or similar. appliance needs servicing under warranty. Please • Any aspect relating to the installation of the product, or damage caused have your model number and proof of purchase ready. during installation including blocked access for repair. Warranty repairs must be authorized by Parmco. • Any third party (including reseller) or consequential loss or damage (direct or indirect) however arising. Subject to updates without prior notice, please visit www.parmco.co.nz for E & O.E. 727626032017 the latest version. - Page 3 Dear Valued Customer, Thank you and congratulations on purchasing your new Parmco appliance. All Parmco products are made to the highest quality and design standards. We are sure you will enjoy your new appliance. As a note, please read through these instructions carefully. These will assist you in gaining a complete understanding of the functions and features o ered by your appliance.
- Page 4 Standards and Regulatory Requirements with particular reference to the New Zealand Electrical Standards. Any attempt to install this or any other Parmco product without an authorised person could result in damage to the product and a possible health hazard. Not having an authorised person install this appliance may result in all associated warranties from Parmco Appliances being null and void.
-
Page 5: Important Safety Information
IMPORTANT SAFETY INFORMATION We recommend that for best performance and to extend the life of your appliance you read the instructions in this owner’s manual thoroughly before using your new appliance. It will provide you with all the information you need to ensure its safe installation, proper use and maintenance. Retain this owner’s manual for future reference. -
Page 6: How To Use Your Oven
WARNING: Accessible parts may become hot during use. To avoid burns, young children should be kept away. Do not use harsh abrasive cleaners or sharp metal scrapers to clean the oven door glass since they can scratch the surface and cause the glass to shatter. ... -
Page 7: Product Description
PRODUCT DESCRIPTION 1. On/Off Button 2. Function Button 3. Temperature Button 4. Window Display 5. Time Button 6. Upper and Lower Exchange Button 7. Time / Temp/ Function Adjust Button 8. Light Button SPECIAL FEATURES The oven comes equipped with the following special features. ●... -
Page 8: Parts And Features
Setting the oven to use Meat Probe Mode ● Insert the probe into the meat. ● Plug the probe into the outlet in the oven. Make sure it is pushed all the way in. If the probe is correctly inserted the symbol will be displayed in the main window. - Page 9 Accessories The following accessories are provided with your oven. 1. Wire grill , for dishes, cake tins, roasting and grilling trays. 2.Wire roast rack, for roasting. 3.Baking tray, for cakes and biscuits. 4.Deep pan, and roasting or collecting meat juices or fat drippings.
- Page 10 The baking tray, deep pan and wire grill should be inserted correctly into the side runners. When taking out the cooked foods from the oven, be careful of hot utensils and surfaces. Example Level 1: Deep pan Level 4: Baking tray When using the deep pan or the baking tray to collect drippings from cooking foods, ensure that the pan or tray is properly placed in the side runners.
-
Page 11: Cooking Functions
COOKING FUNCTIONS After 3 seconds with no adjustment, the oven will automatically start in the selected mode and at the selected temperature. If you wish to change the partition after cooking has started, touch the Function Button hold for about 3 seconds. Then Short touch the Function Button to select the desired partition. - Page 12 Single mode Convection Top Heat + Convection Conventional Top Bake Fan Grill Bottom Heat + Convection Defrosting - 11 -...
-
Page 13: Before First Time Use
OPERATING INSTRUCTIONS BEFORE FIRST TIME USE This oven will not operate until the clock time has been set! Setting the clock When power is first supplied to the oven, the display on the control panel will light briefly And “0:00” will begin blinking in the display. 1 “0: ”... - Page 14 Setting the oven temperature in twin mode Touch the Temperature Button and hold for about 3 seconds ,the temperature will flash(upper or lower mode). Touch the Time / Temp/Function Adjust Button “+” or “-“ to adjust the temperature in increments of 5 °C. Touch the upper and lower exchange Button, the temperature will flash (lower or upper mode).
-
Page 15: Delayed Start
During cooking, you can adjust the previously set end time with the Time Button and Time/Temp/ Function Adjust Button. Cook time - In single,upper and lower modes You can set the cook time during cooking. 1. Touch the Time Button several times untill the”End”... -
Page 16: Child Safety Function
Kitchen Timer (egg timer) This function can only be used when no cooking function is selected. 1. Touch the Timer Button untill “ ” icon and the three digits on the display begin to flash. 2. Touch the Time / Temp /Function Adjust Button “+” or “-“ to set the desired time. 3. -
Page 17: Cooking Guide
Please note that baking results will vary between different brands of stoves/ovens and your usual baking style may need adjusting in order to get the best results out of your Parmco oven. Recipes may state the use of certain cooking functions and temperatures, but due to the variance in cooking ingredients worldwide it is in your best interests to adapt the recipe if results were not as expected by trialling different functions and temperatures. -
Page 18: Oven Functions
OVEN FUNCTIONS The features of this oven include the following functions. The suggested levels and temperatures are there for your convenience. Adjustments can be made so that you achieve the cooking results you want. Pre Heating the oven should be carried out by selecting , “Conventional”, or “Top-heat + Convection”mode Function Shelf Level Temperature (°C) -
Page 19: Maintenance
MAINTENANCE Cleaning Oven interior Make sure the oven is cool before cleaning. ● Do not use coarse scouring pads or cleaning sponges. ● To avoid damaging the enamelled oven surfaces, use commercially available oven cleaners. ● To remove stubborn soil, use a special oven cleaner. ... - Page 20 To dismantle the oven door (two methods) Method 1 remove and assemble procedure: · Remove the seal A (Fig.2)、B、C(Fig.3) by push the no.2 rods of left and right sides(fig.1) · Gently pull out the inner and middle panes of glass(fig.4) ·...
- Page 21 Oven accessories Wash all roasting trays and wire racks and other accessories after each use and dry with a kitchen towel. To clean easily, soak in warm soapy water for about 30 minutes. Catalytic Liners The removable catalytic liners are coated with a dark gray catalytic enamel that can become coated with oil and fat distributed by circulating air during convection heating.
-
Page 22: Troubleshooting
Sometimes simple things can appear to be a problem with the product. The FAQ,s below are offerred as a guide to help before calling Parmco.only. If you need extra advice please contact Parmco on (09) 573 5678 or sales@parmco.co.nz. Please have your serial number and proof or purchase ready as these will be needed to initiate any service call. - Page 23 Q: What should I do if an error code appears and the oven does not heat up? A: There is a fault in the internal electrical circuit connection. Contact Parmco Q: What should I do if the time display is blinking? A: There was a power failure.
-
Page 24: Installation Instructions
INSTALLATION INSTRUCTIONS The power supply to the appliance must be turned off before installation Correct air ventilation is critical to the correct functioning of this appliance and must be strictly observed. Installing under bench The dimensions and placement of the ventillation cut outs are critical to the correct functioning of this appliance. - Page 25 Installing into a high cabinet/oven towers The power supply to the appliance must be turned off before installation Correct air ventilation is critical to the correct functioning of this appliance and must be strictly observed. The oven should be eased or slid into place at such an angle that the cabinetry and or oven is not damaged.
-
Page 26: Important Note
Standards and Regulatory Requirements with particular reference to the New Zealand Electrical Standards. Any attempt to install this or any other Parmco product without an authorised person could result in damage to the product and a possible health hazard. Not having an authorised person install this appliance may result in all associated warranties from Parmco Appliances being null and void. -
Page 27: Technical Data
TECHNICAL DATA Model PPOV-6S-MULTI-1 Power Source 220-240V ~50/60Hz Volume (usable capacity) 70 L Output Power 4120-4890W Weight 41.5KG approx Shipping 45.2KG approx Dimensions (W x H x D) Outside 594 x 594x 569mm Cutout 558 x 583 x 560 mm...
Need help?
Do you have a question about the PPOV-6S-MULTI-1 and is the answer not in the manual?
Questions and answers