Table of Contents
Advertisement
Quick Links
Models:
PPOV-6S-10-1
PPOV-6W-10-1
As part of Parmco Appliances commitment to improving and updating product ranges,
we reserve the right to alter, change and update technical specifications and appearance
attributes of all Parmco Appliances products. E&OE
Installation
and Operating
Instructions
727626022012
Advertisement
Table of Contents

Related Manuals for Parmco PPOV-6S-10-1


Summary of Contents for Parmco PPOV-6S-10-1
- Page 1 Installation and Operating Instructions Models: PPOV-6S-10-1 PPOV-6W-10-1 As part of Parmco Appliances commitment to improving and updating product ranges, we reserve the right to alter, change and update technical specifications and appearance attributes of all Parmco Appliances products. E&OE 727626022012...
-
Page 3: Warranty Conditions
WARRANTY CONDITIONS Your new appliance is covered subject to the terms and conditions contained within the PARMCO SALES warranty. The warranty conditions are provided, in full, at the back of this manual. Keep the receipt or delivery note of the appliance, which provides proof of purchase, in a safe place. -
Page 4: How To Use Your Oven
How to use your oven The multifunction oven combines the advantages of a traditional convection oven with fan assisted models in a single appliance. It is extremely versatile and allows you to choose easily between different cooking modes. Note: The first time you use your oven please set the thermostat to the highest setting and run the oven for approximately half an hour. -
Page 5: Operating The Oven
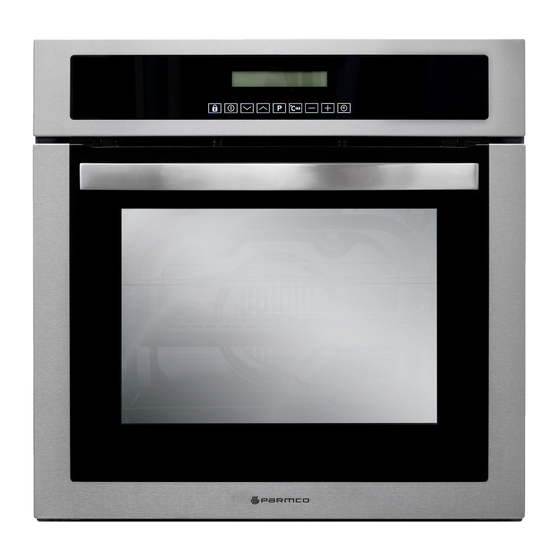
Operating the Oven The Electronic Oven Control Child safety device Temperature Oven Functions Thermometer symbol Memory: P / Test: d Clock functions/Operating time Child safety device ON/OFF button Clock Functions Oven function selection Selector buttons Speekcook Memory function General instructions ·... - Page 6 Speedcook After an oven function is selected, use the speedcook function to pre-heat the oven in a short time frame. Important: Do not put food into the oven until Speedcook is completed and the oven is operating using the desired function. 1.
-
Page 7: Other Functions
Cook time 1. Select oven function and using plus or minus button select the required temperature. 2. Press the Clock Functions button repeatedly until the symbol for Clock time flashes. 3. Using the plus or minus button set the desired cooking time. The oven will switch itself on. -
Page 8: Oven Functions
Deactivating the child safety device 1. To activate, Switch on the appliance using the On/Off button. 2. Press and hold the button until disappears from the display. The child safety device is now deactivated and the appliance is ready for use. Button Beep Switching off button beep 1. - Page 9 Fan Assisted Bottom Bake 1220-1460W The bottom heating element and the fan will switch on. Suitable for pastries, cakes and non dry sweets in baking tins. Top Bake 940-1110W The top heating element comes on. This mode can be used to brown food at the end of the cooking duration. Grill 2090-2520W The top central heating elements come on.
- Page 10 If necessary, clean it, but avoid using abrasive products or objects to do so. Should it become damaged, please contact Parmco Appliances. · Never line the oven bottom with aluminium foil, as the consequent accumulation of heat could compromise the cooking and damage the enamel.
-
Page 11: Practical Cooking Advice
Practical Cooking Advice The oven offers a wide range of cooking alternatives that allow you to cook any type of food in the best possible way. The following directions are only a guideline that may be varied according to your own personal experience. -
Page 12: Soles And Cuttlefish
place a dripping-pan on the 1st oven rack from the bottom. Baking Cakes When baking cakes, always place them in a preheated oven. Make sure you wait until the oven has been preheated thoroughly. Do not open the oven door during baking to prevent the cake from dropping. In general: Pastry is too dry Increase the temperature by 10°... -
Page 13: Table Of Contents
Safety To maintain the efficiency and safety of this appliance, we recommend that you do the following: · Contact Parmco Appliances on 09 573 5678 to find your nearest service agent. · Always use original spare parts. · When handling the appliance, we recommend you always use the purpose provided handles recessed into the sides of the oven to prevent harming people or damaging the appliance itself. -
Page 14: Browning Food To Perfect
· Attempting to install or repair the appliance without the assistance of qualified personnel. FOR ALL REPAIRS AND SERVICES, CONTACT PARMCO APPLIANCES ON 09 573 5678. DO NOT ATTEMPT TO REPAIR OR SERVICE THIS OR ANY OTHER PARMCO PRODUCT WITHOUT PROFESSIONAL ASSISTANCE. - Page 15 Installation of Built-in Ovens In order to ensure that the built-in appliance functions properly, the cabinet in which the appliance will be installed must be appropriate. The figure below gives the dimensions of the cut-out for installation under the counter or in a wall cabinet unit. N.B: Installation in compliance with the consumption declaration.
-
Page 16: Technical Specifications
· Fasten the wires beneath the screw heads using the following colour scheme: Blue (N) Brown (L) Yellow-Green · Secure the supply cable in place with the clamp and close the cover of the terminal board. Connecting the supply cable to the mains Install a standardized plug corresponding to the load indicated on the data plate. -
Page 17: 5 Max
09 573 5678 f: 09 573 5699 e: sales@parmco.co.nz w: www.parmco.co.nz Parmco Appliances extended 5 year warranty The Warranty: The Warranty is not valid: • If the product is not installed and operated in accordance with the operating • Subject to the terms and conditions contained within this instructions. warranty, if the product is not of Acceptable Quality (as • If the product is not installed to comply with the electrical, gas, plumbing defined in the Consumer Guarantees Act) within 5 years of and other Regulations and Codes of Practice in New Zealand. the date of original purchase, then Parmco Sales undertakes • If the product is operated on voltages or frequencies outside the normal range for domestic appliances in New Zealand. to repair or, at it’s sole discretion, replace the product.
Need help?
Do you have a question about the PPOV-6S-10-1 and is the answer not in the manual?
Questions and answers