Table of Contents
Advertisement
Model:
Fix your serial number sticker here for easy reference.
You will need this serial number should your appliance require servicing.
As part of Parmco Appliances commitment to improving and updating product ranges,
we reserve the right to alter, change and update technical specifications and appearance
attributes of all Parmco Appliances products. E&OE.
Installation
and Operating
Instructions
PPOV-9S-48
727626062014
Advertisement
Table of Contents

Related Manuals for Parmco PPOV-9S-48


Summary of Contents for Parmco PPOV-9S-48
- Page 1 Fix your serial number sticker here for easy reference. You will need this serial number should your appliance require servicing. As part of Parmco Appliances commitment to improving and updating product ranges, we reserve the right to alter, change and update technical specifications and appearance attributes of all Parmco Appliances products.
- Page 2 Parmco Appliances before any installation is carried out. We hope you enjoy your new appliance. If you would like to find out more about this product or any other products in Parmco’s extensive range, visit us on the web at www.parmco.co.nz. Regards,...
-
Page 3: Table Of Contents
Standards and Regulatory Requirements with particular reference to the New Zealand Electrical Standards. Any attempt to install this or any other Parmco product without an authorised person could result in damage to the product and a possible health hazard. Not having an authorised person install this appliance may result in all associated warranties from Parmco Appliances being null and void. -
Page 4: Important Safety Information
IMPORTANT SAFETY INFORMATION We recommend that for best performance and to extend the life of your appliance you read the instructions in this owner’s manual thoroughly before using your new appliance. It will provide you with all the information you need to ensure its safe installation, proper use and maintenance. Retain this owner’s manual for future reference. -
Page 5: Use And Care
Do not use harsh abrasive cleaners or sharp metal scrapers to clean the oven door glass since they can scratch the surface and cause the glass to shatter. After using the appliance please ensure that all controls are in the “OFF” position. ... -
Page 6: Installation Instructions
INSTALLATION INSTRUCTIONS The power supply to the appliance must be turned off before installation. The dimensions and placement of the ventillation cut outs are critical to the correct functioning of this appliance. Cut out requirements must not be varied. Installation of Built-in Ovens ... -
Page 7: Electrical Connection
Standards and Regulatory Requirements with particular reference to the New Zealand Electrical Standards. Any attempt to install this or any other Parmco product without an authorised person could result in damage to the product and a possible health hazard. Not having an authorised person install this appliance may result in all associated warranties from Parmco Appliances being null and void. -
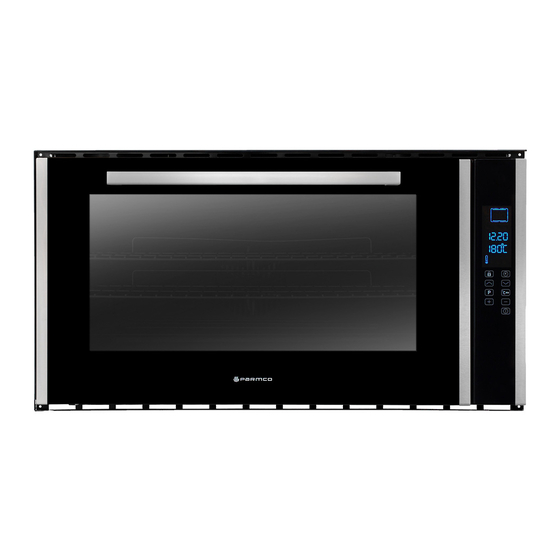
Page 8: Description Of The Appliance
DESCRIPTION OF THE APPLIANCE Control Panel Oven Rack Side Rails Dripping Pan or Baking Sheet Note: The first time you use your appliance, we recommend that you set the thermostat to its highest temperature setting, then leave the empty oven on for about half an hour, with the door closed. After 30 minutes open the oven's door and let it cool down. -
Page 9: Before First Time Use
BEFORE FIRST TIME USE This oven will not operate until the clock time has been set. Setting and changing the current time When the appliance is connected to the electrical supply or when there has been a power cut, the symbol for time flashes automatically. - Page 10 General instructions Switch the appliance on by pressing the On/Off button. When the selected function is selected, the oven begins to heat up or the time set begins to count down. The oven light remains on while the oven is cooking. The oven light is off when the appliance is turned off or switches off automatically.
- Page 11 End time. 2. Press and hold the button for approx. 2 seconds, until an acoustic alarm sounds. Your preferred setting is now stored. 3. To save another setting, press the button for approx. 2 seconds. The previously saved setting is replaced by the new one. ...
-
Page 12: Oven Use
o “0.00”is displayed and the symbols for End time and Cook time flash. To turn off the alarm, press any button. Delayed Start Function Please ensure the time is set (See “Before first time use”) Cook time and End time combined The timer can be set so that the oven will come on at a pre determined time and cook for a specified period then turn itself off. -
Page 13: Oven Functions
o Press the button first and then the buttons and hold together until an audible alarm sounds (approx.2 seconds). The button beep is now switched off. 2. Switching on button beeps o Press the button first and then the button. Hold together until an audible alarm sounds (approx.2 seconds). -
Page 14: Maintenance
Cooling Fan In order to keep the appliance temperature within a safe operating range the appliance is equipped with an automatic cooling fan. This fan comes on when the appliance becomes hot and will continue to run after the appliance has shut off until the appliance has cooled down. When the fan is on, a normal flow of air can be heard exiting between the oven door and the control panel. - Page 15 Replacing the Oven Lamp WARNING: Ensure that the appliance is switched off before replacing the lamp to avoid the possibility of electric shock. 1. Remove the glass cover of the lamp - holder; 2. Remove the lamp and replace with a lamp resistant to high temperatures (300 ) with the following characteristics: a.
-
Page 16: Technical Data
The stains on the catalytic liners caused by grease, fats and oils from cooking are completely normal and will not be able to be completely removed. Catalytic liners are a consumable item and can be replaced with new catalytic liners. TECHNICAL DATA Model PPOV-9S-48 Power Source 220-240V ~ 50/60Hz Volume (usable capacity) 105 L... -
Page 17: The Warranty
09 573 5678 f: 09 573 5699 e: sales@parmco.co.nz w: www.parmco.co.nz Parmco Appliances extended 5 year warranty The Warranty: The Warranty is not valid: • If the product is not installed and operated in accordance with the operating • Subject to the terms and conditions contained within this instructions. warranty, if the product is not of Acceptable Quality (as • If the product is not installed to comply with the electrical, gas, plumbing defined in the Consumer Guarantees Act) within 5 years of and other Regulations and Codes of Practice in New Zealand. the date of original purchase, then Parmco Sales undertakes • If the product is operated on voltages or frequencies outside the normal range for domestic appliances in New Zealand. to repair or, at it’s sole discretion, replace the product.
Need help?
Do you have a question about the PPOV-9S-48 and is the answer not in the manual?
Questions and answers