Table of Contents
Advertisement
Models: OV
Models:
Models:
Models:
As part of Parmco Appliances commitment to improving and updating product ranges,
we reserve the right to alter, change and update technical specifications and appearance
attributes of all Parmco Appliances ovens. E&OE
Installation
and Operating
Instructions
OV- - - - 1 Dimoda
1 Dimoda
OV
OV
1 Dimoda
1 Dimoda
OV- - - - 2 Optima
OV
2 Optima
OV
OV
2 Optima
2 Optima
OV
OV- - - - 3 Davanti
3 Davanti
OV
OV
3 Davanti
3 Davanti
OV
OV- - - - 4 Elegante
4 Elegante
OV
OV
4 Elegante
4 Elegante
All models 5 function, 8 function
white and stainless steel.
1
727626012013
Advertisement
Table of Contents

Related Manuals for Parmco OV-1 Dimoda


Summary of Contents for Parmco OV-1 Dimoda
- Page 1 All models 5 function, 8 function white and stainless steel. As part of Parmco Appliances commitment to improving and updating product ranges, we reserve the right to alter, change and update technical specifications and appearance attributes of all Parmco Appliances ovens. E&OE...
- Page 2 Parmco Appliances before any installation is carried out. We hope you enjoy your new appliance. If you would like to find out more about this product or any other products in Parmco’s extensive range, visit us on the web at www.parmco.co.nz. Regards,...
- Page 3 Standards and Regulatory Requirements with particular reference to the New Zealand Electrical Standards. Any attempt to install this or any other Parmco product without an authorised person could result in damage to the product and a possible health hazard. Not having an authorised person install this appliance may result in all associated warranties from Parmco Appliances being null and void.
-
Page 4: Important Safety Information
IMPORTANT SAFETY INFORMATION We recommend that for best performance and to extend the life of your appliance you read the instructions in this owners manual thoroughly before using your new appliance. It will provide you with all the information you need to ensure its safe installation, proper use and maintenance. - Page 5 DO NOT USE OR STORE FLAMMABLE MATERIALS IN THE APPLIANCE OR NEAR THIS APPLIANCE. For any enquiries please contact Parmco Appliances (09) 573 5678. USE AND CARE OF APPLIANCE This multi-function oven combines the advantages of traditional convection ovens with a modern fan assisted oven in a single appliance.
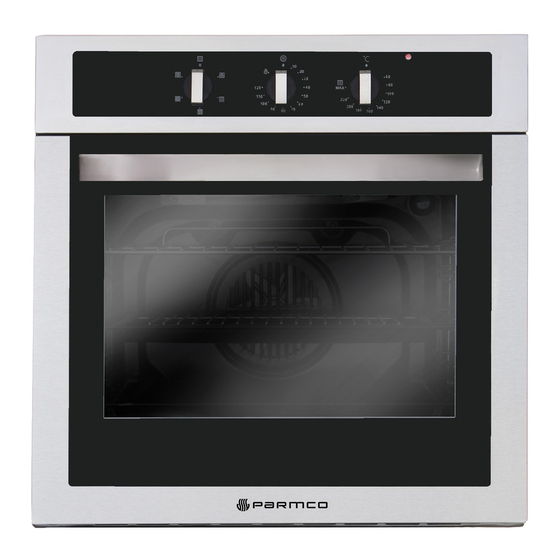
- Page 6 Description of Appliance A. Control panel B. Cooking mode selection knob C. Cooking temperature selection knob D. Electronic programmer. E. Oven indication light (certain models only) F. Dripping pan or baking sheet G. Oven wire rack H. Easy clean side racks 5 and 8 PUSH BUTTON MODEL...
- Page 7 Positioning the Oven Trays & Shelves The baking tray, grill tray and wire shelves can be located in any of five height positions. When positioning tray heights, it is important to remember that this oven may perform differently to the way your previous appliance worked. To obtain the best cooking results please experiment with temperature, rack height and cooking times.
-
Page 8: Cooking Modes
COOKING MODES Please note the model you have purchased may not have all of the functions described below. NOTE: To use your oven in manual mode (not using the end time cooking programmer), the symbol must be selected on the control knob. Convection Mode When set to Convection Mode, the top and bottom heating elements operate together like a ‘normal’... - Page 9 Fan Assisted Grill Mode When the Fan Assisted Grill Mode is selected the inner element and fan operate. This mode increases the circulation of the heated air throughout the oven, which helps prevent food from burning on the surface and allowing the heat to fully penetrate the dish.
-
Page 10: Electronic Timer
ELECTRONIC TIMER NOTE: The clock must be set in order for the oven to operate. 6 BUTTON DIGITAL CLOCK (only available on certain models) This appliance has a digital display 24 hour clock with six control buttons. When the power is connected, the screen displays 3 flashing numbers and “AUTO”. Adjusting the Digital Clock To set the correct time, press the button first and then the + or –... - Page 11 1. Press button, set the cooking time to 45 minutes with the + and – buttons. 2. Press button, set finish time to 14:00 with + and – buttons. 3. Set cooking temperature and cooking mode by turning the thermostat knob and mode selector knob.
- Page 12 3 BUTTON DIGITAL CLOCK 3 BUTTON DIGITAL CLOCK (only 3 BUTTON DIGITAL CLOCK 3 BUTTON DIGITAL CLOCK (only (only (only available on certain models) available on certain models) available on certain models) available on certain models) Adjusting the Clock Once the oven has been connected to the electrical power, the display will show “12:00”...
- Page 13 start cooking automatically. While cooking, “AUTO” and will flash. When the clock displays 14:00, the oven automatically stops cooking. The alarm will ring and “AUTO” will flash. Press button and the ringing will stop. Start Cooking Now and set the Finish Time 1.
-
Page 14: Practical Cooking Advice
Practical Cooking Advice The oven offers a wide range of settings which allow you to cook any type of food in the best possible way. With time and experimentation you will learn the heat settings, cooking mode and shelf height that will deliver you the results that best match your cooking style. -
Page 15: Cooking Guide
COOKING GUIDE Selector Food Weight Rack PreHeat Temp Cook knob setting Type (in KG) height Time Deg C Time From (mins) (mins) bottom Traditional Duck 65.75 Cooking Roast Beef 70-75 Roast Pork 70-80 Roast Lamb 70-80 Biscuits 15-20 Tarts 30-35 Browning Fish 8-10... -
Page 16: Maintenance
There is a rubber seal surrounding the oven. Check the condition of the seal on a regular basis. If necessary, clean it but avoid using abrasive products or objects to do so. Should it becomes damaged please contact Parmco Appliances service department. We recommend you avoid using the oven until it has been repaired. - Page 17 For this reason, we strongly advise you to contact Parmco Service Department, specifying the nature of the problem, the model and serial number of the appliance. This data is...
-
Page 18: Important Note
Requirements, with particular reference to the New Zealand Electrical Standards. Any attempt to install this or any other Parmco product without an authorised person could result in damage to the product and possible health hazard. Not having an authorised person install this appliance may result in all associated warranties from Parmco Appliances being null and void. -
Page 19: Electrical Connection
Before any procedure, it is important to check that the appliance is DISCONNECTED from the electrical mains. Parmco declines all responsibility for any damage deriving from installations that are in breach of the regulations in force or from failure to comply with these installation instructions. - Page 20 INSTALLATION INTO CABINETRY In order for this oven to perform correctly, it requires correct ventilation. Special care must be paid to the ventilations requirements of this oven. The oven must be installed as per the installation instructions below. In order to ensure adequate ventilation, the back panel of the cabinet unit must be removed.
-
Page 21: The Warranty
09 573 5678 f: 09 573 5699 e: sales@parmco.co.nz w: www.parmco.co.nz Parmco Appliances extended 5 year warranty The Warranty: The Warranty is not valid: • If the product is not installed and operated in accordance with the operating • Subject to the terms and conditions contained within this instructions. warranty, if the product is not of Acceptable Quality (as • If the product is not installed to comply with the electrical, gas, plumbing defined in the Consumer Guarantees Act) within 5 years of and other Regulations and Codes of Practice in New Zealand. the date of original purchase, then Parmco Sales undertakes • If the product is operated on voltages or frequencies outside the normal range for domestic appliances in New Zealand. to repair or, at it’s sole discretion, replace the product. - Page 22 Installation and Operating Instructions Models: HOB6S-4E-3 HOB6W-4E-3 As part of Parmco Appliances commitment to improving and updating product ranges, we reserve the right to alter, change and update technical specifications and appearance attributes of all Parmco Appliances products. E&OE. 727626032013...
- Page 23 Parmco Appliances before any installation is carried out. We hope you enjoy your new appliance. If you would like to find out more about this product or any other products in Parmco’s extensive range, visit us on the web at www.parmco.co.nz. Regards,...
- Page 24 Congratulations on the purchase of your new appliance. Now that you have your new cooktop, please take the time to do a couple of very simple tasks. Read the user instructions contained in the first section of this booklet. Your new appliance has been designed and manufactured to the highest standards and incorporates a host of innovative styling and technical features.
- Page 25 Description of the heat plates Rapid hea at plate 200 Rapid hea at plate 150 Rapid hea a t plate 100 0 0W Control kn nobs Pilot light Index scription of the heat plates eration of th he electric p plates vice on the u use of cook...
- Page 26 Operation of the electric plates The electric tops can either be standard type or rapid type. The rapid type tops are distinguished by a red mark at the centre. According to your needs, the tops can be adjusted by turning the knobs either clockwise or anti-clockwise. The positions marked by numbers correspond to the maximum output of heat.
- Page 27 Good (rec cessed convex base) (undersize) (oversize) (moisture o (no utens sil) hotplate) aning Swit tch off the m mains to th e cooktop b before carry ying out any y work and wait for it c cool wn. We advi ise using luk kewarm wa ter and det...
-
Page 28: Installation
Installation Electrical connection Appliances with three-pole cable are set up for operation with alternating current at the voltage and frequency indicated on the rating plate. Look at the connection wiring diagram. The earth conductor is yellow/green. The connection to the electricity supply must be made by a qualified person and following the regulations in force. - Page 29 Note Fire e resistant m material (eg ceramic le es) is requir red to be 45 50 mm abov ve burner to op if l or ve cal structures are within 2 200 mm of the burner. Note 2 ngehood and d exhaust sy ystem must t be at least...
- Page 30 09 573 5678 f: 09 573 5699 e: sales@parmco.co.nz w: www.parmco.co.nz Parmco Appliances extended 5 year warranty The Warranty: The Warranty is not valid: Liability under this warranty will not be accepted for:...
Need help?
Do you have a question about the OV-1 Dimoda and is the answer not in the manual?
Questions and answers