Table of Contents
Advertisement
Quick Links
Installation
and Operating
Instructions
Models:
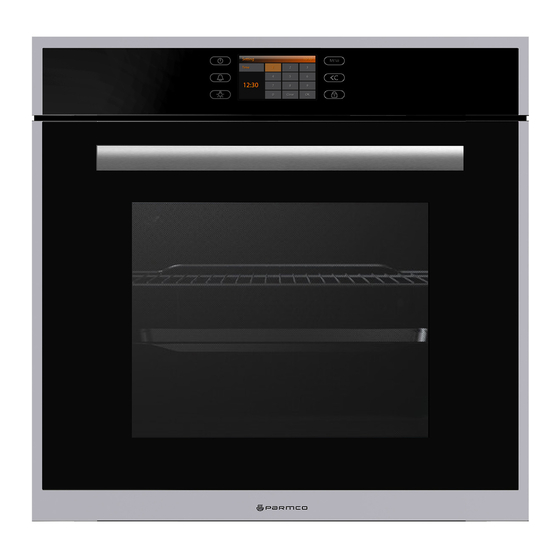
PPOV-6S-TFT
For your convenience, we recommend to attach the serial number label HERE.
As part of Parmco Appliances commitment to improving and updating product ranges,
we reserve the right to alter, change and update technical specifications and appearance
attributes of all Parmco Appliances products. E&OE.
727626122015
Advertisement
Table of Contents

Related Manuals for Parmco PPOV-6S-TFT


Summary of Contents for Parmco PPOV-6S-TFT
- Page 1 PPOV-6S-TFT For your convenience, we recommend to attach the serial number label HERE. As part of Parmco Appliances commitment to improving and updating product ranges, we reserve the right to alter, change and update technical specifications and appearance attributes of all Parmco Appliances products. E&OE.
- Page 2 Dear Valued Customer, Thank you and congratulations on purchasing your new Parmco appliance. All Parmco products are made to the highest quality and design standards. We are sure you will enjoy your new appliance. As a note, please read through these instructions carefully. These will assist you in gaining a complete understanding of the functions and features o ered by your appliance.
-
Page 3: Table Of Contents
INDEX Page Important Safety Information Before Using this Appliance For Your safety Steam and condensation Product details Instructions for use of the electric hob and ceramic work-top Accessories Care and cleaning Practical cooking advice Troubleshooting Installation Instructions Electronic Installation Warranty... -
Page 4: Important Safety Information
IMPORTANT SAFETY INFORMATION We recommend that for best performance and to extend the life of your appliance you read the instructions in this owner's manual thoroughly before using your new appliance. It will provide you with all the information you need to ensure its safe installation, proper use and maintenance. -
Page 5: Steam And Condensation
Keep the appliance thoroughly cleaned. Food residues may cause fire risks. DO NOT use a steam cleaner to clean this appliance. NEVER line the oven with aluminium sheets as doing so may damage the enamel and elements. ... -
Page 6: Product Details
PRODUCT DETAILS Oven Shelf levels are numbered from the bottom up. Levels 4 and 5 are used mainly for the grill function. Please refer to the cooking guides provided throughout this manual to determine appropriate shelf levels for your dishes. Oven Controls The appliance is operated via the display and the electronic buttons next to and below... - Page 7 Display All information about functions, temperature, cooking durations and setting is shown in the display. After the appliance has been switched on with sensor or display, the Main menu appears in the display with a list of options available: Select a menu ● by touching the display. Main menu ...
- Page 8 Function Image Program Name Function Convectional heat Conventional bake Grill Grill Fan grill Fan grill Pizza Fan forced bottom bake Bake Fan forced Fast cooking Fan assisted bake Delicate Fan assisted bottom bake Top heat Top bake Multi cooking Multi cooking Mode Defrost Defrost...
- Page 9 Before using for the first time To enter the basic settings The oven will switch on automatically when it is connected to the electricity supply. You appliance is supplied with a number of standard default settings. To change the settings: ...
- Page 10 Temperature units Click temperature units Settings into the Settings interface; choose the corresponding units in the options after playing "√", set up after the completion of the touch "OK" button to return to the interface of set. Factory default setting Click the default factory Settings options into the set, if you select "YES"...
- Page 11 Set the start time Through the keyboard input the required program running time, with the digital input, run in the middle of the left side of the time change, input hours first, and then input minutes. Click "OK" button to save the set value, and returns the function sub menu. ...
- Page 12 Kitchen timer Set the kitchen timer When the oven is in working status, touch the button, enter setup interface, touch the number keys set time, Input hours first, and then input minutes. Touch the "OK" button, back to the original interface. ...
-
Page 13: Accessories
ACCESSORIES The baking tray, deep pan and wire grill should be inserted correctly into the side runners. When taking out the cooked foods from the oven, be careful of hot utensils and surfaces. Example Level 1: Deep pan Level 4: Baking tray When using the deep pan or the baking tray to collect drippings from cooking foods, ensure that the pan or tray is properly placed in the side runners. -
Page 14: Care And Cleaning
CARE AND CLEANING Cleaning the oven door For normal use, the oven door should not be removed but if removal is necessary, for example, for cleaning, follow these instructions. The oven door is heavy. How to Remove the Oven door For a more thorough clean, you can remove the oven door. - Page 15 Method 2 Remove and assemble procedure: · Flip the glass pane retainers outwards to open them (Fig.1) · Gently lift up the inner pane and remove it (fig.2) · Gently lift up the middle pane and remove it (fig.3) · Clean the glass and other components with an appropriate cleaner. Dry thoroughly, and place on a soft surface.
- Page 16 Oven interior ● Do not hand - clean the door seal. ● Do not use coarse scouring pads or cleaning sponges. ● To avoid damaging the enamelled oven surfaces, use commercially available oven cleaners. ● To remove stubborn soil, use a special oven cleaner. Oven door glass The oven door is equipped with three sheets of glass placed against each other.
- Page 17 ● Set the heat to 250 °C. ● Run the oven for approximately 1 hour. The length of time will depend on the degree of soiling. It is a good idea to set the finish time for the process using the end time setting, in case you forget to switch the oven off at the end.
-
Page 18: Practical Cooking Advice
PRACTICAL COOKING ADVICE The oven offers a wide range of alternatives which allow you to cook any type of food in the best possible way. With time you will learn to make the best use of this versatile cooking appliance and the following directions are only a guideline which may be varied according to your own personal experience. - Page 19 When using this mode, place the grid on the 2nd or 3rd oven rack from the bottom (see cooking table) then, to prevent fat and grease from dripping onto the bottom of the oven and thus smoke from forming, place a dripping-pan on the 1st rack from the bottom. When using this mode, we advise you to set the thermostat to 200°, as it is the most efficient way to use the grill, which is based on the use of infrared rays.
- Page 20 For red meat that should be well done on the outside while tender and juicy in the inside, it is a good idea to start with a high temperature setting (200°-220°)for a short time ,then turn the oven down afterwards. In general, the larger the roast, the lower the temperature setting.
- Page 21 -Raw...
- Page 22 Recipe In the main menu select the Recipe. Choose what you want, enter setup interface, set the degree of baking, defaults to "Medium". After choose the degree of baking, touch "Next", enter the baking temperature Settings interface, this interface default according to choose matching degree of baking temperature, you can adjust temperature.
-
Page 23: Troubleshooting
Repairs and other work by unqualified persons could be dangerous. The manufacturer cannot be held liable for unauthorised work. Ensure power is not supplied until after maintenance or repair work has been carried out. Call Parmco Call Parmco Technical Specifications Inner dimensions of the oven:... - Page 24 INSTALLATION Installing the Oven Electrical installation of this appliance must be performed only by a licensed electrician. The oven must be installed according to the instructions supplied. Remove the protective vinyl from the door after installation. Safety instructions for the installer ...
-
Page 25: Electrical Connection
ELECTRICAL CONNECTION Those ovens equipped with a three-pole power supply cable are designed to operate with an alternating current .The wire for earthling the appliance is yellow-green in colour. Fitting on a Power Supply Cable Opening the terminal board: Using a screwdriver, prize the bolt on the side tabs of the terminal board cover;... -
Page 26: Warranty
Please retain this Warranty card together with receipt or other proof of purchase date when seeking service during the warranty period • Normal or scheduled maintenance including blocked filters or ducting. • Consumable items such as light bulbs. • Any damage to hobs caused by spills when cooking. • Any breakage or damage of glass items. Please contact Parmco at 09 573 5678 if your • Any damage caused by non recommended product used for cleaning, appliance needs servicing under warranty. Please maintaining, lubricating or similar. have your model number and proof of purchase ready. • Any aspect relating to the installation of the product, or damage caused Warranty repairs must be authorized by Parmco. during installation including blocked access for repair. • Any third party (including reseller) or consequential loss or damage (direct or indirect) however arising. Subject to updates without prior notice, please visit www.parmco.co.nz for E & O.E. 727626022015 the latest version.
Need help?
Do you have a question about the PPOV-6S-TFT and is the answer not in the manual?
Questions and answers