
Related Manuals for Parmco PPOV-6S-SIDE-1


Summary of Contents for Parmco PPOV-6S-SIDE-1
- Page 1 Installation and Operating Instructions Model: PPOV-6S-SIDE-1 For your convenience, we recommend to attach the serial number label HERE. 727626112019...
- Page 2 • Normal or scheduled maintenance including blocked filters or ducting. Please retain this Warranty card together with receipt or other proof of purchase date when seeking service during the warranty period • Consumable items such as light bulbs. • Any damage to hobs caused by spills when cooking. • Any breakage or damage of glass items. • Any damage caused by non recommended product used for cleaning, Please contact Parmco at 09 573 5678 if your maintaining, lubricating or similar. appliance needs servicing under warranty. Please • Any aspect relating to the installation of the product, or damage caused have your model number and proof of purchase ready. during installation including blocked access for repair. Warranty repairs must be authorized by Parmco. • Any third party (including reseller) or consequential loss or damage (direct or indirect) however arising. Subject to updates without prior notice, please visit www.parmco.co.nz for E & O.E. 727626042017 the latest version.
- Page 3 Dear Valued Customer, Thank you and congratulations on purchasing your new Parmco appliance. All Parmco products are made to the highest quality and design standards. We are sure you will enjoy your new appliance. As a note, please read through these instructions carefully. These will assist you in gaining a complete understanding of the functions and features o ered by your appliance.
-
Page 4: Table Of Contents
TABLE OF CONTENTS Safety instructions................2 How to save energy...............3 Disposal of the appliance..............3 Unpacking..................3 Description of the appliance............4 Installation..................5 Operation..................8 Prior first use.................8 Electronic programmer..............8 Oven.....................14 Cleaning and maintenance............15 Operation in case of emergency............18 Baking in the oven................19 Technical information..............23 Oven Performance It is important to remember that this oven may perform differently to the way your previous appliance worked. -
Page 5: Safety Instructions
SAFETY INSTRUCTIONS The appliance becomes very hot during operation. Take care not to touch the heating elements inside the oven. WARNING: Accessible parts may become hot during use. To avoid burns, please take care around the appliance and keep young children away. Keep main leads of adjacent appliances from being caught in the door of the oven to avoid damage. -
Page 6: How To Save Energy
HOW TO SAVE ENERGY Using energy in a responsible way not only saves money but also helps the environment. So let's save energy! And this is how you can do it: Make use of residual heat from the oven. If the cooking time is greater than 40 minutes, switch off the oven 10 minutes before the end time. -
Page 7: Description Of The Appliance
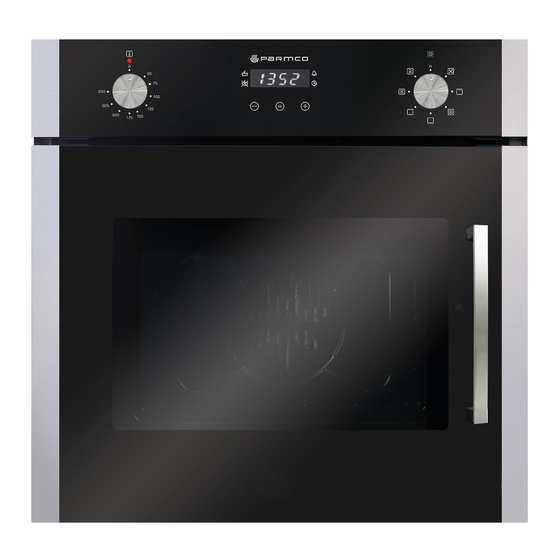
DESCRIPTION OF THE APPLIANCE 1. Temperature control knob 2. Oven function selection knob 3. Oven temperature indicator light 4. Oven door handle 5. Electronic programmer... -
Page 8: Installation
INSTALLATION Installing the oven • The kitchen should be dry and have effective ventilation according to the existing technical provisions • Main lead behind the oven must be placed in such manner to avoid touching the back panel of the oven because of the heat it develops during operation •... - Page 9 21.5...
- Page 10 Electrical connection Warning! All electrical work must be carried out by a qualified and authorized electrician. Before attempting the connection, check whether the voltage indicated on the rating plate • corresponds to the actual mains voltage. • Mains lead should be minimum 1.5m long. Earthing wire should be installed in such manner to be the last one pulled out in case the •...
-
Page 11: Operation
OPERATION Prior first use • Remove packaging, clean the interior of the oven with soft damp cloth and warm water and dry. • Take out and wash the oven accessories with warm water and a little washing-up liquid and dry thoroughly. •... - Page 12 Setting the time 1. At power on, display shows “12.00”, and flashes. 2. The current time can be set using buttons 1 and 3. 5seconds after the time has been set, the new data will be saved. Timer The timer can be activated at any time and with any function. The timer can be set from 1 minute to 23 hours and 59 minutes.
- Page 13 4. When the set time is up the alarm signal will be activated and the signal function will begin to flash again. 5. Press any button, the signal function‘ ’ and alarm signal turn off. Or the alarm signal will be turned off automatically after 2 minutes. Caution! •...
- Page 14 signal will be turned off automatically after 2 minutes. Caution! The cooking time and end of cooking time range Cooking time range: 0 < t ≤ 10 hours End of cooking time range: current time <end of cooking time ≤ current time + 10 hours End of cooking time = current time +cooking time When using the semi-automatic operation, set either the cooking time or the end of...
- Page 15 1. Set the end of cooking time using buttons 1 and 3. 2. Cooking time automatically changes to 3:00. 5 seconds after the setting, the auto function is on. 3 hours later, the current time shows “5:00” the alarm signal is activated. Automatic operation If the oven is to be switched on for a specified period of time and switched off at a fixed hour then you should set the cooking time and the end of cooking time:...
- Page 16 1. Set the cooking time to be “3:00” with button 1and 3. 2. Set the end of cooking time to be 10:00 with the button 3. 3. 5 seconds after settings are selected the auto function is on. When it up to 7:00, the oven will begin to work 5.
-
Page 17: Oven
Oven • Oven is controlled by the function knob and the temperature control knob. Caution! • When selecting any heating function the oven will be switched on only after the temperature has been set by the temperature control knob. Oven Functions Bottom and top elements on Setting the knob to this position allows the oven to be heated conventionally. -
Page 18: Cleaning And Maintenance
Bottom element At this oven function knob position, the oven actives the bottom element. Fan,bottom and top element on At this knob position the oven executes the cook function.Conventional oven with a fan Fan,grill element When the knob is turned to this position,the oven activates the grill and fan function, the oven activates the grill and fan function.In pratice,this function allows the grilling process to be speeded up and an improvement in the taste of the dish,you should only use the gill with the oven door shut. - Page 19 Never clean the appliance with pressurized hot steam cleaner. ● The oven chamber should only be washed with warm water and a small amount of washing ● liquid. Steam cleaning ● -pour 250ml of water (1 cup) into a bowl placed in the oven on the first level from the bottom.
- Page 20 IMPORTANT • Never use screwdrivers or other utensils to remove the light cover. This could damage the enamel of the oven or the lamp-holder. Remove only by hand Never replace the bulb with bare hands as contamination from your fingers can •...
-
Page 21: Operation In Case Of Emergency
Removing the Oven Door Inner Glass The oven door inner glass can be removed to facilitate cleaning. • Fully open the door. • Remove the four A fixing screws from the door hinge. • Rest the door on a soft surface. •... -
Page 22: Baking In The Oven
• Some minor faults can be fixed by referring to the instructions given in the table below. Before calling the customer support centre or the service centre check the following points that are presented in the table. PROBLEM REASON ACTON 1. - Page 23 IMPORTANT Tables below a guidelines only. Baking Table Type of pastry Guide level(from Temp (℃ ) Guide level(from Baking down upwards) down upwards) time (in min) Sweet pastry Sponge cake/ 170-180 60-80 marble cake Victoria sponge 160-180 65-80 Base for a layer cake 170-180 20-30 Sponge layer cake...
- Page 24 Roasting Table Type of meat Guide Temp (℃ ) Roasting Roasting time level(from time (in min) (in min) bottom up) Beef Per 1 cm Roast beef or file rare 12-15 Oven warmed 15-25 juicy(“medium”) Oven warmed up “well 25-30 done” Oven warmed up Roast 160-180 120-140...
- Page 25 Grill table Temp (℃) Grill time (in Type of meat for Weight Guide grill (in grams) level (from min.) bottom up) Meat and sausages 2 beefsteaks, rare 14-16 2beefsteaks, 16-20 medium 2 beefsteaks, well 20-23 done 2 pork scrag fillets 19-23 2 pork chops 20-23...
-
Page 26: Technical Information
TECHNICAL INFORMATION Model PPOV-6S-SIDE-1 220-240V 50Hz Voltage rating 2000W Total power Cod:0040305128...
Need help?
Do you have a question about the PPOV-6S-SIDE-1 and is the answer not in the manual?
Questions and answers