
Related Manuals for ProLights EclDisplay CC


Summary of Contents for ProLights EclDisplay CC
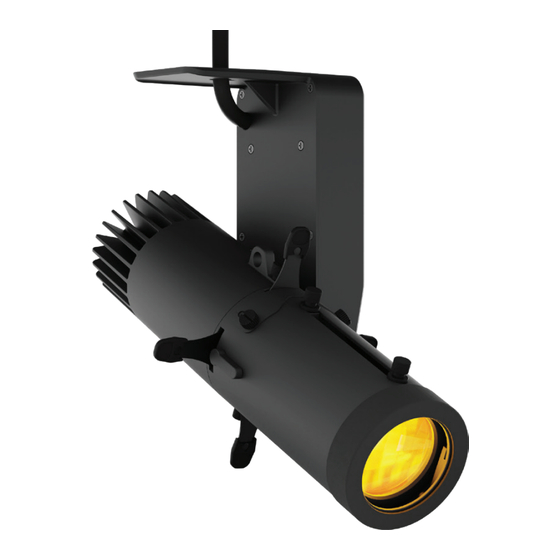
- Page 1 EclDisplay CC 25W White LED Gallery light EclDisplay CCFC 40W RGB+WW LED gallery light USER MANUAL English version REV.01-02/21...
- Page 2 PROLIGHTS product are trademarks OWNED or licensed by Music & Lights S.r.l., its affiliates, and subsidiaries. PROLIGHTS is a registered trademark by Music & Lights S.r.l. All right reserved. Music & Lights – Via A. Olivetti, snc - 04026 - Minturno (LT) ITALY...
-
Page 3: Table Of Contents
HALF SNOOT, FULL SNOOT (CODES ECLDISPHSNOOT, ECLDISPFSNOOT - OPTIONAL) ........................18 CEILING ADAPTER KIT (CODES ECLDISPCEILKIT, ECLDISPCEILFLG - OPTIONAL) ..19 11 - MAINTENANCE MAINTENANCE AND CLEANING THE PRODUCT............22 VISUAL CHECK OF PRODUCT HOUSING ..............22 TROUBLESHOOTING ..................... 23 PROLIGHTS - EclDisplay CC / EclDisplay CCFC... -
Page 4: Safety Information
• Do not reapply power until repairs have been completed. • Refer any service operation not described in this manual to PROLIGHTS Service team or an authorized PROLIGHTS service center. Installation •... - Page 5 • Warning! Disconnect the fixture from AC mains power and allow to cool for at least 10 minutes before handling. • Only technicians who are authorized by PROLIGHTS or Authorised service partners are permitted to open the fixture. • Users may carry out external cleaning, following the warnings and instructions pro- vided, but any service operation not described in this manual must be referred to a qualified service technician.
- Page 6 The products to which this manual refers comply with: • 2014/35/EU - Safety of electrical equipment supplied at low voltage (LVD); • 2014/30/EU - Electromagnetic Compatibility (EMC); • 2011/65/EU - Restriction of the use of certain hazardous substances (RoHS). PROLIGHTS - EclDisplay CC / EclDisplayCCFC...
-
Page 7: Packaging
• NASPW12SK315M: global Pulse Track clip wire suspension set 1.5m, 150N, white; • NASPW12SK35M: global Pulse Track clip wire suspension set 5m, 150N, white; • NASKB122/3: global Pulse Track Mounting Clamp for Rod and Wire, 200N, black/white. PROLIGHTS - EclDisplay CC / EclDisplay CCFC... -
Page 8: Technical Drawing
Weight: 1.52 kg - 3.35 lbs ECLDISPLAYCC with ECLDISPWASHL2550 160 mm [6.3 in] 269 mm [10.6 in] 160 mm [6.3 in] Weight: 1.7 kg - 3.74 lbs ECLDISPLAYCC with ECLDISPPRZL2040 Dimensions are in mm / in - Fig. 01 PROLIGHTS - EclDisplay CC / EclDisplayCCFC... - Page 9 ECLDISPLAYCCFC with ECLDISPWASHL2550 160 mm [6.3 in] 303 mm [11.9 in] 160 mm [6.3 in] Weight: 1.7 kg - 3.74 lbs ECLDISPLAYUCCFC with ECLDISPPRZL2040 Dimensions are in mm / in - Fig. 02 PROLIGHTS - EclDisplay CC / EclDisplay CCFC...
-
Page 10: Tilt Range
4 - TILT RANGE Fig. 03 PROLIGHTS - EclDisplay CC / EclDisplayCCFC... -
Page 11: Installation
Do not use any type of clamp that does not completely encircle the structure when fastened. C6002 clamp RSR Steel security cable Track system 37 [1.5] 87 [3.4] 4 [0.2] Ø14 [Ø0.5] 4 [0.2] Dimensions are in mm / in - Fig. 04 PROLIGHTS - EclDisplay CC / EclDisplay CCFC... -
Page 12: Connection To The External Psu Or Led Driver
Led driver : Constant current 1,5 A maximum output voltage 60Vdc, min 30W. NOTE: Please take attention to the polarity of the connection. Loosen and remove the marked four screws. Then remove the arm housing (1). Fig. 05 PROLIGHTS - EclDisplay CC / EclDisplayCCFC... -
Page 13: Connection To External Power Supplies
MAINS CONTROL SIGNAL CONNECTION WIRES LED - BLACK LED + ECLDISPLAYCCFC driver MAINS CONTROL SIGNAL CONNECTION WIRES RED - BLACK GREEN - BLACK GREEN BLUE - BLACK BLUE WHITE - BLACK WHITE Fig. 06 PROLIGHTS - EclDisplay CC / EclDisplay CCFC... -
Page 14: Start Up
3. KNOB for releasing and locking the optic and for zoom; 4. OPTIC (accessory not included, in the figure ECLDISPWASHL1530); 5. RUBBER RING (accessory included in the box optic); 6. PLASTIC ARM COVER; 7. LOCK TILT. Fig. 07 PROLIGHTS - EclDisplay CC / EclDisplayCCFC... -
Page 15: Accessories Installation
Loosen the two marked knob of the ECLDISPLAY. Insert the optic (2-A) and rotate it (2-B) so the marked grooves (3) of the optic coincides with the four marked flaps of the unit (4). PROLIGHTS - EclDisplay CC / EclDisplay CCFC... - Page 16 The marked lever in position A allows the locking of the blades. Rotating the lever to position B or C allows the release of the blades. This operation must be repeated for both levers on the frame system. Fig. 08 PROLIGHTS - EclDisplay CC / EclDisplayCCFC...
-
Page 17: Barndoor And Filter Frame (Code Ecldispbdnffb - Optional)
(3). Insert the holder from above throught the track Move the marked rod down (6). (4). Then insert the barn door (5). Fig. 09 PROLIGHTS - EclDisplay CC / EclDisplay CCFC... -
Page 18: Anti-Glare Louvre (Code Ecldisplouvre - Optional)
ANTI-GLARE LOUVRE (CODE ECLDISPLOUVRE - OPTIONAL) Anti-glare louvre Rubber ring Insert the anti-glare louvre into the rubber ring. Mount the anti-glare louvre with the rubber ring on the optic. Fig. 10 PROLIGHTS - EclDisplay CC / EclDisplayCCFC... -
Page 19: Gobo Holder (Code Ecldispgobohind - Optional)
GOBO HOLDER (CODE ECLDISPGOBOHIND - OPTIONAL) Loosen the two marked knob of the optic (1). Then move the cap (2). Insert the gobo holder into the slot provided on the optic. Fig. 11 PROLIGHTS - EclDisplay CC / EclDisplay CCFC... -
Page 20: Half Snoot, Full Snoot (Codes Ecldisphsnoot, Ecldispfsnoot - Optional)
Loosen the three marked knob. Insert the half snoot on the optic and tighten the knobs in the egraved ring. Loosen the three marked knob. Insert the full snoot on the optic and tighten the knobs in the egraved ring. Fig. 12 PROLIGHTS - EclDisplay CC / EclDisplayCCFC... -
Page 21: Ceiling Adapter Kit (Codes Ecldispceilkit, Ecldispceilflg - Optional)
100 mm 35 mm [1.4 in] [3.9 in] [9.1 in] [3.9 in] [1.4 in] 110 mm [4.3 in] Ø200 mm [7.9 in] Measurements for cuts on the panels (1) and of the ECLDISPCEILFLG (2). PROLIGHTS - EclDisplay CC / EclDisplay CCFC... - Page 22 Mount the marked ceiling adapter kit on the ceiling by tightening the screws in the marked points (4). Fit the M6 screw to fix the projector (placed upside down) in the holes provided in the back housing (see detail). Fit the M4 screw to lock rotation. PROLIGHTS - EclDisplay CC / EclDisplayCCFC...
- Page 23 (6). Tighten the M4 screw (6) to lock the vertical movement of the plate. Mount the flange tightening the two marked screws (7) to complete the ceiling adapter kit. Fig. 13 PROLIGHTS - EclDisplay CC / EclDisplay CCFC...
-
Page 24: Maintenance
WARNING: the use of alcohol or any other detergent could damage the lenses. • All other service operations on the product must be carried out by PROLIGHTS, its approved service agents or trained and qualified personnel. -
Page 25: Troubleshooting
• Dirty or damaged filters • Install lens assembly properly. Contact an authorized service center in case of technical problems or not reported in the table can not be resolved by the procedure given in the table. PROLIGHTS - EclDisplay CC / EclDisplay CCFC... - Page 26 Note...
- Page 28 PROLIGHTS is a trademark of prolights.it Via A.Olivetti snc MUSIC & LIGHTS S.r.l. support@prolights.it 04026 - Minturno (LT) ITALY musiclights.it Tel: +39 0771 72190...
Need help?
Do you have a question about the EclDisplay CC and is the answer not in the manual?
Questions and answers