Advance acoustic Adfinity 17ST Service Manual
Hide thumbs
Also See for Adfinity 17ST:
- Pressure washer (67 pages) ,
- Instructions for use manual (108 pages)

Related Manuals for Advance acoustic Adfinity 17ST


Summary of Contents for Advance acoustic Adfinity 17ST
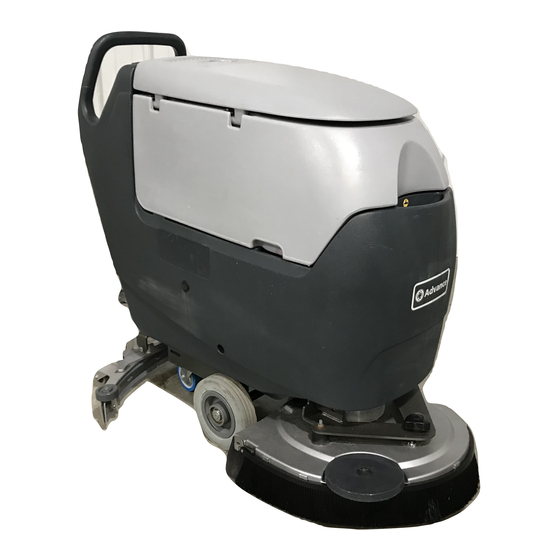
- Page 1 Adfinity 17ST / 20ST / X20R 20D / X20D / X20C / X24D SERVICE MANUAL Advance models: 908 7161 020 908 7162 020 9087290020 908 7163 020 908 7164 020 908 7165 020 908 7166 020 9096982000(5)2012-03...
-
Page 3: Table Of Contents
SERVICE MANUAL ENGLISH TABLE OF CONTENTS GENERAL INFORMATION ............................5 CONVENTIONS ..............................5 MACHINE LIFTING ..............................5 MACHINE TRANSPORTATION ..........................5 OTHER REFERENCE MANUALS ......................... 5 SAFETY ................................. 6 SYMBOLS ................................6 GENERAL INSTRUCTIONS ..........................6 TECHNICAL DATA (For Adfinity™ 17ST, 20ST, X20R) ..................8 TECHNICAL DATA (For Adfinity™... - Page 4 ENGLISH SERVICE MANUAL CHECK/REPLACEMENT/ADJUSTMENT OF DRIVING BELTS FROM MOTORS TO CYLINDRICAL BRUSHES (For Adfinity™ X20C) ..................57 BRUSH ENABLING MICROSWITCH ADJUSTMENT/REPLACEMENT (For Adfinity™ 20D, X20D, X20C, X24D) ......................58 TROUBLESHOOTING ............................59 RECOVERY WATER SYSTEM ..........................60 RECOVERY WATER TANK AND VACUUM GRID CLEANING, AND COVER GASKET CHECK ....... 60 SQUEEGEE CLEANING/CHECK/REPLACEMENT AND SQUEEGEE BLADE REPLACEMENT ......
-
Page 5: General Information
SERVICE MANUAL ENGLISH GENERAL INFORMATION GENERAL INFORMATION CONVENTIONS Forward, backward, front, rear, left or right are intended with reference to the operator’s position, that is to say in driving position with the hands on the handlebar. MACHINE LIFTING WARNING! Do not work under the lifted machine without supporting it with safety stands. MACHINE TRANSPORTATION WARNING! Before transporting the machine, make sure that:... -
Page 6: Safety
ENGLISH SERVICE MANUAL GENERAL INFORMATION SAFETY The following symbols indicate potentially dangerous situations. Always read this information carefully and take all necessary precautions to safeguard people and property. SYMBOLS DANGER! It indicates a dangerous situation with risk of death for the operator. WARNING! It indicates a potential risk of injury for people or damage to objects. - Page 7 SERVICE MANUAL ENGLISH GENERAL INFORMATION WARNING! – Carefully read all the instructions before performing any maintenance/repair procedure. – Before using the battery charger, ensure that frequency and voltage values, indicated on the machine serial number plate, match the electrical mains voltage. –...
-
Page 8: Technical Data (For Adfinity™ 17St, 20St, X20R)
ENGLISH SERVICE MANUAL GENERAL INFORMATION TECHNICAL DATA (For Adfinity™ 17ST, 20ST, X20R) Adfinity™ 17ST Adfinity™ 20ST Adfinity™ X20R Model (1 brush/pad-holder (1 brush/pad-holder (Rotating and vibrating without drive system)) without drive system)) deck with drive system) Machine height 41.6 in (1,058.5 mm) Solution/clean water tank capacity 10.5 gal (40 litres) Recovery water tank capacity... -
Page 9: Technical Data (For Adfinity™ 20D, X20D, X20C, X24D)
SERVICE MANUAL ENGLISH GENERAL INFORMATION TECHNICAL DATA (For Adfinity™ 20D, X20D, X20C, X24D) General technical data Adfinity™ 20D Adfinity™ X20D Adfinity™ X20C Adfinity™ X24D Model (1 brush/pad- (1 brush/pad- (2 cylindrical (2 brushes/pad- holder) holder) brushes) holders) Machine height 42.8 in (1,088 mm) Solution/clean water tank capacity 15.3 gal (58 litres) Recovery water tank capacity... - Page 10 ENGLISH SERVICE MANUAL GENERAL INFORMATION TECHNICAL DATA (For Adfinity™ 20D, X20D, X20C, X24D) (continues) Technical data for machines with brush/pad-holder deck Adfinity™ 20D Adfinity™ X20D Adfinity™ X24D Model (1 brush/pad-holder) (1 brush/pad-holder) (2 brushes/pad- holders) Cleaning width 21.0 in (530 mm) 24.0 in (610 mm) Squeegee width 30.0 in (760 mm)
-
Page 11: Dimensions Machine
SERVICE MANUAL ENGLISH GENERAL INFORMATION DIMENSIONS Adfinity™ 17ST 1190 mm (46.8 in) 760 mm (30.0 in) P100200 DIMENSIONS Adfinity™ 20ST 1228 mm (48.3 in) 760 mm (30.0 in) P100201 Adfinity™ 17ST / 20ST / X20R / 20D / X20D / X20C / X24D 9096982000... - Page 12 ENGLISH SERVICE MANUAL GENERAL INFORMATION DIMENSIONS Adfinity™ X20R 1245 mm (49.0 in) 760 mm (30.0 in) DIMENSIONS Adfinity™ 20D, X20D 1323 mm (52.1 in) 760 mm (30.0 in) P100202 Adfinity™ 17ST / 20ST / X20R / 20D / X20D / X20C / X24D 9096982000...
- Page 13 SERVICE MANUAL ENGLISH GENERAL INFORMATION DIMENSIONS Adfinity™ X20C 1253 mm (49.3 in) 760 mm (30.0 in) P100203 DIMENSIONS Adfinity™ X24D 1311 mm (51.6 in) 810 mm (32 in) P100204 Adfinity™ 17ST / 20ST / X20R / 20D / X20D / X20C / X24D 9096982000...
-
Page 14: Maintenance
ENGLISH SERVICE MANUAL GENERAL INFORMATION MAINTENANCE The lifespan of the machine and its maximum operating safety are ensured by correct and regular maintenance WARNING! Read carefully the instructions in the Safety chapter before performing any maintenance procedure. The following tables provides the scheduled maintenance. The intervals shown may vary according to particular working conditions, which are to be defined by the person in charge of the maintenance. -
Page 15: Machine Nomenclature (For Adfinity™ 17St, 20St, X20R)
SERVICE MANUAL ENGLISH GENERAL INFORMATION MACHINE NOMENCLATURE (For Afinity™ 17ST, 20ST, X20R) Throughout this Manual you will find numbers in brackets – for example: (2). These numbers refer to the components indicated in these two nomenclature pages. Refer to these pages whenever you need to identify a component mentioned in the text.Portare la macchina su un pavimento pianeggiante. - Page 16 ENGLISH SERVICE MANUAL GENERAL INFORMATION MACHINE NOMENCLATURE (For Afinity™ 17ST, 20ST, X20R) (Continues) 51-54 S301514A Adfinity™ 17ST / 20ST / X20R / 20D / X20D / X20C / X24D 9096982000...
- Page 17 SERVICE MANUAL ENGLISH GENERAL INFORMATION MACHINE NOMENCLATURE (For Afinity™ 17ST, 20ST, X20R) (Continues) 71 72 73 71 72 73 74 75 76 84 83 78 77 Adfinity™ 17ST - 20ST Adfinity™ X20R S311328 S311329 S311330 Adfinity™ 17ST / 20ST / X20R / 20D / X20D / X20C / X24D 9096982000...
-
Page 18: Machine Nomenclature (For Adfinity™ 20D, X20D, X20C, X24D)
ENGLISH SERVICE MANUAL GENERAL INFORMATION MACHINE NOMENCLATURE (For Afinity™ 20D, X20D, X20C, X24D) Throughout this Manual you will find numbers in brackets – for example: (2). These numbers refer to the components indicated in these two nomenclature pages. Refer to these pages whenever you need to identify a component mentioned in the text. Control panel 50. - Page 19 SERVICE MANUAL ENGLISH GENERAL INFORMATION MACHINE NOMENCLATURE (For Afinity™ 20D, X20D,X20C, X24D) (Continues) 55 13 26 15 S301516A Adfinity™ 17ST / 20ST / X20R / 20D / X20D / X20C / X24D 9096982000...
- Page 20 ENGLISH SERVICE MANUAL GENERAL INFORMATION MACHINE NOMENCLATURE (For Afinity™ 20D, X20D, X20C, X24D) (Continues) S301517A Adfinity™ 17ST / 20ST / X20R / 20D / X20D / X20C / X24D 9096982000...
-
Page 21: Solution/Clean Water Supply System
SERVICE MANUAL ENGLISH SOLUTION/CLEAN WATER SUPPLY SYSTEM SOLUTION/CLEAN WATER SUPPLY SYSTEM SOLUTION/CLEAN WATER TANK AND SUPPLY SYSTEM CLEANING Drive the machine to the appointed solution disposal area. • (For Adfinity™ X20R, 20D, X20D, X20C, X24D) Turn the ignition key (80) to “0”. •... -
Page 22: Solution Filter Cleaning (For Adfinity™ 20D)
ENGLISH SERVICE MANUAL SOLUTION/CLEAN WATER SUPPLY SYSTEM SOLUTION FILTER CLEANING (For Adfinity™ 20D) Drive the machine on a level floor. Turn the ignition key (80) to “0”. Close the solution tap (A) under the machine left lower side. The tap (A) is closed when it is on the position (B) and it is open when it is on the position (C). -
Page 23: Solenoid Valve Disassembly/Assembly (For Adfinity™ X20R)
SERVICE MANUAL ENGLISH SOLUTION/CLEAN WATER SUPPLY SYSTEM SOLENOID VALVE DISASSEMBLY/ASSEMBLY (For Adfinity™ X20R) Disassembly Lower the deck by pressing the pedal (11). Disconnect motor connectors, water line to deck at union (F) and two mounting screws holding deck to lift arms (G). Remove deck Remove the screw (A), disconnect the connector (B) and recover the gasket. -
Page 24: Solenoid Valve Disassembly/Assembly (For Adfinity™ 20D, X20D, X20C, X24D)
ENGLISH SERVICE MANUAL SOLUTION/CLEAN WATER SUPPLY SYSTEM SOLENOID VALVE DISASSEMBLY/ASSEMBLY (For Adfinity™ 20D, X20D, X20C, X24D) Disassembly (For machines with brushes/pad-holders) Remove the brushes/pad-holders. Lower the deck by pressing the pedal (11). (For Adfinity™ 20D) Loosen the clamp (A) and disconnect the hoses (B) from the filter assembly (C). Disconnect the union (D) from the solenoid valve (E) and recover the gasket. -
Page 25: Ecoflex
SERVICE MANUAL ENGLISH ECOFLEX™ SYSTEM ECOFLEX™ SYSTEM CLEAN WATER FILTER CLEANING (For Adfinity™ X20D, X20C, X24D) Drive the machine on a level floor. Turn the ignition key (80) to “0”. Open the cover (22) and check that the recovery water tank (21) is empty, otherwise empty it with the drain hose (16). Grasp the handle (41) and carefully lift the tank (40). -
Page 26: Detergent Tank Cleaning (For Adfinity™ X20R, X20D, X20C, X24D)
ENGLISH SERVICE MANUAL ECOFLEX™ SYSTEM DETERGENT TANK CLEANING (For Adfinity™ X20R, X20D, X20C, X24D) Drive the machine to the appointed detergent disposal area. Turn the ignition key (80) to “0”. Open the cover (22) and check that the recovery water tank (21) is empty, otherwise empty it with the drain hose (16). Close the cover (22). -
Page 27: Water Pump Disassembly/Assembly (For Adfinity™ X20D, X20C, X24D)
SERVICE MANUAL ENGLISH ECOFLEX™ SYSTEM WATER PUMP DISASSEMBLY/ASSEMBLY (For Adfinity™ X20R, X20D, X20C, X24D) Disassembly If the tank (21) contains recovery water: • Drive the machine to the appointed recovery water disposal area. • Turn the ignition key (80) to “0”. •... -
Page 28: Water Pump Disassembly/Assembly (For Adfinity™ X20R)
ENGLISH SERVICE MANUAL ECOFLEX™ SYSTEM DETERGENT PUMP AND CHECK VALVE DISASSEMBLY/ASSEMBLY (For Adfinity™ X20R) Disassembly If the tank (21) contains recovery water: • Drive the machine to the appointed recovery water disposal area. • Turn the ignition key (80) to “0”. •... - Page 29 SERVICE MANUAL ENGLISH ECOFLEX™ SYSTEM DETERGENT PUMP AND CHECK VALVE DISASSEMBLY/ASSEMBLY (For Adfinity™ X20R) (Continues) S301527 Adfinity™ 17ST / 20ST / X20R / 20D / X20D / X20C / X24D 9096982000...
-
Page 30: Detergent Pump And Check Valve Disassembly/Assembly (For Adfinity™ X20D, X20C, X24D)
ENGLISH SERVICE MANUAL ECOFLEX™ SYSTEM DETERGENT PUMP AND CHECK VALVE DISASSEMBLY/ASSEMBLY (For Adfinity™ X20D, X20C, X24D) Disassembly If the tank (21) contains recovery water: • Drive the machine to the appointed recovery water disposal area. • Turn the ignition key (80) to “0”. •... - Page 31 SERVICE MANUAL ENGLISH ECOFLEX™ SYSTEM DETERGENT PUMP AND CHECK VALVE DISASSEMBLY/ASSEMBLY (For Adfinity™ X20D, X20C, X24D) (Continues) S301526A Adfinity™ 17ST / 20ST / X20R / 20D / X20D / X20C / X24D 9096982000...
-
Page 32: Troubleshooting
ENGLISH SERVICE MANUAL ECOFLEX™ SYSTEM TROUBLESHOOTING Small amount of detergent or no detergent reaches the brushes Possible causes: The detergent flow percentage is too low (check/change the percentage as shown in the User Manual). The hydraulic circuit upstream of the detergent pump is not triggered (check if the hose (48) is filled and, if necessary, perform one or more draining cycle, as shown in the relevant paragraph). -
Page 33: Brushing System
SERVICE MANUAL ENGLISH BRUSHING SYSTEM BRUSHING SYSTEM BRUSH/PAD CLEANING CAUTION! It is advisable to wear protective gloves when cleaning the brushes/pads because there may be sharp debris. Remove the brushes/pads, as shown in the User Manual. Clean and wash the brushes/pads with water and detergent. Check that the brush/pads are integral and not excessively worn;... -
Page 34: Brush/Pad-Holder/Cylindrical Brush Deck Disassembly/Assembly (For Adfinity™ 17St, 20St)
ENGLISH SERVICE MANUAL BRUSHING SYSTEM BRUSH/PAD-HOLDER BRUSH DECK DISASSEMBLY/ASSEMBLY (For Adfinity™ 17ST, 20ST) The machine can be equipped with either the brush/pad-holder deck or the cylindrical brush deck. Disassembly Drive the machine on a level floor. Remove the brushes/pad-holders, as shown in the User Manual. Lower the brush/pad-holder deck by pressing the pedal (11). -
Page 35: Brush/Pad-Holder/Cylindrical Brush Deck Disassembly/Assembly (For Adfinity™ X20R)
SERVICE MANUAL ENGLISH BRUSHING SYSTEM DECK DISASSEMBLY/ASSEMBLY (For Adfinity™ X20R) Disassembly Drive the machine on a level floor. Lower the deck by pressing the pedal (11). Disconnect the deck motor electrical connection (A). Disconnect the solution hose connection (B). Remove the screws (C), then remove the deck assembly. Assembly Assemble the components in the reverse order of disassembly. -
Page 36: Brush/Pad-Holder/Cylindrical Brush Deck Disassembly/Assembly (For Adfinity™ 20D, X20D, X20C, X24D)
ENGLISH SERVICE MANUAL BRUSHING SYSTEM BRUSH/PAD-HOLDER/CYLINDRICAL BRUSH DECK DISASSEMBLY/ASSEMBLY (For Adfinity™ 20D, X20D, X20C, X24D) The machine can be equipped with either the brush/pad-holder deck (18a and 18b) or the cylindrical brush deck (18c), according to the following procedures. CAUTION! When the deck is installed/removed, it may be necessary to change the squeegee too, because they must have the same width. -
Page 37: Brush Motor Electrical Input Check (For Adfinity™ 17St, 20St)
SERVICE MANUAL ENGLISH BRUSHING SYSTEM BRUSH MOTOR ELECTRICAL INPUT CHECK (For Adfinity™ 17ST, 20ST) WARNING! This procedure must be performed by qualified personnel only. Check If the tank (21) contains recovery water: • Drive the machine to the appointed recovery water disposal area. •... -
Page 38: Brush Motor Electrical Input Check (For Adfinity™ X20R)
ENGLISH SERVICE MANUAL BRUSHING SYSTEM BRUSH MOTOR ELECTRICAL INPUT CHECK (For Adfinity™ X20R) WARNING! This procedure must be performed by qualified personnel only. Check Drive the machine on a level floor. Jack one of the drive wheel off of the floor. Lower the deck with a red pad or brush attached into the floor by pressing the pedal (11). -
Page 39: Brush Motor Electrical Input Check (For Adfinity™ 20D, X20D)
SERVICE MANUAL ENGLISH BRUSHING SYSTEM BRUSH MOTOR ELECTRICAL INPUT CHECK (For Adfinity™ 20D, X20D) WARNING! This procedure must be performed by qualified personnel only. Check If the tank (21) contains recovery water: • Drive the machine to the appointed recovery water disposal area. •... - Page 40 ENGLISH SERVICE MANUAL BRUSHING SYSTEM BRUSH MOTOR ELECTRICAL INPUT CHECK (For Adfinity™ 20D, X20D) (Continues) S301534A Adfinity™ 17ST / 20ST / X20R / 20D / X20D / X20C / X24D 9096982000...
-
Page 41: Brush Motor Electrical Input Check (For Adfinity™ X20C)
SERVICE MANUAL ENGLISH BRUSHING SYSTEM BRUSH MOTOR ELECTRICAL INPUT CHECK (For Adfinity™ X20C) WARNING! This procedure must be performed by qualified personnel only. Check Remove the cylindrical brushes, as shown in the User Manual. Lower the deck by pressing the pedal (11). Apply the amperometric pliers (A) on one cable (B) of the brush motor (C). -
Page 42: Brush Motor Electrical Input Check (For Adfinity™ X24D)
ENGLISH SERVICE MANUAL BRUSHING SYSTEM BRUSH MOTOR ELECTRICAL INPUT CHECK (For Adfinity™ X24D) WARNING! This procedure must be performed by qualified personnel only. Check Remove the brushes, as shown in the User Manual. Lower the deck by pressing the pedal (11). Apply the amperometric pliers (A) on one cable (B) of the brush motor (C). -
Page 43: Brush Motor Carbon Brush Check/Replacement (For Adfinity™ 17St, 20St)
SERVICE MANUAL ENGLISH BRUSHING SYSTEM BRUSH MOTOR CARBON BRUSH CHECK/REPLACEMENT (For Adfinity™ 17ST, 20ST) Check If the tank (21) contains recovery water: • Drive the machine to the appointed recovery water disposal area. • Turn off the switches (71) and (73). •... -
Page 44: Brush Motor Carbon Brush Check/Replacement (For Adfinity™ 20D, X20D)
ENGLISH SERVICE MANUAL BRUSHING SYSTEM BRUSH MOTOR CARBON BRUSH CHECK/REPLACEMENT (For Adfinity™ 20D, X20D) Check If the tank (21) contains recovery water: • Drive the machine to the appointed recovery water disposal area. • Turn the ignition key (80) to “0”. •... - Page 45 SERVICE MANUAL ENGLISH BRUSHING SYSTEM BRUSH MOTOR CARBON BRUSH CHECK/REPLACEMENT (For Adfinity™ 20D, X20D) (Continues) S301541A Adfinity™ 17ST / 20ST / X20R / 20D / X20D / X20C / X24D 9096982000...
-
Page 46: Brush Motor Carbon Brush Check/Replacement (For Adfinity™ X20C)
ENGLISH SERVICE MANUAL BRUSHING SYSTEM BRUSH MOTOR CARBON BRUSH CHECK/REPLACEMENT (For Adfinity™ X20C) Check Remove the brush motor (see the procedure in the relevant paragraph). At the workbench, remove dust and debris from the motor, especially in the area of the protection clamp (A). Remove the protection clamp (A). -
Page 47: Brush Motor Carbon Brush Check/Replacement (For Adfinity™ X24D)
SERVICE MANUAL ENGLISH BRUSHING SYSTEM BRUSH MOTOR CARBON BRUSH CHECK/REPLACEMENT (For Adfinity™ X24D) Check Remove the deck (see the procedure in the relevant paragraph). At the workbench, remove dust and debris from the motor, especially in the area of the carbon brushes. Remove four protection covers (A) by disengaging the fasteners. -
Page 48: Brush Motor Carbon Brush Check/Replacement (For Adfinity™ X20R)
ENGLISH SERVICE MANUAL BRUSHING SYSTEM BRUSH MOTOR CARBON BRUSH CHECK/REPLACEMENT (For Adfinity™ X20D) Remove the deck (see the procedure in the relevant paragraph). Set the scrub deck on a workbench, NOTE The brush motor does not need to be removed from deck assembly. Remove wire retaining nut and rubber packing. - Page 49 SERVICE MANUAL ENGLISH BRUSHING SYSTEM BRUSH MOTOR CARBON BRUSH CHECK/REPLACEMENT (For Adfinity™ X20D) (Continues) Remove end plate. Replace the carbon brushes. • Observe how the springs roll when the brush is pushed back before taking it apart. • Remove a brush and spring. •...
- Page 50 ENGLISH SERVICE MANUAL BRUSHING SYSTEM BRUSH MOTOR CARBON BRUSH CHECK/REPLACEMENT (For Adfinity™ X20D) (Continues) Install the wave washer. Install the end cover in stages. • Install it far enough so that the brushes will contact the commutator when the temporary retaining wires are removed. Then remove the wires.
-
Page 51: Brush Motor Disassembly/Assembly (For Adfinity™ 17St, 20St, 20D, X20D)
SERVICE MANUAL ENGLISH BRUSHING SYSTEM BRUSH MOTOR DISASSEMBLY/ASSEMBLY (For Adfinity™ 17ST, 20ST, 20D, X20D) Disassembly Remove the deck (see the procedure in the relevant paragraph). At the workbench, remove the screw (A) from the deck. Remove the hub assembly (B) with a puller. Remove the screws (C). -
Page 52: Brush Motor Disassembly/Assembly (For Adfinity™ X20R)
ENGLISH SERVICE MANUAL BRUSHING SYSTEM BRUSH MOTOR DISASSEMBLY/ASSEMBLY (For Adfinity™ X20R) Disassembly Remove the deck (see the procedure in the relevant paragraph). At the workbench, remove the screw (A) and remove pad driver (B). Remove counter weight screws (C) and remove counter weight. Remove aluminium driver (E) with a puller if necessary. -
Page 53: Deck Cover Bumper Wheel Torque (For Adfinity™ X20R)
SERVICE MANUAL ENGLISH BRUSHING SYSTEM DECK COVER BUMPER WHEEL TORQUE (For Adfinity™ X20R) Adfinity™ 17ST / 20ST / X20R / 20D / X20D / X20C / X24D 9096982000... - Page 54 ENGLISH SERVICE MANUAL BRUSHING SYSTEM DECK COVER BUMPER WHEEL TORQUE (For Adfinity™ X20R) (Continues) torque spec 50-60 in-lbs (5.6-6.8 N-m) Adfinity™ 17ST / 20ST / X20R / 20D / X20D / X20C / X24D 9096982000...
-
Page 55: Brush Motor Disassembly/Assembly (For Adfinity™ X20C)
SERVICE MANUAL ENGLISH BRUSHING SYSTEM BRUSH MOTOR DISASSEMBLY/ASSEMBLY (For Adfinity™ X20C) Disassembly Remove the cylindrical brush deck (see the procedure in the relevant paragraph). At the workbench, remove the screw (A) from the motor which has to be disassembled. Remove the case (B). Loosen the nut (C) and move the pulley (D) to loosen the belt (E). -
Page 56: Brush Motor Disassembly/Assembly (For Adfinity™ X24D)
ENGLISH SERVICE MANUAL BRUSHING SYSTEM BRUSH MOTOR DISASSEMBLY/ASSEMBLY (For Adfinity™ X24D) Disassembly Remove the deck (see the procedure in the relevant paragraph). At the workbench, remove the screw (A) from the reduction unit which has to be disassembled. Remove the hub assembly (B) with a puller. Remove the screws (C). -
Page 57: Check/Replacement/Adjustment Of Driving Belts From Motors To Cylindrical Brushes (For Adfinity™ X20C)
SERVICE MANUAL ENGLISH BRUSHING SYSTEM CHECK/REPLACEMENT/ADJUSTMENT OF DRIVING BELTS FROM MOTORS TO CYLINDRICAL BRUSHES (For Adfinity™ X20C) Check Drive the machine on a level floor. Turn the ignition key (12) to “0”. Lower the cylindrical brush deck by pressing the pedal (11). Remove the screws (A) and remove the covers (B). -
Page 58: Brush Enabling Microswitch Adjustment/Replacement (For Adfinity™ 20D, X20D, X20C, X24D)
ENGLISH SERVICE MANUAL BRUSHING SYSTEM BRUSH ENABLING MICROSWITCH ADJUSTMENT/REPLACEMENT (For Adfinity™ 20D, X20D, X20C, X24D) Drive the machine on a level floor. Turn the ignition key (80) to “0”. Disconnect the battery connector (12). Remove the screws (A) and move the drive paddle cover (B). Check that the springs (C) operate correctly when releasing the drive paddle (D). -
Page 59: Troubleshooting
SERVICE MANUAL ENGLISH BRUSHING SYSTEM TROUBLESHOOTING ALL BRUSHES DO NOT ROTATE Possible causes: The brush enabling microswitch is misadjusted or broken (adjust or replace). The wiring harness between microswitch and function electronic board is damaged (repair). The brush motor electromagnetic switch wiring harness is damaged (repair). The function electronic board is damaged (replace). -
Page 60: Recovery Water System
ENGLISH SERVICE MANUAL RECOVERY WATER SYSTEM RECOVERY WATER SYSTEM RECOVERY WATER TANK AND VACUUM GRID CLEANING, AND COVER GASKET CHECK Drive the machine to the appointed recovery water disposal area. • (For Adfinity™ X20R, 20D, X20D, X20C, X24D) Turn the ignition key (80) to “0”. •... -
Page 61: Squeegee Cleaning/Check/Replacement And Squeegee Blade Replacement
SERVICE MANUAL ENGLISH RECOVERY WATER SYSTEM SQUEEGEE CLEANING/CHECK/REPLACEMENT AND SQUEEGEE BLADE REPLACEMENT CAUTION! It is advisable to wear protective gloves when cleaning the squeegee because there may be sharp debris. Disassembly and cleaning Drive the machine on a level floor. •... - Page 62 ENGLISH SERVICE MANUAL RECOVERY WATER SYSTEM SQUEEGEE CLEANING/CHECK/REPLACEMENT AND SQUEEGEE BLADE REPLACEMENT (continues) S301552 Adfinity™ 17ST / 20ST / X20R / 20D / X20D / X20C / X24D 9096982000...
-
Page 63: Vacuum System Motor Filter Cleaning
SERVICE MANUAL ENGLISH RECOVERY WATER SYSTEM VACUUM SYSTEM MOTOR FILTER CLEANING Disassembly and cleaning If the tank (21) contains recovery water: • Drive the machine to the appointed recovery water disposal area. • (For Adfinity X20R, 20D, X20D, X20C, X24D) Turn the ignition key (80) to “0”. (For Adfinity 17ST, 20ST) Turn off the switches (71) and (73). -
Page 64: Vacuum System Motor Carbon Brush Check/Replacement
ENGLISH SERVICE MANUAL RECOVERY WATER SYSTEM VACUUM SYSTEM MOTOR CARBON BRUSH CHECK/REPLACEMENT Remove the vacuum system motor (see the procedure in the relevant paragraph). At the workbench, remove the cover (A) (press-fitted) from the vacuum system motor (B). Remove the screws (C). Disconnect the electrical connections (D). -
Page 65: Vacuum System Motor Disassembly/Assembly
SERVICE MANUAL ENGLISH RECOVERY WATER SYSTEM VACUUM SYSTEM MOTOR DISASSEMBLY/ASSEMBLY Disassembly If the tank (21) contains recovery water: • Drive the machine to the appointed recovery water disposal area. • (For Adfinity™ X20R, 20D, X20D, X20C, X24D) Turn the ignition key (80) to “0”. •... -
Page 66: Squeegee Spring Check/Replacement (All Models, With Aluminium Squeegee)
ENGLISH SERVICE MANUAL RECOVERY WATER SYSTEM SQUEEGEE SPRING CHECK/REPLACEMENT (All models, with aluminium squeegee) Check Drive the machine on a level floor. • (For Adfinity™ X20R, 20D, X20D, X20C, X24D) Turn the ignition key (80) to “0”. • (For Adfinity™ 17ST, 20ST) Turn off the switches (71) and (73). Check that the springs (A) and (B) push the squeegee (C) on the floor correctly. -
Page 67: Troubleshooting
SERVICE MANUAL ENGLISH RECOVERY WATER SYSTEM TROUBLESHOOTING The vacuum system motor does not turn on The wiring harness between the function electronic board and the vacuum system relay is damaged or short-circuited (check and repair). The vacuum system relay is damaged (replace). The wiring harness between relay and motor is damaged (repair). -
Page 68: Drive System
ENGLISH SERVICE MANUAL DRIVE SYSTEM DRIVE SYSTEM TRACTION ENABLING MICROSWITCH ADJUSTMENT/REPLACEMENT (For Adfinity™ X20R, 20D, X20D, X20C, X24D) Drive the machine on a level floor. Turn the ignition key (80) to “0”. Disconnect the battery connector (12). Remove the screws (A) and move the drive paddle cover (B). Check that the springs (C) operate correctly when releasing the drive paddle (D). -
Page 69: Maximum Speed Potentiometer Disassembly/Assembly (For Adfinity™ X20R, 20D, X20D, X20C, X24D)
SERVICE MANUAL ENGLISH DRIVE SYSTEM MAXIMUM SPEED POTENTIOMETER DISASSEMBLY/ASSEMBLY (Adfinity™ X20R, 20D, X20D, X20C, X24D) Disassembly Disconnect the battery connector (12). Operating inside the hole (A), loosen the threaded dowel and remove the maximum speed adjuster knob (B). Unscrew the potentiometer mounting nut (C). Remove the screws (D) and move the cover (E). -
Page 70: Drive System Motor Electrical Input Check (For Adfinity™ X20R, 20D, X20D, X20C, X24D)
ENGLISH SERVICE MANUAL DRIVE SYSTEM DRIVE SYSTEM MOTOR ELECTRICAL INPUT CHECK (For Adfinity™ X20R, 20D, X20D, X20C, X24D) WARNING! This procedure must be performed by qualified personnel only and with the help of an assistant. Check that the batteries are completely charged, otherwise charge them as shown in the User Manual. If the tank (21) contains recovery water: •... -
Page 71: Drive System Motor Carbon Brush Check And Replacement (For Adfinity™ X20R, 20D, X20D, X20C, X24D)
SERVICE MANUAL ENGLISH DRIVE SYSTEM DRIVE SYSTEM MOTOR CARBON BRUSH CHECK AND REPLACEMENT (For Adfinity™ X20R, 20D, X20D, X20C, X24D) Drive the machine to the appointed disposal area, and empty the recovery water tank (21) with the hose (16). Place the machine on a hoisting system (if available). Otherwise, drive the machine on a level floor. -
Page 72: Drive System Motor-Differential Disassembly/Assembly (For Adfinity™ X20R, 20D, X20D, X20C, X24D)
ENGLISH SERVICE MANUAL DRIVE SYSTEM DRIVE SYSTEM MOTOR-DIFFERENTIAL DISASSEMBLY/ASSEMBLY (Adfinity™ X20R, 20D, X20D, X20C, X24D) Disassembly If the tank (21) and/or (20) contains recovery water: • Drive the machine to the appointed disposal area. • Turn the ignition key (80) to “0”. •... -
Page 73: Troubleshooting
SERVICE MANUAL ENGLISH DRIVE SYSTEM TROUBLESHOOTING Open circuit Possible causes: There are bulky debris or cords under the machine or around the driving wheels (remove the debris). The motor is damaged (check the motor electrical input). The floor gradient is excessive (do not use the drive system on slopes with a gradient exceeding the specifications). There is a short circuit in the drive system electronic board harness (repair). -
Page 74: Drive System Electronic Board Diagnostic Table
ENGLISH SERVICE MANUAL DRIVE SYSTEM TROUBLESHOOTING (Continues) Drive system electronic board diagnostic table No. of Meaning Action flashes (*) Drive system/brush enabling microswitch Check the microswitch adjustment closed when starting the machine Faulty speed potentiometer Check both speed potentiometers Faulty speed potentiometer Check both speed potentiometers Speed potentiometer off neutral when Check the speed potentiometer adjustment... -
Page 75: Other Systems
SERVICE MANUAL ENGLISH OTHER SYSTEM OTHER SYSTEM SCREW AND NUT TIGHTENING CHECK Drive the machine to the appointed disposal area, and empty the recovery water tank (21) with the hose (16). Place the machine on a hoisting system (if available). Otherwise, drive the machine on a level floor. -
Page 76: Electrical System
ENGLISH SERVICE MANUAL ELECTRICAL SYSTEM ELECTRICAL SYSTEM MACHINE WORKING HOUR CHECK (optional) (For Adfinity X20R, 20D, X20D, X20C, X24D) Turn the ignition key (80) to “I”. Press the vacuum system switch (73) and read on the hour counter (79) the total number of working hours (scrubbing/drying) performed by the machine. -
Page 77: Battery Type Setting (Wet Or Gel) (For Adfinity™ 17St, 20St)
SERVICE MANUAL ENGLISH ELECTRICAL SYSTEM BATTERY TYPE SETTING (WET OR GEL) (For For Adfinity™ 17ST, 20ST) Set the electronic board of the machine and of the battery charger according to the type of batteries installed (WET or GEL) as shown below: Machine setting Press the switch (71) or (73) and pay attention to the following in the very first seconds of machine operation: •... -
Page 78: Fuse Check/Replacement
ENGLISH SERVICE MANUAL ELECTRICAL SYSTEM FUSE CHECK/REPLACEMENT Disconnect the battery connector (12). Move aside the recovery water drain hose (16). Remove the battery charger cable (I) from the cable holder (J). Remove the screws (A) and carefully move aside the panel (B) by disengaging the grommet (K) from its housing on the panel (B). -
Page 79: Brush Motor Electromagnetic Switch Disassembly/Assembly
SERVICE MANUAL ENGLISH ELECTRICAL SYSTEM BRUSH MOTOR ELECTROMAGNETIC SWITCH DISASSEMBLY/ASSEMBLY Disassembly Disconnect the battery connector (12). Move aside the recovery water drain hose (16). Remove the battery charger cable (6) from the cable holder (7). Remove the screws (A) and carefully move aside the panel (B) by disengaging the cable grommet (C) from its housing on the panel (B). -
Page 80: Drive System Electronic Board Disassembly/Assembly (For Adfinity™ X20R, 20D, X20D, X20C, X24D)
ENGLISH SERVICE MANUAL ELECTRICAL SYSTEM DRIVE SYSTEM ELECTRONIC BOARD DISASSEMBLY/ASSEMBLY (For Adfinity™ X20R, 20D, X20D, X20C, X24D) Disassembly Disconnect the battery connector (12). Move aside the recovery water drain hose (16). Remove the battery charger cable (6) from the cable holder (7). Remove the screws (A) and carefully move aside the panel (B) by disengaging the cable grommet (C) from its housing on the panel (B). -
Page 81: Function Electronic Board Disassembly/Assembly
SERVICE MANUAL ENGLISH ELECTRICAL SYSTEM FUNCTION ELECTRONIC BOARD DISASSEMBLY/ASSEMBLY Disassembly Disconnect the battery connector (12). Move aside the recovery water drain hose (16). Remove the battery charger cable (6) from the cable holder (7). Remove the screws (A) and carefully move aside the panel (B) by disengaging the cable grommet (C) from its housing on the panel (B). -
Page 82: Troubleshooting
ENGLISH SERVICE MANUAL ELECTRICAL SYSTEM TROUBLESHOOTING the previous chapters related to the use of the electrical system. Other possible causes: The batteries are discharged or the connections are not efficient (charge the batteries or clean the connections). The batteries are broken (check the battery no-load voltage).Assembly NOTE A fault in the battery charger and relevant connections can affect the machine operation. -
Page 83: Component Layout (For Adfinity™ 17St, 20St)
SERVICE MANUAL ENGLISH ELECTRICAL SYSTEM COMPONENT LAYOUT (For Adfinity™ 17ST, 20ST) Key: 24 V battery Battery connector Battery charger connector Battery charger (optional) Deck connector Function electronic board Brush electromagnetic switches Vacuum system relay Water solenoid valve Deck fuse Vacuum system fuse Signal circuit fuse Hour counter (optional) Brush/pad-holder motor... -
Page 84: Wiring Diagram (For Adfinity™ 17St, 20St)
ENGLISH SERVICE MANUAL ELECTRICAL SYSTEM WIRING DIAGRAM (For Adfinity™ 17ST, 20ST) Key: Colour codes: 24 V battery Black Battery connector Blue Battery charger connector Brown Battery charger (optional) Green Deck connector Grey Function electronic board Orange Brush electromagnetic switches Pink Vacuum system relay Water solenoid valve Violet... -
Page 85: Component Layout (For Adfinity™ X20R, 20D, X20D, X20C, X24D)
SERVICE MANUAL ENGLISH ELECTRICAL SYSTEM COMPONENT LAYOUT (For Adfinity™ X20R, 20D, X20D, X20C, X24D) Key: 24 V battery Battery connector Battery charger connector Battery charger (optional) Cylindrical brush deck secondary connector Function electronic board Drive system electronic board Brush electromagnetic switches Vacuum system relay Detergent solenoid valve (optional) Deck fuse... - Page 86 ENGLISH SERVICE MANUAL ELECTRICAL SYSTEM COMPONENT LAYOUT (For Adfinity™ 20D, X20D, X20C, X24D) (Continues) F5 F6 S301580A Adfinity™ 17ST / 20ST / X20R / 20D / X20D / X20C / X24D 9096982000...
-
Page 87: Wiring Diagram (For Adfinity™ 20D, X20D, X20C, X24D) (Till S/N 072014255)
SERVICE MANUAL ENGLISH ELECTRICAL SYSTEM WIRING DIAGRAM (For Adfinity™ 20D, X20D, X20C, X24D) (Till S/N 072014255) Key: Only for machines with cylindrical brush deck (**) Only for machines without on-board battery charger 24 V battery Colour codes: Battery connector Battery charger connector Black Battery charger (optional) Blue... -
Page 88: Wiring Diagram (For Adfinity™ 20D, X20D, X20C, X24D) (From S/N 072014256)
ENGLISH SERVICE MANUAL ELECTRICAL SYSTEM WIRING DIAGRAM (For Adfinity™ 20D, X20D, X20C, X24D) (From S/N 072014256) Key: Only for machines with cylindrical brush deck (**) Only for machines without on-board battery charger 24 V battery Colour codes: Battery connector Battery charger connector Black Battery charger (optional) Blue... -
Page 89: Wiring Diagram (For Adfinity™ X20R)
SERVICE MANUAL ENGLISH ELECTRICAL SYSTEM WIRING DIAGRAM (For Adfinity™ X20R) Key: Only for machines without on-board battery charger Colour codes: 24 V battery Battery connector Black Battery charger connector Blue Battery charger (optional) Brown Function electronic board Green Drive system electronic board Grey Brush electromagnetic switches Orange... -
Page 90: Eb1 Electronic Board Connector Pins
ENGLISH SERVICE MANUAL ELECTRICAL SYSTEM EB1 ELECTRONIC BOARD CONNECTOR PINS 7CFBA700 7CFBA707 7CFBA708 S301581 Electronic board for Adfinity™ 17ST, 20ST Electronic board for Adfinity™ X20R Supplier Ref. Ref. Rev. Spec. Supplier Ref. Ref. Rev. Spec. 7CFBA600 Till S/N 072115094 7CFBA708 current version 7CFBA606 current version... - Page 91 SERVICE MANUAL ENGLISH ELECTRICAL SYSTEM EB1 ELECTRONIC BOARD CONNECTOR PINS (continues) MOLEX MINIFIT type 2 ways vertical (all version) Electronic Description V ref. Connected to board in/out Solenoid valve power supply + 24V with key on “I” 0V pulsed, according to water flow setting, only with paddle Solenoid valve power supply - pressed and brush function activated MOLEX MINIFIT type 6 ways vertical (only version 7CFBA700)
- Page 92 14600 21st Avenue North Plymouth, MN 55447-3408 www.advance-us.com Phone: 800-989-2235 Fax: 800-989-6566 ©2012 Nilfisk-Advance, Inc. A Nilfisk-Advance Brand...
Need help?
Do you have a question about the Adfinity 17ST and is the answer not in the manual?
Questions and answers