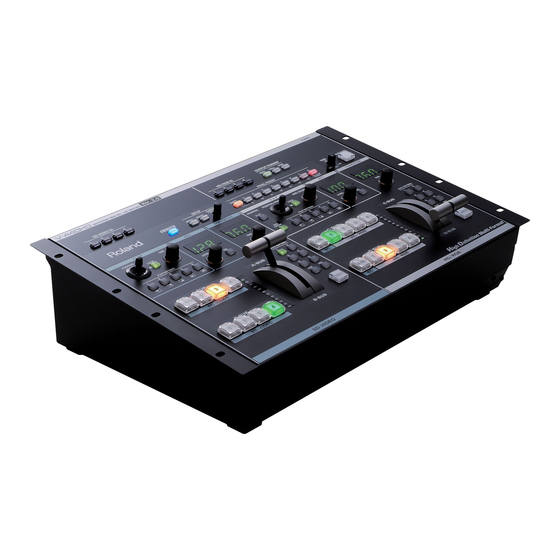
Edirol V-440HD Owner's Manual
Multi-format video mixer
Hide thumbs
Also See for V-440HD:
- Owner's manual (80 pages) ,
- Brochure & specs (4 pages) ,
- Specifications (1 page)
Table of Contents
Advertisement
Quick Links
Download this manual
See also:
Handbook
Owner's Manual
Before using this unit, carefully read the sections entitled: "IMPORTANT SAFETY
INSTRUCTIONS" (p. 2), "USING THE UNIT SAFELY" (p. 3–4), and "IMPORTANT
NOTES" (p. 5). These sections provide important information concerning the proper
operation of the unit. Additionally, in order to feel assured that you have gained a
good grasp of every feature provided by your new unit, Owner's Manual should be
read in its entirety. The manual should be saved and kept on hand as a convenient
reference.
Copyright © 2006 ROLAND CORPORATION
All rights reserved. No part of this publication may be reproduced in any form
without the written permission of ROLAND CORPORATION.
Advertisement
Table of Contents

Related Manuals for Edirol V-440HD


Summary of Contents for Edirol V-440HD
- Page 1 Owner’s Manual Before using this unit, carefully read the sections entitled: “IMPORTANT SAFETY INSTRUCTIONS” (p. 2), “USING THE UNIT SAFELY” (p. 3–4), and “IMPORTANT NOTES” (p. 5). These sections provide important information concerning the proper operation of the unit. Additionally, in order to feel assured that you have gained a good grasp of every feature provided by your new unit, Owner’s Manual should be read in its entirety.
-
Page 2: Important Safety Instructions
WARNING: To reduce the risk of fire or electric shock, do not expose this apparatus to rain or moisture. CAUTION RISK OF ELECTRIC SHOCK DO NOT OPEN ATTENTION : RISQUE DE CHOC ELECTRIQUE NE PAS OUVRIR CAUTION: TO REDUCE THE RISK OF ELECTRIC SHOCK, DO NOT REMOVE COVER (OR BACK). -
Page 3: Using The Unit Safely
Used for instructions intended to alert the user to the risk of death or severe injury should improperly. Used for instructions intended to alert the user to the risk of injury or material damage should the unit be used improperly. * Material damage refers to damage or other adverse effects caused with respect to the home and all its... - Page 4 • Do not force the unit’s power-supply cord to share an outlet with an unreasonable number of other devices. Be especially careful when using extension cords—the total power used by all devices you have connected to the extension cord’s outlet must never exceed the power rating (watts/amperes) for the extension cord.
-
Page 5: Important Notes
Roland assumes no liability concerning such loss of data. Additional Precautions • Damage or breakdown of the V-440HD or mistakes in operation may result in the loss of data stored in memory. To avoid problems in the event of the loss of important data, write down the settings on p. -
Page 6: Table Of Contents
Master and Slave Devices ... 46 Advanced Multi-Screen Settings ... 46 Transmitting Settings to MIDI-Connected V-440HDs ...48 Saving the V-440HD’s Settings to a Computer ...48 Switching Between NTSC and PAL ...49 Displaying Test Patterns ...50 Reference...51 About the HD/RGB IN Connectors (D-Sub) ...51 About the RGB OUT Connectors (D-Sub)...51... -
Page 7: Main Features
HDTV. Although there are a number of different types of HD, which can vary depending on the country where the technology was developed, the V-440HD utilizes the standards recommended in BT.709-3, established by the ITU in February, 1998. -
Page 8: Multiformat Video Mixer
• The V-440HD uses a variety of effects, including transitions (effects used when switching video images), P in P, and key composite effects. • Using the V-440HD in combination with an SD video mixer allows you to compose video using up to six different effects simultaneously. -
Page 9: Features Added In Ver. 2.0
Settings can be transmitted via MIDI (p. 48) The V-440HD’s settings can now be transmitted from the MIDI connector. RS-232C backup function (p. 48) The V-440HD’s settings can now be edited and backed up using a computer or similar device. Preview (standby) TALLY output (p. 52) Additional Menu Functions Individual reset of menu items (p. -
Page 10: Connection Example
Main Features Connection Example A variety of video formats can be handled with a single V-440HD, providing great flexibility for various different applications. Live Switching The V-440HD can be used for live switching with video productions that mix material in SD and HD formats. You can freely switch video from HD cameras and SD cameras and use chroma key and luminance key effects with characters displayed by a computer. -
Page 11: Before Using The V-440Hd
Before Using the V-440HD Check the Contents of the Package The V-440HD includes the following accessories. Please take a moment to confirm that all of these items have been included with the V-440HD. If you find that any item is missing, contact your nearest Roland Service Center. -
Page 12: Names Of Things And What They Do
MIDI button. Select “V-LINK Indicator” in “MIDI Sw Mode” (p. 65) in the menu. Settings Section ... (p. 17) Used for making various settings for the V-440HD. For descriptions of each of the controllers, refer to “Settings Section” (p. 17). - Page 13 16). Names of Things and What They Do “Channels” and “Buses” • Channel: Each of the V-440HD’s video inputs is called a “channel.” The SD and HD/RGB sections feature Channels 1–4, with each channel being independently controlled. Each “channel” is the equivalent of a “path” for the video signals.
-
Page 14: Sd Section
Flashing (Yellow or Green) * The colors in which buttons light can be changed in “Input Sw LED Color” under “13. System” in the V-440HD menu. For more on menu operations, refer to “Menu Operations” (p. 25). 11. B-BUS Channel Buttons (SD) 1–4 ... (p. 38) These buttons are used to select the video signals to be input to the B-BUS, from the video input to the SD IN connectors 1–4. - Page 15 13. Video Fader (SD) ... (p. 37) Moving the video fader up or down switches between the SD section A-BUS and B-BUS. Tilt the fader shown in the figure up to switch to the A-BUS; tilt the fader down to switch to the B-BUS. The video switches using the effect selected with the (15.) TRANSITION buttons (SD).
-
Page 16: Hd/Rgb Section
Flashing (Yellow or Green) * The colors in which buttons light can be changed in “Input Sw LED Color” under “13. System” in the V-440HD menu. For more on menu operations, refer to “Menu Operations” (p. 25). Sub-Screen Position (Factory Setting) -
Page 17: Settings Section
P in P or key composite is in use * The colors in which buttons light can be changed in “Input Sw LED Color” under “13. System” in the V-440HD menu. For more on menu operations, refer to “Menu Operations” (p. 25). -
Page 18: Rear Panel
TALLY Terminals (HD, SD)... (p. 52) TALLY signals are output here. When a television monitor equipped with a TALLY terminal is connected to the V-440HD, the V-440HD can then be used to activate the television monitor’s TALLY lamp. Tally signals from the HD/RGB section are output from the TALLY HD terminal;... -
Page 19: Hd/Rgb Output Section
These BNC connectors output video from the SD S-VIDEO IN connectors or SD COMPOSITE IN connectors as composite video. When the V-440HD is connected to a video monitor equipped with composite video input connectors, you can monitor the video of each channel. -
Page 20: Connections And Settings
Before connecting the V-440HD, make sure that the power to all devices to be connected is turned off. Connect the included power cord to the V-440HD’s AC inlet, then connect the other end of the cord to a power outlet. - Page 21 • Using more than one pass with Loop Thru may result in attenuation of the video With three or more V-440HDs connected using Loop Thru, the video signal becomes more attenuated the further down the signal path the V-440HD is. When using identical video with three or more V-440HDs, be sure to use a commercially available video multiplexer.
-
Page 22: Precautions When Making Settings
With Rack-Mounting and Other Enclosures Observe the following precautions when mounting the V-440HD in a rack or portable case. • Ensure that the location provides good air flow. -
Page 23: Basic Operation
Outputting and Stopping the Final Output To output and stop the V-440HD’s final output, use the OUTPUT FADE button. You can have the final output fade out over the period set with the TIME knob by pressing the OUTPUT FADE button. This period can be set from 0.0 seconds to 4.0 seconds. -
Page 24: Making Various Settings
Basic Operation Making Various Settings The V-440HD’s various settings are set from the menu. The menu is displayed on the video monitor connected to the SD PREVIEW OUT connector. Displaying Menus Press the MENU button to display the menu on the video monitor connected to the SD PREVIEW OUT connector. -
Page 25: Menu Operations
Button Saving Settings Selected in the Menu Settings are saved in the V-440HD’s internal memory by pressing the MENU button a number of times until the menu is closed. Returning the Settings Made in the Menus to Their Initial Values To restore the factory preset values of the menu, perform the following procedure. -
Page 26: Input And Output Settings
Input and Output Settings Since the V-440HD is capable of handling video input and output with entirely different formats, it may be necessary to make adjustments for the differences of resolution and aspect ratio. The appropriate input/output settings should be made, ones which suit the source and output devices connected to the V-440HD. -
Page 27: Setting The Hd/Rgb Input
Automatic setting for the RGB input Hold down the HD/RGB IN button corresponding to the RGB signal being input for at least 3 seconds; the V-440HD automatically detects the signal being input and makes the appropriate settings. When the signal detection is completed, all... - Page 28 Input and Output Settings About the Input Video Aspect Ratio The V-440HD is capable of simultaneously handling video images in differing formats and with different aspect ratios (the ratio of the vertical and horizontal dimensions). The V-440HD outputs video by scaling (enlarging/reducing) the input video so it matches the output format.
-
Page 29: Setting The Sd Input
59.94 Hz • PAL 50 Hz Select either NTSC or PAL for use with the V-440HD. For instructions on setting the SD signal format to be used, refer to “Switching Between NTSC and PAL” (p. 49). Inputting Analog Component SD Video To input SD video to the V-440HD as analog component video, input to the HD/RGB IN BNC connectors. -
Page 30: Hd/Rgb Section Operations
SD section (SD PGM video). Switching in the HD/RGB Section Using the V-440HD’s video fader (HD/RGB) along with the C-BUS channel buttons (HD/RGB) and D-BUS channel buttons (HD/RGB), you can switch between HD, RGB, and SD video input. Each type of video being input is indicated in the input settings (p. - Page 31 Selecting the Effect Applied when Switching Buses (HD/RGB) The effect applied when switching the video is selected by pressing the TRANSITION buttons (HD/RGB). Button Function switching Dissolve switching WIPE PATTERN 1–6 Wipe switching Customizing Wipe Transitions The wipe switching effects assigned to the TRANSITION (HD/RGB) WIPE PATTERN 1–6 buttons can be set from the menu.
- Page 32 “18. Sw Enable” under “2. HD/RGB Input” in the menu. Changing the Switching Method Version 2.0 of V-440HD provides the PGM-PST (flip-flop) method of operation employed by many professional-grade switchers. Use the following procedure to switch the method of operation.
-
Page 33: Hd/Rgb Section P In P Effects
(HD/RGB)” (p. 31) while the P in P effect is in use. Terminology Used with the P in P Effect The following terminology is used in describing the V-440HD’s P in P effect. • Position: positioning of the sub-screen •... - Page 34 P in P Position, Size, Pan, and Zoom Settings The settings processed with the above procedure are stored to the lit P in P PATTERN button and saved until the V-440HD is turned off. Use of the settings that have been changed with the procedure above after the power is turned off requires that the settings be saved to the V-440HD.
- Page 35 Saving the P in P Effect Settings (HD/RGB) To use P in P effect settings the next time the V-440HD is turned on, save the settings to the P in P PATTERN buttons (HD/RGB). When a P in P PATTERN button (HD/RGB) is held down for at least two seconds, the P in P settings are saved to that button.
-
Page 36: Hd/Rgb Section Key Composite Effects
HD/RGB Section Operations HD/RGB Section Key Composite Effects You can use key composite effects in combining C-BUS and D-BUS video. The portions with the key color in the video on the bus to which the key composite effect is applied are made transparent, and the video on the other bus is inserted as shown below. -
Page 37: Sd Section Operations
You can switch and compose SD video in the SD section. Switching in the SD Section You can switch the SD video input using the V-440HD’s video fader (SD) along with the A-BUS channel buttons (SD) and B-BUS channel buttons (SD). - Page 38 * This cannot be select- ed while the P in P ef- fect (p. 39) is in use. If As programmed at the factory, the V-440HD’s A-BUS channel the P in P effect is in use when WIPE PAT- buttons (B-BUS channel buttons) light yellow for PGM output TERN 1–6 is selected,...
-
Page 39: Sd Section P In P Effects
Changing the Switching Method The V-440HD allows you to use the “flip-flop” switching method, the one employed by many professional-level video switchers. Use the following procedure to change the switching method. Press the MENU button. Select “13. System.” Press the ENTER button. - Page 40 Settings (SD)” at the right side of this page. Saving the P in P Effect Settings To use P in P effect settings the next time the V-440HD is turned on, save the settings to the P in P PATTERN buttons (SD).
-
Page 41: Sd Section Key Composite Effects
SD Section Key Composite Effects You can use key composite effects in combining A-BUS and B-BUS video. The portions with the key color in the video on the bus to which the key composite effect is applied are made transparent, and the video on the other bus is inserted as shown below. -
Page 42: Other Operations
PRESET button for at least two seconds. Once the PANEL PRESET is saved, all of the PANEL PRESET buttons 1–8 flash. The content of the V-440HD’s internal memory cannot be written to any external device. Calling Up PANEL PRESET Settings Press a PANEL PRESET button 1–8. -
Page 43: Exchanging Presets
Copying Presets Use the following procedure to copy settings from one PANEL PRESET to another PANEL PRESET button. Press the MENU button. The menu is displayed. Select “11. Panel Preset Edit.” Press the ENTER button. Select “1. Copy.” Select the preset to be copied. The preset shown at the left of the screen becomes the copy source. -
Page 44: Multi-Screen Output
Video MIDI Master Slave1 The V-440HD used as the control device is referred to here as the “master.” The other V-440HDs whose operations are linked to the master are referred to as “slaves.” Connection Instructions for Output to Two Screens When using multiscreen output, use the following method to connect the V-440HD with other devices. -
Page 45: Connection Instructions For Output To 3 Or More Screens
Switching On Multi-Screen Output After completing the settings as described in “i. Setting the Master” and “ii. Setting the Slaves” above, use the master V-440HD to select “On” in “1. Multi Screen On/Off” under “12. Multi Screen” in the menu. -
Page 46: Switching Off The Multi-Screen Functions
Other Operations Switching Off the Multi-Screen Functions Using the master V-440HD, select “Off” in “1. Multi Screen On/Off” under “12. Multi Screen” in the menu. Temporarily Switching Off the Multi-Screen Function for the Master and Slave Devices To temporarily switch off the Multi Screen function for the master and slave devices, press the MIDI button so that the button’s light... -
Page 47: Adjusting The Displays
3. Following the instructions in “Transmitting Settings to MIDI-Connected V-440HDs” (p. 48), send the settings to the slave V-440HDs. Adjust the zooming of any slave V-440HD as needed. The procedure is identical to steps 1-3 above. -
Page 48: Transmitting Settings To Midi-Connected V-440Hds
The data is then transmitted. Saving the V-440HD’s Settings to a Computer You can transfer and save the V-440HD’s settings to a computer or other device connected with a cable to the V-440HD’s REMOTE connector (p. 53). For more on the REMOTE connector specifications, refer to “About the REMOTE Connector”... -
Page 49: Switching Between Ntsc And Pal
Select “1. System Frame Rate.” Select NTSC or PAL. If using NTSC, select “60-NTSC”; select “50-PAL” if using PAL. The V-440HD can output color bars. This is useful when making output settings. For more on the menus, refer to “Menu Operations” (p. 25). -
Page 50: Displaying Test Patterns
Other Operations Displaying Test Patterns The V-440HD outputs color bar test patterns. Use of this patterns is convenient when making the output settings. Outputting the Test Pattern from the HD/RGB OUT Connectors Press the MENU button. The menu is displayed. -
Page 51: Reference
The HD/RGB IN connector (D-sub) and HD/RGB IN connector (BNC) for any particular channel are linked internally within the V-440HD. So, for example, if analog component signals are input to the Channel 1 HD/RGB IN connector (D-sub), the same signals are output from the Channel 1 HD/RGB IN connector (BNC). -
Page 52: About The Tally Connectors
SD video is output from the TALLY SD connector, and the switching status of the HD/RGB video is output from the TALLY HD connector. * Obtain a separate cable for use in connecting the V-440HD with the TALLY input-equipped television monitor. -
Page 53: About The Remote Connector
• Stop Bit Length: 1 bit • Encoding: ASCII • Flow Control: XON/XOFF Pin number Signal name Pin Connections * The V-440HD’s connectors are male. To connect to a computer, use a female-female crossover cable. Cable Connections: V-440HD Computer 1 : DCD... -
Page 54: Controlling The V-440Hd From An External Device Via Midi
Reference Controlling the V-440HD from an External Device Via MIDI The V-440HD can be controlled from an external device using MIDI. For example, you can use a Roland multitrack recorder to control video performances that are synchronized to the sounds. -
Page 55: Midi Messages Handled By The V-440Hd
• System Exclusive Messages These messages are used for transmitting device-specific settings. On the V-440HD, these messages are used for transmitting P in P settings and when setting the Multi Screen outputs. When System Exclusive messages are exchanged, MIDI transmissions are distinguished by Device IDs rather than MIDI channels. -
Page 56: Controlling The V-440Hd From A Pr-80/50
Control feature is not compatible with earlier versions, which prevents use of the functions described above. [What you can do when a PR series device and the V-440HD are connected] • You can seamlessly switch HD, RGB, and SD video input to the V-440HD with the video clips contained in the PR series device. -
Page 57: Installing The Rack Mount Hardware
Before attaching the rack mount hardware, turn the power off to the V-440HD and all connected devices and disconnect all power cords and connection cables. Turn the V-440HD over and remove the screws specified in the following figure to remove the rack mount hardware. (V-440HD Bottom Panel) Return the screws removed in Step 2 to their original holes and secure. -
Page 58: Menu Parameters
Menu Parameters For more on menus, see p. 24. 1. HD/RGB Output Settings for the final output are made here. Parameters 1- 1. Output Format (1080i) Sw 1- 2. Output Format (720p) Sw 1- 3. Output Format (RGB) Sw 1- 4. Output Format Sw Lock 1- 5. - Page 59 “Fixed Aspect: Letter” or “Fixed Aspect: Crop” for “5. Scaling Type.” For more detailed information, refer to “About the Input Video Aspect Ratio” (p. 28). About the HD/RGB Input Format The V-440HD inputs component and RGB video in the formats shown in the following table. Component 480/60p...
- Page 60 Menu Parameters 3. HD/RGB PinP/Zoom Advanced settings for the HD/RGB section’s P in P effect are made here. Parameters 3- 1. HD/RGB PinP1 3- 2. HD/RGB PinP2 3- 3. HD/RGB PinP3 3- 4. HD/RGB PinP4 3- 5. HD/RGB PinP5 HD/RGB P in P Parameters Parameters Size X Position...
- Page 61 5. HD/RGB Wipe Select Settings for the TRANSITION buttons’ (HD/RGB) WIPE PATTERN 1–6 are made here. Parameters 5- 1. HD/RGB Wipe Sw 1 5- 2. HD/RGB Wipe Sw 2 5- 3. HD/RGB Wipe Sw 3 5- 4. HD/RGB Wipe Sw 4 5- 5.
- Page 62 Menu Parameters 8. SD PinP Advanced settings for the SD section’s P in P effect are made here. Parameters 8- 1. SD PinP1 8- 2. SD PinP2 8- 3. SD PinP3 8- 4. SD PinP4 8- 5. SD PinP5 For more on the SD section’s P in P effects, see p. 39. SD P in P Parameters Parameters PinP Size...
- Page 63 Resets the above settings to the original factory settings Explanation Switches the Multi Screen function on and off Number of screens used with Multi Screen V-440HD rank and screen position Screen1 (master) screen horizontal size Screen1 (master) screen vertical size Screen1 (master) screen horizontal position...
- Page 64 The sync level of the SD signal output by some SD video devices may be lower than standard values, preventing adequate synching when the V-440HD is set to factory default values. If this occurs, you may be able to achieve synchronization by adjusting the “13-5.
-
Page 65: Factory Reset
OUTPUT FORMAT button (p. 26) MIDI assign OUTPUT FADE button (p. 23) MIDI assign TIME knob (p. 23) MIDI assign * Refer to “Controlling the V-440HD from a PR-80/50” (p. 56). Transmits the settings to MIDI-connected devices Resets the above settings to the original factory settings... -
Page 66: Commands Transmitted From External Devices To The V-440Hd
Channel number (0: SD IN Channel 1, 1: SD IN Channel 2, 2: SD IN Channel 3, 3: SD IN Channel 4) This selects the A-BUS channels. ACK is returned by the V-440HD upon proper reception of the command. B-BUS Channel Select stxSIB:a;... - Page 67 Channel number (0: HD/RGB Channel A/B, 1: HD/RGB IN Channel 1, 2: HD/RGB IN Channel 2, 3: HD/RGB IN Channel 3, 4: HD/RGB IN Channel 4) This selects the C-BUS channels. ACK is returned by the V-440HD upon proper reception of the command. D-BUS Channel Select stxHID:a;...
-
Page 68: Commands Transmitted From The V-440Hd To External Devices
REMOTE Command Reference Version Information Request stxVER; Transmit this when you want to check the V-440HD’s version. The version information is returned. * For more details on version information, refer to “VER Version Information” on this page. Active Sensing Request stxACS;... -
Page 69: Midi Implementation
MIDI implementation Model: V-440HD Version: 2.00 Symbol Item Setting range MIDI channel 0H-FH (ch.1 - ch.16) Control value, 00H-7FH (0 - 127) Velocity value, etc. (Only when the item is the Note On Velocity, the setting range is “01H-7FH (1 - 127)”.) -
Page 70: Midi Messages Transmitted From Midi Out
* If MIDI Thru is ON, MIDI messages received at MIDI IN are re-transmitted without change from MIDI OUT. * If MIDI Thru is ON, messages from the V-440HD itself will not be transmitted. ■Channel voice messages ● Control Change * The messages assigned in MIDI Setup will be transmitted when you operate the panel. - Page 71 Byte Explanation Exclusive status ID number (Roland) Device ID (dev: 00H–1FH, factory setting is 10H) 1st byte of model ID (V-440HD) 2nd byte of model ID (V-440HD) 3rd byte of model ID (V-440HD) Command ID (DT1) Upper byte of address...
-
Page 72: Parameter Address Map
MIDI implementation 3. Parameter Address Map ■3-1. V-440HD (Model ID = 00H 00H 10) * Addresses marked by # are sent as two bytes; an upper nibble (upper 4 bits) and lower nibble (lower 4 bits). Example) If the original data is BCH, 0BH is transmitted as the first byte. The next byte transmitted is 0CH. For reception, this is ignored if two bytes are not received together. - Page 73 Example) If the original data is channel B, 0BH is transmitted as the first byte. The next byte transmitted is 0CH. For reception, this is ignored if two bytes are not received together. * If — is shown in the value field, the V-440HD does not have a corresponding parameter. This will be ignored if received.
- Page 74 MIDI implementation ●3-2-3. Color Control Preference +--------------+-------------------------------------+---------------------------+--------------------------------------------------------+ |Address |Parameter Name +--------------+-------------------------------------+---------------------------+--------------------------------------------------------+ |#10H 20H 00H |V-LINK Rx Setting (Color Cb) |#10H 20H 02H |V-LINK Rx Setting (Color Cr) |#10H 20H 04H |V-LINK Rx Setting (Brightness) |#10H 20H 06H |V-LINK Rx Setting (VFX A 1) |#10H 20H 08H |V-LINK Rx Setting (VFX A 2) |#10H 20H 0AH...
- Page 75 Thus, the message to be transmitted is F0H 41H 00H 00H 10H 12H 01H 10H 14H 00H 01H 7EH 7FH ■Settings Transmitted/Received Using MIDI ●MIDI Tx Channel This sets the V-440HD’s MIDI Transmit channel. The factory default setting is 1. ●MIDI Rx Channel This sets the V-440HD’s MIDI Receive channel.
- Page 76 Values 0-127 set with MIDI correspond to FADE OUT(Black) -100%. ●PR Control This enables control of the V-440HD from an Edirol PR-80/50. The factory default setting is OFF. The values 0 and 1 can be set using MIDI, which correspond to the settings OFF and ON.
-
Page 77: Midi Implementation Chart
MULTI FORMAT VIDEO MIXER MIDI IMPLEMENTATION CHART Model V-440HD Function... Basic Default Channel Changed Default Mode Messages Altered Note Number : True Voice Note On Velocity Note Off After Key’s Touch Channel’s Pitch Bend 0, 32 1 — 5 7 — 31 64 —... -
Page 78: Block Diagram
Block Diagram... -
Page 79: Settings And Parameters
Settings and Parameters HD Size16:9 Output Use the V-440HD’s component output for shows and other situations where the video is being output to plasma displays or high- definition projectors. HD Video Output Device HD Camera Final Output (HD) Plasma Display or Other Display V-440HD Settings Parameters Set the following parameters from the menu. -
Page 80: Rgb Video Live Output
Settings and Parameters RGB Video Live Output In business presentations and other such situations, use the V-440HD’s RGB output when outputting video to a data projector. Final Output (RGB) Projector or Other Display V-440HD Settings Parameters Set the following parameters from the menu. Make parameter settings suited for the particular usage environment. -
Page 81: Sd Size4:3 Output
In shows and other situations where SD video is being output to LED displays or similar displays, you can output video from the V- 440HD’s HD OUT connectors. Only the resulting composite video from the SD section is output from the V-440HD’s SD PGM OUT connectors. HD Video Output Device... -
Page 82: Hd-Sdi Recording
HD-SDI Recording When recording the V-440HD’s video output with an HD CAM deck, DVC PRO HD deck, HD non-linear editing device, or other such equipment, it may be necessary to convert the V-440HD’s component output to HD-SDI signals. For this, you will need to obtain a separate HD HD-SDI converter to convert the component signals to HD-SDI. -
Page 83: Troubleshooting
• Video output incompatible with receiving device If the video output from the V-440HD is in a format that is not compatible with the receiving device (such as a television monitor or projector), the receiving device may be unable to output images well. - Page 84 V-440HD becoming hot • Something is blocking the exhaust vent or ventilation port The V-440HD is cooled with forced air, so if anything impeding the exhaust vent or any other air flow intake or vent, it will prevent proper cooling of the V-440HD.
-
Page 85: Menu Settings Memo
Menu Settings Memo 1. HD/RGB Output 1: Output Format (1080i ) Sw 2: Output Format (720p) Sw 3: Output Format (RGB) Sw 4: Output Format Sw Lock 5: Zooming 6: Bright 7: Contrast 8: Saturation 9: Red 10: Green 11: Blue 12: Output Fade Mode 13: Output Fade Color 14: Output Fade Sw Motion... - Page 86 Menu Settings Memo 8. SD PinP (Size) 1: P in P Size 2: P in P X Position 3: P in P Y Position 4: P in P Border Size 5: P in P Border Color 6: P in P Trimming 9.
-
Page 87: Panel Preset Memo
Menu Settings Memo SD Section HD/RGB Section Others Panel Preset Memo... -
Page 88: Main Specifications
Main specifications V-440HD: MULTI FORMAT VIDEO MIXER Video Processing Video Format: Video Sampling Rate: Effects Video Transition Composition FX Multi-Screen Presentation Synchronization Multiple Units by MIDI Master Fade Connectors SD Input S-Video (Y/C) Preferential Video (composite) x 4 HD/RGB Input... -
Page 89: Index
Index ... 14 A-BUS Channel Button (SD) ... 18 AC Inlet ... 17 AUTO Button (HD/RGB) ... 15 AUTO Button (SD) ... 14 B-BUS Channel Button (SD) ... 16 C-BUS Channel Button (HD/RGB) ... 17 D-BUS Channel Button (HD/RGB) ... 17 ENTER Button ... -
Page 90: Information
Information Information When you need repair service, call your nearest EDIROL/Roland Service Center or authorized EDIROL/Roland distributor in your country as shown below. CENTRAL/LATIN ASIA AMERICA CHINA Roland Shanghai Electronics Co.,Ltd. Roland Systems Group U.S. 5F. No.1500 Pingliang Road 425 Sequoia Drive Suite 114,... -
Page 91: Federal Communications Commission Radio Frequency Interference Statement
This product complies with the requirements of European Directives EMC 89/336/EEC and LVD 73/23/EEC. FEDERAL COMMUNICATIONS COMMISSION RADIO FREQUENCY INTERFERENCE STATEMENT This equipment has been tested and found to comply with the limits for a Class B digital device, pursuant to Part 15 of the FCC Rules. - Page 92 04349834 06-09-1N...
Need help?
Do you have a question about the V-440HD and is the answer not in the manual?
Questions and answers