SGM Q Series User Manual
Hide thumbs
Also See for Q Series:
- User manual (24 pages) ,
- User manual (20 pages) ,
- User manual (22 pages)
Table of Contents
Advertisement
Quick Links
Advertisement
Table of Contents

Related Manuals for SGM Q Series


Summary of Contents for SGM Q Series
- Page 1 USER MANUAL Q-S E R I E S Q-S E R I E S Q-10 Q-10 Q-10 P O I Q-10 P O I...
-
Page 2: Q-10 Series Dimensions
Q-10 SERIES USER MANUAL REV. F © 2021 SGM Light A/S ® . The information in this document is subject to change without notice. SGM and all affiliated companies disclaim liability for any injury, damage, direct or indirect loss, consequential or economic loss, or any other loss occasioned by the use of, inability to use, or reliance on the information contained in this manual. -
Page 3: Table Of Contents
POI Permanent Outdoor Installation............................. 16 Physical differences ......................................16 Configuration ........................................16 LED Indicator ........................................16 SGM Addressing Tool ......................................16 POI Spanner ......................................... 17 POI Tilt lock ........................................... 17 Installation and rigging the Q-10 POI ..................................17 Connecting DMX and AC power in POI ..........................17 Accessories .................................. -
Page 4: Safety Information
Read the following safety precautions carefully before unpacking, installing, powering, or operating the device. SGM luminaries are intended for professional use only. They are not suitable for household use. Les luminaires SGM sont impropre à l’usage domestique. Uniquement à usage professionnel. -
Page 5: Before Installing This Product
Before installing this product Please visit the SGM official website at sgmlight.com for the latest version of this user manual / safety information leaflet. Due to continuous improvements, the instructions may change without notice. SGM always recommends the latest available firmware version from sgmlight.com. -
Page 6: Overview
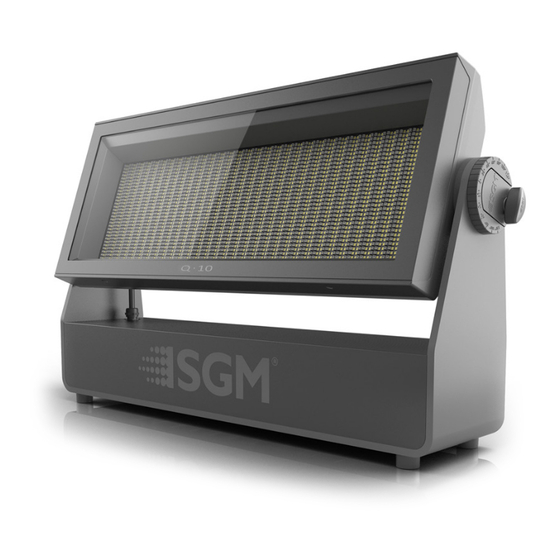
Q-10 features: • Powerful all-in-one SGM LED luminaire, with a total of 4,096 SMD LEDs and 8 individually controllable segments, weighing around 20 kg. • A strobe light, a flood light, a pixel light, and a blinder with a non-fading continuous output. -
Page 7: Preparing For Installation
Installing / rigging the Q-10 Series 106 mm All SGM luminaries have locking points in the base for installation and rigging. In both [ 4,2in ] standard and POI fixtures, the distance between the points from center to center is always 106 mm. - Page 8 Figure 3: Dimensions for Q-10 base locking points Rigging process Start the standard rigging process by blocking the lower working area, and make sure the work is performed from a stable platform. 1. Check that the clamp/bracket is undamaged and can bear at least 10 times the weight of the fixture. Check that the structure can bear at least 10 times the weight of all installed fixtures, lamps, cables etc.
-
Page 9: Tilt Lock
The angle indicator in the wheel shows the current angle of inclination. NOTE: In POI versions, SGM provides a POI Spanner with a pig-nose key for tilt adjustment. Either use the large or the small pig-nose key, depending on the type of fixture. See “POI Tilt lock” on page 17 to know more about the tilt lock in Q-10 POI. -
Page 10: Configuring The Device
IP rating. For POI versions, please refer to “Connecting DMX and AC power in POI” on page 17 to see how to connect DMX and AC power. NOTE: SGM fixtures provide a passive DMX Thru signal as DMX Out, instead of an active output signal. Connecting a wireless transmitter... -
Page 11: Configuring The Device For Dmx Control
The active input type is displayed under the wireless signal strength indicator. The signal strength can be also checked via RDM data by using an external RDM device (e.g. the SGM A-4). NOTE: In POI version with wireless, the DMX signal strength can only be checked through RDM. -
Page 12: Q-10 Connection Diagram
Q-10 Connection diagram Max. 32 units/DMX line 100- 277V AC 100- 277V AC 100- 277V AC 50-60 Hz 50-60 Hz 50-60 Hz 1000W 1000W 1000W 120 Ohm +/- 5% 5 PIN XLR XLR pin out DATA DATA - DATA + Figure 12: Q-10 connection diagram (see “Q-10 POI connection diagram”... -
Page 13: Fixture Properties
The fixture can operate in RGB calibrated mode, which ensures that colors are compatible across the range of SGM fixtures. However, the Q-10 also offers the ability to operate in RAW mode with full control of each color. -
Page 14: Control Menu
Select startup program Info Product Type Stops test sequence execution. Firmware Version Displays installed firmware version. Serial Number Displays SGM serial# RDM ID Displays RDM ID. (Unique RDM ID for identification) DMX View Up to 504 DMX Displays received DMX levels. addresses... -
Page 15: Rdm
Confirm that the power is switched on, confirm that the be completely dead. cables are plugged in. Main fuse is blown. Contact SGM support or certified SGM service partner. Fixture suddenly turned off. Power was turned off. Check the power supply, switches and breakers. -
Page 16: Poi Permanent Outdoor Installation
Figure 15: Q-10 POI LED indicator SGM Addressing Tool SGM provides a windows software tool designed to allow the user to address and configure the fixtures through RDM. Changing the settings is done in the exact same way as it is in the display. -
Page 17: Poi Spanner
The Q-10 POI base has six M-10 nuts that can be used for installation and rigging. The SGM Omega bracket (not included) or a customized bracket is needed to install the fixture. Consider the dimensions below of the Q-10 POI base for customized mounting bracket purposes. - Page 18 Figure 20: Connecting DMX and AC Power in Q-10 POI Connecting a wireless transmitter in POI In POI versions with wireless, it is necessary to pair the fixture with a new transmitter (by default, the fixture is linked to the SGM factory transmitter).
-
Page 19: Accessories
Accessories The Q-10 Series can be used with various accessories such as cables, barndoors, and anti-glare shields. To get to know all the available Q-10 accessories, see www.sgmlight.com or contact your local SGM dealer. Barndoors The Q-10 Series features 4-way barndoors. The barndoors are designed and intended to be mounted on the fixture without the use of any tools. -
Page 20: Maintenance
Cleaning SGM luminaires with IP65 or IP66 rating do not need any cleaning procedures inside the fixture. However, cleaning the front lens may be needed to achieve the maximum light output after exposure to dust, sand, or dirt. Exterior housing can also be cleaned to get a better look. -
Page 21: Fixtures And Accessories
Q-10, Std, BL ................................. P/N: 80033100 Q-10, POI, BL ................................P/N: 80270403 The Q-10 Series can be ordered in any RAL color. Contact your local SGM dealer for ordering customized color housings. Q-10 Accessories 2 m power cable with IP-rated power connector ......................P/N: 07860040 SGM USB uploader cable ..............................P/N: 83062011... -
Page 22: User Notes
User Notes... - Page 23 User Notes...
- Page 24 SGM Light A/S Sommervej 23 8210 Aarhus V Denmark Tel: +45 70 20 74 00 info@sgmlight.com www.sgmlight.com...
Need help?
Do you have a question about the Q Series and is the answer not in the manual?
Questions and answers