Table of Contents
Advertisement
Quick Links
Advertisement
Table of Contents

Related Manuals for SGM Q-8 Standard


Summary of Contents for SGM Q-8 Standard
- Page 1 USER MANUAL Q·8 Standard Document Revision I | Released 2024-11-20...
-
Page 2: Q-8 Standard Dimensions
The SGM logo, the SGM name, and all other trademarks in this document perwtaining to SGM services or SGM products are trademarks owned or li- censed by SGM, its affiliates, and subsidiaries. -
Page 3: Table Of Contents
CONTENT Q-8 STANDARD DIMENSIONS 5 SAFETY INFORMATION 6 BEFORE INSTALLING THIS PRODUCT 7 INSTALLATION Q·8 STANDARD 7 Identification and terminology 8 Unpacking 8 Application considerations 8 Transport & handling 8 Rigging 9 Rigging process using SGM Omega brackets 10 Tilt lock 10 Power requirements 11 Connecting power 11 Connecting data 11 Connecting a wireless transmitter 11 Signal priority 12 USER INTERFACE 12 ... - Page 4 CONTENT 21 ACCESSORIES 21 Barndoors 22 Anti-glare shields 22 Filter frames 23 MAINTENANCE 23 SGM Vacuum Test kit 23 USB - XLR Uploader cable 24 Firmware Updates 25 Cleaning 25 Maintenance Schedule 25 Maintenance Notes 26 TROUBLESHOOTING 26 FIXTURES AND ACCESSORIES 26 Ordering information 26 Accessories 27 APPROVALS AND CERTIFICATIONS 28 USER NOTES Q·8 Standard...
-
Page 5: Safety Information
WARNING! READ THE FOLLOWING SAFETY PRECAUTIONS CAREFULLY BE- FORE UNPACKING, INSTALLING, POWERING OR OPERATING THE DEVICE. SGM fixtures are intended for professional use only. They are not suitable for household use. Les fixtures SGM sont impropre à l’usage domestique. Uniquement à usage professionnel. -
Page 6: Before Installing This Product
EXTERNAL CLEANING AND VISUAL INSPECTION OF THE FIXTURE All users of the SGM fixtures should regularly clean those parts of the fixture directly exposed to the elements, such as the external housing and front lenses. Additionally, all owners of the SGM fixtures must periodically check the external housing of the fixture for structural breaks, deteri- oration, cracked lenses, or loose screws. -
Page 7: Installation Q·8 Standard
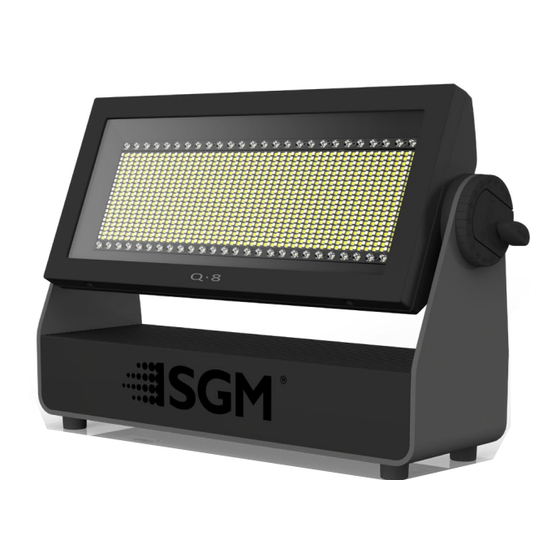
INSTALLATION Q·8 STANDARD IDENTIFICATION AND TERMINOLOGY A: Strobe blinders B: RGBW section C: Tilt Lock D: Cooling Fans Control Panel (POI n/a) F: OLED Display (POI n/a) G: Rubber feet H: GORE-TEX Membrane I: Power in and out J: DMX in and out K: Handle L: Barndoors attachment points (x2) M: Safety wire attachment point... -
Page 8: Unpacking
Ø 18 mm All SGM fixtures have locking points in the base for installation and rig- [ 0,7in ] ging. In both standard and POI fixtures, the distance between the points from center to center is always 106 mm. -
Page 9: Rigging Process Using Sgm Omega Brackets
Ø18 233,80 467,60 Figure 2: Dimensions for base locking points RIGGING PROCESS USING SGM OMEGA BRACKETS WARNING! ALWAYS USE MIN. 2 OMEGA BRACKETS WHEN RIGGING THE FIXTURE. Step 1 Start the rigging process by blocking the lower working area, and make sure the work is performed from a stable platform. -
Page 10: Tilt Lock
5. Install a safety wire that can bear at least 10 times the weight of the fixture. The safety wire attachment point is designed to fit a carabiner AISI316 grade. 6. Verify that there are no combustible materials, cables, or surfaces to be illuminated within 0.3 m (12 in) of the fixture. -
Page 11: Connecting Power
IP-rated XLR connectors suitable for outdoor use. Terminate the DMX out cable of the last fixture in the data link with a 120 ohm DMX termination. Note that SGM fixtures provide a passive DMX Thru signal as DMX Out, instead of an active output signal. CONNECTING A WIRELESS TRANSMITTER The fixture is designed to look for wireless transmitters in‘connect’... -
Page 12: User Interface
USER INTERFACE The fixture can be set up by using the control panel and OLED multi-line display on fixture’s head or through RDM. The OLED display shows the current status and menu of the fixture. It is used to configure individual fixture settings and read error messages. -
Page 13: Display
DISPLAY OPERATIONAL MODE (A) 10CH Displays the current mode (quick color, stand-alone, or DMX mode). The fixture is set by default to be controlled ( 11 ) in DMX mode. DMX ADDRESS (B) Displays the current DMX address. The DMX address is al- tered directly from this view. -
Page 14: Configuring The Device For Dmx Control
CONFIGURING THE DEVICE FOR DMX CONTROL ABOUT DMX The fixture can be controlled using signals sent by a DMX controller on a number of DMX channels. DMX is the USITT DMX512-A standard, based on the RS-485 standard. The signal is sent as DMX data from a console (or a controller) to the fixtures via a shielded twisted pair cable designed for RS-485 devices. -
Page 15: Setting A Static Color Manually
SETTING A STATIC COLOR MANUALLY The standard fixture can be configured to display a predefined and static color. To set up a static color select ENTER → MANUAL → QUICK COLOR. Note that the static color can be activated via. SETTINGS → STARTUP or SETTINGS → DMX LOSS FUNCTION. The current quick color program can always be stopped by going to: ENTER →... -
Page 16: Fixture Properties
FIXTURE PROPERTIES FACTORY DEFAULT DMX address DMX mode 27CH Standard Startup mode Fan mode Standard Display turn display off Flip screen Normal orientation Power limit full power DMX Prioritization Wired PWM frequency Default 3.29KHz Keylock disabled POI LED enabled RDM device label Set to fixture label Log off wireless LED ENGINE... -
Page 17: Individual Fixture Settings
High-speed strobe effect The Q-8 features two stripes of dedicated strobe light. These strobes have multiple modes, including: random strobe, pulse effects and pulse effects with variable speed (Standard version only). Beam angle The standard Q-8 offers a native 110º beam angle in the Q section, and a native 84º beam angle in the strobe blinders. These can be modified using different optional magnetic holographic filter frames and barndoors. -
Page 18: Control Menu
CONTROL MENU LEVEL 1 LEVEL 2 FUNCTION Mode Select Mode Select DMX mode Test LED Panel Test Enter to start LED test Display Test Enter to start Display test Fan Test Enter to start Fan test Manual Quick Color Editor Green Blue White... - Page 19 LEVEL 1 LEVEL 2 FUNCTION Settings Display Saver Display Off Display Dim LED PWM Frequency Selectable PWM Frequency from 3,29 to 30 kHz DMX Loss Function DMX Hold Quick Color Blackout All On DMX Hold 5 min Startup Mode Quick Color Macro High Speed Program 1...
-
Page 20: Rdm
SUPPORTED RDM FUNCTIONS The Q-8 features are supported via various RDM functions. RDM (Remote Device Management) is a protocol enhancement to USITT DMX512 that allows bi-directional commu- nication between the fixtures and the controller over a standard DMX line. This protocol will allow configuration, sta- tus monitoring and management. -
Page 21: Accessories
ACCESSORIES BARNDOORS The Q-8 features 4-way and 8-way barndoors. The barndoors are designed and intended to be mounted on the fixture without the use of any tools. To install the barndoors: • Attach the lower plug-in pins to the bottom part of the Q-8 front. -
Page 22: Anti-Glare Shields
Figure 14 : Half anti-glare shields FILTER FRAMES The Q-8 features various optional magnetic, holographic fil- ter frames such as elliptical diffusers. There are four filter frame choices available from SGM: • wide angle • medium angle • elliptical vertical wide angle •... -
Page 23: Maintenance
Figure 17: SGM Vacuum Test Kit USB - XLR UPLOADER CABLE The SGM USB to DMX cable is an accessory used mainly to update the fixture with the latest SGM firmware. See below how to update the fixture with the latest firmware. -
Page 24: Firmware Updates
• Go to MENU → SYSTEM → FIRMWARE VERSION • Through RDM To update a fixture with the latest firmware, use an SGM USB 5-Pin-XLR uploader cable, and a Windows-based computer with the SGM Firmware Tool software installed (available for download at www.sgmlighting.com). -
Page 25: Cleaning
CLEANING SGM fixtures with IP65 or IP66-rating do not need any cleaning procedures inside the fixture. However, cleaning the front lens may be needed to achieve the maximum light output after exposure to dust, sand, or dirt. The exterior housing can also be cleaned to get a better look. To maintain adequate cooling, fans must be cleaned periodically. -
Page 26: Troubleshooting
Confirm that the power is switched on, confirm to be completely dead. that the cables are plugged in. If the cause can- not be detected, contact your local SGM dealer or support@sgmlight.com Fixture suddenly turned off. Power was turned off. -
Page 27: Approvals And Certifications
APPROVALS AND CERTIFICATIONS Conforms to ..............2014/35/EU: Low Voltage Directive Conforms to . -
Page 28: User Notes
USER NOTES Q·8 Standard Revision I | Released 2024-11-20... - Page 29 SGM LIGHTING APS Sommervej 23 8210 Aarhus V Denmark Tel: +45 70 20 74 00 info@sgmlighting.com www.sgmlighting.com...
Need help?
Do you have a question about the Q-8 Standard and is the answer not in the manual?
Questions and answers