
Subscribe to Our Youtube Channel
Related Manuals for Kanardia Horis


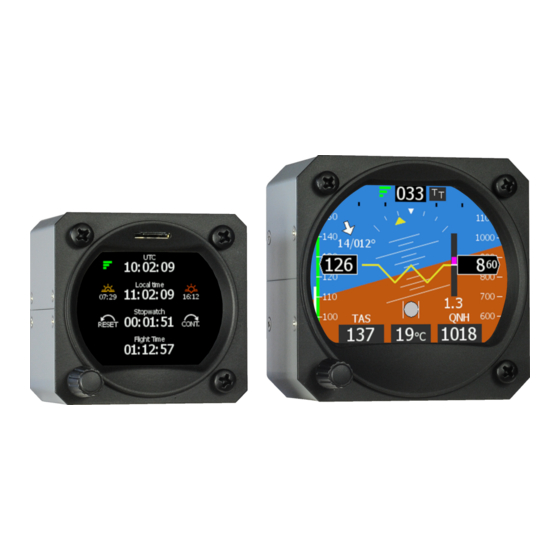
Summary of Contents for Kanardia Horis
- Page 1 Horis - Installation and User Manual © Kanardia d.o.o. August 2021 Manual Revision 1.16 Software Version 3.8...
- Page 3 In short, the license gives you right to copy, reproduce and modify this document if: • you cite Kanardia d.o.o. as the author of the original work, • you distribute the resulting work only under the same or similar license to this one.
- Page 4 Horis User Manual of figures were drawn using Libre Office Draw, Inkscape and Bric- scad applications. Photos and scanned material was processed using Gimp. Sam2p was used to convert pictures into eps format. All document sources are freely available on request under the license mentioned above and can be obtained by email.
- Page 5 1.13 Jul 2020 Instrument pictures updated. 1.14 Nov 2020 Autopilot support, minor corrections. 1.15 May 2021 Internal backup battery support in Horis 57. 1.16 Aug 2021 The max output current on RS-232 port changed to 50 mA. Contents 1 Introduction 1.1 Latest Manual Version .
-
Page 6: Table Of Contents
2.9 Repair ......2.10 Horis Use in Gliders .... - Page 7 Horis User Manual CONTENTS 3 Horis Screens 3.1 AD-AHRS ......3.2 Directional Indicator ....
- Page 8 Horis User Manual CONTENTS 4.6.16 Security ..... 4.6.17 About ..... .
- Page 9 General Description Horis is an electronic device. It consists of a set of sensors and an LCD display. Majority of sensors are built into its compact housing: static pressure, dynamic pressure, 3 axis accelerometer, 3 axis angular rate and GPS receiver.
- Page 10 Tables 1–3 starting on page 11 list basic technical specifications of Horis. Roll, Pitch and Yaw The AD-AHRS-GPS module (a.k.a. AIRU), which is built-in Horis is responsible for calculation of roll, pitch and yaw angles (a.k.a. Euler angles). The module holds several sensors, which readings are combined to- gether using sophisticated algorithms.
- Page 11 32 bit, ARM Cortex M3 - LCD, 120 Mhz Start-up time System less than 1 s, AHRS about 5 s. Table 1: Technical specifications of Horis instrument. from accelerometers, angular rates, true airspeed and airspeed accel- eration. This apparent gravity is then used to stabilize roll and pitch angles, but it can’t be used to stabilize yaw.
- Page 12 320 x 240 pix, diagonal 2.55”, 16 bit full colour, super bright SD card slot micro SD, since Jan 2020 Table 2: Additional specifications for 57 mm Horis version. Description Value Weight 250 g (300 g with GPS antenna and OAT cable)
-
Page 13: Installation & Maintenance
30 seconds. Installation & Maintenance Horis requires a standard size 57/80 mm hole in the instrument panel. Position of the hole must ensure good access for knob operations and it must be always visible from the pilot’s perspective. -
Page 14: Mounting Procedure
. To prevent internal stresses, please make sure that the instrument panel is flat. The fourth hole is used for the knob axle. Figure 4 illustrates the mounting hole. Remove the mounting screws from the instrument and then remove Only Horis 80 mm. © Kanardia 2021... - Page 15 Figure 3: Photo of the knob with its cap removed. Some older Horis 80 have an additional M6 nut that is used as an axle guide. This nut must be also removed. Insert the instrument from the back side of the instrument panel.
-
Page 16: Space Behind The Panel
Warning: Figures are not in scale. Space Behind the Panel Horis requires only minimal space behind the instrument panel. Depth of housing is 48 mm, connectors require additional 19 mm and cables and tubing require about 20 mm as shown on Figure 5. - Page 17 Horis User Manual 2.4 Connections Figure 5: Side view of Horis. Only minimal space is required behind the panel. Figure shows 57 mm version, but side dimensions for 80 mm Horis are even smaller (40 mm depth). Figure 6: Back view of the instrument with connections. 57 mm ver- sion is shown.
-
Page 18: Static - Pst
Water must not be allowed to enter the tubing. We strongly recommend labelling each tube before connecting to Ho- ris or any other instrument. If you ever have to remove Horis from the instrument panel, this will help a lot during re-installation. - Page 19 GND – ground. Table 4: Description of pins for the CAN bus communication. When connected to the bus, Horis will transmit a large amount of information: attitude, altitude, position, temperature, baro-settings, health status etc. Slave units connected on the bus (round altimeter, airspeed indicator, etc.) are capable of using this information.
-
Page 20: Power - Pwr
Horis User Manual 2.4 Connections 2.4.4 Power - PWR Connect supplied power cable at the back of the instrument. Power connector has a notch on one side, which protects against wrong polarity, see Figure 9. +12 V … red GND … blue Figure 9: Pins of the power connector. -
Page 21: Outside Air Temperature - Oat
2.4.6 Outside Air Temperature - OAT Outside air temperature (OAT) probe is shipped with Horis. This is a digital temperature sensor glued inside a threaded aluminium housing. Default OAT cable length is 1.5 meters but other lengths are available on request. - Page 22 Horis User Manual 2.4 Connections 1 … 4 Figure 10: Pins of the OAT connector. OAT information is required to calculate true airspeed from indicated airspeed and altitude, as well as to provide you with the outside temperature information. In order to provide accurate measurements, OAT probe must be in-...
-
Page 23: Rs-232 Port (Nmea Out)
In most cases you only connect two or three pins – pins 1-3. Pins 4 and 6 are used only when you use Horis as a power source. By default Horis transmits NMEA GGA and RMC sentences on pin 3. -
Page 24: D-Sub 9 Port
Please note that max current output on RS-232 port is 50 mA at 12 V (0.6 W). A larger current may damage Horis. There is no short- circuit protection. If pins 1 and 6 are in short, this will damage Horis. -
Page 25: Levelling Ahrs
Levelling AHRS During assembly of the AHRS unit into the Horis and during in- stallation of Horis into the instrument panel, a small misalignment may appear. This means that internal axes of the AHRS unit are not parallel to the aircraft axes –... -
Page 26: Yaw Misalignment
Horis User Manual 2.5 Levelling AHRS Such misalignment can be perfectly adjusted without loss of precision using the procedure described in this section. 2.5.1 Yaw Misalignment Roll and pitch angle can be adjusted automatically, but yaw angle must be set explicitely, before the procedure starts. -
Page 27: Procedure
Use supports and lift tail or nose if necessary. • Please make sure that aircraft is level for both, roll and pitch. Make also sure that Horis is turned on for at least five minutes – this warms up the internal electronics and stabilises numerical filters. -
Page 28: Internal Backup Battery
Internal Backup Battery Since May 2021 Horis 57 mm could be ordered with internal backup battery. Horis 80 mm does not have this option yet and may be only equipped with external backup battery (UPS-L). If Horis is ordered with internal backup battery the battery module is installed into the Horis. -
Page 29: Operation
Operation Horis with internal battery is able to start even when external power is not present. It is started with a short press on rotating knob. Horis will start only when battery charge is sufficient. When external power is applied to Horis it will start just like normal Horis. -
Page 30: Status Icon
If no in-flight condition is detected or if there is no user action with rotating knob, Horis will turn off after 5 minutes. When Horis is operating on internal battery, it can be turned off by long press of 5 seconds. You can’t turn Horis off, if it is powered externally. 2.7.3... -
Page 31: Maintenance
However, low battery voltages may affect Horis operation. Although Horis works also with voltages as low as 9 V, a problem may appear even at higher voltages. A typical scenario (where gyros inside Horis go crazy) happens when battery is at its low end (say at 11 V –... - Page 32 • Most gliders use two main batteries. When Horis is needed, always fly on the battery which is more full. • A 57 mm Horis may be equipped with internal backup battery. • For 80 mm Horis, you can use our backup battery module, P/N: UPS-L.
-
Page 33: Software Update
Update With a Module Most Horis models have no means (SD card, USB slot) for a direct software update. It can be updated with a help of the Blu device and an Android telephone or tablet, which is running our Kanja app. -
Page 34: Update With Micro Sd Card
firmware is installed and ready to use. 2.11.2 Update With Micro SD Card Only Horis models that have SD card slot can be updated this way. If Horis does not have the SD card slot, Blu must be used. See section 2.11.1. -
Page 35: Horis Screens
A black/white flasing screen informs that update is in progress. It takes about 9-10 seconds to finsih the update. 4. After the update, Horis displays a window telling about update success. This window is dislayed only once after each successful update. - Page 36 Horis User Manual 3.1 AD-AHRS Figure 18: Horis AD-AHRS screen with markings. 2. GPS status signal. Three green bars indicate normal operation (3D fix). A small green diamond next to three green bars means that GPS position is further enhanced with SBAS (EGNOS, WAAS, etc.) One yellow bar indicates marginal 2D fix and...
- Page 37 Electronic magnetic compass (Magu) is an external device and is not a part of Horis system. With Magu connected and properly calibrated, the AD-AHRS unit in Horis can determine heading and it can calculate wind direction and speed. © Kanardia 2021...
-
Page 38: Directional Indicator
Horis User Manual 3.2 Directional Indicator 11. Artificial horizon with a reference line, roll arc and pitch lines. Reference line can be used for 45 turns, short roll arc dashes define 15 and 30 marks and longer dash defines 45 mark. In pitch, long line defines 10 , medium 5 and short 2.5 markings. - Page 39 2. Heading bug is used as reference marker. Simply turn the knob to move the reference marker. When Horis is coupled with an autopilot the bug is in sync with autpilot direction setting. When autipilot direction reference is changed, the bug will be automatically adjusted.
-
Page 40: G-Meter
4.6.5 on page 49 for the details. Typically, G-Meter is used as a third screen. Figure 20: Horis G-Meter screen with markings. Figure 20 shows the screen with several important points marked. 1. Scale neutral point is at 1 G and it is located exactly at 9 o’clock. -
Page 41: Chrono
The Chrono screen is optional and it may not be enabled by default. When not visible, it must be enabled in settings. Please see section 4.6.5 on page 49 for the details. Figure 21: Horis chrono screen with markings. Figure 21 shows the screen with several important points marked. © Kanardia 2021... -
Page 42: Operations
A slow speed or hovering will falsely trigger landing event and flight time will reset when movement is resumed. Operations Horis is operated using a single push knob. You can do the following actions with the knob: • Rotate the knob to change something. -
Page 43: Adjusting Qnh
• Push the knob to confirm something. • Push the knob for a few seconds to enter a main menu Horis does not have a close button. When a window is opened and editing mode is not active, a white bar appears across the window caption. -
Page 44: Adjusting Direction Indicator
The Pitch Reset option is selected by default. See Figure 22. • Push the knob once again in order to activate the option. Horis needs a few seconds to adjust for new neutral pitch value. Do not use this function in a turbulence or in an unstable flight regime. -
Page 45: Settings
Initial (start-up) brightness is specified in settings. See section 4.6.14 for more details. Settings Horis can be configured with several options described next. The settings screen is accessed via the main menu. Figure 23 illustrates the settings menu and some of the options. -
Page 46: Airspeed
Horis User Manual 4.6 Settings Unit Type Options Heading True, Magnetic Speed kts, km/h, mph Vario (rate of climb) m/s, ft/min, kts Wind m/s, km/h, kts Altitude meter, feet hPa, inHg Temperature C, F Table 11: Unit options. Figure 24: Units selection window. -
Page 47: Response Time
Horis User Manual 4.6 Settings Yellow end define the bottom yellow part of the speed tape. If you do not want to have yellow range on the bottom part, set Yellow end to the same value as Start. • Green end defines the end of the green range on the speed tape. -
Page 48: Ahrs Level
• Wild – very fast response. Figure 27: Illustration of the response time options window. 4.6.4 AHRS Level After the installation of Horis into an instrument panel, Horis internal axes must be aligned to the aircraft axes. The AHRS Level procedure © Kanardia 2021... -
Page 49: Screens
See Section 2.5 on page 25 for more details. 4.6.5 Screens Horis may show up to four different screens. For each screen you can define its content. See figure 28. It can be one of the following options: • AD-AHRS Screen, •... -
Page 50: Direction Indicator
• GPS track – GPS track is used as direction source. If MAGU is selected as direction source and Magu is not present, this selection will be ignored and Horis will take GPS track instead. If MAGU is present and GPS track is selected as data source, mag- netic compassed is disabled. -
Page 51: Pitostatic Offset
Horis User Manual 4.6 Settings • Green high defines positive G green limit. Any valid range between green and red values is drawn in yellow color automatically. Figure 29: Illustration G-Meter parameters. 4.6.8 Pitostatic Offset Modern digital sensors used for IAS and altitude measurements may drift a little bit over time, especially after being exposed to a pro- longed period of severe cold. -
Page 52: Turn Rate
Altitude In order to set the altitude offset you need a reference altimeter. Set the QNH on Horis and reference altimeter to the same value, say 1013 hPa. • Use the knob to select the altitude offset frame. This is already selected when the window is opened. -
Page 53: Time Zone
UTC+10:30. Here, set hours to 10 and minutes to 30. Yet another one is Newfoundland and Labrador, where local time is UTC -2:30. In this case set hours to -2 and minutes to 30. Horis does not automatically adjust for Summer daylight savings time. © Kanardia 2021... -
Page 54: Compass Calibration
The TQ-KTX2 format will send only RMC sentence every second. 4.6.14 Initial Brightness Use this option to set the Horis LCD display brightness at startup. Default value is 100%, but if find Horis display too bright, you may © Kanardia 2021... -
Page 55: Gnss Info
4.6.15 GNSS Info Horis can show the GNSS satellite constallation currently in use. Figure 33 illustrates an example. Figure 33: An example of GNSS constallation where GPS and Glonass satellites are visible. Distribution is poor. North- ern latitudes are not present. - Page 56 Horis User Manual 4.6 Settings Numbers in the top left corner tell how many of visible satellites are used in solution. For example, GPS 6/9 means that 9 GPS satellites are detected but 6 are used in position calculation. HDOP, VDOP and PDOP values indicates quality of the solution.
-
Page 57: Security
If you forgot the PIN, enter 75213 and you will get access to the Settings menu. You can also set an empty PIN. In this case Horis does not ask for password. Figure 34: You can specify your own PIN to limit access to the Settings menu. -
Page 58: Autopilot
This means that the following devices are required for an autopilot system. All these devices are connected via CAN bus. 1. Horis 80 or 57 mm. It must be a master Horis. Slave Horis can not be used. The AD-AHRS-GPS module, which is inside each master Horis has all required sensors. -
Page 59: Intended Use
Horis User Manual 5.1 Intended Use Intended Use The autopilot is designed to help a pilot in stable, controllable flight conditions during cruising. If such conditions are met, the autopilot can be engaged to take some relief from the pilot, who can perhaps focus a bit more on ATC communication or to do some navigation task. -
Page 60: Limited Conditions
(24) months from retail purchase. Warranty Coverage Kanardia’s warranty obligations are limited to the terms set forth below: Kanardia d.o.o. warrants the Kanardia-branded hardware product will conform to the published specification when under normal use for a period of twenty-four months (24) from the date of retail pur- chase by the original end-user purchaser (”Warranty Period”). - Page 61 Kanardia; (f) to consumable parts, such as batteries, unless damage has occurred due to a defect in materials or workmanship; or (g) if any Kanardia serial number has been removed, altered or defaced.
- Page 62 Kanardia products and any failure to maintain the confidentiality of data stored on the product. Under no circumstances will Kanardia be liable for the provision of substitute goods or services.
-
Page 63: 6.2 Tso Information
This product is not TSO approved as a flight instrument. Therefore, the manufacturer will not be held responsible for any damage caused by its use. The Kanardia is not responsible for any possible damage or destruction of any part on the airplane caused by default operation of instrument.
Need help?
Do you have a question about the Horis and is the answer not in the manual?
Questions and answers