Table of Contents
Advertisement
Quick Links
Advertisement
Table of Contents

Related Manuals for Kanardia INDU


Summary of Contents for Kanardia INDU
- Page 1 INDU ALTIMETER Manual © Kanardia d.o.o. June 2023 Revision 1.8...
- Page 3 In short, the license gives you right to copy, reproduce and modify this document if: • you cite Kanardia d.o.o. as the author of the original work, • you distribute the resulting work only under the same or similar license to this one.
- Page 4 This product contains a battery that is used to provide power when the primary source of power is unavailable and is de- signed to last the life of the product. Any attempt to service or replace this battery should be preformed by a qualified ser- vice tehnician. © Kanardia 2015-2020...
- Page 5 Illumination with push button models. Jul 2017 Backup battery option. Mar 2016 Procedure for Illumination wheel activation. Dec 2015 Procedure for QNH toggle and IAS auto zero. Oct 2015 Altitude model is extended up to 20000 m. Feb 2015 Initial release © Kanardia 2015-2020...
-
Page 6: Table Of Contents
6.2 Pressure Altitude Calculation ....18 6.3 Altitude Derivative ......19 © Kanardia 2015-2020... - Page 7 9.1 Warranty ......25 9.2 TSO Information ......28 © Kanardia 2015-2020...
-
Page 8: Introduction
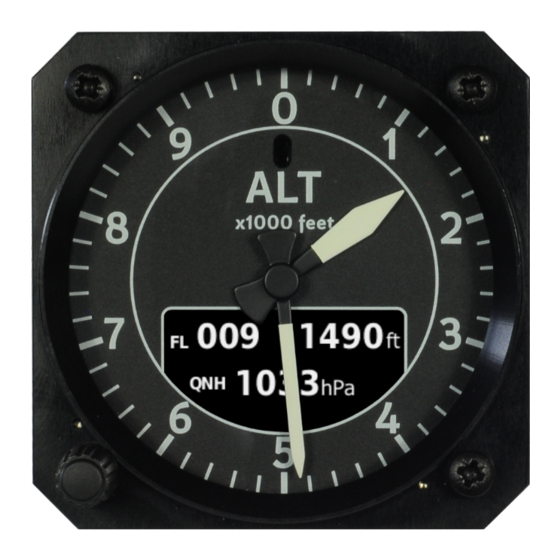
1. Introduction Introduction First of all, we would like to thank you for purchasing our device. Indu Altimeter is an electronic device, which mimics classical altimeter construction and combines it with the state of the art electronics. This results in the best of both worlds;... -
Page 9: Technical Specification
When the instrument is equipped with a backup battery, some specifications from the table 1 are different and correct specifications are listed in table 2 on page 9. Options Indu Altimeter comes in a few variants regarding scale and backup battery. LCD display can have options, too. © Kanardia 2015-2020... -
Page 10: Scale Options
1200 hPa, 20 cm resolution QNH range 1080 hPa, (17.42 31.89 inHg) Internal logger storage more than 50 h, 1 s interval Communication CAN bus, 29 bit header, 500 kbit, Kanardia protocol Table 1: Basic technical specifications. © Kanardia 2015-2020... -
Page 11: Display
Optionally, Indu Altimeter can be equipped with integrated backup battery. If the main power is switched off, the instrument obtains power from internal battery for a limited time. In addition, the backup battery in Indu Altime- ter can supply power for one low power external device, like Indu Airspeed Indicator. -
Page 12: Installation
Installation Indu Altimeter requires a standard size 57/80 mm hole in the instrument panel. The position of the hole must ensure good access to the instrument for the QNH adjustments and it must be always visible from the pilot’s perspec- tive. -
Page 13: Connections
Altimeter — Manual 2.2 Connections (a) 57 mm (b) 80 mm Figure 3: Instrument panel cutout and mounting hole. Note: Figure is not in scale. Connections Figures 4 and 5 illustrate all connections at the backside of the instruments. © Kanardia 2015-2020... -
Page 14: Static Pressure - Pst
2.2.1 Static Pressure - Pst Indu Altimeter must be connected to the static pressure source. Static pres- sure source is usually obtained from pressure sources located on the fuselage side surfaces or from the static port on the pitot tube. -
Page 15: Can Bus - Can
Please note that CAN bus must be terminated. Typically, this means that one of the connecting instruments must have a terminator plug installed. In addition, Indu Altimeter also provides limited power (about 1 A at 12 V) for devices connected on the CAN bus. For example: to power a slave Indu Vertical Speed Indicator you can connect it to your Indu Altimeter via CAN bus. -
Page 16: Power - Power
In this case, do not connect anything to the green connector. Adjustments The QNH knob is used to perform some adjustments of Indu Altimeter. In fact, this knob may be also used to adjust IAS, when such instrument is connected to the CAN bus. -
Page 17: Airspeed Adjustment - Auto Zero
Altimeter — Manual 3.2 Airspeed Adjustment - Auto Zero 2. Turn the knob on Indu Altimeter to indicate 1020 hPa (30.12 inHg) and wait for about 3 seconds for a short cyan line to appear on the top of LCD display. -
Page 18: Toggle Qnh Hpa - Inhg
3. Turn the knob to 1013 hPa (29.91 inHg) to complete the procedure. 4. Finally, you need to turn off Indu Altimeter and then back on in order to activate the change. © Kanardia 2015-2020... -
Page 19: Maintenance & Repair
1000 F, at least 25 V and at least 100 C working temperature. Diode 1N5818G +12 V Instrument Capacitor 1000 μF, 25V, 108°C Figure 6: Circuit that may prevent sudden voltage drops in certain installa- tions. © Kanardia 2015-2020... -
Page 20: Sensor Calibration
The equations converts geopotential altitude into pressure. Here z means geopotential altitude, g = 9.806645 m/s is gravity constant, R = 287.0528 N · m/kg · K. is gas constant for dry air, p = 1013.25 hPa is standard © Kanardia 2015-2020... -
Page 21: Altitude Derivative
Altitude Derivative Altitude calculated from pressure is numerically derived to get rate of altitude change – vertical speed. The derivative is mathematically correct and as such does not introduce any error. We are using multiple point numerical derivation. © Kanardia 2015-2020... -
Page 22: Backup Battery
Normal Operation Upon switching on the system bus and backup battery circuit (see also section 7.4) Indu Altimeter first performs initial checks. Next, it goes into charging mode. In most cases backup battery is already full and charger will shut off in a few minutes. -
Page 23: Connection Schematics
Altimeter — Manual 7.4 Connection Schematics 1. Run Indu Altimeter on the system bus until the battery is fully charged – wait until the small green rectangle appears on the screen. This indicates that battery was fully charged. 2. Disconnect the system bus, so that Altimeter (and perhaps some other instrument like Indu Airspeed Indicator) is now running only on backup battery. -
Page 24: Internal Backup Power With Push Button
Indu Altimeter units since S/N:23114 are using knob of the instrument to enable and disable backup power. Switch ON The Indu Altimeter switches on when it is powered with ex- ternal source. At the same time it automatically switches on internal backup battery. -
Page 25: Can Bus Power Schematics
Figure 8: Connection solution with two switches. CAN Bus Power Schematics Each Indu Altimeter has two CAN bus connectors at the back. In the case of backup battery, only one connector provides backup power to other connected instruments. The power is limited to 150 mA at 12V (1.8 W). -
Page 26: Replacement
4. Cut cable ties. 5. Desolder battery pads and remove the old battery. 6. Insert and solder the new battery. Take care about polarity. 7. Fix it with new cable ties. 8. Assemble the instrument in the reverse order. © Kanardia 2015-2020... -
Page 27: Slave Version
8. Slave Version Slave Version A slave version of Indu Altimeter also exists. The slave version does not have its own sensors and depends on some external master device. The master and slave devices must be connected with CAN bus. The slave must get all information from the CAN bus. - Page 28 Warranty. Refer to the licensing agreement accompanying such software for details of your rights with respect to its use. This warranty does not apply: (a) to damage caused by use with non-Kanardia products; (b) to damage caused by accident, abuse, misuse, flood, fire, earth- quake or other external causes;...
- Page 29 No Kanardia reseller, agent, or employee is authorized to make any modification, extension, or addition to this warranty, and if any of the foregoing are made, they are void with respect to Kanardia. Limitation of Liability...
-
Page 30: 9.2 Tso Information
This product is not TSO approved as a flight instrument. Therefore, the manufacturer will not be held responsible for any damage caused by its use. The Kanardia is not responsible for any possible damage or destruction of any part on the airplane caused by default operation of instrument.
Need help?
Do you have a question about the INDU and is the answer not in the manual?
Questions and answers