Table of Contents
Advertisement
Available languages
Available languages
Quick Links
Advertisement
Chapters
Table of Contents

Related Manuals for Stihl STIHL PC 70


Summary of Contents for Stihl STIHL PC 70
- Page 1 STIHL PC 70, 75 Manual de instrucciones Instruction Manual...
- Page 2 E Manual de instrucciones 1 - 34 G Instruction Manual 35 - 67...
-
Page 3: Table Of Contents
Arrancar / parar el motor En el caso de que tenga usted alguna Indicaciones para el servicio pregunta sobre este producto, diríjase a su distribuidor STIHL o directamente a Limpiar el filtro de aire nuestra empresa de distribución. Ajustar el carburador Atentamente Bujía... -
Page 4: Notas Relativas A Este Manual De Instrucciones
Perfeccionamiento técnico Notas relativas a este Indicaciones relativas a la manual de instrucciones seguridad y técnica de STIHL trabaja permanentemente en el trabajo perfeccionamiento de todas las Símbolos gráficos máquinas y dispositivos; por ello, nos Será necesario observar reservamos los derechos relativos a las medidas de seguridad Los símbolos gráficos existentes en la... - Page 5 Al trabajar por primera vez con esta STIHL ofrece una extensa gama de máquina: dejar que el vendedor o un equipamiento de protección personal. Ropa y equipo especialista le aclare cómo manejarla de forma segura.
- Page 6 Acoplar únicamente herramientas de Después de repostar, corte o accesorios, autorizados ADVERTENCIA apretar el cierre de depó- por STIHL para esta máquina. Si tiene sito roscado lo más preguntas al respecto, consulte a un Emplear un protector para el transporte firmemente posible.
- Page 7 español Sobre el manejo Comprobar que la herramienta de El manejo de la máquina lo efectúa una – corte esté correctamente montada, sola persona – no permitir la presencia esté firmemente asentada y el de otras personas en el sector de Antes del trabajo estado sea perfecto (limpia, no trabajo –...
- Page 8 español reparación a un distribuidor No trabajar solo – observar siempre una especializado. Controlar o bien corregir distancia apropiada respecto de otras periódicamente el ajuste del ralentí. personas a las que se pueda llamar para que presten auxilios en caso de No trabajar con gas de arranque –...
- Page 9 Trabajar con la máquina tratando de distribuidor especializado. STIHL hacer poco ruido y acelerando poco – no ADVERTENCIA recomienda un distribuidor dejar innecesariamente el motor en especializado STIHL.
- Page 10 español embrague que ello origina, se produce Sujeción y manejo de la máquina Recomendación: varios operarios un sobrecalentamiento y un deterioro de deberán intercambiarse en el uso de la piezas funcionales importantes (como máquina durante el día. p. ej., el embrague, piezas de la carcasa No se puede establecer una duración de plástico) –...
- Page 11 Emplear únicamente bujías en perfecto manual de instrucciones. Encargar estado, autorizadas por STIHL – véase todos los demás trabajos a un "Datos técnicos". distribuidor especializado. Inspeccionar el cable de encendido STIHL recomienda encargar los (aislamiento perfecto, conexión firme).
-
Page 12: Aplicación
español Preparativos Aplicación Ponerse la correspondiente ropa protectora, observar las normas de Aplicación para trabajos apropiados seguridad Ajustar el vástago telescópico a la Emplear la cortadora sólo para palmas longitud deseada. La PC 75 sólo se de aceite, para cortar hojas y para deberá... - Page 13 español Técnica de trabajo con la hoz Cortar hojas Aplicar la punta de la hoz al racimo Dar gas y cortar el racimo con la Enganchar la hoz por el borde de punta de la hoz corte sobre la hoja Poner la mano derecha en la empuñadura de mando;...
- Page 14 español Técnica de trabajo con el cincel Cortar hojas Aplicar el cincel unos 10 cm delante del racimo Aplicar el cincel unos 10 cm delante de la palma Acelerar y oprimir el cincel hacia el Poner la mano derecha en la racimo y cortar éste empuñadura de mando;...
- Page 15 español No sacar el racimo apalancando con el cincel o el engranaje Otras operaciones Aplicar el cincel a la hoja o al racimo No ensartar el racimo con el cincel siguiente No transportar el racimo con el Cortar siempre muy cerca del cincel tronco Repetir la modalidad de trabajo...
-
Page 16: Completar La Máquina
español Montar el engranaje Completar la máquina Aflojar los tornillos de apriete (1) del Retirar la caperuza protectora del engranaje – no desenroscarlos extremo del vástago y guardarla para usos posteriores – véase "Guardar la máquina" Posicionar la máquina Alinear el engranaje sobre el vástago, de manera que el apoyo de la máquina en el motor esté... - Page 17 español Apretar los tornillos de apriete sólo Ejecución A Ejecución B a mano con la llave universal o la llave dinamométrica a 8 Nm. Montar la herramienta de corte Los tornillos y las tuercas para fijar la herramienta de corte se encuentran en el volumen de suministro de la cortadora.
-
Page 18: Ajustar El Cable Del Acelerador
índice octano y tiene siempre la proporción de mezcla correcta. El STIHL MotoMix está mezclado para Oprimir el fiador de la empuñadura obtener la máxima durabilidad del motor de mando hasta el extremo de la... - Page 19 Si mezcla el combustible uno mismo, Guardar la mezcla de combustible solo se puede usar un aceite de motor de dos tiempos STIHL u otro aceite de Sólo en bidones homologados para motor de alto rendimiento de las clases combustible, guardándolos en un lugar...
-
Page 20: Repostar Combustible
Extraer del depósito el cabezal de aspiración de combustible con un Al repostar, no derramar combustible ni gancho y retirarlo del tubo flexible llenar el depósito hasta el borde. STIHL recomienda utilizar el sistema de Insertar un nuevo cabezal de llenado STIHL para combustible aspiración en el tubo flexible... -
Page 21: Ajustar El Vástago Telescópico
español Símbolo en el cursor del mando Ajustar el vástago Arrancar / parar el motor unificado telescópico h – Señal de parada y flecha – para desconectar el motor, empujar el Elementos de mando Sólo PC 75 cursor del mando unificado en el sentido de la flecha que hay en la señal de parada (h) a STOP-0 ADVERTENCIA... - Page 22 español Adoptar una postura segura La máquina está lista para el trabajo. Presionar la máquina contra el Parar el motor suelo con la mano izquierda para que no se mueva – el pulgar, por debajo de la caja del ventilador Empujar el cursor del mando unificado en el sentido de la flecha existente en la señal de parada (h)
-
Page 23: Indicaciones Para El Servicio
español Si no arranca el motor pese a ello Indicaciones para el servicio Limpiar el filtro de aire Empujar el cursor del mando unificado en el sentido de la flecha Los filtros de aire sucios disminuyen la existente en la señal de parada (h) Durante el primer tiempo de servicio potencia del motor, aumentan el a la posición de STOP-0... -
Page 24: Ajustar El Carburador
español Estando atornillada la tapa del filtro Ajustar el carburador El carburador se ha ajustado en fábrica a valores estándar. Este ajuste del carburador está armonizado, de manera que el motor recibe una mezcla óptima de combustible y aire en cualesquiera Colocar el filtro de plástico estados operativos. - Page 25 español Valor orientativo El motor se para en ralentí Girar el tornillo regulador principal (H) Girar lentamente el tornillo de tope aprox. 1/4 de vuelta por cada 1000 m del ralentí (LA) en sentido horario (3300 ft) de diferencia de altitud hasta que el motor funcione con regularidad –...
-
Page 26: Bujía
Enroscar la bujía y presionar quemados – emplear sólo bujías firmemente el enchufe de la misma autorizadas por STIHL y que estén Limpiar la bujía si está sucia desparasitadas – véase "Datos Comprobar la distancia entre técnicos"... -
Page 27: Lubricar El Engranaje
(2) con grasa de comercio engranajes STIHL para motoguadañas (accesorio especial) Colocar el protector para el transporte Introducir a presión unos 40 g de... - Page 28 español Ejecución A Ejecución B ADVERTENCIA Antes de quitar los tornillos, asegurar suficientemente la herramienta de corte – ésta se puede plegar – ¡peligro de lesiones! Ejecuciones de máquina diferentes Según la ejecución de la máquina, difiere el acople de la herramienta de Aflojar las tuercas (1) y corte.
- Page 29 – o encargar el trabajo a Colocar la línea imaginaria sobre el un distribuidor especializado – centro de los dos orificios – para STIHL recomienda un distribuidor determinar los puntos de medición especializado STIHL para el espesor (B) y (C)
-
Page 30: Comprobación Y Mantenimiento Por El Distribuidor Especializado
"Completar la máquina" el filo de corte por ambos lados Hacer revisar los cojinetes por el Cincel distribuidor especializado y hacerlos sustituir si es necesario – STIHL recomienda el distribuidor especializado STIHL PC 70, PC 75... -
Page 31: Instrucciones De Mantenimiento Y Conservación
español Instrucciones de mantenimiento y conservación Estos datos se refieren a condiciones de trabajo normales. En condiciones de tra- bajo más dificultosas (fuerte acumulación de polvo, etc.) y trabajos diarios de mayor duración, acortar correspondientemente los intervalos indicados. control visual (estado, estanqueidad) Máquina completa limpiar Empuñadura de mando... - Page 32 Guía y perno en el engranaje (sólo ejecu- ciones con guía y perno en el engranaje) sustituir por un distribuidor especializado comprobar Lubricación del engranaje completar Rótulos adhesivos de seguridad sustituir STIHL recomienda un distribuidor especializado STIHL PC 70, PC 75...
-
Page 33: Minimizar El Desgaste Y Evitar Daños
Algunas piezas de la máquina están La observancia de las instrucciones de STIHL recomienda encargar los sometidas a un desgaste normal aun este manual de instrucciones evita un trabajos de mantenimiento y las cuando el uso sea el apropiado y se han desgaste excesivo y daños en la... -
Page 34: Componentes Importantes
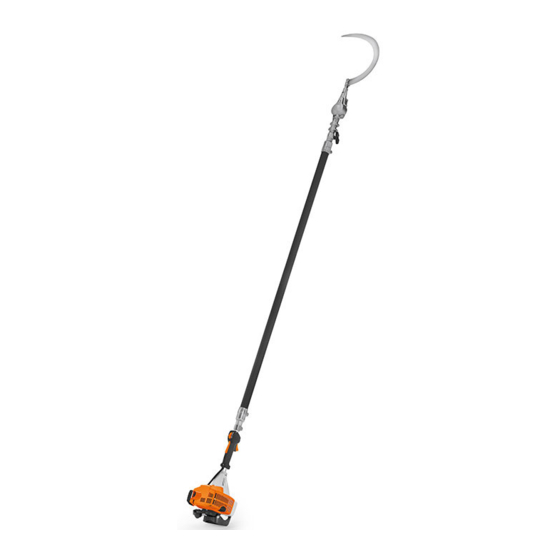
español Componentes importantes Tubo flexible de agarre Vástago rígido (sólo PC 70) Cursor del mando unificado Bloqueo del acelerador Acelerador Enchufe de la bujía Tapa del filtro de aire Apoyo de la máquina Protector 10 Hoz 11 Cincel 12 Guía (existente según la ejecución de máquina) 13 Perno (existente según la ejecución de máquina) -
Page 35: Datos Técnicos
PC 70 con hoz El valor de CO medido en el Vástago: 15 m/s procedimiento de sistema de Empuñadura de 15 m/s homologación de la UE se indica en mando: www.stihl.com/co2 en los datos técnicos específicos del producto. PC 70, PC 75... -
Page 36: Indicaciones Para La Reparación
STIHL. Los distribuidores especializados STIHL siguen Los productos STIHL no deben echarse periódicamente cursillos de instrucción a la basura doméstica. Entregar el y tienen a su disposición las producto STIHL, el acumulador, los informaciones técnicas. - Page 37 English Contents Dear Customer, Guide to Using this Manual Safety Precautions and Working Thank you for choosing a quality engineered STIHL product. Techniques Using the Unit It has been built using modern Assembling the Unit production techniques and comprehensive quality assurance.
-
Page 38: Guide To Using This Manual
English Engineering improvements Guide to Using this Manual Safety Precautions and Working Techniques STIHL's philosophy is to continually improve all of its products. For this Special safety precau- Pictograms reason we may modify the design, tions must be observed engineering and appearance of our... - Page 39 The user is responsible for avoiding in any way since this may increase the hair net, cap, etc.). injury to third parties or damage to their risk of personal injury. STIHL excludes property. all liability for personal injury and WARNING...
- Page 40 Check that the spark plug boot is possible. – for this power tool by STIHL. If you have secure – a loose boot may cause any questions in this respect, consult a arcing that could ignite combustible This reduces the risk of unit vibrations servicing dealer.
- Page 41 English Never attempt to modify the controls Your power tool is designed to be can arc. Have the power switched off – or safety devices in any way. operated by one person only. Do not before starting cutting work in the allow other persons in the work area.
- Page 42 STIHL recommends an authorized The dusts (e.g. sawdust), vapor and STIHL servicing dealer. smoke produced during operation may be dangerous to health. If dust levels are WARNING very high, wear a suitable respirator.
- Page 43 English Before Starting Determine escape path important components (e.g. clutch, are left-handed. Wrap your fingers and remove all obstacles. polymer housing components) – and this around the control handle and drive can increase the risk of injury from the tube. cutting attachment moving while the WARNING Only extend the telescoping shaft...
- Page 44 Use only a spark plug of the type Maintenance and Repairs approved by STIHL and make sure it is in good condition – see "Specifications". Service the machine regularly. Do not Inspect the ignition lead (insulation in attempt any maintenance or repair work good condition, secure connection).
-
Page 45: Using The Unit
English Preparations Using the Unit Wear suitable protective clothing, observe safety precautions. Intended Use Adjust the telescoping shaft to the required length. Use your palm cutter only for cutting the The PC 75 may be used with the fronds of oil palms and harvesting fruit. chisel only when the telescoping The palm cutter with chisel is shaft is fully compressed. - Page 46 English Working Technique with Sickle Cutting palm fronds Apply tip of sickle to fruit bunch. Open the throttle and cut through Hook cutting edge of the sickle over the fruit bunch with the tip of the the palm frond. Hold the control handle with your sickle.
- Page 47 English Working Technique with Chisel Cutting palm fronds Position the chisel about 10 cm in front of the fruit bunch. Position the chisel about 10 cm in front of the palm frond. Open the throttle and push the Hold the control handle with your chisel towards the fruit bunch and right hand, and the shaft with your Open the throttle and push the...
- Page 48 English Do not use the chisel or gearbox to pry fruit bunches out of the tree. Other steps Apply the chisel to the next palm Do not use the chisel to lance the frond or fruit bunch. fruit bunch. Always cut close to the trunk. Do not use the chisel to carry the fruit bunch.
-
Page 49: Assembling The Unit
English Mounting the Gearbox Assembling the Unit Loosen the clamp screws (1) on the Pull the protective cap off the end of gearbox – do not remove them. the drive tube and keep it in a safe place for later use – see "Storing the Power Tool". - Page 50 English Tighten down the clamp screws by Version A Version B hand only using the combination wrench or to 8 Nm with a torque wrench. Mounting the Cutting Attachment The palm cutter comes with the screws and nuts required to mount the cutting attachment.
-
Page 51: Adjusting The Throttle Cable
STIHL MotoMix STIHL recommends the use of STIHL MotoMix. This ready-to-use fuel mix contains no benzol or lead, has a high octane rating and ensures that you always use the right mix ratio. -
Page 52: Fueling
Engine Oil can quickly make the fuel mix unusable. If you mix the fuel yourself, use only STIHL MotoMix may be stored for up to STIHL two-stroke engine oil or another 2 years without any problems. high-performance engine oil in... -
Page 53: Adjusting The Telescoping Shaft
English Open the filler cap. Adjusting the Telescoping Starting / Stopping the Filling up with fuel Shaft Engine WARNING PC 75 only Controls After fueling, tighten down the filler cap as securely as possible by hand. WARNING Changing the Fuel Pickup Body Always shut off the engine and fit the transport guard Throttle trigger lockout... - Page 54 English Symbol on slide control NOTICE h – stop symbol and arrow. To stop the engine, push the slide control in Do not stand or kneel on the drive tube the direction of the arrow on the stop since it will otherwise be permanently symbol (h) to STOP-0.
-
Page 55: Operating Instructions
English Blip the throttle trigger to disengage Throttle cable adjustment Operating Instructions the starting throttle position. The Check adjustment of throttle cable – slide control moves to the normal see chapter on "Adjusting the run position F – and the engine Throttle Cable". -
Page 56: Cleaning The Air Filter
English On the screw-mounted filter cover: Cleaning the Air Filter Dirty air filters reduce engine power, increase fuel consumption and make starting more difficult. Your power tool comes standard with either a clip-on or screw-mounted filter cover. Fit the foam filter element (4) in the filter cover. -
Page 57: Adjusting The Carburetor
English Carry out the standard setting. Adjusting the Carburetor Start and warm up the engine for about 5 minutes. The carburetor comes from the factory Open the throttle wide. with a standard setting. At high altitude This setting provides an optimum fuel-air mixture under most operating Turn the high speed screw (H) conditions. -
Page 58: Spark Plug
Install WARNING only suppressed spark plugs of the If the cutting attachment continues to run type approved by STIHL – see when the engine is idling, have your "Specifications". Clean dirty spark plug. machine checked and repaired by your servicing dealer. -
Page 59: Lubricating The Gearbox
(2) of STIHL gear lubricant for Fit the transport guard. brushcutters (special accessory) If gearbox and cutting attachment into the filler hole. -
Page 60: Sharpening The Cutting Attachment
English Version A Sharpening the Cutting WARNING Attachment To reduce the risk of injury, secure the cutting attachment in place before WARNING removing the screws – it may drop down. Wear protective gloves to reduce the Different machine versions risk of direct contact with the sharp cutting edges. - Page 61 English Version B Check the cutting attachment regularly for damage (nicks or cracks) and wear. WARNING To reduce the risk of injury, do not continue using, a damaged, broken, warped or worn cutting attachment (e.g. cracks in area of cutting edge) and do To check wear, place the removed not attempt to sharpen, straighten or cutting attachment on the...
- Page 62 Attachment". Chisel Sharpen the cutting attachment with a whetstone (special accessory) or have it sharpened by your dealer – STIHL recommends a STIHL servicing dealer. Resharpen frequently, take away as little material as possible. Sharpen the cutting edge uniformly – do not alter the contour of the cutting attachment.
-
Page 63: Inspections And Maintenance By Dealer
If there a noticeable increase in vibrations or running noises: Have your dealer check and, if necessary, replace the bearings in the drive tube – STIHL recommends a STIHL servicing dealer. PC 70, PC 75... -
Page 64: Maintenance And Care
English Maintenance and Care The following intervals apply to normal operating conditions only. If your daily work- ing time is longer or operating conditions are difficult (very dusty work area, etc.), shorten the specified intervals accordingly. Visual inspection (condition, leaks) Complete machine Clean Control handle... - Page 65 Sharpen Visual inspection (wear, cracks, dam- Guide and pin on gearbox (only versions age, warped) thus equipped) Have replaced by servicing dealer Check Gearbox lubrication Replenish Safety labels Replace STIHL recommends an authorized STIHL servicing dealer. PC 70, PC 75...
-
Page 66: Minimize Wear And Avoid Damage
English servicing dealer. STIHL dealers are Spark plug – Minimize Wear and Avoid regularly given the opportunity to attend Components of antivibration system Damage – training courses and are supplied with the necessary technical information. Observing the instructions in this manual... -
Page 67: Main Parts
English Main Parts Handle hose Fixed drive tube (PC 70 only) Slide control Throttle trigger lockout Throttle trigger Spark plug boot Air filter cover Machine support Deflector 10 Sickle 11 Chisel 12 Guide (not fitted in all versions) 13 Pin (not fitted in all versions) 14 Gearbox 15 Telescoping drive tube (PC 75 only) 16 Wing screw... -
Page 68: Specifications
ISO 11201 Engine power to 0.95 kW REACH regulation (EC) No. 1907/2006 ISO 8893: (1.3 bhp) at PC 70: 92 dB(A) see www.stihl.com/reach. 8,500 rpm PC 75: 92 dB(A) Cut-off speed: 10,500 rpm Exhaust Emissions Sound power level L... -
Page 69: Maintenance And Repairs
When repairing the machine, only use the garbage can. Take the product, replacement parts which have been accessories and packaging to an approved by STIHL for this power tool or approved disposal site for environment- are technically identical. Only use high- friendly recycling. - Page 70 English PC 70, PC 75...
- Page 72 0458-754-8721-D spanisch / englisch www.stihl.com *04587548721D* 0458-754-8721-D...
Need help?
Do you have a question about the STIHL PC 70 and is the answer not in the manual?
Questions and answers