Table of Contents
Advertisement
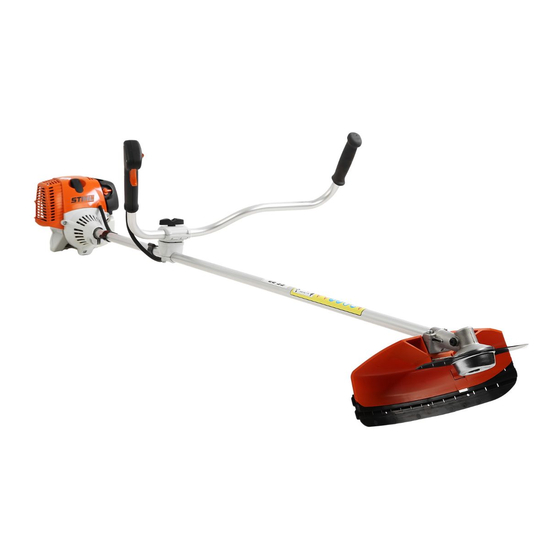
STIHL FS 90
STIH)
Instruction Manual
Manual de instrucciones
Warning!
For safe operation follow all safety
precautions in Instruction Manual - improper
use can cause serious injury.
Advertencia!
Para su seguridad durante el manejo de este
producto, siga siempre las precauciones de
seguridad dadas en el manual de
instrucciones - el uso indebido puede causar
lesiones graves.
Advertisement
Chapters
Table of Contents

Related Manuals for Stihl FS 90


Summary of Contents for Stihl FS 90
- Page 1 STIH) STIHL FS 90 Instruction Manual Manual de instrucciones Warning! For safe operation follow all safety precautions in Instruction Manual - improper use can cause serious injury. Advertencia! Para su seguridad durante el manejo de este producto, siga siempre las precauciones de...
-
Page 2: Table Of Contents
Metal Cutting Tools ......47 before using your trimmer/brushcutter. Mounting the Loop Handle ..... 24 Inspections and Maintenance Contact your STIHL dealer or the STIHL Adjusting the Throttle Cable ... 26 by Dealer ........47 distributor for your area if you do not Fitting the Carrying Eye .... -
Page 3: Guide To Using This Manual
STIHL dealer for illustration. environment. assistance. Example: Therefore some changes, modifications Loosen the screw (1) and improvements may not be covered Lever (2) ... in this manual. FS 90, FS 90 R... -
Page 4: Safety Precautions And Working Techniques
Use STIHL does not recommend the use of Careless or improper use may cause only cutting attachments that are rigid blades when cutting in stony areas. - Page 5 These conditions reduce the hand's this machine when you are fatigued. Most of these safety precautions and ability to feel and regulate temperature, warnings apply to the use of all STIHL produce numbness and burning Warning! trimmer/brushcutters. Different models sensations and may cause nerve and Be alert –...
- Page 6 Warning! your grip and help to and side protection complying with ANSI The ignition system of the STIHL unit protect your hands. Z 87.1 (or your applicable national produces an electromagnetic field of a standard). To reduce the risk of injury to very low intensity.
-
Page 7: Approved Combinations Of
Wear sturdy authorized. Although certain boots with nonslip soles. unauthorized attachments are useable Steel-toed safety boots with STIHL power tools, their use may, in are recommended. fact, be extremely dangerous. For the cutting attachments authorized by Wear an approved safety... -
Page 8: Fueling Instructions
Your STIHL power tool uses an oil- pressure build-up in the tank to release Using the grip, turn the cap firmly gasoline mixture for fuel (see the chap- slowly. - Page 9 Do not attach any cutting attachment to a unit without proper installation of all required parts. Failure to use the proper parts may cause the blade or head to fly off and seriously injure the operator or bystanders. FS 90, FS 90 R...
- Page 10 If you cannot set the correct idle speed, specified in your instruction manual for of your harness (see appropriate have your STIHL dealer check your proper control and less fatigue in chapter of this manual). power tool and make proper operation.
- Page 11 Never hold the accompanied the substance at issue. cutting attachment above waist height. FS 90, FS 90 R...
- Page 12 (background) level, the operator and any bystanders should wear a respirator approved by NIOSH/ MSHA for the type of dust encountered. FS 90, FS 90 R...
- Page 13 If the blade or head continues attachment parallel to the ground. Use of injury, always shut off the engine and to loosen, see your STIHL dealer. Never a trimmer/brushcutter above ground remove the spark plug boot before use a trimmer/brushcutter with a loose level or with the cutting attachment replacing the cutting attachment.
- Page 14 You may also permanently damage the engine. Have your muffler serviced and repaired by your STIHL servicing dealer only. FS 90, FS 90 R...
- Page 15 It achieves a (e.g. clutch, polymer housing "softer" cut with less risk of damaging components). Such damage could, tree bark etc. than polymer blades. among other things, cause the cutting attachment to rotate at idle. FS 90, FS 90 R...
- Page 16 To reduce the risk of injury, extreme caution should be used when cutting with the shaded area of any rigid blade. FS 90, FS 90 R...
- Page 17 Resharpen the brush knife the blade can be turned over to utilize regularly (when it has dulled noticeably). the cutting edges on the other side. FS 90, FS 90 R...
- Page 18 When a trimmer/brushcutter with a circular saw blade is used to cut down Before starting the cut, accelerate the small trees, STIHL recommends that the engine up to full throttle. Perform cut standard deflector be removed and with uniform pressure. STIHL...
- Page 19 Use of serious injury to the operator or Never test the ignition system with the non-STIHL parts may cause serious or bystanders by a kickout, never use a spark plug boot removed from the spark fatal injury.
- Page 20 Store the power tool in a dry and high or locked location out of reach of children. Before storing for longer than a few days, always empty the fuel tank. See chapter "Storing the Machine" in the instruction manual. FS 90, FS 90 R...
-
Page 21: Approved Combinations Of Cutting Tool, Deflector, Handle And Harness
23 Full harnesss may be used 9 Brush knife 250-3 Warning! 24 Full harness must be used 10 Scratcher tooth circular STIHL brushcutters with a loop handle saw blade 200 without barrier bar may be used only Equipment 11 Chisel tooth circular... - Page 22 English / USA Cutting tool Deflector, Limit Stop Handle Harness/Strap FS 90, FS 90 R...
-
Page 23: Approved Power Tool Attachments
Washer (6) remain at the tommy screw . STIHL power tool attachments are available for converting the single Separate the clamps. purpose FS unit into other power tool Springs (4) and (5) remain in the combinations. lower clamp. FS 90, FS 90 R... - Page 24 (13) line up. Line up the handlebar at a right Insert screw and tighten down angle to the drive tube – check firmly. dimension A again. Tighten down the wing screw firmly FS 90, FS 90 R...
-
Page 25: Mounting The Loop Handle
Throttle Cable Adjustment Tighten down the wing screw firmly. Go to chapter "Adjusting the Working position: Throttle Cable". Reverse the sequence described above to swing the handles up and turn the handlebar counter- clockwise. FS 90, FS 90 R... - Page 26 (1) as far as stop. them into the barrier bar as far as and must be located between the stop. Go to “Securing the Loop Handle”. loop handle and control handle. Go to “Securing the loop handle”. FS 90, FS 90 R...
-
Page 27: Adjusting The Throttle Cable
Squeeze the two ends of the clamp together and hold in that position. Insert M 6 x 14 screw (2). Line up the carrying eye. Tighten down the screw firmly. 1) Included as standard or available as special accessory FS 90, FS 90 R... -
Page 28: Mounting The Deflector
Fit the plate (3) and line it up. guide slot on the skirt and line it up Insert M 5 x 18 screws and tighten with the first hole. down firmly. Fit the screw and tighten it down firmly. FS 90, FS 90 R... -
Page 29: Mounting The Cutting Tools
Mounting hardware is not packed will need the following additional with the machine parts: Nut (3), rider plate (4) and Only mowing heads may be thrust washer (5) (special mounted. accessories). FS 90, FS 90 R... - Page 30 Pull the thrust washer (5) off the counterclockwise onto the shaft (1) shaft (2). as far as stop. Block the output shaft. Tighten down the mowing head. Remove the tool used to block the shaft. FS 90, FS 90 R...
- Page 31 Block the output shaft. Screw the mounting nut (4) with the combination wrench (5) counterclockwise on to the output shaft and tighten down firmly. Remove the tool used to block the shaft. FS 90, FS 90 R...
- Page 32 Deflector” Direction of rotation is marked by arrow on inside of cutting head Fit the appropriate limit stop before deflector or limit stop. mounting the circular saw blade 200 (4,5) – see “Mounting the Deflector”. FS 90, FS 90 R...
-
Page 33: 4-Mix Engine
4-MIX Engine Fuel The STIHL 4-MIX engine features gas This engine is certified to operate on Use only STIHL two-stroke engine oil or oil lubrication and must be run on a fuel unleaded gasoline and the STIHL two- equivalent high-quality two-stroke mixture of gasoline and engine oil. -
Page 34: Fueling
In order to reduce the risk of burns or other personal injury from escaping gas vapor and fumes, remove the fuel filler cap carefully so as to allow any pressure build-up in the tank to release slowly. FS 90, FS 90 R... -
Page 35: Fitting The Harness
Harness”. chapter “Approved Combinations of neck, the cap is not properly seated and Cutting Tool, Deflector, Handle and tightened and you must repeat the Harness”. above steps. FS 90, FS 90 R... -
Page 36: Balancing The Brushcutter
Adjust the carrying ring – tighten the When the correct floating position has screw moderately – let the unit go been reached: until it is balanced – then check the Tighten down the screw on the floating position. carrying ring. FS 90, FS 90 R... -
Page 37: Starting / Stopping The Engine
STOP-O (4) – engine off – the ignition is switched off # – normal run position (5) – the engine is running or can start START (6) - the ignition is switched on, the engine can start FS 90, FS 90 R... - Page 38 – even if the bulb is already Hold the unit with your left hand and filled with fuel. press it down firmly – your thumb should be under the fan housing. Do not stand or kneel on the drive tube! FS 90, FS 90 R...
- Page 39 Move the slide control to STOP-O. slide control moves to the normal run position # Pull off the spark plug boot (10). and the engine settles down to idle speed. Open the throttle slightly. Warm up engine for brief period. FS 90, FS 90 R...
-
Page 40: Cleaning The Air Filter
Do not wash. Replace any damaged parts. Install filter element in the filter housing. Refit the filter cover. Insert the screw and tighten it down firmly. FS 90, FS 90 R... -
Page 41: Adjusting The Carburetor
This setting provides an optimum fuel-air screw (LA) so that the tool does not mixture under most operating rotate. conditions. With this carburetor it is only possible to adjust the engine idle speed within fine limits. FS 90, FS 90 R... -
Page 42: Spark Arresting Screen In Muffler
3 minutes. smoothly. Engine stops while idling Turn idle speed screw (LA) slowly clockwise until the engine runs smoothly – the tool must not rotate. Remove the screws (2). Lift away the shroud (3). FS 90, FS 90 R... -
Page 43: Checking The Spark Plug
These factors cause deposits to form on the insulator nose which may result in trouble in operation. FS 90, FS 90 R... -
Page 44: Lubricating The Gearbox
Unscrew the filler plug (1). If no grease can be seen on the inside of the filler plug, screw the tube (2) of STIHL gear lubricant for brushcutters - see “Special Accessories” - into the filler hole. Squeeze up to 1/5 oz (5 g) grease into the gear housing. - Page 45 Remove the rope rotor with washer (4) and pawl (5). Tie a simple overhand knot in the new rope (see "Specifications") and then thread it through the top of the grip and the rope bushing (6). FS 90, FS 90 R...
- Page 46 If the spring pops out of the housing Go to "Tensioning the rewind during installation: Refit it in the spring". counterclockwise direction, starting outside and working inward. FS 90, FS 90 R...
-
Page 47: Storing The Machine
Let go of rope slowly so that it winds onto the rotor. The starter grip must locate firmly in the rope guide bushing. If the grip droops to one side: Increase spring tension by adding one more turn. FS 90, FS 90 R... -
Page 48: Sharpening Metal Cutting Tools
STIHL balancer (special accessory) and rebalanced as necessary. Resharpen the cutters (1) uniformly – do not alter the contour of the parent blade (2) in any way. See cutting tool packaging for additional sharpening instructions. FS 90, FS 90 R... -
Page 49: Maintenance Chart
Spark arresting screen in muffler* Replace All accessible screws and nuts (not Retighten adjusting screws) * see “Guide to Using this Manual” STIHL recommends that this work be done by a a STIHL servicing dealer FS 90, FS 90 R... - Page 50 Antivibration elements (rubber buffers, springs) Replace Visual inspection Replace Metal cutting tools Sharpen Check tightness Check Gearbox lubrication Replenish Safety labels Replace STIHL recommends that this work be done by a a STIHL servicing dealer FS 90, FS 90 R...
-
Page 51: Parts And Controls
12 Fuel Pump 13 Choke Knob 14 Air Filter Cover 15 Fuel Tank 16 Machine Support 17 Handle Support 18 Wing Screw 19 Loop Handle 20 Barrier Bar Serial number see "Guide to Using this Manual" FS 90, FS 90 R... -
Page 52: Throttle Trigger Interlock
Controls the speed of the engine. 16. Machine Support Slide Control For resting machine on the ground. For starting throttle, run and stop. Keeps the throttle partially open during starting, switches the engine’s ignition off to stop the engine. FS 90, FS 90 R... - Page 53 Metal mowing tool Deflector The cutting attachment, i. e. blade, (for mowing heads only) made from metal for different Line limiting blade purposes (special accessory). Deflector with skirt (for all cutting tools) Skirt Metal mowing tool FS 90, FS 90 R...
-
Page 54: Specifications
FS 90 with bike handle: Bore: 1.50 in (38 mm) 12.8 lbs (5.8 kg) Stroke: 0.98 in (25 mm) FS 90 R with loop handle: 12.1 lbs (5.5 kg) Engine power to ISO 8893: 1.3 bhp (0.95 KW) Idle speed: 2,800 rpm Engine cut-off speed: 10,500 rpm Max. -
Page 55: Maintenance And Repairs
STIHL replacement parts. Original STlHL parts can be identified by the STlHL part number, the STIHl logo and, in some cases, by the STlHL parts symbol (. This symbol may appear alone on small parts. FS 90, FS 90 R... -
Page 56: Stihl Incorporated Federal Emission Control Warranty Statement
You are responsible for presenting your Obligations Coverage: small off-road equipment engine to a STIHL service center as soon as a The U.S. Environmental Protection In the U.S., 1997 and later model year problem exists. The warranty repairs will Agency (EPA) and STIHL Incorporated... - Page 57 This Emission Control Systems replaced by STIHL Incorporated at no used for any warranty maintenance or Warranty shall not cover any of the cost to the owner. Any warranted part...
-
Page 58: Stihl Incorporated California Exhaust And Evaporative Emissions Control Warranty Statement
English / USA For California only: STIHL Incorporated California Exhaust and Evaporative Emissions Control Warranty Statement Manufacturer’s Warranty Your Warranty Rights and You are responsible for presenting your Coverage Obligations small off-road equipment engine to a STIHL servicing dealer as soon as the... - Page 59 Subsection engines. defective, the part will be replaced by COVERAGE BY STIHL STIHL Incorporated at no cost to the 6. The owner must not be charged for INCORPORATED, see above. A owner. diagnostic labor that leads to the...
-
Page 60: Trademarks
® AUTOCUT Where to make a claim for Ematic™ / Stihl-E-Matic™ Warranty Service ® EASYSTART FixCut™ Bring the STIHL product to any ® OILOMATIC HT Plus™ authorized STIHL servicing dealer and ® STIHL Cutquik present the signed STIHL product IntelliCarb™... - Page 61 STIHL SuperCut™ STIHL Territory™ TapAction™ TrimCut™ This listing of trademarks is subject to change. Any unauthorized use of these trademarks without the express written consent of ANDREAS STIHL AG & Co. KG, Waiblingen is strictly prohibited. FS 90, FS 90 R...
Need help?
Do you have a question about the FS 90 and is the answer not in the manual?
Questions and answers